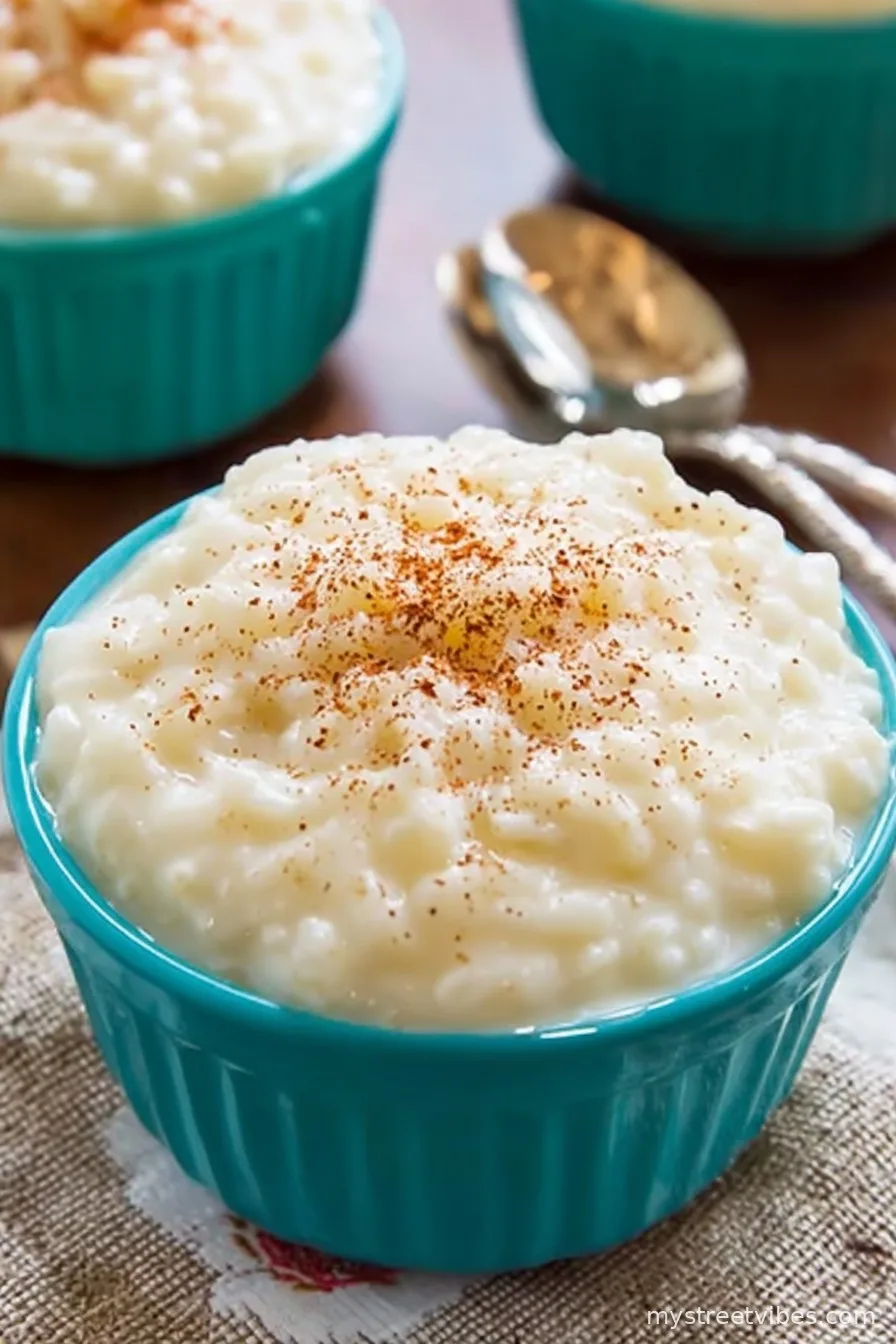
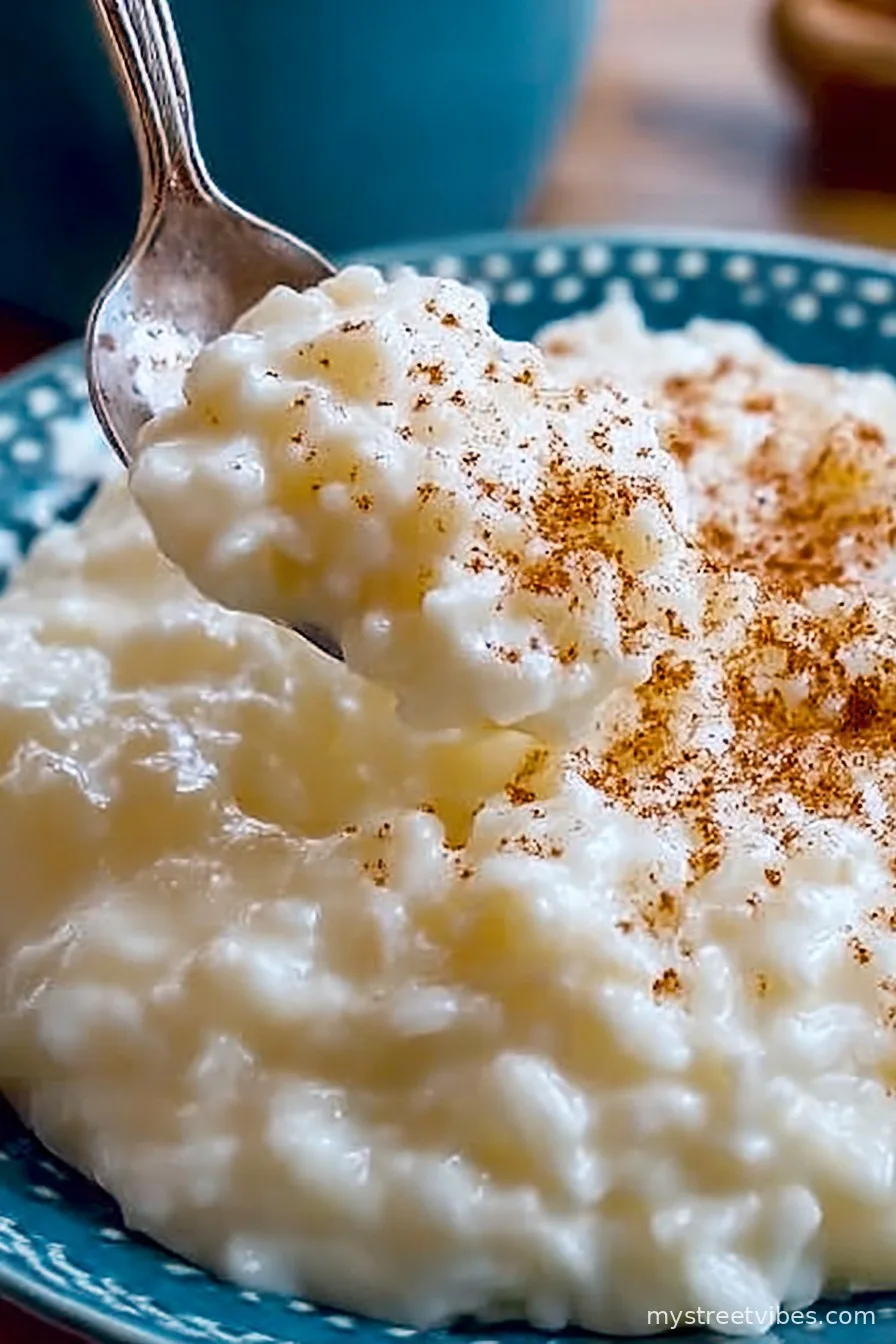
Right, let me just set the scene—every time autumn rolls around, I find myself digging out the same battered recipe card for old-fashioned rice pudding. It’s got splatters of milk and even a little vanilla stain you can still see if you hold it up to the light! My mum handed it down, saying “It’s not proper comfort if you don’t have a fair bit of clean-up after,” and I suppose she’s right. So, if you’re craving something warm and nostalgic, you’ve come to the right kitchen (with actual cat footprints on the counter, but let’s not judge, eh?).
Why I Keep Coming Back to This Pudding
I make this rice pudding on rainy Sundays, usually when everyone’s sniffing around the kitchen pretending not to be hungry (they’re not fooling anyone, by the way). My family goes bonkers for this, probably thanks to the creamy texture. Every once in a while, the top gets gloriously caramelized, and there’s basically a family brawl for the crispy edges. By the way, this recipe also saved me one winter when all I had in the fridge was milk, rice, and the odd raisin—I call that a win. Honestly, if you’re looking for something fancy, this isn’t it. But if you want to feel like you’ve wrapped yourself in a fluffy blanket with a bowl of warmth, here you go. Oh, don’t get me started on the times I’ve scorched the bottom—just soak the pan and start again (I do).
What You’ll Need (And How I Cheat Sometimes)
- 3/4 cup short-grain white rice (I use Arborio if I’m feeling swanky, but any basic pudding rice does the job. Jasmine in a pinch—not my fave, but it works)
- 4 cups whole milk (I’ve swapped in 2% before—creamy factor takes a hit but it’s still pudding. Oat milk? Surprisingly ok, though it’s a bit thinner)
- 1/3 cup sugar (Sometimes I mix in a bit of brown sugar or honey if I’ve run out)
- 1/2 teaspoon salt (Grandma always said you can’t skip this. She was right. Try it.)
- 1 teaspoon vanilla extract (I toss in extra—who’s judging?)
- 1/2 teaspoon ground cinnamon (optional, or allspice, or a shake of nutmeg. You do you)
- 1/2 cup raisins (My kids pick them out. Sometimes I use chopped dates or skip ‘em. Apple chunks, if you’re feeling autumnal)
- 1 tablespoon butter (Real butter, though margarine will do if that’s what you’ve got. Don’t let the butter police tell you otherwise)
How I Actually Make It (With Some Mess-Ups)
- Set your oven to 325°F (or, if you’re not in the US, that’s about 160°C—honestly, use the middle setting if your oven’s ancient like mine).
- Grab a medium-ish saucepan and combine your milk, rice, sugar, and salt. Whisk it a bit but don’t panic about lumps—it all sorts itself out.
- Bring to just under a simmer (gentle warmth, not a full-on boil). I usually stare out the window and forget, then rush back when it’s almost bubbling over. Stir often, or it’ll get weird at the edges.
- Pour the whole thing into a greased baking dish (no greased dish? Just rub around a bit of butter with a paper towel—it’ll do).
- Stir in your vanilla, raisins (or not), and most of the cinnamon, saving a pinch for the top. Pop the butter in little blobs all over the surface. Dust with leftover cinnamon (looks fancy; tastes fancier).
- Bake, uncovered, for about 1 hour 15 minutes, maybe a bit more. Give it a stir at the hour mark—this is where I usually sneak a taste and somehow “lose” a spoonful. If the top crusts up, it’s perfect. If it seems soupy, just bake a tad longer.
- Let it cool a smidge before diving in. Nobody enjoys burnt tongue, promise.
Notes I’ve Learned the Hard Way
- If you use long-grain rice, it never really goes creamy (ask me how I know…)
- If you’ve only got skim milk, try mixing in a splash of cream or, honestly, a spoonful of Greek yoghurt before baking—works in a pinch.
- Reheat with a splash of milk; microwave is fine, though I think the stovetop brings it back to life better. But who has patience?
Things I’ve Tried (Some Worked, Some… Not So Much)
- Adding orange zest—brilliant. Makes it kind of fancy without much work.
- Chopping in dark chocolate—it was fun, but actually a bit too much, even for me. Maybe cut back to a handful next time.
- I once tried coconut milk. It tasted like a tropical holiday, but, honestly, it was maybe a little too much for my rainy Sunday mood.
- Skipping the oven and simmering on the stove; it technically “works,” but you miss that caramelised bit on top.
What to Use If You Don’t Have the Right Gear
A baking dish is easiest for this, but honestly, I’ve used a deep pie plate or even a giant mug before (desperate times). Don’t stress if you don’t have a whisk; a fork or a good spoon will do. If you want to see lovely oven-safe dishes, Serious Eats did a pretty fun round-up—I look, I don’t buy (well, sometimes!).
How Long This Lasts (Spoiler: It Doesn’t at My House)
Store leftovers covered in the fridge for up to 3 days. That’s what all the official recipes say, anyway. Mine rarely makes it past breakfast the next morning. If you need to, pop it in an airtight container and reheat gently with a splash of milk. If it gets too thick, I just eat it cold—no shame in that.
How We Usually Serve It Around Here
I love mine warm from the oven, with a little dollop of cream (or clotted cream if it’s a special night). My partner likes his cold with a slug of maple syrup, which I always thought was odd until I tried it. Sometimes the kids sprinkle on some chopped nuts for crunch. If you want ideas, Smitten Kitchen has a nice run-down for jazzing up rice pudding — though I swear by extra cinnamon.
Lessons I Wish I Knew Sooner
- I once tried to rush the baking by turning the oven higher—didn’t work (burnt milk city, not recommended).
- Let it sit for at least 10 minutes out of the oven. Otherwise, it’s more milky soup than pudding. Ask me how I know.
- Don’t skimp on the vanilla. Trust me.
Your Rice Pudding Questions—Answered
- Can I make this with brown rice? Eh, you can, but it’ll need more liquid and more time and, honestly, the texture never quite gets that classic creamy thing. If health is your thing, though, give it a go.
- What if I hate raisins? Oh, you’re not alone—just leave ‘em out. Maybe swap for chopped dates or dried cherries or, heck, nothing at all. No crimes committed.
- Can I double the recipe? Yes! Use a bigger baking dish (otherwise you’ll be scraping burnt milk from the oven bottom for ages). Stir a couple of times while baking so the rice doesn’t get all lumpy at the edges—it sorts itself out.
- Why is my pudding runny? Give it time, and remember it thickens as it cools. Or bake it longer. Patience… it’s not my strong suit either.
- Do I have to use an oven? Technically, you can simmer it all on the stove, just stir more often. The oven version tastes more like proper old-school pudding to me, though. Up to you!
Just for fun (and so I sound like I know what I’m talking about), I’ll leave you with another classic version here. But, really, I think this is the way to go. Happy pudding-ing, and holler if you want my secret for not burning the crust (just kidding—I still haven’t got it right every time).
Ingredients
- 3/4 cup uncooked white rice
- 2 cups water
- 4 cups whole milk
- 2/3 cup granulated sugar
- 1/4 teaspoon salt
- 2 large eggs
- 1 teaspoon pure vanilla extract
- 1/2 teaspoon ground cinnamon
- 1/2 cup raisins (optional)
Instructions
-
1In a medium saucepan, bring the rice and water to a gentle boil. Reduce heat to low, cover, and simmer until the water is absorbed and the rice is tender, about 15 minutes.
-
2Stir in the milk, sugar, and salt. Cook uncovered over medium heat, stirring frequently, until the mixture thickens and becomes creamy, about 25 to 30 minutes.
-
3In a small bowl, beat the eggs. Gradually add a few spoonfuls of the hot rice mixture to the eggs, whisking quickly to temper.
-
4Slowly pour the tempered eggs back into the saucepan, stirring constantly. Add vanilla extract, cinnamon, and raisins if using. Continue cooking for 2-3 minutes.
-
5Remove from heat and allow the pudding to cool slightly. Serve warm or chilled, garnished with extra cinnamon if desired.
CLICK FOR NUTRITION INFO
↑
Approximate Information for One Serving
Serving Size:
1 serving
Calories:
260 caloriescal
Protein:
7gg
Fat:
6gg
Saturated Fat:
0g
Trans Fat:
0g
Cholesterol:
0mg
Sodium:
0mg
Potassium:
0mg
Total Carbs:
44gg
Fiber:
0g
Sugar:
0g
Net Carbs:
0g
Vitamin A:
0
Vitamin C:
0mg
Calcium:
0mg
Iron:
0mg
Nutrition Disclaimers
Number of total servings shown is approximate. Actual number of servings will depend on your preferred portion sizes.
Nutritional values shown are general guidelines and reflect information for 1 serving using the ingredients listed, not including any optional ingredients. Actual macros may vary slightly depending on specific brands and types of ingredients used.
To determine the weight of one serving, prepare the recipe as instructed. Weigh the finished recipe, then divide the weight of the finished recipe (not including the weight of the container the food is in) by the desired number of servings. Result will be the weight of one serving.
Did you make this recipe?
Please consider Pinning it!!