I’m not gonna lie, there’s something about mini meatloaf that just reminds me of after-school dinners at my old place. The kitchen would smell amazing, my brother would come barreling down the hallway at the mere hint of ketchup (it’s like a sixth sense, honestly), and there’d be this gentle bickering about who got the biggest one. Now, I make this mini meatloaf recipe for my own crew—usually on chilly evenings when comfort food calls my name louder than emails do. Oh, and you wouldn’t believe how much more willingly kids eat meatloaf when it looks like an individual little feast just for them! I mean, who can resist a meal that’s basically portion-controlled comfort in muffin form?

Why You’ll Love Making These
- I make this when I’m in the mood for meatloaf but not in the mood for waiting an hour and a half (honestly, patience is not my strong suit after work).
- My family goes wild for these—I think it’s the crispy edges and personal-size portions that win them over. Also, less fighting about who gets the end piece (you know the one—I still say it’s the best bit).
- If you’ve ever been frustrated by how a full-size meatloaf takes forever to cook or never comes out right in the center, well, mini meatloaves solve the problem. Not to mention they fit in lunchboxes the next day (if you can hide a couple; good luck with that).
Gather Up These Ingredients
- 1 lb (about 450g) ground beef (I usually grab 80/20 for juiciness, but turkey or chicken works too if you wanna lighten things up)
- 1/2 cup breadcrumbs (Sometimes I use panko for extra bite. Saltines in a pinch? Been there, done that.)
- 1/3 cup milk (whole or 2% is what I have, almond milk works too if there’s a dairy situation)
- 1 egg
- 1 small onion, grated or very finely chopped (Or skip it if the little ones spot “bits”—but I sneak it in whenever I can!)
- 2 cloves garlic, minced (Honestly, sometimes I just use a good shake of garlic powder if I can’t be fussed)
- 2 tablespoons ketchup (plus more for topping—I’ve used BBQ sauce in a wild moment and it wasn’t half bad)
- 1 tablespoon Worcestershire sauce (I mumble this when I say it out loud, but it really does make a difference)
- 1/2 teaspoon dried thyme (or Italian seasoning if that’s what’s open—hey, I’m not above it)
- 1 teaspoon salt (add a little less if your breadcrumbs are salty)
- 1/4 teaspoon black pepper (Honestly, I barely measure; pinch and taste!)
How I Make Mini Meatloaf (And Sometimes Wing It)
- Preheat your oven to 400°F (200°C). While it heats, grab a muffin tin—you’ll want the 12-cup kind, but I have absolutely squooshed them into a 6-cup tray once (made big boys; longer cook time, just FYI).
- In a large bowl, chuck in your ground beef, breadcrumbs, milk, egg, onion, garlic, ketchup, Worcestershire sauce, thyme (or whatever’s handy), salt, and pepper. Now, wash your hands and dive in—mix it well, but don’t treat it like bread dough or it’ll get tough.
- If things feel too wet, sprinkle in a bit more breadcrumbs. Too dry? A splash more milk. I go by feel here more than science; don’t overthink it! This is when I sneak a tiny bit to taste for seasoning (yes, raw beef—don’t yell at me, it’s a risk I’m willing to take, but a non-beefy sniff works too).
- Divide the mixture evenly among the muffin cups. I just sort of eyeball it—if one’s a bit wonky, nobody notices once there’s ketchup on top. Press down gently to pack them in, but don’t mash or they’ll get dense.
- Spoon a squiggle of ketchup (or BBQ sauce, if you’re feeling sassy) on top of each. You could get artsy and swirl it with a fork if you’re in the mood.
- Bake for 22 to 25 minutes, or until the tops look a bit caramelized and there’s no pink in the centers. I usually cut into one to check (and, yes, I eat the evidence). Sometimes, the fat bubbles up around the edges—looks weird, but totally normal.
- Let them cool for 5 or so minutes before trying to pry them out; trust me, burning your hand isn’t worth the Instagram photo.
Notes Form the Trenches
- Once, I forgot to spray the pan—mini meatloaves stuck like stubborn barnacles. Since then, I give the muffin tin a quick shot of nonstick spray. Crisis averted.
- I think these actually taste even better the next day. Something about sitting overnight just makes the flavors cozy up and hang out, y’know?
- If you want them crispier on the bottom, pull them out and set them on a baking rack for the last five minutes. Or don’t. Sometimes I just want dinner done, pronto.
Variations I’ve Actually Tried (And One Dud)
- “Sneaky Veg” edition: I grated in a carrot and a zucchini once—works like a charm, and nobody fussed. (Well, my daughter claims she “knew,” but ate hers anyway.)
- Cheesy top: About halfway through, I’ve popped a thin slice of cheddar on top. Gets all bubbly and lovely. Don’t use fancy Gruyère, though. Didn’t melt, just sat there glaring at me.
- Tex-Mex: I stirred in a spoon of salsa and swapped ketchup for taco sauce. Surprisingly good, actually.

What You Need (And What to Use If You Don’t Have It)
- Muffin tin: If you don’t have one, you could just blob the mix onto a lined baking sheet and shape little domes. Works, not as cute, but tasty all the same.
- Mixing bowl, fork or your hands (hands are better, even if you end up with “meatloaf fingers”)
- Spoon for the ketchup—fancy piping bag not required (that sounds fussy, right?)
How to Store Mini Meatloaf (Though… Will You Even Have Leftovers?)
If you DO manage to hide a couple away, let them cool, pop into a sealed container, and keep in the fridge for up to three days. They freeze perfectly, but honestly, in my house, it never lasts more than a day. Reheat gently or even eat them cold straight out of the fridge—I won’t judge.
Serving Suggestions – Tried & True
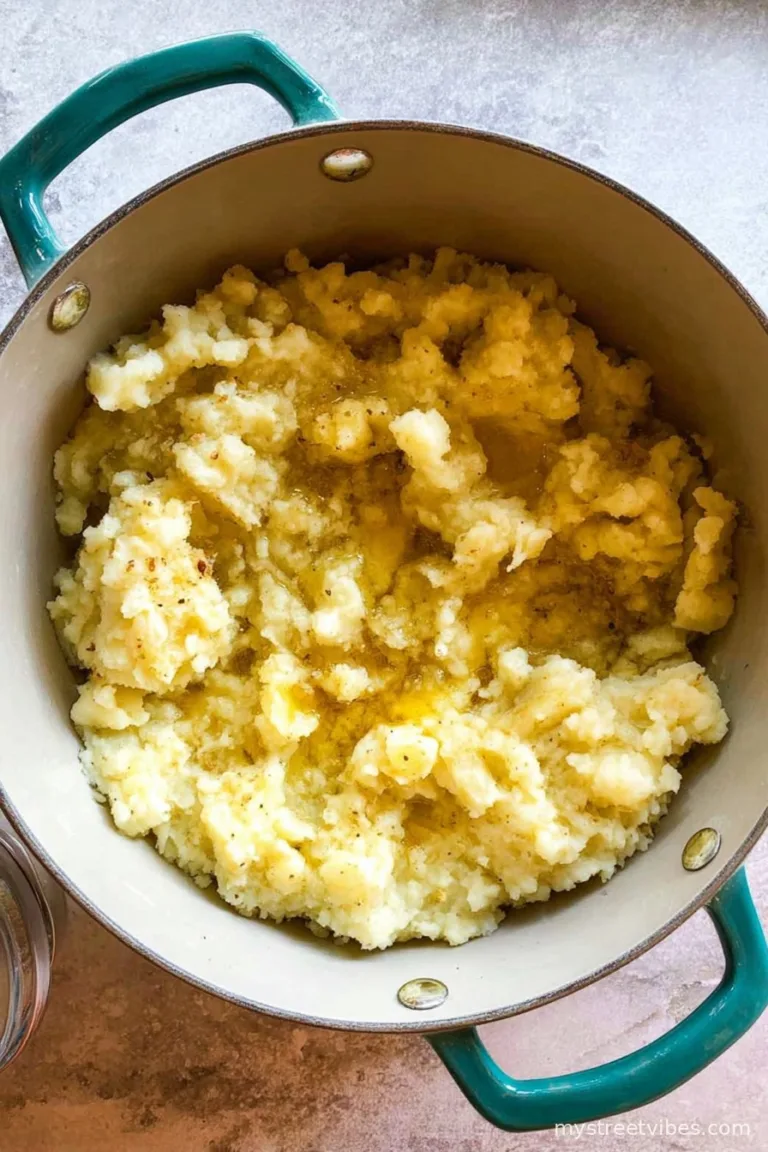
- I almost always serve these with mashed potatoes and green beans on the side—classic, right? My nephew likes to smash his mini meatloaf atop the potato mountain and make a “volcano.” Apparently, it’s a thing.
- If you’re in a rush, a bagged salad and some buttered bread will do (and, okay, sometimes everything gets slathered in more ketchup in this house).
Pro Tips – Lessons From Tangled Aprons
- I once tried to double the recipe in one big bowl and ended up flinging breadcrumbs halfway across the kitchen. Mix gently, maybe do two bowls if you’re scaling up!
- Rushing the cool-down step? Don’t do it. I’ve lost more than one mini meatloaf to premature removal. They fall apart faster than my New Year’s resolutions. Let them sit the whole 5 minutes.
FAQ – I’ve Heard These A Lot
- Can I use a different ground meat?
- Yep—ground turkey or chicken both work. Pork’s a bit too fatty, but it does add flavor if you mix it in. Actually, I find beef the juiciest, though. Your call.
- What if I don’t have breadcrumbs?
- No worries—crush up crackers (like saltines) or even blitz up some oats. Gran’s trick was stale bread torn up really small. Turns out you get a gentler texture that way.
- My meatloaves shrank! Did I mess up?
- Nope, this happens—they contract a little as they cook. If they’re swimming in fat, just lift them out with a fork or spoon. Waste not, want not, right?
- Can I make these ahead?
- For sure. Prep the mixture, fill muffin cups, then stash in the fridge until ready to bake. I wouldn’t leave raw meat sitting more than a day, though, just to be safe.
- Do I need a fancy meat thermometer?
- Helpful, yes (especially if you like numbers), but honestly, I just crack one open and peek. If there’s no pink, you’re good.
Oh, quick digression—one time I added a little smoked paprika just for fun, and now I kinda crave that smoky flavor every fall. Give it a try if you like a little campfire feel (that’s a thing, right?).
Ingredients
- 1 lb (about 450g) ground beef (I usually grab 80/20 for juiciness, but turkey or chicken works too if you wanna lighten things up)
- 1/2 cup breadcrumbs (Sometimes I use panko for extra bite. Saltines in a pinch? Been there, done that.)
- 1/3 cup milk (whole or 2% is what I have, almond milk works too if there’s a dairy situation)
- 1 egg
- 1 small onion, grated or very finely chopped (Or skip it if the little ones spot “bits”—but I sneak it in whenever I can!)
- 2 cloves garlic, minced (Honestly, sometimes I just use a good shake of garlic powder if I can’t be fussed)
- 2 tablespoons ketchup (plus more for topping—I’ve used BBQ sauce in a wild moment and it wasn’t half bad)
- 1 tablespoon Worcestershire sauce (I mumble this when I say it out loud, but it really does make a difference)
- 1/2 teaspoon dried thyme (or Italian seasoning if that’s what’s open—hey, I’m not above it)
- 1 teaspoon salt (add a little less if your breadcrumbs are salty)
- 1/4 teaspoon black pepper (Honestly, I barely measure; pinch and taste!)
Instructions
-
1Preheat your oven to 400°F (200°C). While it heats, grab a muffin tin—you’ll want the 12-cup kind, but I have absolutely squooshed them into a 6-cup tray once (made big boys; longer cook time, just FYI).
-
2In a large bowl, chuck in your ground beef, breadcrumbs, milk, egg, onion, garlic, ketchup, Worcestershire sauce, thyme (or whatever’s handy), salt, and pepper. Now, wash your hands and dive in—mix it well, but don’t treat it like bread dough or it’ll get tough.
-
3If things feel too wet, sprinkle in a bit more breadcrumbs. Too dry? A splash more milk. I go by feel here more than science; don’t overthink it! This is when I sneak a tiny bit to taste for seasoning (yes, raw beef—don’t yell at me, it’s a risk I’m willing to take, but a non-beefy sniff works too).
-
4Divide the mixture evenly among the muffin cups. I just sort of eyeball it—if one’s a bit wonky, nobody notices once there’s ketchup on top. Press down gently to pack them in, but don’t mash or they’ll get dense.
-
5Spoon a squiggle of ketchup (or BBQ sauce, if you’re feeling sassy) on top of each. You could get artsy and swirl it with a fork if you’re in the mood.
-
6Bake for 22 to 25 minutes, or until the tops look a bit caramelized and there’s no pink in the centers. I usually cut into one to check (and, yes, I eat the evidence). Sometimes, the fat bubbles up around the edges—looks weird, but totally normal.
-
7Let them cool for 5 or so minutes before trying to pry them out; trust me, burning your hand isn’t worth the Instagram photo.
CLICK FOR NUTRITION INFO
↑
Approximate Information for One Serving
Serving Size:
1 serving
Calories:
270 caloriescal
Protein:
18gg
Fat:
16gg
Saturated Fat:
0g
Trans Fat:
0g
Cholesterol:
0mg
Sodium:
0mg
Potassium:
0mg
Total Carbs:
12gg
Fiber:
0g
Sugar:
0g
Net Carbs:
0g
Vitamin A:
0
Vitamin C:
0mg
Calcium:
0mg
Iron:
0mg
Nutrition Disclaimers
Number of total servings shown is approximate. Actual number of servings will depend on your preferred portion sizes.
Nutritional values shown are general guidelines and reflect information for 1 serving using the ingredients listed, not including any optional ingredients. Actual macros may vary slightly depending on specific brands and types of ingredients used.
To determine the weight of one serving, prepare the recipe as instructed. Weigh the finished recipe, then divide the weight of the finished recipe (not including the weight of the container the food is in) by the desired number of servings. Result will be the weight of one serving.
Did you make this recipe?
Please consider Pinning it!