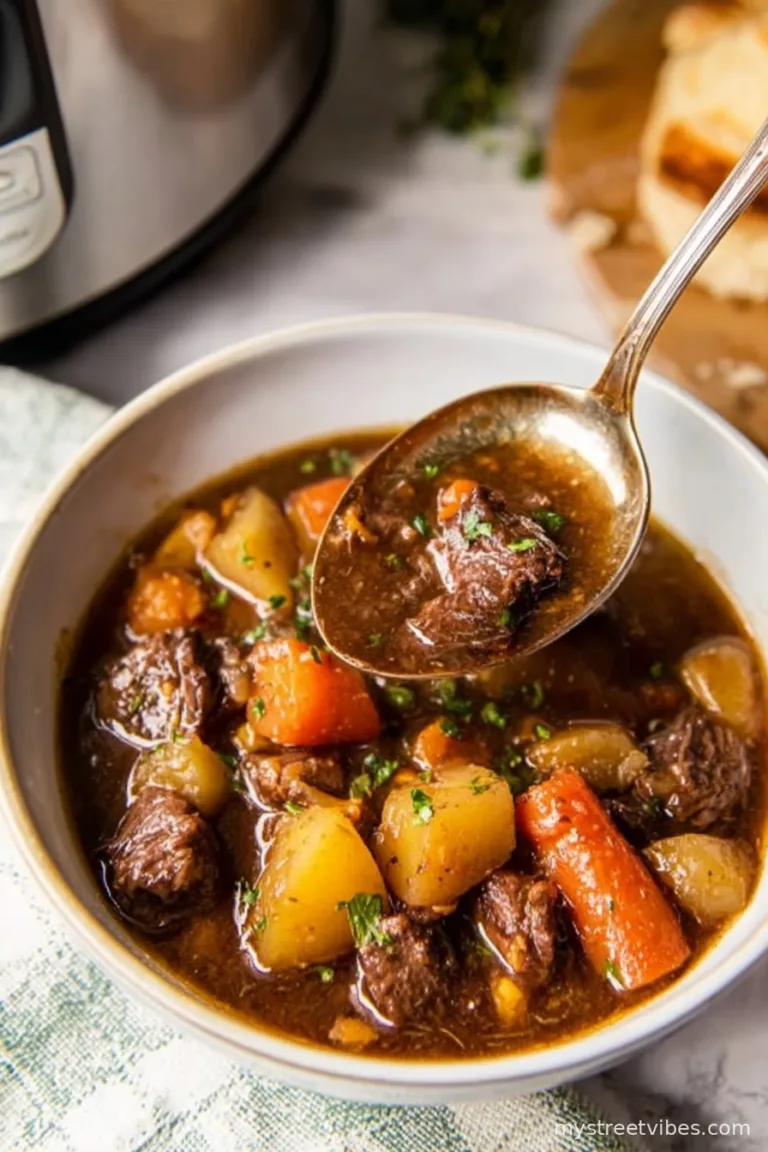
If you ever find yourself craving something warm and hearty after a long (possibly chaotic) day, let me tell you: this ground beef chili has been my rescue more times than I can count. Actually, my first attempt was when I was fresh out of college, and—full disclosure—I totally burned the onions because my roommate distracted me with his wild story about the neighbor’s runaway ferret. Totally worth it. Now, every time the weather even hints at a chill, I whip this up and let that smell fill the whole house. There’s just something a bit magical about a big pot of chili bubbling away, especially when you’re wearing those slippers with the questionable stain on the toe.

Why You’ll Love This Chili (or at least find it less annoying than most)
I always make this when I need some reliable comfort food that doesn’t involve too many pans—because washing up after feels like punishment. My family goes absolutely bananas for this (my brother tries to steal leftovers), probably because it’s rich and beefy and you can basically pile on every fun topping in your fridge. Oh, and I used to always struggle with chili that tasted a bit…muddy? This one actually tastes like chili (not just spiced tomato soup), thanks to the way you brown the beef and that bit of cocoa powder snuck in there. If you’ve ever spent an hour stirring something that ends up just “meh,” this recipe is not that.
Gather Your Chili Ingredients (but swap if you have to…)
- 1 tablespoon olive oil (or, I’ve used vegetable oil when I ran out. Didn’t notice a real difference!)
- 1 large yellow onion, chopped (red works if that’s all you’ve got; my grandmother declared yellow essential, but she also thought margarine was healthy)
- 3 cloves garlic, minced (sometimes I just use that jarred stuff if I’m in a rush—sorry, food purists)
- 1 pound (450g) ground beef—80/20 makes a richer chili, but leaner works too
- 2 tablespoons chili powder (honestly, heap it on or ease up, depending on your crowd)
- 1 teaspoon ground cumin
- 1/2 teaspoon paprika (smoked is nice, but regular’s fine)
- 1/4 teaspoon cayenne pepper (optional if you’re sensitive, or double if you’re feeling dangerous)
- 1 teaspoon dried oregano
- 1 (15-ounce) can diced tomatoes (fire-roasted? Go for it. Plain also works)
- 1 (8-ounce) can tomato sauce
- 1 (15-ounce) can kidney beans, drained and rinsed (or pinto beans if you’re out)
- 1 (15-ounce) can black beans, drained and rinsed (skip these if you’re bean-averse like my cousin Ted)
- 1 cup beef broth (I’ve cheated with chicken stock, it’s still tasty)
- 1 teaspoon unsweetened cocoa powder (I swear this is the secret – trust me for once!)
- 1 teaspoon salt (or more—taste as you go)
- 1/2 teaspoon black pepper
How I Actually Make This Ground Beef Chili
- Heat a big heavy pot (Dutch oven or any big soup pot—don’t sweat the details) over medium heat. Throw in the olive oil and onion; sauté till the onion is soft and even a bit golden. If a little bit sticks, the flavor’s just getting started.
- Stir in the garlic and cook for about 30 seconds—just enough so you start to smell it. Don’t wander off for a phone notification at this point or it’ll burn. (Learned that too many times…)
- Crumble in the ground beef and cook, breaking it up with a spatula, until it’s no longer pink and has some good browned bits. If there’s lots of fat, you can spoon some off, but I usually just leave it for extra flavor unless it looks scary greasy.
- Sprinkle in your chili powder, cumin, paprika, cayenne, and oregano. Stir it all around till the meat’s evenly coated and it smells like you just walked into a chili cook-off (I always lean in and take a big sniff here—be careful not to inhale cayenne, trust me).
- Dump in the diced tomatoes (juice too!), tomato sauce, both beans, and beef broth. Sprinkle in cocoa powder, salt, and pepper. Give it a good stir. Don’t worry if it looks soupy—it thickens up.
- Bring the whole thing to a gentle boil, then lower the heat so it bubbles quietly. Simmer, uncovered, for about 30 minutes, giving it a stir now and then. Sometimes I wander off and it gets a bit too thick; just add a splash more broth or even water. This is also when I sneak a taste and maybe adjust the salt or spice.
- Once it’s thick to your liking and everything tastes good, turn off the heat. You can let it sit to meld even more if you have time, or just serve it up because patience is overrated.
Real Notes (Hard-won wisdom from a batch gone wrong)
- If you simmer it way too long and it starts sticking, just add a splash of water and scrape up the bits—they’re honestly kind of the best part.
- Cocoa powder might sound weird, but you don’t taste chocolate—it just deepens the flavor. I forgot it once and kept thinking, why is this missing something?
- Don’t worry if the chili seems too thin at first. By the time you’re ready to eat, it’ll probably be perfect (if not, keep simmering, or add a spoonful of cornmeal—learned that hack from an old neighbor).
How I’ve Played with This Recipe (And Goofed Up Once)
- Swapped in turkey for beef: It’s good, just less rich. My health-nut friend prefers it that way.
- Once tried adding lentils instead of beans—regretted it. Too mushy.
- Doubled the cayenne once for a “spicy challenge” night. It was… memorable. Maybe stick to the usual unless you love sweat.
- Used leftover rotisserie chicken/taco meat—worked surprisingly well, not quite the same, but a decent fridge cleanup solution.

My Favorite Gear (But Improvise If Needed)
I always reach for my heavy Dutch oven, mostly because I like the way it holds heat. But any big pot will do—if your only option is a battered saucepan, make it work. One time I used a stockpot I found at a yard sale. Turned out just fine!
Storing Leftovers—If You Have Any!
This chili honestly gets better the next day (I think so anyway), stored in the fridge in any lidded container. Probably lasts about 3 days, but in my house, it disappears on day two. You can freeze it, too—just let it cool fully before packing it away. But I almost never get around to freezing, because the leftovers rarely last that long.
Serving How We Like It
Ladle into big bowls. We always top with lots of shredded cheddar, a little sour cream, green onions if I remember to chop them, and crumbled tortilla chips. Occasionally someone sneaks in some hot sauce or pickled jalapenos. Oh, cornbread on the side? That’s a winning combo around here. If you want to get really fancy, offer a lime wedge—totally unnecessary, but looks classy.
Lessons Learned (AKA My Pro Tips)
- Don’t rush browning the meat—once I tried cranking the heat to speed things up, just ended up with craggy gray blobs. Take your time here!
- Always taste before you finish. Sometimes the saltiness creeps up on you, or you get a bite and think, “needs just a touch more cumin.”
- If the beans start to break down, don’t panic—it’s still chili, not a science project.
Chili FAQs—Stuff I’ve Actually Been Asked
- Can I make this in a slow cooker? Absolutely, just brown your beef and onions first in a pan, then dump everything in the slow cooker. Cook on low for 6-8 hours or until it tastes nice and rich.
- How spicy is this? Honestly, it depends—if you’re nervous, halve the cayenne. If you’re looking to wake up your sinuses, double it (at your own risk!).
- What if I don’t have chili powder? You can approximate with some extra paprika and cumin, maybe a little garlic powder. Not quite the same, but it’ll do in a pinch.
- Can I skip the beans? Yes—makes for more of a Texan-style chili. My cousin Ted insists on it. To each their own.
- Can I add corn or other weird things? Sure, live a little! I’ve thrown in bell peppers, corn, even a dash of coffee once. Not every experiment has been a hit, but (unless you go wild with the lentils again) it’s hard to ruin chili.
- Is it better the next day? Oh, for sure. Something happens overnight—magic? Chemistry? Who knows, but the flavors all cuddle up together and mellow out. I often hide a bowl in the back of the fridge just for me.
And there you have it. My not-so-secret, sorta-chatty guide to ground beef chili. May your kitchen smell delicious and your socks stay dry. If you mess it up, just call it “rustic.”
Ingredients
- 1 tablespoon olive oil (or, I’ve used vegetable oil when I ran out. Didn’t notice a real difference!)
- 1 large yellow onion, chopped (red works if that’s all you’ve got; my grandmother declared yellow essential, but she also thought margarine was healthy)
- 3 cloves garlic, minced (sometimes I just use that jarred stuff if I’m in a rush—sorry, food purists)
- 1 pound (450g) ground beef—80/20 makes a richer chili, but leaner works too
- 2 tablespoons chili powder (honestly, heap it on or ease up, depending on your crowd)
- 1 teaspoon ground cumin
- 1/2 teaspoon paprika (smoked is nice, but regular’s fine)
- 1/4 teaspoon cayenne pepper (optional if you’re sensitive, or double if you’re feeling dangerous)
- 1 teaspoon dried oregano
- 1 (15-ounce) can diced tomatoes (fire-roasted? Go for it. Plain also works)
- 1 (8-ounce) can tomato sauce
- 1 (15-ounce) can kidney beans, drained and rinsed (or pinto beans if you’re out)
- 1 (15-ounce) can black beans, drained and rinsed (skip these if you’re bean-averse like my cousin Ted)
- 1 cup beef broth (I’ve cheated with chicken stock, it’s still tasty)
- 1 teaspoon unsweetened cocoa powder (I swear this is the secret – trust me for once!)
- 1 teaspoon salt (or more—taste as you go)
- 1/2 teaspoon black pepper
Instructions
-
1Heat a big heavy pot (Dutch oven or any big soup pot—don’t sweat the details) over medium heat. Throw in the olive oil and onion; sauté till the onion is soft and even a bit golden. If a little bit sticks, the flavor’s just getting started.
-
2Stir in the garlic and cook for about 30 seconds—just enough so you start to smell it. Don’t wander off for a phone notification at this point or it’ll burn. (Learned that too many times…)
-
3Crumble in the ground beef and cook, breaking it up with a spatula, until it’s no longer pink and has some good browned bits. If there’s lots of fat, you can spoon some off, but I usually just leave it for extra flavor unless it looks scary greasy.
-
4Sprinkle in your chili powder, cumin, paprika, cayenne, and oregano. Stir it all around till the meat’s evenly coated and it smells like you just walked into a chili cook-off (I always lean in and take a big sniff here—be careful not to inhale cayenne, trust me).
-
5Dump in the diced tomatoes (juice too!), tomato sauce, both beans, and beef broth. Sprinkle in cocoa powder, salt, and pepper. Give it a good stir. Don’t worry if it looks soupy—it thickens up.
-
6Bring the whole thing to a gentle boil, then lower the heat so it bubbles quietly. Simmer, uncovered, for about 30 minutes, giving it a stir now and then. Sometimes I wander off and it gets a bit too thick; just add a splash more broth or even water. This is also when I sneak a taste and maybe adjust the salt or spice.
-
7Once it’s thick to your liking and everything tastes good, turn off the heat. You can let it sit to meld even more if you have time, or just serve it up because patience is overrated.
CLICK FOR NUTRITION INFO
↑
Approximate Information for One Serving
Serving Size:
1 serving
Calories:
370 caloriescal
Protein:
27gg
Fat:
14gg
Saturated Fat:
0g
Trans Fat:
0g
Cholesterol:
0mg
Sodium:
0mg
Potassium:
0mg
Total Carbs:
37gg
Fiber:
0g
Sugar:
0g
Net Carbs:
0g
Vitamin A:
0
Vitamin C:
0mg
Calcium:
0mg
Iron:
0mg
Nutrition Disclaimers
Number of total servings shown is approximate. Actual number of servings will depend on your preferred portion sizes.
Nutritional values shown are general guidelines and reflect information for 1 serving using the ingredients listed, not including any optional ingredients. Actual macros may vary slightly depending on specific brands and types of ingredients used.
To determine the weight of one serving, prepare the recipe as instructed. Weigh the finished recipe, then divide the weight of the finished recipe (not including the weight of the container the food is in) by the desired number of servings. Result will be the weight of one serving.
Did you make this recipe?
Please consider Pinning it!