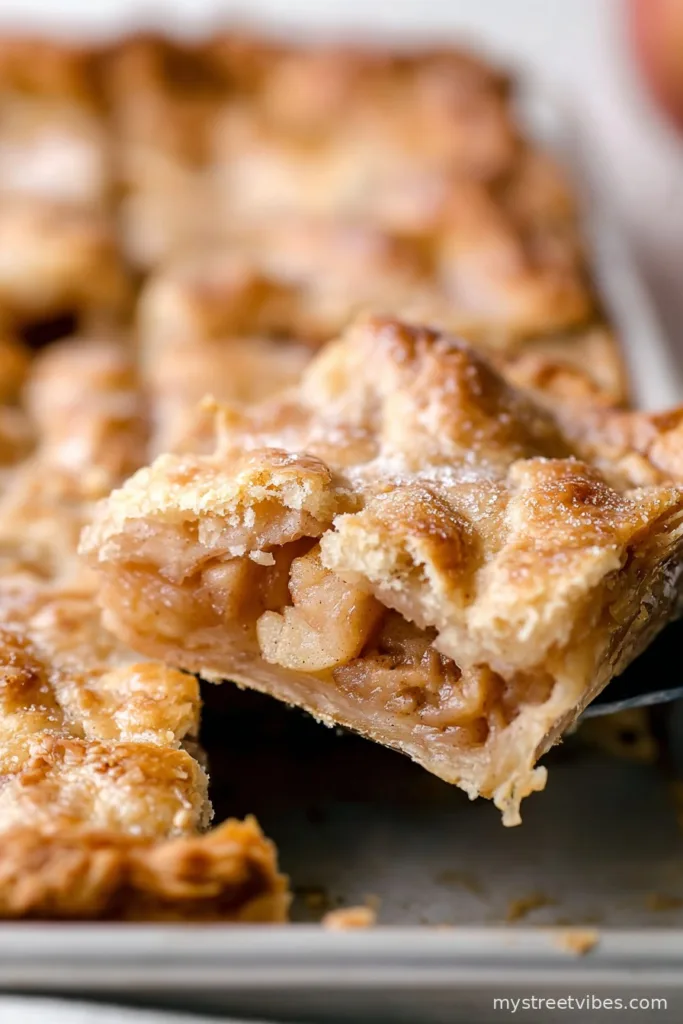
Let Me Tell You How Apple Slab Pie Stole the Show
Alright, friend, let’s get this out of the way: I am NOT a pastry chef. Far from it. But every autumn, when apples start tumbling out of neighbors’ trees (some of which probably aren’t even supposed to be there, if you get my drift), I get a serious itch for something cozy in the oven. Enter my old pal, the Apple Slab Pie. If you’ve ever tried wrangling finicky pie pans while kids are running through your kitchen asking when dessert is ready—oh, and the dog’s drooling on your feet—you’ll get why this big, rustic pie is my go-to. It feeds a crowd, doesn’t require a perfectly crimped edge, and, honestly, if it looks a bit more “abstract art” than “museum quality,” that’s half the charm.
One time, I baked this for a bonfire night and forgot to set the timer (don’t ask, it was chaos). The edges got just a bit crispy, but the middle? Melty apples, flaky crust, and everyone fought over the corner pieces. So now, burnt edges are kind of our secret family jam. Not that I’m recommending it, but if it happens, just embrace it.
Why I Keep Making This (And Why You Probably Will, Too)
I make this when there’s a crowd (Thanksgiving, potlucks, or, you know, a random Tuesday when I’m feeling ambitious). My family goes nuts for it, especially because you get more crust-to-filling ratio than a traditional pie—crust-lovers, this one’s for you (hi, Dad!). And honestly? If you’re not a pie crust whisperer, this is forgiving. Like, really forgiving; it shrugs off imperfections like my old jeans. I used to dread all that rolling and chilling for classic pies, but the slab version is way less fussy. Plus, if I get lazy (happens more than I’d like to admit), I’ve even grabbed store-bought dough. No one ever noticed, except maybe my grandmother, who gave me “the look” just once. Now she just asks for seconds. I used to fuss over peeling every apple—now, half the skins stay on. Call it rustic.
What You’ll Need (With a Few Cheeky Swaps)
- Pie dough for top and bottom: Homemade? Absolutely. Store-bought? Been there, done that, no shame at all (use two standard pie crust boxes, or make your own if you want to feel fancy).
- About 8 cups of apples (roughly 6-7 big guys)—Granny Smith, Honeycrisp, anything tart-ish. Sometimes I mix whatever’s on hand; my neighbor’s tree produces apples I can’t even identify, and it’s always fine.
- 3/4 cup sugar: White, brown, a mix, whatever. Family likes it a *little* less sweet so sometimes I use 1/2 cup and a drizzle of honey (probably not traditional, but who’s judging?).
- 3 tbsp flour or 2 tbsp cornstarch: To thicken all those lovely juices. My grandma insisted on Wondra, but honestly any flour works just fine.
- 1 tsp cinnamon + a pinch of nutmeg: Actually, sometimes I add allspice or ginger if I have it on hand—go wild.
- Lemon juice (splash): About 2 tbsp. Real lemon or bottled, use what’s hanging around.
- Pinch of salt: Just do it, trust me.
- 1 egg, beaten (for brushing): Or skip this if you don’t care about shiny crust.
- 2 tbsp butter (dotted on top): I tend to go heavy-handed here.
How I Throw This Together (With Admitted Sidetracks)
- First, preheat your oven to 400°F (about 200°C). Or, you know, as hot as your cranky oven will actually go. Then, if you’re using homemade dough, roll that out on a very well-floured surface. It should be big enough to fit a rimmed baking sheet or jelly roll pan (mine’s about 10×15 inches—give or take, doesn’t need to be perfect).
- Line your pan with one crust—patch up holes, squish cracks together with your fingers. I promise, no one will ever see this under all the apples.
- Pile in your sliced apples, mixed up with sugar, flour/cornstarch, spices, lemon juice, and that pinch of salt. I usually just do this in a big bowl, then eat a slice or two for quality control. (It’s science.)
- Dot with butter—this is where it all goes silky when baked. Now, top with your other crust. It never fits perfectly, so let it get rustic around the edges. If you feel like it, cut a few random slits on top for steam to sneak out. Or use a fork for a quick crimp, but honestly, it’s a big rectangle, so don’t stress it.
- Brush with your beaten egg (or not), and sprinkle with a bit of coarse sugar if you’ve got it. (I sometimes forget this step, and it still comes out fine!)
- Bake for about 35-40 minutes, maybe a bit longer if the top isn’t caramel-gold. Oh—and put a sheet of foil under the pan because this ALWAYS bubbles over. That sticky stuff is brutal to scrape up. Trust me.
- Let it cool at least 30 minutes; it needs to set, but, um, I’ve cut it hot many times. It runs a bit, but who cares—sometimes messy is better.
My Notes (Aka, What I Learnt the Hard Way)
- If the dough tears while rolling, just patch it with your hands. It bakes up fine. Actually, I think it tastes better with a few extra layers.
- Mixing apple types gives more flavor. Once, I used only Red Delicious and everyone agreed: not again. Toss in some tart apples if you can—it’s worth it.
- The pie actually does cut easier the next day. But in my house it’s gone faster than I can say “slab.” Sometimes I hide a piece for breakfast.
- Trying to slice it hot is a bit like herding cats. On second thought, maybe let it cool longer if you want neat pieces.
Things I’ve Tried (From Genius to Oops…)
- Subbed pears for half the apples once—surprisingly great. My sister raved (!).
- Tried adding cranberries—got too tart. Maybe less next time, or some more sugar.
- A swirl of caramel sauce under the top crust? YES. But maybe skip if you don’t want things super sweet or sticky.
- Once used frozen puff pastry. Turned out a bit weirdly chewy, but if you’re desperate, it’ll do in a pinch.
Do You Really Need Fancy Equipment?
A rimmed baking sheet (jelly roll pan) is ideal, but honest truth? I’ve made it on a regular cookie sheet lined with parchment. Edges hang off—just trim and call it rustic. And if you don’t have a rolling pin, roll the dough with a wine bottle or whatever’s round and clean (been there, done that, more times than I’d admit).

Storage: Good Luck Getting Leftovers
Supposedly, you can cover this and keep it at room temp 1-2 days, or fridge for up to 4. In my house it never lasts more than a day. But I did once refrigerate a leftover piece, and it held up fine for breakfast—tastes great cold too.
Serving? Make It Yours
We always serve ours with vanilla ice cream, but heavy cream or even a wedge of cheddar cheese (trust me, it’s a Midwest thing) is fantastic. Sometimes I drizzle extra caramel on top if I’m feeling especially generous—or need to bribe someone into doing dishes.
Pro Tips (Learned by Messing Up)
- Don’t rush chilling the dough. I tried once and it turned to mushy chaos. Chill at least 30 minutes first—more if you remember.
- Peeling apples is optional. Sometimes I don’t bother, and nobody blinks—fiber is good, right?
- Lift the whole pie out of the pan using parchment if you want pretty slices. I’ve ruined good spatulas trying to get it out, so just pull the paper up at the corners (careful, it’s hot!)
FAQ—Because Folks Have Definitely Asked
- Can I make this the night before? You sure can, and actually, I think it’s better the next day; just let it cool fully before covering it. That said, warm is amazing too.
- What apples are best? I like Granny Smith or Honeycrisp—mix if you can—but honestly, any apple that’ll hold its shape (avoid mushy mealy ones). More ideas here.
- Can I freeze it? I haven’t, because, well, leftovers never last. But I checked and they say you can freeze baked pieces, just wrap them up tight. Then, rewarm it in the oven so the crust stays decent.
- Store-bought vs homemade crust? Both! Honest answer: store-bought makes this so much easier, but homemade’s unbeatable if you have the time (or patience—sometimes I don’t!).
- Can I halve the recipe? Yep, just use a smaller pan and reduce everything by about half. Or make two and gift one to a neighbor; that’s what I do when apples are out of control.
If you’re curious about more pie wisdom, I’ve picked up some great hacks browsing King Arthur’s baking site, which I recommend when you want alll the details.
All in all, this is that laid-back but totally crowd-pleasing dessert you’ll come back to whenever apples are crowding your counter. Or any day that could use a little extra flaky, sticky-sweet goodness. If you try something new, let me know how it goes (unless it’s anchovies—please don’t do that).

Ingredients
- 2 refrigerated pie crusts
- 6 cups peeled and sliced apples (such as Granny Smith)
- 3/4 cup granulated sugar
- 1/4 cup all-purpose flour
- 2 teaspoons ground cinnamon
- 1/4 teaspoon ground nutmeg
- 1 tablespoon lemon juice
- 2 tablespoons unsalted butter, diced
Instructions
-
1Preheat the oven to 400°F (200°C). Lightly grease a rimmed 15×10-inch jelly roll pan.
-
2Roll out pie crusts to fit the pan, pressing them together to cover the entire bottom and up the sides. Trim any excess dough.
-
3In a large bowl, toss together the sliced apples, granulated sugar, flour, cinnamon, nutmeg, and lemon juice until well coated.
-
4Spread the apple mixture evenly over the prepared crust. Dot the apples with diced butter.
-
5Roll out the remaining crust and place over the apples. Crimp the edges to seal. Cut small slits in the top to allow steam to escape.
-
6Bake for 40 minutes or until the crust is golden brown and the filling is bubbling. Let cool before slicing and serving.
CLICK FOR NUTRITION INFO
↑
Approximate Information for One Serving
Serving Size:
1 serving
Calories:
270 caloriescal
Protein:
2 gg
Fat:
12 gg
Saturated Fat:
0g
Trans Fat:
0g
Cholesterol:
0mg
Sodium:
0mg
Potassium:
0mg
Total Carbs:
39 gg
Fiber:
0g
Sugar:
0g
Net Carbs:
0g
Vitamin A:
0
Vitamin C:
0mg
Calcium:
0mg
Iron:
0mg
Nutrition Disclaimers
Number of total servings shown is approximate. Actual number of servings will depend on your preferred portion sizes.
Nutritional values shown are general guidelines and reflect information for 1 serving using the ingredients listed, not including any optional ingredients. Actual macros may vary slightly depending on specific brands and types of ingredients used.
To determine the weight of one serving, prepare the recipe as instructed. Weigh the finished recipe, then divide the weight of the finished recipe (not including the weight of the container the food is in) by the desired number of servings. Result will be the weight of one serving.
Did you make this recipe?
Please consider Pinning it!!