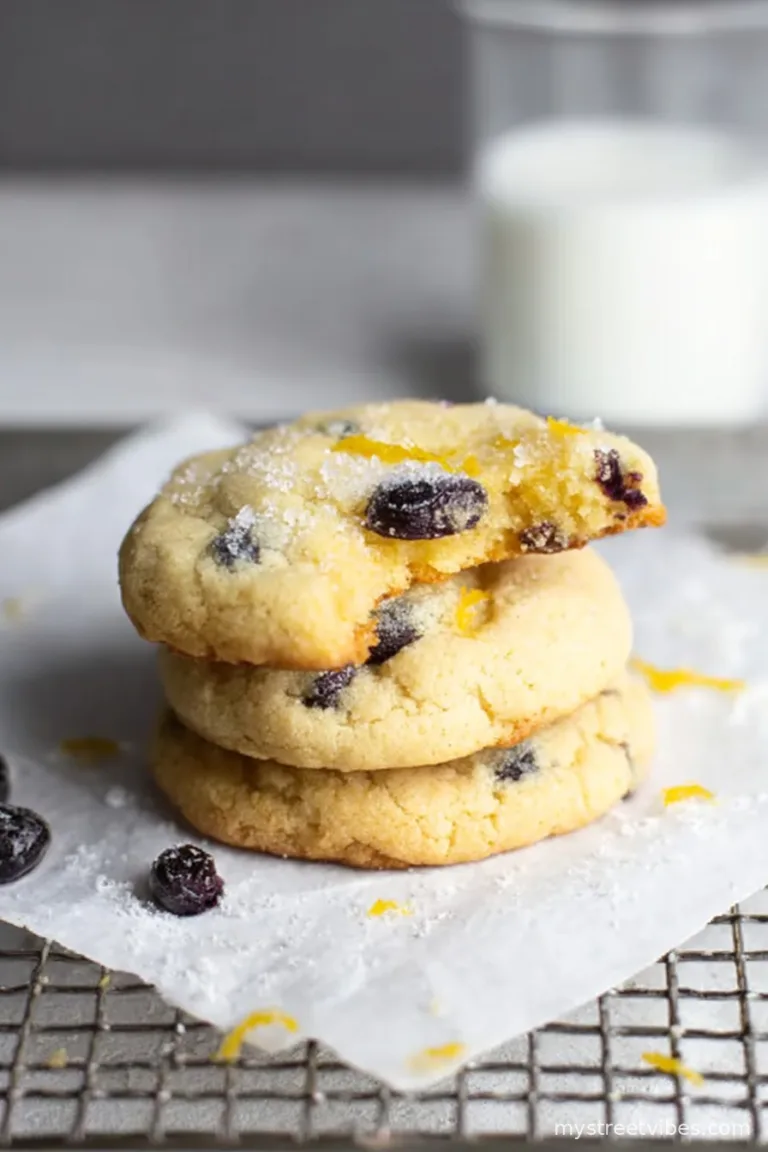
If You Know, You Know… Martino’s Tea Cakes Were Legendary
Alright, friend, pull up a chair because I am about to try and do Martino’s Bakery Original Tea Cakes justice. You remember Martino’s, right? That funny-smelling bakery with the dazzling display case and the cheery staff who always spelled my name wrong on the order slip? Those tea cakes… I’m telling you, one whiff and I’m five years old again sneaking a second (okay, sometimes a third) cookie from the battered Tupperware Granny always kept on top of the fridge. There are a million copycats swirling about online, but this one is the closest my grubby mitts have managed without intercepting a bakery shipment itself—or calling my cousin in Hackensack, which, honestly… is nearly as hard.

Why You’ll Find Yourself Making These Again and Again
I whip these up when life feels a bit gray, you know? My crew goes wild for them (except my partner, who says they’re “fine” but somehow keeps eating six in a row). Kids love dunking them in milk, and I swear they taste better a day later—if they manage to last that long. There’s no secret, just soft, sweet nostalgia. I used to always burn the bottoms (gave my smoke detector plenty of exercise), but once you find that sweet spot, you’ll just keep coming back.
What You’ll Need, Give or Take
- 2 1/4 cups all-purpose flour (I sometimes swap half for cake flour if I’m feeling fancy)
- 1/2 teaspoon salt (though, I’ve “accidentally” doubled it a few times and it’s still pretty good)
- 1 teaspoon baking powder
- 1 cup granulated sugar (I sometimes lean toward 3/4 cup if I want them less sweet—nobody notices)
- 1/2 cup unsalted butter, softened (Grandma always used Land O’Lakes, but honestly, anything in a stick works)
- 2 large eggs (size doesn’t matter much, truly)
- 1 teaspoon vanilla extract (I ran out once and tossed in almond; definitely a different cake but not bad!)
- 1/4 cup buttermilk (I use regular milk with a squeeze of lemon if I’m out—works in a pinch)
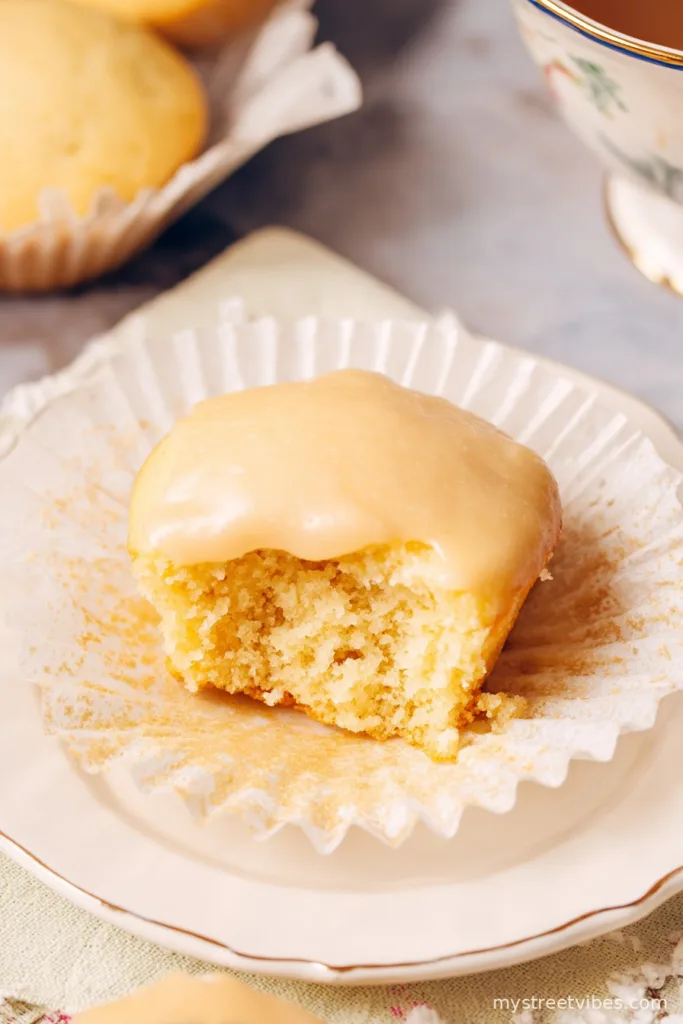
- Powdered sugar for dusting (if you want that bakery vibe; sometimes I skip it and feel a tiny bit rebellious)
How I Throw These Together (Fewer Rules, More Joy)
- First up, get your oven up to 350°F (175°C). Seriously, let it preheat (I never do and always wish I had—oops).
- Whisk the flour, salt, and baking powder in a medium bowl. No fancy sifter needed, just give it a good mix—bonus points if you don’t fling flour everywhere (I always do).
- Cream your softened butter and sugar together in a big bowl until it looks pale and fluffy—it’ll take 2-3 minutes, or until your arm gets tired. You can use a hand mixer, but a wooden spoon and gumption work too (biceps, anyone?)
- Beat in the eggs one at a time, then add the vanilla. Don’t panic if it looks a bit curdled; it always evens out. Actually, sometimes I forget the vanilla and stir it in later—no disaster yet.
- Add half the dry ingredients, then the buttermilk, and then the rest of the dry stuff. Stir gently; you want it just combined. If you over-mix, they get tough. (Ask me how I know.)
- Scoop heaping tablespoons of dough onto a parchment-lined baking sheet. Or use a cookie scoop if you’re feeling snazzy. Leave some space—they spread a bit.
- Pop them in the oven for 12–14 minutes. You want just the edges golden. If in doubt, less is more. (This is where I usually sneak a taste. Baker’s rights!)
- Cool them right on the tray for about 5 minutes—seriously, they’re fragile. Transfer to a wire rack if you have one; otherwise, the back of a chopping board works.
- Dust with powdered sugar once they’re cool, if you fancy. Or don’t. I won’t tell.

Some Notes I’ve Gathered—Usually After Messing Up
- The dough is sticky—if yours isn’t, maybe double-check the measurements but don’t stress. A damp spoon helps a ton with scooping.
- If you use all cake flour, the cookies are softer, but maybe too soft if you want the real Martino’s chewiness.
- I once subbed brown sugar in a panic. Not bad, but it’s a different animal—more molasses-y than Martino’s vibe.
Variations (Some Are Hits, Some Misses!)
- I tossed in lemon zest once—bright and delicious. My neighbor thinks orange would be good, but I haven’t tried it yet.
- I also attempted mini chocolate chips, but honestly… totally overwhelmed the tea cake magic. Wouldn’t do that again (learn form my mistake, please).
- If you love almond, swap in almond extract for half the vanilla, but go easy—it’s strong stuff.

Do You Need Fancy Tools? Meh
Honestly, a good old baking sheet (doesn’t even need to match), parchment paper (or just grease the pan), a bowl, and a whisk or fork will do. I used to think a cookie scoop was essential—turns out, two spoons or even your hands work just fine. If your oven is a bit wonky (mine’s a relic), just keep an eye on them at the end.
How To Store (They Never Last…)
You can keep these tea cakes in an airtight container at room temp, and they should be good for 2–3 days. Though, in my place, they’re gone day one—no exaggeration. If you truly must keep them around longer, freeze them—just be sure to separate with parchment or else you’ll end up with a cookie brick.
Serving, The Family Way
We’re big on serving these with strong tea or coffee in the afternoon (Granny’s tradition). Once, my niece insisted on making sandwich cookies with raspberry jam in the middle—not traditional, but honestly fantastic. Fancy plates not required.
Here’s What I Learned the Hard Way (Don’t Be Like Me)
- Seriously, let the cookies cool before moving them. The first time I made these, I tried picking them up hot and ended up with a pile of crumbs. Patience pays.
- If you rush the creaming stage, they come out dense (ask my brother about his “tea cake boulders”).
- Don’t overbake! The color tricked me once—the bottoms get too brown fast, so trust your timer more than your eyes.
Your Questions, My Honest Answers
Can I make these gluten-free?
I haven’t tried, but a friend used a one-to-one GF flour and said they were “decent,” so maybe worth a shot (let me know if you nail it!).
Is buttermilk necessary?
It helps the texture, but regular milk with a smidge of lemon juice does the trick for me when I forget to buy buttermilk—so, no stress.
Can I double the recipe?
Go wild! I’ve definitely doubled (and even tripled, for holidays). Just don’t crowd the oven—spread out the sheets.
Any way to make these vegan?
Not my zone, but I’ve heard flax eggs work okay, and plant butter is a solid sub, but the flavor is a tad different. Worth a go if that’s your thing.
So, there you have it. Give these a whirl and let me know how yours turn out—if you don’t eat them all in one go, you’re stronger willed than me! And if you do, honestly? No judgment here.
Ingredients
- 2 1/4 cups all-purpose flour (I sometimes swap half for cake flour if I’m feeling fancy)
- 1/2 teaspoon salt (though, I’ve “accidentally” doubled it a few times and it’s still pretty good)
- 1 teaspoon baking powder
- 1 cup granulated sugar (I sometimes lean toward 3/4 cup if I want them less sweet—nobody notices)
- 1/2 cup unsalted butter, softened (Grandma always used Land O’Lakes, but honestly, anything in a stick works)
- 2 large eggs (size doesn’t matter much, truly)
- 1 teaspoon vanilla extract (I ran out once and tossed in almond; definitely a different cake but not bad!)
- 1/4 cup buttermilk (I use regular milk with a squeeze of lemon if I’m out—works in a pinch)
- Powdered sugar for dusting (if you want that bakery vibe; sometimes I skip it and feel a tiny bit rebellious)
Instructions
-
1First up, get your oven up to 350°F (175°C). Seriously, let it preheat (I never do and always wish I had—oops).
-
2Whisk the flour, salt, and baking powder in a medium bowl. No fancy sifter needed, just give it a good mix—bonus points if you don’t fling flour everywhere (I always do).
-
3Cream your softened butter and sugar together in a big bowl until it looks pale and fluffy—it’ll take 2-3 minutes, or until your arm gets tired. You can use a hand mixer, but a wooden spoon and gumption work too (biceps, anyone?)
-
4Beat in the eggs one at a time, then add the vanilla. Don’t panic if it looks a bit curdled; it always evens out. Actually, sometimes I forget the vanilla and stir it in later—no disaster yet.
-
5Add half the dry ingredients, then the buttermilk, and then the rest of the dry stuff. Stir gently; you want it just combined. If you over-mix, they get tough. (Ask me how I know.)
-
6Scoop heaping tablespoons of dough onto a parchment-lined baking sheet. Or use a cookie scoop if you’re feeling snazzy. Leave some space—they spread a bit.
-
7Pop them in the oven for 12–14 minutes. You want just the edges golden. If in doubt, less is more. (This is where I usually sneak a taste. Baker’s rights!)
-
8Cool them right on the tray for about 5 minutes—seriously, they’re fragile. Transfer to a wire rack if you have one; otherwise, the back of a chopping board works.
-
9Dust with powdered sugar once they’re cool, if you fancy. Or don’t. I won’t tell.
CLICK FOR NUTRITION INFO
↑
Approximate Information for One Serving
Serving Size:
1 serving
Calories:
120 caloriescal
Protein:
2 gg
Fat:
4.5 gg
Saturated Fat:
0g
Trans Fat:
0g
Cholesterol:
0mg
Sodium:
0mg
Potassium:
0mg
Total Carbs:
18 gg
Fiber:
0g
Sugar:
0g
Net Carbs:
0g
Vitamin A:
0
Vitamin C:
0mg
Calcium:
0mg
Iron:
0mg
Nutrition Disclaimers
Number of total servings shown is approximate. Actual number of servings will depend on your preferred portion sizes.
Nutritional values shown are general guidelines and reflect information for 1 serving using the ingredients listed, not including any optional ingredients. Actual macros may vary slightly depending on specific brands and types of ingredients used.
To determine the weight of one serving, prepare the recipe as instructed. Weigh the finished recipe, then divide the weight of the finished recipe (not including the weight of the container the food is in) by the desired number of servings. Result will be the weight of one serving.
Did you make this recipe?
Please consider Pinning it!