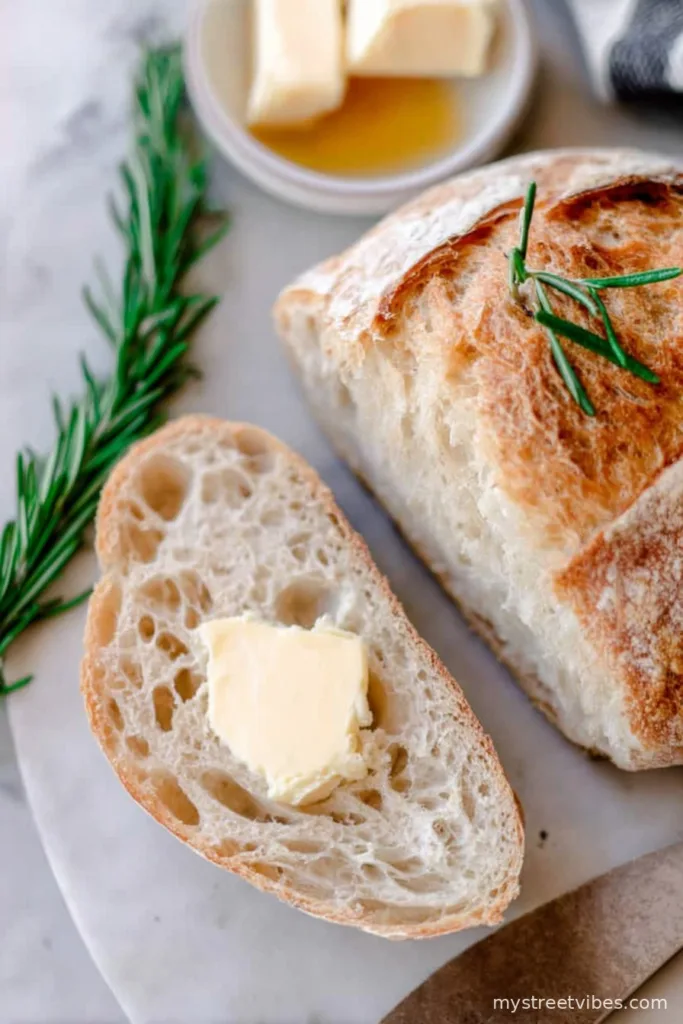
If you’ve ever had the urge to fill your house with the smell of fresh-baked bread, oh boy, this rosemary sourdough bread is where I always end up (sometimes with flour in my hair, most times with a grin). The first time I baked it, my dog stared at the oven like he expected magic to tumble out. I actually started making this bread because my friend grabbed a fancy loaf from a posh bakery and I thought, well, how hard could that be? Spoiler: Hard enough, but so worth it—especially with the rosemary twisting things up a notch.
Why on Earth You’ll Love This (Trust Me)
I pull out this rosemary sourdough bread recipe when my house needs some cozifying, or when I’ve got that one last sad rosemary sprig eyeing me from the crisper drawer (honestly, that plant survives anything). My family? They devour the entire loaf in oh—maybe two hours. Sometimes they even skip dinner and just eat this with butter, which… actually, not the worst plan? I’ll admit, the rising part of sourdough used to make me twitchy—nothing like waiting all day only to find a pancake instead of a loaf! But this one? Usually rises like a champ, and the rosemary adds a whiff that makes anyone in the house wander over to investigate.
Gather Up What You’ll Need (Give or Take)
- 500g strong white bread flour (sometimes I sneak in 100g whole wheat; the result’s tasty but heavier—your call)
- 350g water, lukewarm-ish (just not icy, I once killed a starter with fridge-chilly water—oops)
- 100g active sourdough starter (my grandma swears by a bubbly starter, but I’ve used slightly sleepy ones and survived)
- 10g salt (sea salt’s the dream, but table salt works in a pinch—no shame)
- 1-2 tbsp fresh rosemary, finely chopped (dried rosemary works if you’re desperate, just use a little less)
- Optional: a glug of olive oil for brushing the top (but not essential—I mostly skip it)
Let’s Make Sourdough Bread with Rosemary—Hang On!
- Start by mixing your flour and water in a huge bowl (where you can get your hands dirty, obviously). Stir it together until it’s sorta sticky and let it sit for about 45 minutes. This is autolyse—it sounds fancy, but it’s really just a rest for the dough—makes it easier to mix later.
- Now, add your starter and salt. Use your hands if you like a more rustic experience or a spoon if you hate sticky fingers. Mix for a couple of minutes until it kind of comes together. Don’t freak out if it’s messy—perfection is not the goal here.
- Add the rosemary and mix again. This is usually when I pinch off a little dough to smell it—heaven.
- Cover with a tea towel (I use a faded one with strawberries, but anything clean works) and let it rest for 30 minutes somewhere not too cold or drafty (the time I left mine under the extractor fan in winter, it barely moved…).
- Do 3 sets of stretch and folds every 30 minutes: grab one side of the dough, stretch it up, flop it over, rotate the bowl, repeat. This is the workout. It’ll get smoother—promise.
- Let it rise until doubled—usually 3-5 hours, but honestly, just check every so often. Sometimes I lose track and it’s still fine. If you need to slow down, pop it in the fridge for a longer, overnight rise. This is also when you can take a break and call your mum.
- Shape the dough into a round—or whatever shape fits your pot or baking tin—and place in a floured banneton or a colander with a linen cloth. Sprinkle some extra flour over the top. Cover and let rest another 1-2 hours—or, stick it in the fridge again if dinner got complicated.
- Preheat your oven to 230°C (that’s like 450°F, more or less) well before baking. Place a Dutch oven in there to get rip-roaring hot (if you don’t have one, see my note below—fret not).
- Flip the dough onto parchment or directly into your hot pot. Score the top with a sharp knife—I usually make a random squiggle because…art. Bake covered for 25 minutes, then another 20-25 uncovered to get that deep golden crust.
- Let it cool a bit before slicing, though, honestly, we never manage to wait. Warm bread is irresistible.
Random Notes from My Kitchen Lab
- If your dough looks super flat after baking, it might just have over-proofed—or maybe, the starter was tired. No biggie—still great for toast!
- I used to fuss about perfect scoring for Instagram but—actually, I find it tastes exactly the same no matter the pattern (and sometimes the loaf looks like a tornado hit it).
- If you forget the last stretch and fold? Eh, don’t sweat it; I’ve done much worse and the bread was just fine.

Things I’ve Tried (Some Brilliant, Some…Not)
- Threw in olives once—SO good with rosemary, but a few rolled right out the dough and onto the oven floor. Watch out if you try this.
- Lemon zest adds a weirdly fresh note; not everyone liked it, but my mate Jess thought it was banging.
- Tried using beer instead of water. Would not suggest… The dough was odd, and the bread was more brick than cloud.
Kit I Always Grab (Or Improvise)
Truth: my Dutch oven is my pride and joy. But if you don’t have one, just bake on a heavy tray and pop an oven-safe bowl of water underneath for steam—it’s not the same, but it’s honestly close enough for most people.
How It Keeps—Not That It Ever Lasts
If you’re lucky enough to have leftovers, wrap the bread in a clean tea towel and it’ll stay decent on the counter for a day or two (though honestly, in my house it never lasts more than a day). Freezes just okay: slice and wrap before freezing if you do. Toast from frozen is my secret lazy breakfast.
How We Serve It Here (AKA, Family Rituals)
I could (and do) eat a slab of this bread, still warm, with just butter. But it’s also epic dunked into soup. My partner likes it drizzled with olive oil and a pinch of flaky salt—posh, right? Sometimes we get all wild and make toast soldiers for eggs, which makes my son giggle for some reason.

What I’ve Learned—The Hard Way
- Don’t rush the proof, even if you’re hungry. I once baked it early and ended up with what I call a bread frisbee.
- Let it cool. No, really! Cutting in too soon can gum up the crumb. Still, sometimes I ignore my own advice…
- Scoring with a blunt knife? Been there—tore a chunk right out of the loaf. Get it sharp or use kitchen shears if you’re desperate.
Real Questions People Ask Me All the Time
- Can I use dried rosemary? Yep! Scale it back a smidge—the flavor gets punchier (and, um, don’t use old dusty stuff from the 90s… learned that the hard way).
- My dough is too sticky—help? Sourdough’s always sticky. If it’s flowing like pancake batter, maybe add a tablespoon or two more flour; but otherwise, just keep flouring your hands.
- No banneton—what can I do? Oh, grab a colander, line it with a tea towel dusted with flour. Works a treat. Did this for a year before giving in to the fancy kit.
- Can I skip the Dutch oven? For sure. Bake on a sheet, toss a cup of water into a hot pan at the bottom of the oven for instant steam—it’s a bit fiddly but totally works.
- Can I mix in other herbs? Absolutely! Thyme and sage are fun combos—actually, go wild, but maybe not mint. That was weird.
Anyway, if you give this rosemary sourdough bread a crack, let me know how it goes—or just send up a bread toast (with extra butter, obviously). Happy baking, mate!

Ingredients
- 500g bread flour
- 350ml water, lukewarm
- 100g active sourdough starter
- 10g sea salt
- 2 tbsp fresh rosemary, finely chopped
- 1 tbsp olive oil
- 1 tsp sugar
Instructions
-
1In a large bowl, combine bread flour, sugar, and water. Mix until just combined and let it rest, covered, for 30 minutes.
-
2Add active sourdough starter, sea salt, chopped rosemary, and olive oil to the dough. Mix well until fully incorporated.
-
3Perform several stretch and folds over 2 hours, allowing the dough to rest covered for 30 minutes between each fold.
-
4Cover and refrigerate the dough for 12-16 hours for bulk fermentation.
-
5Shape the dough into a round loaf, place in a floured proofing basket, and let rise for 1-2 hours at room temperature.
-
6Preheat oven to 230°C (450°F) with a Dutch oven inside. Score the bread, transfer to the hot Dutch oven, and bake with lid on for 25 minutes. Remove lid and bake for another 20 minutes until golden and crisp. Cool before slicing.
CLICK FOR NUTRITION INFO
↑
Approximate Information for One Serving
Serving Size:
1 serving
Calories:
180cal
Protein:
5 gg
Fat:
2 gg
Saturated Fat:
0g
Trans Fat:
0g
Cholesterol:
0mg
Sodium:
0mg
Potassium:
0mg
Total Carbs:
36 gg
Fiber:
0g
Sugar:
0g
Net Carbs:
0g
Vitamin A:
0
Vitamin C:
0mg
Calcium:
0mg
Iron:
0mg
Nutrition Disclaimers
Number of total servings shown is approximate. Actual number of servings will depend on your preferred portion sizes.
Nutritional values shown are general guidelines and reflect information for 1 serving using the ingredients listed, not including any optional ingredients. Actual macros may vary slightly depending on specific brands and types of ingredients used.
To determine the weight of one serving, prepare the recipe as instructed. Weigh the finished recipe, then divide the weight of the finished recipe (not including the weight of the container the food is in) by the desired number of servings. Result will be the weight of one serving.
Did you make this recipe?
Please consider Pinning it!!