Let Me Tell You About These Chicken Pitas…
Oh man, if only you could’ve seen my kitchen the first time I tried these sheet pan chicken pitas with herby ranch. There was a lot of frantic lid-rattling and me nearly dropping a whole bottle of olive oil, but the end result? Amazing. I swear my brother-in-law ate four in one go (how does he even have room?). Anyway, if you’re after a weeknight dinner that doesn’t ask too many questions but still gives you that “wow, I made this!” vibe, this is it. Plus, you get permission to drench everything in herby ranch — which, in my books, is always a good thing.
Why You’re Gonna Like This (Trust Me)
I make this when I’m totally knackered after work and don’t want to juggle five pans (just one, thanks). It’s always a hit with picky eaters — even my cousin, who barely likes anything that isn’t chicken nuggets, loves it. Honestly! I keep some frozen pitas on standby specially for this. And, bonus, when you make it all on a single sheet pan, clean-up’s a breeze (unless you’re like me and accidentally spill half the ranch — in which case, uh, just soak the pan overnight).
What You’ll Need (Substitutions & Family Quirks Included)
- 4 boneless, skinless chicken thighs (I sometimes use breasts if that’s what’s left in the freezer — juicier thighs are nicer, though!)
- 2 teaspoons smoked paprika (regular’s fine too, but the smokiness is chef’s kiss)
- 1 teaspoon garlic powder (honestly, just chuck in an extra clove of fresh garlic if you prefer the real deal)
- 1 teaspoon dried oregano — or thyme, or both, if thyme’s all you’ve got
- 1 lemon, zest and juice (My grandma says you can sub in a splash of vinegar if you’re out)
- 3 tablespoons olive oil (Sunflower works if you’re running low)
- Salt and black pepper (go on, taste as you go — it’s your meal)
- 1 large red onion, sliced (white is fine but not quite as sweet)
- 1 large bell pepper, sliced (any color, I don’t judge — sometimes I use two small ones)
- 4-6 pita breads (homemade or the trusty store kind; no shame—though I burned homemade once, so just use storebought if you want to keep it easy)
- A handful of mixed greens or lettuce (spinach, arugula, or whatever’s a bit wilted in the crisper)
- For the Herby Ranch:
- 1/2 cup Greek yogurt (sometimes I just use sour cream because that’s what’s open)
- 1/4 cup mayo (light or full-fat — honestly, I can barely tell the difference when it’s mixed in)
- 1 garlic clove, finely chopped
- 2 tablespoons fresh chopped dill (dry is okay in a pinch — just use less!)
- 2 tablespoons fresh parsley (again, if you only have cilantro, it’s different but still good — one time I used basil and it totally worked)
- Splash of buttermilk, milk, or even water to thin the sauce slightly (I’ve even used almond milk — worked fine)
- Zest and juice of half a lemon
- Salt and pepper, to taste
So, How Do You Make ‘Em?
- Preheat your oven to 425°F (220°C). Line your biggest baking sheet with parchment, unless you quite like scrubbing pans. I don’t.
- Chop up the chicken thighs into decent bite-size bits. Not microscopic, but not dinosaur chunks either. Toss them in a big bowl with the paprika, garlic powder, oregano, lemon zest and juice, olive oil, a big pinch of salt, and legit loads of black pepper. (This is where I’ve sometimes gone a little overboard — oops.)
- Scatter your sliced onion and bell pepper all over the pan, then plonk the chicken pieces on top. Try to get everything in a single layer so it roasts, not steams — but honestly, I’ve crowded the pan before and it still tasted good, just took longer.
- Bake for 20-25 minutes. Halfway through, I usually open the oven and give it all a quick stir — and, yeah, maybe ‘sample’ a bite, you know, for safety’s sake. Chicken should be cooked through and just starting to catch on the edges. Don’t fret if it looks a bit messy.
- While that’s cooking, stir together your ranch ingredients: yogurt, mayo, garlic, dill, parsley, lemon zest and juice, dash of salt, splash of buttermilk to get it pourable. Taste and tweak till you think “I’d eat this on a shoe.” (No need to be too precious, I once used only dill and it was still fab.)
- If your pitas aren’t soft, wrap them in foil (or not, I’m honestly pretty lazy about this) and chuck them into the oven for the last 5 minutes.
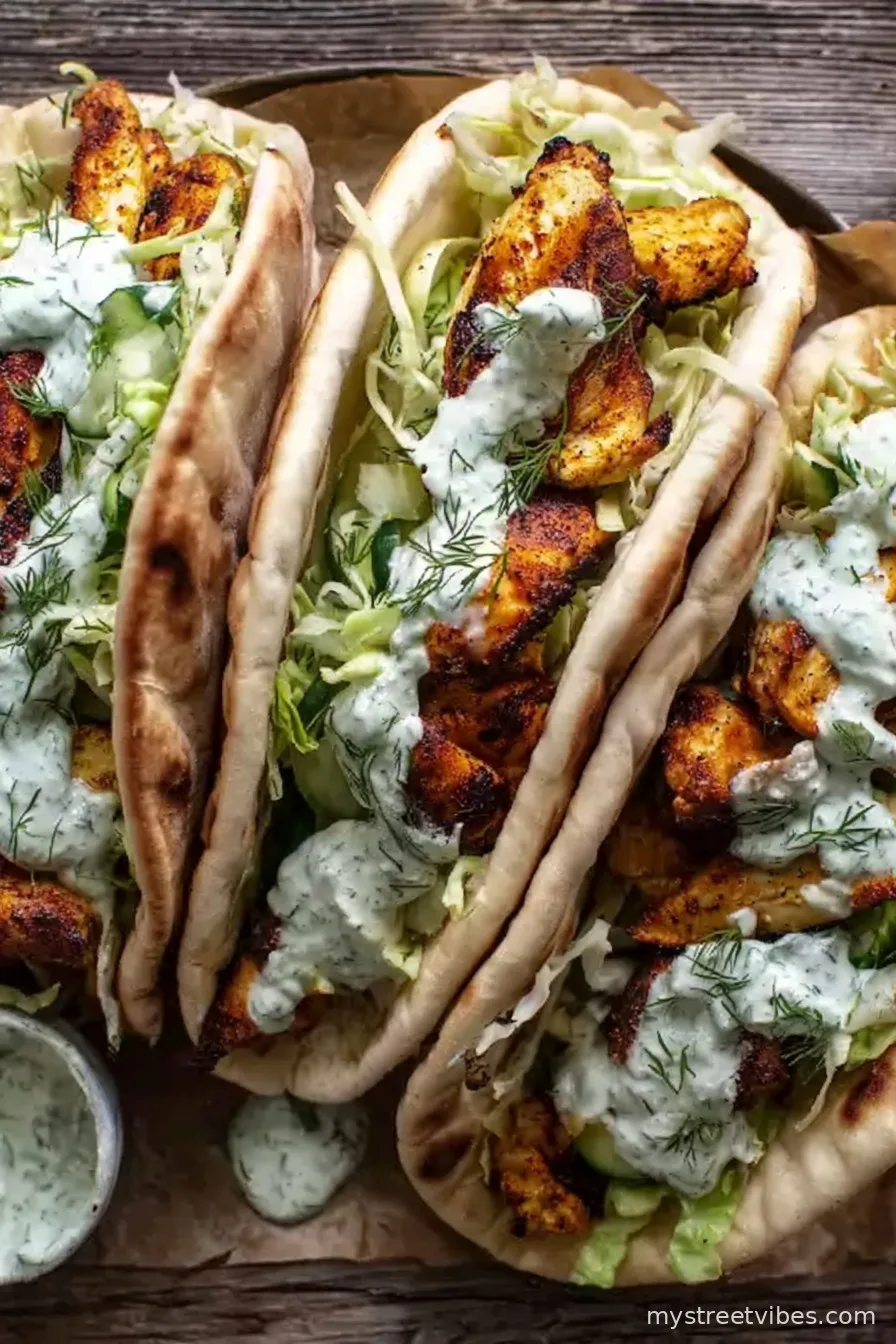
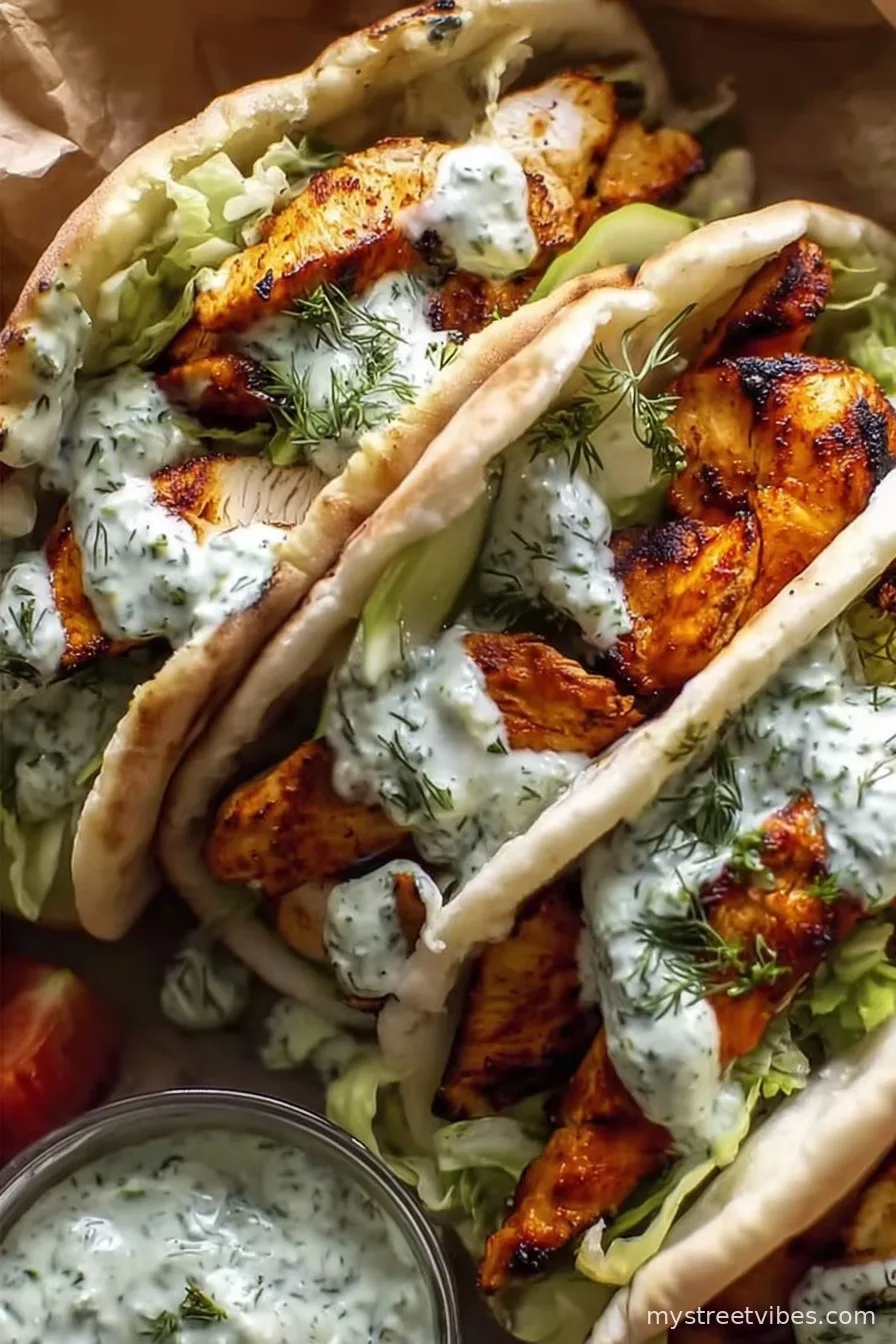
- When it’s all done, time to assemble! Lay down your pita, pile on the greens, heap the chicken and veg mix, and smother with herby ranch. Use your hands and embrace the mess — that’s how you know it’s good.
Things I Learned the Hard Way (Notes)
- If you let the ranch sit for a bit (like 10-15 mins), it tastes even better. Trust me, I forgot it in the fridge once — best accidental discovery!
- Sometimes I roast a couple garlic cloves with the chicken, just for fun; their flavor gets richer than raw garlic in the ranch.
- The onions and peppers almost always stick a little; don’t panic, that’s the caramelized gold you want for flavor.
Fun Variations I’ve Tried (Some Winners, One Miss)
- Once swapped out the chicken for chickpeas and cauliflower for my veggie friend; turns out, this is even better cold the next day. Success!
- Pita got swapped with naan one time — not authentically Greek or Middle-Eastern, but boy was it good.
- Tried adding pineapple once, thinking it’d be like tropical chicken pizza. Yeah… wouldn’t really bother again, but each to their own!
Equipment (But There Are Workarounds!)
- Big old rimmed baking sheet (but if you only have two smaller trays, just split the stuff up, nothing bad happens — except maybe one tray cooks faster, so swap halfway!)
- Parchment or foil — makes clean up a doddle, but you can definitely just oil the pan instead, if you fancy washing up later
- Mixing bowls (if you’re out, a big salad bowl works too — I’ve even used a pasta pot once or twice without disaster)
How to Store Leftovers (If There Are Any, Ha!)
If you somehow don’t finish the whole lot in one go, just put the meat and veggies into an airtight container in the fridge. It’ll keep about 2-3 days, but honestly, in my house it never sits around that long! The ranch keeps for about the same. Pitas get a bit tough after a day, so I just pop them in the toaster to revive ‘em.
Serving — My Two Cents
I always throw extra greens on the table — sometimes with a squeeze of lemon. My little nephew likes a heap of crumbled feta over his, and if I’m feeling very fancy, I toss on a few pickled onions. A scoop of proper Greek salad, maybe some crispy oven fries on the side (because why not?). Family tradition says someone always debates whether to fold or wrap — in my house, we do both, and argue about it the whole meal.
The “Don’t Skip These” Pro Tips
I once tried rushing the marinade step and regretted it big time — the flavor just didn’t get into the chicken. Even 10-15 minutes while you prep the veg makes a difference. Oh, and I’ve learned not to overload the pan… actually, I find it works better if you just use two pans and rotate them, or things get a bit steamy and sad-looking.
Your Sheet Pan Pita FAQs… Answered!
- Q: Can I use chicken breast instead of thighs?
- A: Yep! Just keep an eye out so you don’t overcook the chunks. Maybe check at 18 minutes if you like ‘em juicy.
- Q: Is the ranch super garlicky?
- A: Hmm, not unless you really pile on the cloves; but if you’re nervous, start with less. (I once went overboard and it was… potent, let’s just say.)
- Q: Can I freeze leftovers?
- A: The chicken and veg, yes, though the texture isn’t quite as good on defrosting. Ranch, not so much — it goes a bit weird. Pitas, yes, but wrap them well.
- Q: Any brands of pita you recommend?
- A: Honestly? Whatever’s freshest, but for a splurge I like the ones from Pita Bread Company. Or check out your local bakery if you’re not in a rush.
- Q: What’s good to serve alongside?
- A: Pickled veg, chips, even just a wedge salad; sometimes I whip up Smitten Kitchen’s furikake popcorn for a weird but awesome crunch!
Random tangent — did you know pitas were once used as edible napkins in the old days? (Not sure how true that is — I heard it from my uncle, who’s a notorious fibber.) Anyway, hope you enjoy making these pitas as much as we do. And if you invent a new twist, tell me — unless it’s pineapple. Kidding. Sort of.
Ingredients
- 1 1/2 pounds boneless, skinless chicken thighs, cut into strips
- 1 red bell pepper, sliced
- 1 red onion, sliced
- 2 tablespoons olive oil
- 2 teaspoons smoked paprika
- 1 teaspoon garlic powder
- 1 teaspoon dried oregano
- 1/2 teaspoon salt
- 4 pita breads
- 1/2 cup cherry tomatoes, halved
- For the herby ranch:
- 1/2 cup Greek yogurt
- 2 tablespoons mayonnaise
- 1 tablespoon chopped fresh parsley
- 1 tablespoon chopped fresh dill
- 1 tablespoon lemon juice
- 1 clove garlic, minced
- Salt and black pepper, to taste
Instructions
-
1Preheat your oven to 425°F (220°C). Line a sheet pan with parchment paper.
-
2In a large bowl, toss chicken strips, bell pepper, and red onion with olive oil, smoked paprika, garlic powder, dried oregano, and salt until evenly coated.
-
3Spread the chicken and vegetables evenly on the prepared sheet pan. Roast for 22-25 minutes, stirring halfway through, until the chicken is cooked through and vegetables are tender.
-
4Meanwhile, prepare the herby ranch by mixing Greek yogurt, mayonnaise, parsley, dill, lemon juice, garlic, salt, and black pepper in a small bowl until smooth.
-
5Warm the pita breads briefly in the oven or a dry skillet. Fill each pita with roasted chicken and veggies, top with cherry tomatoes, and drizzle generously with the herby ranch sauce. Serve immediately.
CLICK FOR NUTRITION INFO
↑
Approximate Information for One Serving
Serving Size:
1 serving
Calories:
515 caloriescal
Protein:
38gg
Fat:
18gg
Saturated Fat:
0g
Trans Fat:
0g
Cholesterol:
0mg
Sodium:
0mg
Potassium:
0mg
Total Carbs:
49gg
Fiber:
0g
Sugar:
0g
Net Carbs:
0g
Vitamin A:
0
Vitamin C:
0mg
Calcium:
0mg
Iron:
0mg
Nutrition Disclaimers
Number of total servings shown is approximate. Actual number of servings will depend on your preferred portion sizes.
Nutritional values shown are general guidelines and reflect information for 1 serving using the ingredients listed, not including any optional ingredients. Actual macros may vary slightly depending on specific brands and types of ingredients used.
To determine the weight of one serving, prepare the recipe as instructed. Weigh the finished recipe, then divide the weight of the finished recipe (not including the weight of the container the food is in) by the desired number of servings. Result will be the weight of one serving.
Did you make this recipe?
Please consider Pinning it!!