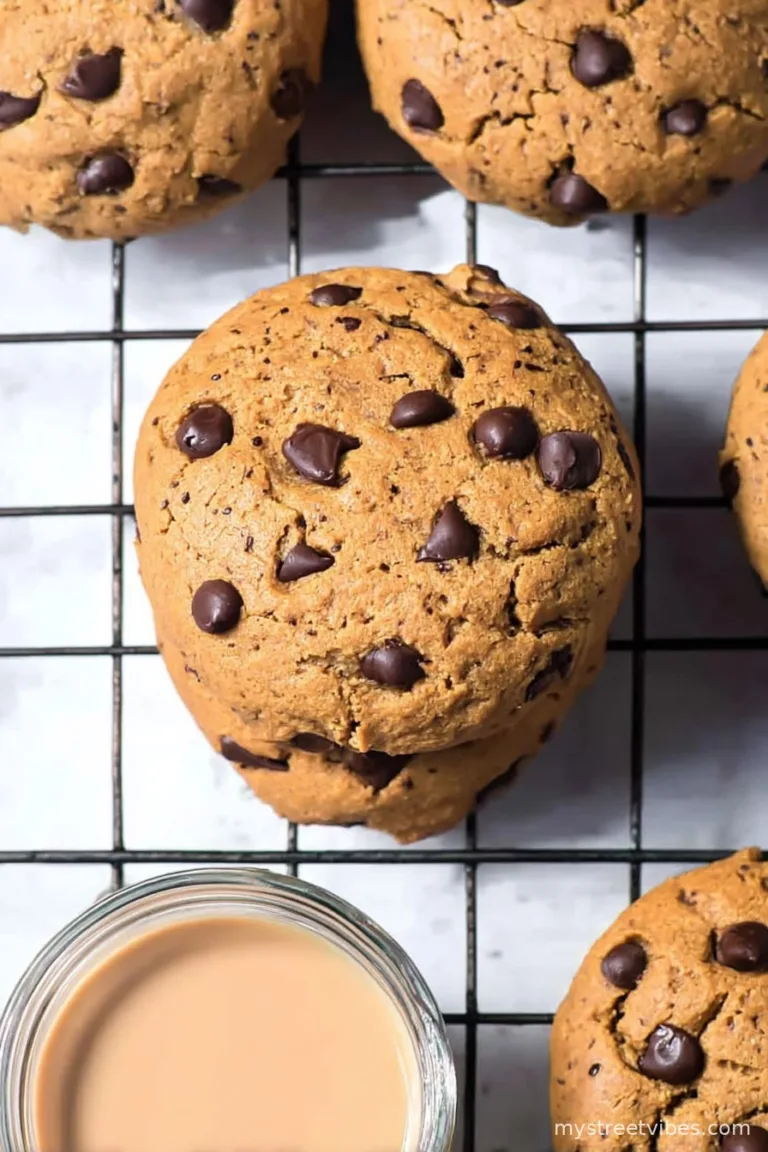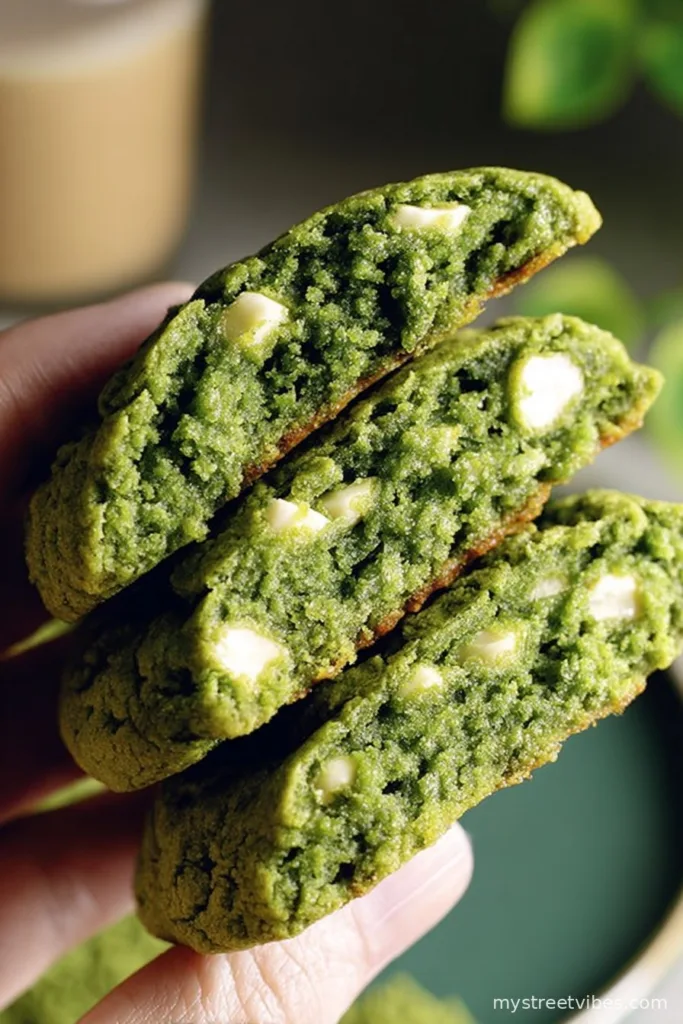
So, About These Matcha White Chocolate Cookies…
I swear, every time I whip up a batch of these cookies, I’m instantly whisked back to this afternoon when my sister and I emptied a whole bag of white chocolate buttons just for the heck of it—then wondered where they all went (oops). The matcha in here isn’t exactly from a high and mighty tea ceremony, but honestly, that’s part of the magic. I mean, who decided we have to keep our matcha for fancy tea anyway? If you ask me, mixing it with white chocolate in cookie form is the best ‘rule breaking’ I’ve done all year. Oh, and once I dropped my dough on the floor, and the cat tried to claim it. But those bits didn’t make it into the final cookies, promise!

Why You’ll Love This
I usually make these matcha white chocolate cookies on those ‘meh’ days when I need a pick-me-up but don’t want to stand in the kitchen forever. They’re sweet, earthy (good earthy, not like… dusty), and a bit fancy without acting like it. My family actually asks for them at Christmas, birthdays, Tuesdays, you get the idea. They’re basically my “Oh, you’re coming over? Let me bake something” recipe. Trust me, I was super skeptical about matcha in cookies—once upon a time, my first batch went an unfortunate shade of green but tasted like hope and sugar anyway (thankfully, I’ve improved since then!).
The Ingredients (and My Lazy Shortcuts)
- 2 cups (250g) all-purpose flour
- 1 tbsp matcha powder (I use culinary grade, not the top shelf stuff. If you want a lighter green and milder taste, use 2 tsp instead. Or do what my friend does and just heap it in, wild.)
- 1/2 tsp baking soda
- 1/2 tsp salt (or a couple hefty pinches—nobody’s counting exactly except my grandma…)
- 3/4 cup (170g) unsalted butter, softened (If I’m out, melted coconut oil is okay, but it gives a slightly different vibe)
- 1 cup (200g) sugar (White sugar, but sometimes I just use 3/4 cup and toss in a scoop of light brown for depth)
- 1 large egg (Room temperature. Or slightly chilly if you’re impatient, like me.)
- 1 tsp vanilla extract (The imitation stuff is fine, sorry, not sorry!)
- 3/4 cup white chocolate chips (Or a handful of chopped white chocolate bar. My cousin swears by the budget store-brand, and honestly, it all tastes good)
How I Actually Bake These Cookies
- Preheat your oven. 350°F (180°C). Or, almost there—sometimes I pop the cookies in a bit early because, who can wait?
- Mix your dries. So, grab a bowl and dump in the flour, matcha, baking soda, and salt. I usually give it a quick whisk but, on rushed days, a fork does it.
- Butter + sugar time. In a bigger bowl, beat your butter and sugar together until it’s all fluffy and lighter in color. (I did this by hand with a wooden spoon once. Not for the faint of heart.)
- Egg & vanilla go in. Crack in your egg and add vanilla. Beat that in until it looks creamy. Here’s where I tend to sneak a taste—honestly, it’s kinda irresistible, but don’t tell anyone I said that.
- Dry meets wet. Toss the flour mixture into the butter stuff. I do this in two parts because otherwise my kitchen looks like it snowed matcha. Mix until just combined! It’ll look streaky green; that’s normal.
- Fold in chocolate. White chocolate chips go in last. Some fall on the counter. Some into my mouth. You get the idea.
- Scoop & drop. About 1.5 tablespoons per cookie, plopped onto a lined baking tray. Sometimes I roll ‘em, but honestly, to each their own. Leave a bit of space, they spread more than you’d think.
- Bake! 10–12 minutes usually does the trick. Edges just golden. If you keep peeking—guilty!—it’s alright. They’ll look a bit soft when they’re done; that’s good.
- Let cool a little (if you can wait). They firm up, but I always burn my tongue on the first one. Like clockwork.
Notes (AKA My Baking Learnings)
- I used too much matcha once and it tasted like a pine tree—maybe good for nature lovers?
- If your dough feels too sticky, chill it for 10 minutes. If it’s still sticky after, just go with it. Wonky cookies taste just as good.
- Cookies brown fast on the bottoms, so use a light colored baking tray. That or just check ‘em a minute early.
Other Versions I’ve Tried (Not All Winners!)
- Almond extract instead of vanilla is surprisingly nice.
- I tried dried cranberries once—tasted kinda weird with the matcha, so maybe steer clear unless you’re feeling wild.
- Dark chocolate chips are fine but they boss the matcha around, so white is still my fave.

Equipment (But Don’t Stress If Yours Is Missing)
- Baking tray—lined with parchment (foil in a pinch, just butter it so you don’t spend ages scraping cookies off)
- Mixing bowls—nothing fancy, I’ve used salad bowls before
- Hand mixer is fast, but honestly a wooden spoon is a workout and gets the job done (sorta like arm day at the gym—skip at your own peril)
- Cookie scoop—nice but a tablespoon works, too
How to Keep Them (If You Manage To)
Store these in an airtight tin or jar on the counter. They’re good for about 3 days, but, honestly, in my house, they never last past breakfast number two. (Someone always nabs the last one, and it’s usually me, not gonna lie.)
How I Serve These (And Sometimes Don’t Share)
I love them just with coffee. Or tea if you’re fancying it. Once, I sandwiched two with ice cream—not quite traditional, but it weirdly worked. My little cousin dunks hers in warm milk, but really, just eat them as soon as you can without burning your mouth off.
Pro Tips I Learned the Hard Way
- I tried to use cold butter once. Could’ve used it as a building brick, it was so hard to mix. Let it soften!
- I once crammed all the dough onto one tray, cookies merged into mega-cookie…actually, that was kinda awesome, but maybe use two trays.
- Don’t skip lining the tray. Getting matcha-green cookie bits off bare metal—yeah, no thanks.
Some FAQ – Actual Questions I’ve Gotten
- Q: Do these work with vegan butter?
Yeah, they do! But the texture gets a bit puffier. I just roll with it. - Q: Can I double the matcha?
If you want REALLY strong matcha, sure, but honestly, too much makes it almost medicinal. Try it if you’re feeling bold, though! - Q: My cookies turned blueish. Is that normal?
Wild, right? Sometimes certain brands of matcha react with baking soda and get quirky. Tastes fine! - Q: Do you sift the matcha?
Occasionally, if I can be bothered. Most times I just dump it in. It’s all good in the end. - Q: Can you freeze the dough?
You bet. Roll into balls, freeze, then bake from frozen—just tack on 2 minutes more.
Anyway, that’s pretty much it. If you run into any weirdness, it’s probably normal. Or at least, I’ve seen it too! And if you come up with a new twist that doesn’t taste like tree bark, let me know—I’m all ears. Happy baking!
Ingredients
- 1 1/2 cups all-purpose flour
- 1 tablespoon matcha green tea powder
- 1/2 teaspoon baking soda
- 1/4 teaspoon salt
- 1/2 cup unsalted butter, softened
- 3/4 cup granulated sugar
- 1/4 cup light brown sugar, packed
- 1 large egg
- 1 teaspoon pure vanilla extract
- 3/4 cup white chocolate chips
Instructions
-
1Preheat oven to 350°F (175°C) and line a baking sheet with parchment paper.
-
2In a medium bowl, whisk together flour, matcha powder, baking soda, and salt.
-
3In a large bowl, cream together the softened butter, granulated sugar, and brown sugar until light and fluffy.
-
4Beat in egg and vanilla extract until well combined. Gradually mix in the dry ingredients, then fold in the white chocolate chips.
-
5Scoop tablespoon-sized portions of dough onto the prepared baking sheet, spacing them about 2 inches apart.
-
6Bake for 10-12 minutes or until edges are lightly golden. Cool on the baking sheet for 5 minutes before transferring to a wire rack.
CLICK FOR NUTRITION INFO
↑
Approximate Information for One Serving
Serving Size:
1 serving
Calories:
130cal
Protein:
2 gg
Fat:
6 gg
Saturated Fat:
0g
Trans Fat:
0g
Cholesterol:
0mg
Sodium:
0mg
Potassium:
0mg
Total Carbs:
18 gg
Fiber:
0g
Sugar:
0g
Net Carbs:
0g
Vitamin A:
0
Vitamin C:
0mg
Calcium:
0mg
Iron:
0mg
Nutrition Disclaimers
Number of total servings shown is approximate. Actual number of servings will depend on your preferred portion sizes.
Nutritional values shown are general guidelines and reflect information for 1 serving using the ingredients listed, not including any optional ingredients. Actual macros may vary slightly depending on specific brands and types of ingredients used.
To determine the weight of one serving, prepare the recipe as instructed. Weigh the finished recipe, then divide the weight of the finished recipe (not including the weight of the container the food is in) by the desired number of servings. Result will be the weight of one serving.
Did you make this recipe?
Please consider Pinning it!!