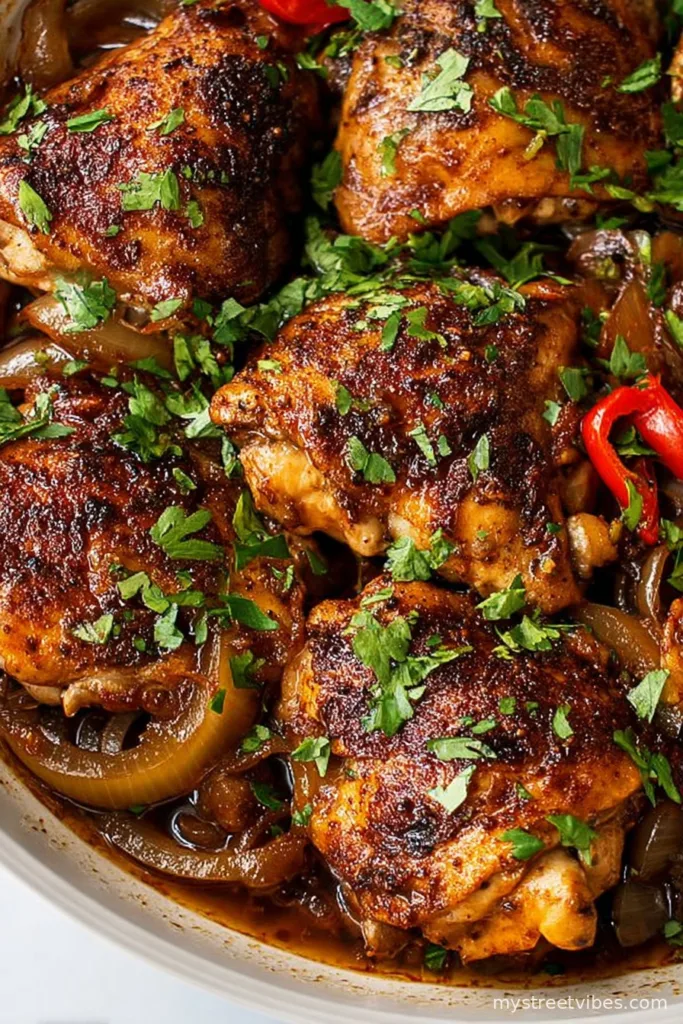
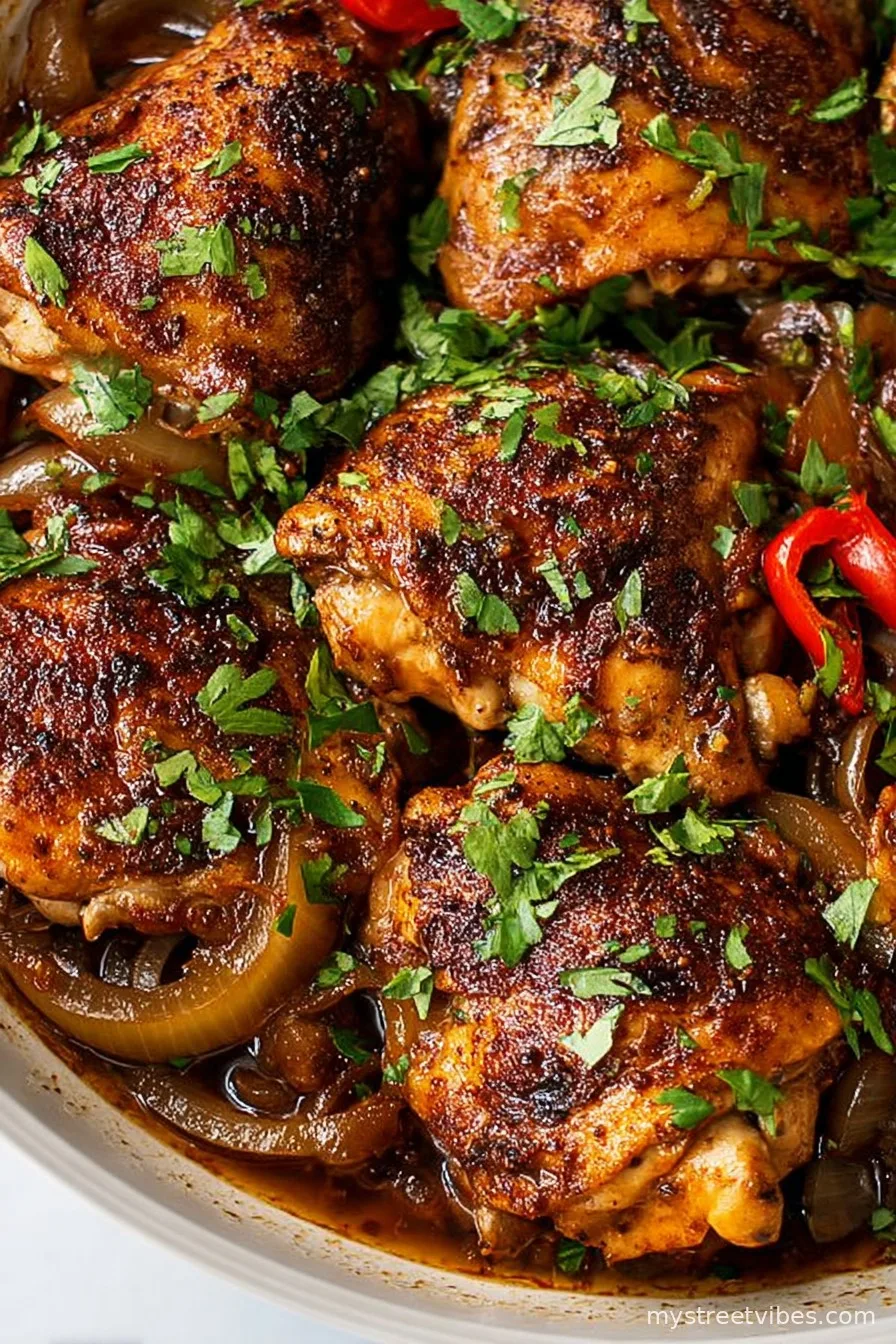
Let Me Tell You About Instant Pot Chicken Thighs…
I swear, every time I hear the beep of my Instant Pot firing up, my stomach gets all hopeful—because nine out of ten times, there’s Chicken Thighs in there, and that’s something I never get bored of. The first time I tried making chicken this way, I was skeptical (like, how juicy could it actually be?), but it turned out so foolproof, I stopped bothering with oven mitts and slaving over the stove. Once I almost dropped the lid on my foot—don’t recommend that bit, but the results were worth it! If you’re like me and hate standing around stirring, this recipe is going to be your new pal in the kitchen.
Why You’ll Be Hooked (Just Like Me)
I make this whenever I’ve completely forgotten to defrost something, because these thighs can handle being a little icy around the edges (procrastinators rejoice). My family actually gets weirdly competitive about snagging the juiciest piece—my cousin Peter claims he can tell if I swap the spices from last time, which, I mean, maybe he can? Also, I used to always stress about overcooked, rubbery chicken, but with this, even if you accidentally leave it for a couple extra minutes, it’s still good (trust me, I’ve tested that unintentionally).
Let’s Talk Ingredients
- 6 bone-in, skin-on chicken thighs (I sometimes use boneless if that’s what I’ve got, but I think bone-in is juicier)
- 1 tablespoon olive oil (my grandmother absolutely swore by sunflower oil—honestly, any neutral oil works fine)
- 1 teaspoon kosher salt
- 1/2 teaspoon black pepper (cracked is best, but pre-ground when I’m lazy)
- 1 teaspoon smoked paprika (sweet paprika’s fine if you’re out, or dust a bit of chili powder in for a kick—why not?)
- 1/2 teaspoon garlic powder
- 1/2 teaspoon dried thyme (fresh is lovely, but I rarely have it)
- 3/4 cup chicken broth (sometimes, I just use water with a bouillon cube; no one’s ever noticed)
- 2–3 garlic cloves, smashed (totally optional, but I like the little bursts of flavor)
How It Comes Together (My Way)
- First off, pat the chicken thighs dry—that way the skin gets kinda crispy. I usually do this on the sink with a bit of kitchen roll (but I forget sometimes—it’s not the end of the world).
- Season the thighs on both sides with salt, pepper, paprika, garlic powder, and thyme. If I’m feeling patient, I’ll gently lift the skin and sprinkle a little under there, too. It makes a difference. Or, just toss them all in a bowl and massage the spices in—get your hands a bit messy.
- Pour the olive oil in the Instant Pot, and hit the sauté function. Give it a minute or two to get hot, and then lay the chicken thighs in, skin-side down. Usually in two batches—otherwise you crowd the pot and nothing browns (lesson learned the messy way). Sear them for about 3 minutes per side, just til you get some goldenness. Don’t panic if they stick a little; they’ll release when they’re ready.
- Remove the chicken to a plate. Pour in the broth and scrape up the brown bits (that’s where the magic is). Nestle the chicken back in, skin-side up, in a slightly overlapping layer. Tuck the garlic cloves in there, too, if using.
- Now, put the lid on, twist it to lock (this is usually where my brain goes, ‘wait, did I add the broth?’ Double-check!), and set it for 10 minutes on high pressure. If your chicken thighs are huge (like Scottish rugby player big), try 12 minutes.
- Let the pressure release naturally for about 5 minutes, then quick release the rest. Careful, the steam is hotter than you’d think—I got a red hand last time I dove in too soon. Open the lid and take a sniff. Heaven.
- Put the chicken on a plate and, if you want the skin crispier, chuck it under the broiler for 3–5 minutes. Sometimes I skip this if everyone’s starving, and it’s still tasty.
Notes from the Field (aka, My Trial and Error)
- Don’t skip drying the chicken if you want that golden skin. If you do forget (happens!), maybe just broil a tad longer at the end.
- I’ve made this with frozen chicken—just skip searing, pressure cook for 12-13 minutes, and bump the flavor with a little extra garlic powder. It doesn’t brown, but it sure tastes good.
- This recipe is forgiving. Once I measured the salt after spilling part of it on the stove, and it still tasted fab.
Variations I’ve Attempted (With Mixed Results)
- Lemon pepper: Toss in lemon slices and a spritz of zest. Tangy!
- Spicy Cajun: Use Cajun seasoning and swap broth for beer if you’re feeling wild (not for kids, obviously).
- BBQ Style: Once, I lathered them with BBQ sauce before pressure cooking. It kinda burned on the bottom. Stick to brushing it on after, then broil. Learned the hard way.
- Herb Explosion: I once added rosemary and sage, but honestly, it tasted a bit like a potpourri shop smells. Wouldn’t recommend unless you’re obsessed with herbs.

The Gear I Actually Use (and How I Fake It)
- Instant Pot, obviously (I use a 6-qt, but I once borrowed a friend’s older one and it still worked)
- Tongs: Or, if they’re in the dishwasher, a couple of forks. Improvise, adapt, overcome.
- Baking sheet for broiling, but honestly, I’ve even used my old pizza pan. Just keep an eye out for catching drips.
- Measuring spoons—except when I eye-it. That’s my secret ingredient (don’t tell my cousin Peter).
How Do You Store These?
Leftovers? In my house? Rare, but if you do, I pop ’em in a lidded container, fridge, for up to three days. They do taste even richer on day two, though maybe that’s just me justifying making a batch “for later.” You can reheat in a skillet (a splash of broth keeps things juicy) or microwave. Freezer? Yea, they freeze okay, but honestly, they never make it that far in my flat.
Serving: What Goes With This?
As for sides, I like buttery mashed potatoes or (if I’m on a health kick) green beans. Sometimes I spoon the cooking juice over rice. Family tradition: we always have fluffy dinner rolls to mop everything up, because as my uncle used to say, “Why waste good sauce?”
The Stuff I Wish I’d Known (Pro Tips!)
- Don’t rush the pressure release. I once tried to quick-release right away—ended up with tough chicken. Lesson learned; patience, grasshopper.
- Don’t forget the broth. Dry chicken is the opposite of fun.
- Spices: Actually, I find it works better if I don’t overdo it on the smoked paprika, or it starts to taste like campfire (not in a good way).
Sometimes Folks Ask Me… (FAQ Style)
- Can I stack the chicken thighs?—Yup, in the Instant Pot, I just overlap them a bit. They cook evenly anyway.
- Do I have to use chicken broth?—Nope, water works—add a splash of wine if you’ve got it kicking about, or just use a stock cube.
- What if I don’t have all the spices?—It’s honestly hard to mess this up. Use what you like; I once forgot the thyme and nobody even clocked it.
- Is the skin supposed to come out crispy?—Not straight from the pot, but you can crisp it under the broiler. Or not! It’ll still be tasty.
- Can I do this with other cuts?—Sure, but thighs are juicier than breasts in my not-so-humble opinion.
Oh! Slight digression: once I tried this recipe at a friend’s kitchen that didn’t have an Instant Pot—tried it in a slow cooker and while it worked, something gets lost in all that waiting. Sometimes quicker really is better.
Ingredients
- 6 bone-in, skin-on chicken thighs (I sometimes use boneless if that’s what I’ve got, but I think bone-in is juicier)
- 1 tablespoon olive oil (my grandmother absolutely swore by sunflower oil—honestly, any neutral oil works fine)
- 1 teaspoon kosher salt
- 1/2 teaspoon black pepper (cracked is best, but pre-ground when I’m lazy)
- 1 teaspoon smoked paprika (sweet paprika’s fine if you’re out, or dust a bit of chili powder in for a kick—why not?)
- 1/2 teaspoon garlic powder
- 1/2 teaspoon dried thyme (fresh is lovely, but I rarely have it)
- 3/4 cup chicken broth (sometimes, I just use water with a bouillon cube; no one’s ever noticed)
- 2–3 garlic cloves, smashed (totally optional, but I like the little bursts of flavor)
Instructions
-
1First off, pat the chicken thighs dry—that way the skin gets kinda crispy. I usually do this on the sink with a bit of kitchen roll (but I forget sometimes—it’s not the end of the world).
-
2Season the thighs on both sides with salt, pepper, paprika, garlic powder, and thyme. If I’m feeling patient, I’ll gently lift the skin and sprinkle a little under there, too. It makes a difference. Or, just toss them all in a bowl and massage the spices in—get your hands a bit messy.
-
3Pour the olive oil in the Instant Pot, and hit the sauté function. Give it a minute or two to get hot, and then lay the chicken thighs in, skin-side down. Usually in two batches—otherwise you crowd the pot and nothing browns (lesson learned the messy way). Sear them for about 3 minutes per side, just til you get some goldenness. Don’t panic if they stick a little; they’ll release when they’re ready.
-
4Remove the chicken to a plate. Pour in the broth and scrape up the brown bits (that’s where the magic is). Nestle the chicken back in, skin-side up, in a slightly overlapping layer. Tuck the garlic cloves in there, too, if using.
-
5Now, put the lid on, twist it to lock (this is usually where my brain goes, ‘wait, did I add the broth?’ Double-check!), and set it for 10 minutes on high pressure. If your chicken thighs are huge (like Scottish rugby player big), try 12 minutes.
-
6Let the pressure release naturally for about 5 minutes, then quick release the rest. Careful, the steam is hotter than you’d think—I got a red hand last time I dove in too soon. Open the lid and take a sniff. Heaven.
-
7Put the chicken on a plate and, if you want the skin crispier, chuck it under the broiler for 3–5 minutes. Sometimes I skip this if everyone’s starving, and it’s still tasty.
CLICK FOR NUTRITION INFO
↑
Approximate Information for One Serving
Serving Size:
1 serving
Calories:
320 caloriescal
Protein:
30 gg
Fat:
20 gg
Saturated Fat:
0g
Trans Fat:
0g
Cholesterol:
0mg
Sodium:
0mg
Potassium:
0mg
Total Carbs:
2 gg
Fiber:
0g
Sugar:
0g
Net Carbs:
0g
Vitamin A:
0
Vitamin C:
0mg
Calcium:
0mg
Iron:
0mg
Nutrition Disclaimers
Number of total servings shown is approximate. Actual number of servings will depend on your preferred portion sizes.
Nutritional values shown are general guidelines and reflect information for 1 serving using the ingredients listed, not including any optional ingredients. Actual macros may vary slightly depending on specific brands and types of ingredients used.
To determine the weight of one serving, prepare the recipe as instructed. Weigh the finished recipe, then divide the weight of the finished recipe (not including the weight of the container the food is in) by the desired number of servings. Result will be the weight of one serving.
Did you make this recipe?
Please consider Pinning it!