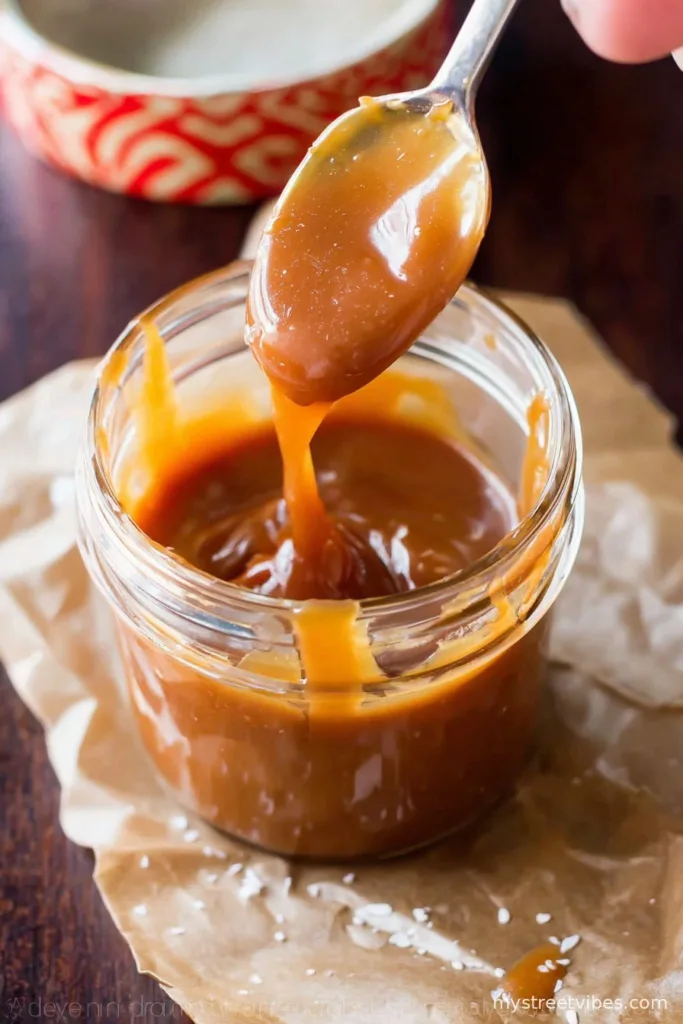
Caramel Fiascos and Victories—Let’s Talk Homemade Salted Caramel
So the first time I tried making salted caramel, I was young and stubborn—plus distracted by my friend texting me about a sale at Tesco. Cue boiling sugar chaos and smoke so dramatic you’d think I’d summoned a mini fog machine in the kitchen. But hey, it’s now become my little party trick (the caramel, not the smoke). There’s something magic about pouring liquid gold over anything and everything. And yeah, I do sometimes lick the spatula when there’s nobody watching. Actually, that’s not true. I do it even if there is someone watching. Oops.
Why You’ll Love This (Or At Least the Way I Make It)
I make this salted caramel when I’m feeling like a dessert wizard or honestly when I’ve got those bananas going brown and need an excuse to make something sinful. My family goes crazy for this—my brother literally eats it with a spoon, which is mildly horrifying and also impressive. And when a drizzle ends up on my ice cream, I swear the clouds part and my problems just melt. Although sometimes, if I’ve let it cook a hair too long, it does get a bit chewy but even then it’s still tasty. If you get the urge to double the recipe ’cause it seems ‘small’, been there! Don’t. Trust me, candy thermometers have their limits (and so do my patience and my countertops).
Here’s What You’ll Need (Substitutes & Shortcuts Galore)
- 1 cup (200g) white granulated sugar (I’ve swapped in light brown sugar in a pinch. Gives it a molasses twang. Not bad!)
- 6 tbsp (85g-ish) unsalted butter, cut in cubes (I guess salted is fine, just go easy on the later salt)
- 1/2 cup (120ml) heavy cream—double cream if you’re in the UK, and yeah, once I used single cream which… made it a bit runny but still delicious.
- 1–2 teaspoons flaky sea salt (table salt works, but sea salt looks fancy, and for some reason my kids eat it faster when I use the fancy stuff)
- Optional: 1 tsp vanilla extract—my grandmother always skipped this but I say, why not?
Directions (Or How Not to Burn Down Your Kitchen)
- Heat the sugar. Grab a medium, heavy-bottomed saucepan (or whatever’s clean—who’s judging). Pour in the sugar over medium heat. Stir constantly with a wooden spoon. At first it’ll look like it’s going nowhere—kinda like watching paint dry. Suddenly, it starts to clump, then melt, and eventually you’ll have a deep amber puddle. Don’t walk away—seriously, I tried once, came back, and met a charred sugar brick.
- Butter time! Carefully add your chunks of butter. It will bubble and sizzle and look slightly unhinged. That’s normal! Stir until the butter melts through. This is when I sneak a taste and always regret it—hot caramel is like magma. Just, don’t.
- Add the cream. Slowly drizzle in the cream (I learned the hard way that dumping it in makes it geyser up, like Old Faithful but scarier). The caramel might seize up and look gross—don’t panic! Stir gently and it’ll smooth out. If it doesn’t, lower the heat or add a splash more cream.
- Salt it. Remove the pan from the heat. Stir in the salt and vanilla if you’re using it (this is the fun part where the kitchen smells like you’ve been baking all day, even if you haven’t).
- Cool and jar. Let the caramel cool for 10–15 minutes before pouring into a jar. Sometimes I just leave the pan out and people attack it with spoons, but honestly, a jar keeps things a bit more civilized.
Notes & Things I Messed Up (So You Won’t Have To)
- That grainy thing? If the sugar crystallizes, just add a splash of water next time at the start—it helps. Though sometimes it still happens and I just pretend it’s extra texture.
- I once used vegan butter and oat cream. It was edible, but the consistency was like runny fudge. Maybe don’t try that, or do—it’s your kitchen!
- If you burn it a bit, you can scrape away the top part and nobody’ll notice (if they’re not caramel snobs).
Variations (Some Winners, One Loser…)
- Bourbon Caramel: I once splashed in a tablespoon of bourbon at the end. Hit or miss with the kids, but the adults? Huge grin fest.
- Espresso Salted Caramel: If you’ve got instant espresso, dissolve a little and add after the cream. This is like fancy coffee shop stuff.
- Spicy Caramel: Tried a teensy bit of cayenne. My cousin loved it, I thought it was weird. So maybe don’t, unless you like heat everywhere.
Don’t Sweat the Equipment
A heavy-bottom pan helps because the sugar heats evenly, but honestly, I’ve done it in a rubbish old saucepan and survived. No candy thermometer? Me either. If you can eyeball a dark amber color, you’re golden (literally). Wooden spoon is nice; metal does the job, but get ready to scrub.

Storage—If It Lasts That Long
Pop your homemade salted caramel in a jar, cover, and stash it in the fridge. Probably lasts two weeks—though honestly in my house it rarely survives to day two. Warm in the microwave if it gets too thick. I don’t recommend freezing; it turns weird. But I’ve seen folks do it on Bigger Bolder Baking, and they seem happy, so maybe that’s just me.
Serving It Up—Endless Possibilities
Pancakes, waffles, drizzled over brownies—don’t even get me started on ice cream. My nephew likes it on apples, which I think is, honestly, genius. Sometimes for a treat breakfast I’ll stir a spoonful into my coffee (don’t tell my dentist). And for holidays, we pour it over store bought donuts, which feels low-effort, but everyone is too busy inhaling to care.
Lessons Learned (Or, Please Don’t Rush Caramel)
- I one tried turning the heat up high to hurry it along—bad plan. Sugar goes from lovely to burnt-out quick as a fox. Patience really is the secret ingredient.
- Once, I skipped stirring to see what would happen. You guessed it—barely caramel at all, mostly a stiff clump at the bottom. So yeah, stir.
FAQ—Real Questions From My (Very Blunt) Family & Friends
- Is this the same as store-bought caramel? Not really. It’s richer, saltier, thicker—less sweet, more buttery. The stuff in the squeeze bottle’s fine, but this? Next level. Actually, I think the homemade kind just tastes more real, somehow.
- Can you double or triple it? You can, but I’ve had it crystallize when I get ambitious. If you do go big, use a massive pan and be patient. And maybe have a backup dessert (spoken from a place of mild caramel heartbreak).
- What if I don’t have fancy salt? Use table salt! Flaky sea salt’s nice but not essential. Even regular Maldon will do (I use this one when I’m feeling posh).
- Help, it’s too thick to pour! Microwave it for 15–20 seconds and stir. If it’s really stubborn, add a splash of warm cream and mix again.
- Can I use plant-based ingredients? Yep, but it won’t set or taste quite the same. I’ve tried coconut cream and vegan butter; still yummy, but more like caramel sauce than chewy caramel.
- Why does my caramel taste burnt? Caramel’s a drama queen; a few seconds too long and it’ll taste smoky. Watch it like a hawk the last minute or so.
And just so you know, this isn’t the perfectly piped, precious kind of caramel. It’s messy, a little wild, and exactly what I want when I’m craving that sweet salty fix. If you want tips on troubleshooting actual caramel candies (the firmer kind), there’s a nice step-by-step guide here as well. Otherwise, grab that spoon and go to town!
Ingredients
- 1 cup granulated sugar
- 6 tablespoons unsalted butter, cut into cubes
- 1/2 cup heavy cream, at room temperature
- 1 teaspoon sea salt, plus extra for topping
- 1 teaspoon vanilla extract
- 2 tablespoons water
Instructions
-
1In a medium heavy-bottomed saucepan, combine granulated sugar and water. Stir over medium heat until sugar dissolves.
-
2Stop stirring and allow the mixture to boil. Cook until the sugar turns a deep amber color, swirling the pan occasionally.
-
3Carefully add butter cubes to the caramelized sugar, whisking continuously until the butter is fully melted.
-
4Slowly pour in the heavy cream while whisking. The sauce will bubble up; continue to stir until smooth.
-
5Remove from heat. Stir in sea salt and vanilla extract until well combined. Allow to cool slightly before serving.
-
6Transfer the salted caramel to a jar or airtight container. Store in the refrigerator for up to two weeks.
CLICK FOR NUTRITION INFO
↑
Approximate Information for One Serving
Serving Size:
1 serving
Calories:
185 caloriescal
Protein:
0.5 gg
Fat:
10 gg
Saturated Fat:
0g
Trans Fat:
0g
Cholesterol:
0mg
Sodium:
0mg
Potassium:
0mg
Total Carbs:
25 gg
Fiber:
0g
Sugar:
0g
Net Carbs:
0g
Vitamin A:
0
Vitamin C:
0mg
Calcium:
0mg
Iron:
0mg
Nutrition Disclaimers
Number of total servings shown is approximate. Actual number of servings will depend on your preferred portion sizes.
Nutritional values shown are general guidelines and reflect information for 1 serving using the ingredients listed, not including any optional ingredients. Actual macros may vary slightly depending on specific brands and types of ingredients used.
To determine the weight of one serving, prepare the recipe as instructed. Weigh the finished recipe, then divide the weight of the finished recipe (not including the weight of the container the food is in) by the desired number of servings. Result will be the weight of one serving.
Did you make this recipe?
Please consider Pinning it!!