Let Me Tell You Why This Apple Crisp is My Fall MVP
Okay, friend, let me set the scene: It’s raining sideways, you’re wearing socks that don’t match (because who has time for matching socks anymore?), and the house smells like apples and cinnamon. This Healthy High Protein Apple Crisp is basically my love letter to autumn, and honestly, I started making it one year when I’d run out of butter (classic) and needed a dessert that wouldn’t make me feel like a total lump after two helpings. First try wasn’t perfect, I’ll admit. I was so distracted by the dog staring at my apple slices that I forgot the oats! But, that’s what makes cooking at home a little adventure, right?

Why I Keep Coming Back To This
I whip this up when I want to eat dessert for breakfast and not feel like I’m making questionable life choices. Or when my nephews invade the kitchen hunting for snacks (it’s gone in 15 minutes, tops). My family—especially my dad, who claims he can “taste the protein” but I think he’s just being dramatic—literally shovels it onto their plates. I like that I can justify a second serving, since, hello, protein and fiber. Plus, it’s legit simple: I used to dread peeling apples, but now I just do a rough slice and call it rustic. No complaints so far.
What You’ll Need—But Feel Free to Improvise
- 5-6 medium apples (Granny Smith are my go-to, but Pink Lady is great; honestly, use whatever apples keep rolling around in your fruit bowl)
- 2 tablespoons lemon juice
- 3 tablespoons maple syrup (or honey, or just regular ol’ sugar if you’re out—done all three, nobody’s the wiser)
- 1/2 teaspoon ground cinnamon (or more if you accidentally sneeze mid-pour, not that I’ve done that…)
- Pinch of salt
- 1 teaspoon vanilla extract (optional, but I think it’s worth it)
- 1 cup rolled oats (quick oats in a pinch; steel cut… not so much)
- 1/2 cup vanilla protein powder (I use whey, but my plant-based friend swears by pea protein—so, up to you)
- 1/3 cup almond flour (or plain flour, if you don’t care about gluten; heck, I’ve tried ground oats too)
- 1/3 cup chopped nuts (walnuts, pecans, or nothing—sometimes I forget entirely)
- 2 tablespoons melted coconut oil (can sub olive oil, or even a sneaky dollop of Greek yogurt if you’re out of oil; texture’s a little more cake-like that way)
- Pinch more cinnamon, just because
How I Actually Make It (Warts and All)
- Preheat your oven to 180°C (350°F), first—don’t forget this step like I sometimes do. Grease a cake dish or honestly anything oven-safe and not too shallow.
- Grab those apples—peel or don’t peel, your call (sometimes I skip peeling if I’m feeling lazy, and it’s not the end of the world). Chop them any old way as long as they’re mostly the same size and toss into a mixing bowl.
- Add lemon juice, maple syrup, cinnamon, salt, and vanilla. Mix it all together. This is usually when I sneak a slice, you know, ‘just to test.’
- Pour the apple mixture into your dish. Give it a gentle pat; admire your work. Now, onto the topping—my favorite bit.
- In another bowl, throw in oats, protein powder, almond flour, nuts, coconut oil, and another dash of cinnamon. Mix it with a fork (or your hands, just wash them first). Sometimes it’ll look a bit dry—add a splash of plant milk or water if so, but don’t go overboard. Actually, I find it works better if it’s a bit crumbly.
- Scatter your oat mixture over the apples. It doesn’t need to be perfectly even; clumps get extra crispy, which is, let’s face it, the gold standard.
- Bake for about 35-40 minutes, or until the top is golden and the edges look bubbly. Sometimes I check at 30 minutes because my oven is temperamental. If you smell caramelized apple, you’re probably almost there.
- Let it sit for 5 mins before serving (if you can wait that long… usually, I can’t, and burn my tongue every time).
Notes I Learned the Hard Way
- If you slice the apples too thin, they’ll vanish into a weird mush; chunkier slices = more bite. This took me like three tries to accept.
- Protein powder clumps up sometimes—just break it up with your fingers, no biggie.
- Actually, if you forget the salt, it just tastes flat. So don’t skip it.
Stuff I’ve Tried (Not All Winners…)
- Swapping almond flour for regular flour: worked fine, nobody noticed. Coconut flour? Not my best idea (way too dry).
- Adding berries with the apples: good in theory, but makes it a bit soupy. Maybe halve the maple syrup if you try this?
- Chopped dates in the crumble: tastes great, but makes the topping sticky, so your call.

What If I Don’t Have a Special Baking Dish?
Listen, once I made this in a cast iron pan and it was brilliant. I’ve used a big glass Tupperware. Shoot, you could probably use a deep pie plate. Don’t let fancy bakeware stop you—just line it with parchment if you’re nervous about sticking.
How Long Does It Keep?
Supposedly, you can store leftovers in the fridge for up to 3 days. But, honestly, in my house, it never lasts more than a day and a half—tops. Reheat in the oven for a crispy top, or just eat cold from the container—they’re both fair game. Actually, dare I say it tastes even better the next day? Maybe that’s just me.
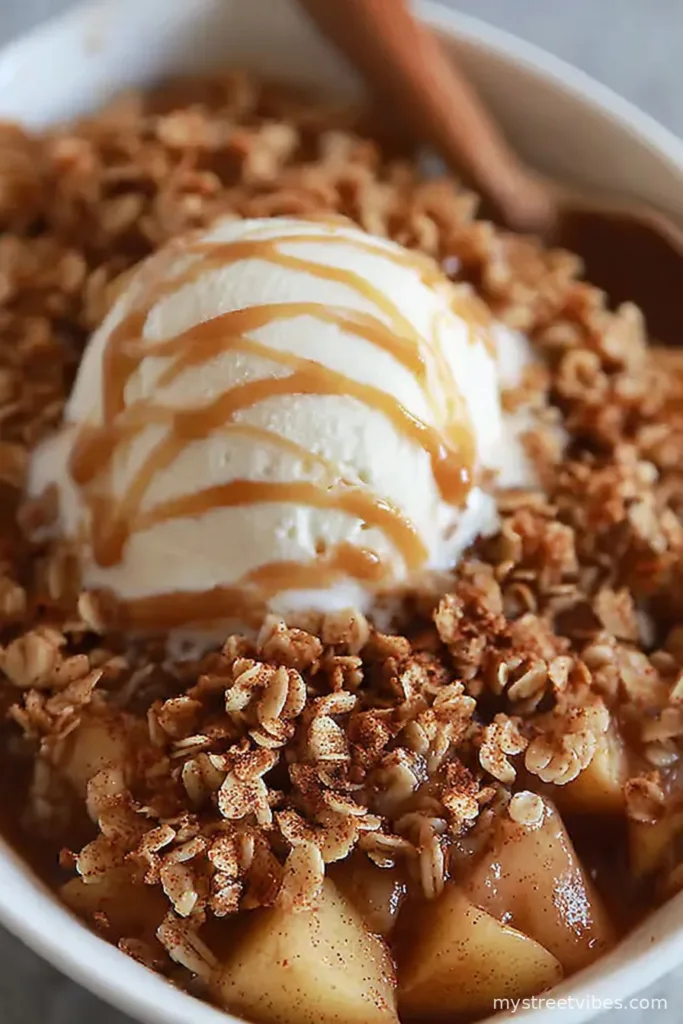
This Is How I Serve It (But You Do You)
I love it warm, in a big bowl, with a dollop of thick Greek yogurt (or vanilla skyr if you’re feeling fancy—I never am). For dessert, my sister piles on vanilla ice cream, but I can’t resist a drizzle of extra maple syrup. Oh, sometimes I sprinkle a pinch of sea salt on top if I’m feeling a bit chef-y.
Pro Tips (AKA, My Personal Facepalms)
- I once tried to rush the topping by not mixing it enough—ended up with a floury bite here and there; don’t do that. Just use your fingers if you must.
- If you put foil on top for the whole bake, the topping never crisps up right, so only tent it if it’s really getting too brown.
- Don’t wander off to answer the door mid-chop (unless you want mystery skin in your crisp; learned that the hard way—ouch).
Wait, People Also Ask…
- Can I make this dairy free? Yep! Just use plant-based protein powder and coconut or olive oil. Tastes grand, promise.
- What about gluten free? If your oats are certified gluten free and you use almond or oat flour, you’re golden.
- Can I halve the recipe? For sure, just use a smaller dish or even a couple big ramekins. (I do this when I’m solo and don’t want leftovers.)
- How do I make it sweeter? Taste your apples first! Some are tart little blighters, so up the sweetener if you like. Or just trust your gut.
- What apples are best? Ah, the eternal debate. I say use what you’ve got, but Granny Smith brings the tang. Golden Delicious goes soft, so maybe mix a couple kinds for fun?
Oh, random tangent: Once, I tried making this in July with peaches. Didn’t go well—if you try it, maybe let me know how it goes? Anyway, I’ll be over here with another bowl. Enjoy!
Ingredients
- 5 medium apples, peeled, cored, and sliced
- 1 tablespoon lemon juice
- 2 teaspoons ground cinnamon
- 1/2 teaspoon nutmeg
- 1/4 cup maple syrup
- 1 cup old-fashioned oats
- 1/2 cup vanilla protein powder
- 1/4 cup almond flour
- 1/4 cup chopped walnuts
- 3 tablespoons coconut oil, melted
- 1/4 teaspoon salt
Instructions
-
1Preheat the oven to 350°F (175°C) and lightly grease a baking dish.
-
2In a large bowl, toss apple slices with lemon juice, 1 teaspoon cinnamon, nutmeg, and half the maple syrup. Spread evenly in the prepared baking dish.
-
3In another bowl, combine oats, protein powder, almond flour, walnuts, remaining cinnamon, and salt.
-
4Add melted coconut oil and the rest of the maple syrup to the dry mixture. Stir until a crumbly topping forms.
-
5Sprinkle the oat-protein topping evenly over the apples.
-
6Bake for 30-35 minutes or until the topping is golden brown and the apples are tender. Serve warm.
CLICK FOR NUTRITION INFO
↑
Approximate Information for One Serving
Serving Size:
1 serving
Calories:
230cal
Protein:
9 gg
Fat:
8 gg
Saturated Fat:
0g
Trans Fat:
0g
Cholesterol:
0mg
Sodium:
0mg
Potassium:
0mg
Total Carbs:
34 gg
Fiber:
0g
Sugar:
0g
Net Carbs:
0g
Vitamin A:
0
Vitamin C:
0mg
Calcium:
0mg
Iron:
0mg
Nutrition Disclaimers
Number of total servings shown is approximate. Actual number of servings will depend on your preferred portion sizes.
Nutritional values shown are general guidelines and reflect information for 1 serving using the ingredients listed, not including any optional ingredients. Actual macros may vary slightly depending on specific brands and types of ingredients used.
To determine the weight of one serving, prepare the recipe as instructed. Weigh the finished recipe, then divide the weight of the finished recipe (not including the weight of the container the food is in) by the desired number of servings. Result will be the weight of one serving.
Did you make this recipe?
Please consider Pinning it!!