So, Why Am I Slightly Obsessed With These Fries?
Alright, confession time: I started making gluten free sweet potato fries that one summer I spent “eating healthy” (you can picture my sarcastic air quotes). I’d just gotten fed up with those sad, soggy sweet potato sticks masquerading as fries at some places – like, why bother? My first batch at home was, well, let’s call it memorably bad. But hey, that’s how you learn, right? My sister still brings up the time I mistook paprika for chili powder and nearly set her taste buds on fire. Good times.
Why You’ll Probably Love This (Or At Least Like It Enough)
I make these any time I want to feel a bit fancy, or when friends come over and I want to look like I actually tried. My family goes bananas for them—maybe a better metaphor is “they devour them like hungry raccoons.” They disappear so fast, I’ve basically given up worrying about leftovers (spoiler alert: they’re better fresh, but honestly not bad cold either!). And if you’ve ever struggled with fries that turn out limp instead of crispy—join the club—I’ve picked up a trick or two after a handful of failed attempts.
What You’ll Need (With Some Cheeky Swaps)
- 2 big sweet potatoes (or 3 smaller ones; to be honest, whatever’s on hand—even purple ones work. Just wash ’em well!)
- 2–3 tablespoons cornstarch (I sometimes swap in potato starch if the cabinet’s running low)
- 2–3 tablespoons olive oil (canola gets the job done in a pinch; my gran was loyal to Bertolli but, honestly, any supermarket stuff is fine)
- Salt, to taste (I like sea salt, but table salt works—don’t stress)
- Optional: 1/2 teaspoon smoked paprika or a mild chili powder if you’re in the mood (hey, just not both at once… learn from my mistakes)
- Optional: Toss in some black pepper or a pinch of garlic powder if you like a bit of extra oomph
Alright, Here’s How I’ve Been Making Them Lately
- First, preheat your oven to somewhere around 220°C/425°F. Give or take—my oven’s about as old as I am and has a mind of its own.
- Peel those sweet potatoes if you want. Or don’t! The skin gets nice and crispy, but sometimes if it looks dodgy or a bit thick, I just take it off. Cut the potatoes into fries—you know, just about the width of your index finger. Uniform-ish.
- Toss the fries in cold water for 30 minutes (or honestly, as long as you remember while you get distracted watching cat videos). Drain & dry—you want these as dry as possible! If you skip this step, they’re not as crispy, but eh, life is short.
- In a big bowl, mix the fries with cornstarch first. This is where I usually forget the order, so, to clarify: starch before oil. Makes all the difference.
- Add the oil and your spices, then toss (use your hands—less cleanup, more fun).
- Spread the fries out on a baking tray covered with parchment—you really want them in one layer, not cuddled up. Crowding = sad, limp fries. (I learned this the hard way. Once. Maybe twice.)
- Bake for about 25 minutes, then flip all the fries over. Slam them back in for another 10–15 minutes, until they look crispy and bronzed. This is where I usually sneak a taste and occasionally burn my tongue. Worth it.
A Few Notes From the Trenches
- If your fries come out soft, don’t panic. They’ll still make great leftovers for breakfast—yes, breakfast.
- Cornstarch (or potato starch) really is the secret here. Although, on the odd Tuesday when I’m out of both, I just go without and accept their softer fate.
- Actually, I find a really hot oven makes a bigger difference than anything else. Above 400°F is best; below that, you’re in potato wedge-land.
Weird Variations I’ve Actually Tried
- Shake up some cumin and cinnamon for a slightly Moroccan flair. It’s weirdly good with garlic dip (here’s my garlic sauce obsession).
- Turning them into sweet potato “tots”… which sounds fun, but mine turned out more, uh, vaguely spherical pancakes. Maybe skip that unless you have mad chef skills.
- I’ve swapped in avocado oil once on a whim—worked fine. Coconut oil was a bit much for my taste.
Do You Really Need Special Equipment?
A sharp knife, really. Mandolines slice nice, but I’ve used a just-okay vegetable peeler before because sometimes, half my gadgets have walked off. Baking sheets (or even a pizza tray) will do. Parchment makes cleanup far less soul-crushing—but tin foil sprayed with oil works too, if you’re out.

How To Store Them Without Losing Your Mind
These keep in the fridge up to 2 days, in a lidded container. Good luck, though—mine rarely survive 24 hours. You can re-crisp them in a hot oven for like 10 minutes, though second-day fries are honestly best with an egg for breakfast. Or cold, standing by the fridge. I won’t judge!
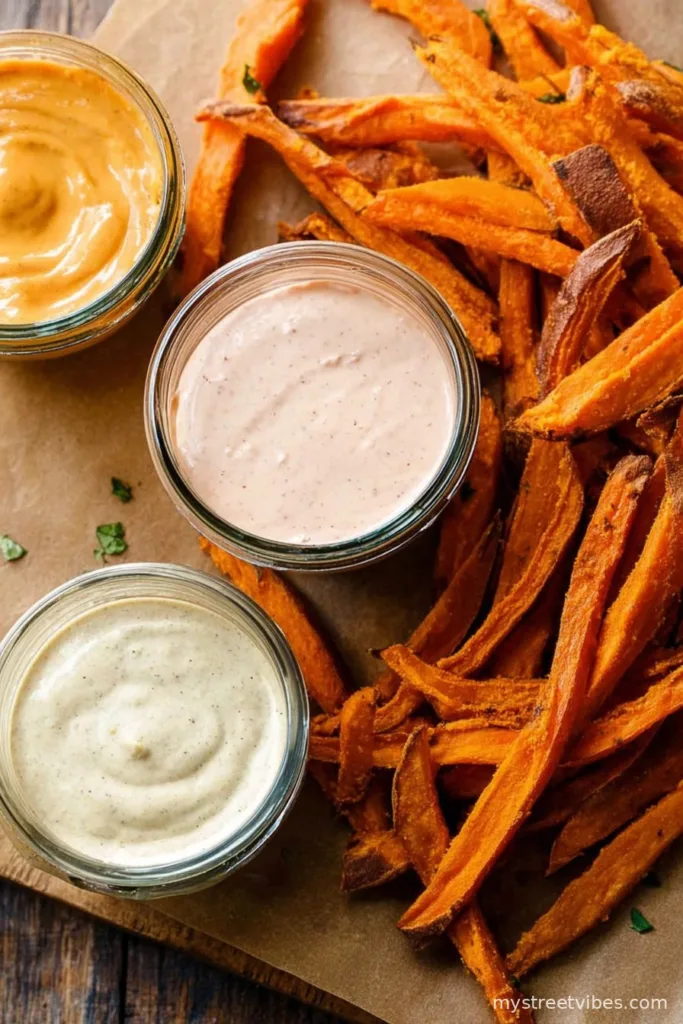
How We Love To Serve ‘Em Around Here
Classic ketchup, obviously. But I’m partial to chipotle mayo (try it, seriously). My mum loves them with a homemade yogurt dip, probably to feel virtuous. If it’s a party, I’ll actually pile them up on a big platter with lots of dips and pretend that was the plan all along. Oh, and once a year, we drizzle a bit of maple syrup when nobody’s looking.
Pro Tips (Or How Not to Mess It Up Like I Did)
- Don’t rush the soak-and-dry part—tried it once, got saddest fries ever. They really need it.
- Don’t skip the flip. Seriously, you’ll end up with blackened bottoms and pale tops. I did, and it was tragic.
- Oil just enough. Too much and you’d get soggy fries; too little and they’re all squeaky-dry. There’s a sweet spot—you’ll find it.
Wait, So What If… (Some FAQ Real Folks Have Asked Me)
- Q: Can I air fry these?
Yep, and actually they get even crispier if you don’t overcrowd. 200°C for around 15–18 minutes, shake once halfway through. - Q: Do I have to peel the potatoes?
Nah. I mostly don’t. Just scrub really well. The skins get tasty, promise. - Q: What if I forget the cornstarch?
No worries, they’ll be softer but still yum. Maybe call them sweet potato “wedges” and nobody will know. - Q: Cornstarch isn’t gluten free, right?
Oh, but it is! Just double check the label if you’re super sensitive, but most pure cornstarch brands are totally gluten free. - Q: Can I freeze them?
Hm, I’d say they get kind of weirdly chewy if you do. Not my favorite. But hey, experiment! - Q: Why do my fries stick to the tray?
Either you’re using too little oil, or maybe your pan isn’t nonstick. Parchment paper is your new best mate for this—seriously, don’t skip it.
So there you go. Possibly too much information about fries, but honestly, that’s my style. If you want more sweet potato shenanigans, Minimalist Baker’s version is great too—I borrowed a thing or two from them. Enjoy, and don’t be afraid to tweak as you go. Fries don’t have to be perfect to be ridiculously good.

Ingredients
- 2 large sweet potatoes
- 2 tablespoons olive oil
- 1 tablespoon cornstarch
- 1 teaspoon smoked paprika
- 1/2 teaspoon garlic powder
- 1/2 teaspoon sea salt
- 1/4 teaspoon ground black pepper
- 1/4 teaspoon cayenne pepper (optional, for heat)
Instructions
-
1Preheat your oven to 425°F (220°C) and line a large baking sheet with parchment paper.
-
2Peel the sweet potatoes and cut them into evenly sized thin fries or sticks.
-
3In a large bowl, toss the sweet potato fries with cornstarch until fully coated. Then drizzle with olive oil, add smoked paprika, garlic powder, sea salt, black pepper, and cayenne pepper if using. Mix well.
-
4Spread the fries in a single layer on the prepared baking sheet, making sure they are not crowded.
-
5Bake for 15 minutes, flip the fries, and continue baking for another 15 minutes until golden brown and crispy.
-
6Serve hot, optionally sprinkled with extra salt or fresh herbs.
CLICK FOR NUTRITION INFO
↑
Approximate Information for One Serving
Serving Size:
1 serving
Calories:
180cal
Protein:
2 gg
Fat:
6 gg
Saturated Fat:
0g
Trans Fat:
0g
Cholesterol:
0mg
Sodium:
0mg
Potassium:
0mg
Total Carbs:
30 gg
Fiber:
0g
Sugar:
0g
Net Carbs:
0g
Vitamin A:
0
Vitamin C:
0mg
Calcium:
0mg
Iron:
0mg
Nutrition Disclaimers
Number of total servings shown is approximate. Actual number of servings will depend on your preferred portion sizes.
Nutritional values shown are general guidelines and reflect information for 1 serving using the ingredients listed, not including any optional ingredients. Actual macros may vary slightly depending on specific brands and types of ingredients used.
To determine the weight of one serving, prepare the recipe as instructed. Weigh the finished recipe, then divide the weight of the finished recipe (not including the weight of the container the food is in) by the desired number of servings. Result will be the weight of one serving.
Did you make this recipe?
Please consider Pinning it!!