Let Me Tell You Why These Cookies Matter (To Me Anyway)
Okay, can we just agree there is something magical about baking chocolate chip cookies—even if you’re dodging gluten like it’s a game of hopscotch? I first made these when my niece was diagnosed celiac, and suddenly baking felt like uncharted territory. I’ll admit, my first batch was a hilarious mess (the entire tray came out as one enormous cookie slab, which my brother called a “cookie pizza”—honestly, not the worst dessert idea I’ve had). These days, though, I’ve nearly got it down. Except for that one time I forgot to add the chocolate. Oops.
Oh, and if you’re the type who likes nibbling the dough, good news—gluten-free flour seems to make it extra safe. Probably. Don’t quote me. But anyway, there’s just something cozy and sort of victorious about pulling these out of the oven, perfectly golden, smelling like you’ve actually got your act together (even if you totally don’t).
Why You’ll Probably Love This (Even If You’re Skeptical)
I whip these up whenever my gluten-free friend drops by (which, conveniently, is usually around cookie time). My teenager once said—now, this is big—”Mom, these taste just as good as regular cookies!” And she is not generous with praise. I make these for potlucks mostly because everyone thinks gluten-free automatically means taste-free, which is just not true; at least not anymore. Plus, if you’ve ever been disappointed by a flat, sad, gluten-free cookie, you can finally leave those dark days behind. This recipe was my little rebellion after one too many gritty store-bought versions. (And on tough days, I make a double batch and freeze most of it. Sneaky self-care, right?)
The Stuff You Need (With My Two Cents On Each)
- 1 1/2 cups gluten-free all-purpose flour blend (I usually grab Bob’s Red Mill or King Arthur; my grandma insists on Pamela’s, but honestly, I just use what’s on sale)
- 1/2 teaspoon baking soda (bicarb, if you’re across the pond!)
- 1/2 teaspoon salt (I sometimes use Maldon flakes because I’m fancy. Or, you know, regular table salt)
- 1/2 cup unsalted butter, melted (once used coconut oil—worked okay but cookies were, well, beachy)
- 1/2 cup brown sugar, packed (or coconut sugar if you’re feeling virtuous, but brown tastes richer to me)
- 1/4 cup white sugar (sometimes I skip it if I’m feeling dramatic about sugar intake—totally fine)
- 1 large egg (room temp if you remember, but I usually don’t)
- 2 teaspoons vanilla extract (the good stuff if you can splurge—though supermarket own-brand gets the job done)
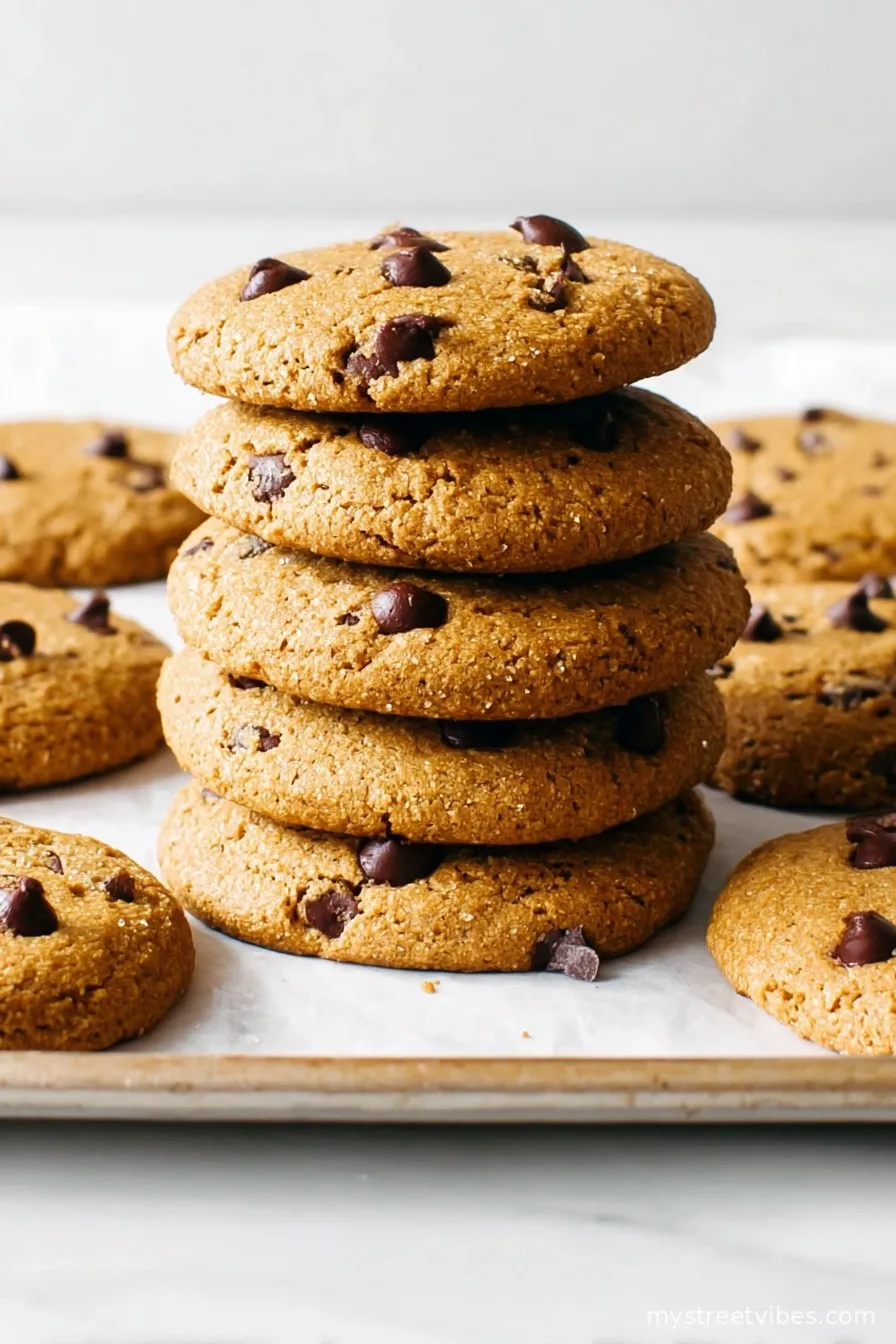
- 1 cup chocolate chips (dark, semi-sweet, or even chopped up chocolate bars, which melt better anyway)
- 1/2 cup chopped walnuts or pecans (totally optional, but my dad swears it’s the secret to a proper cookie)
Side-Tracked Directions, Just For Fun
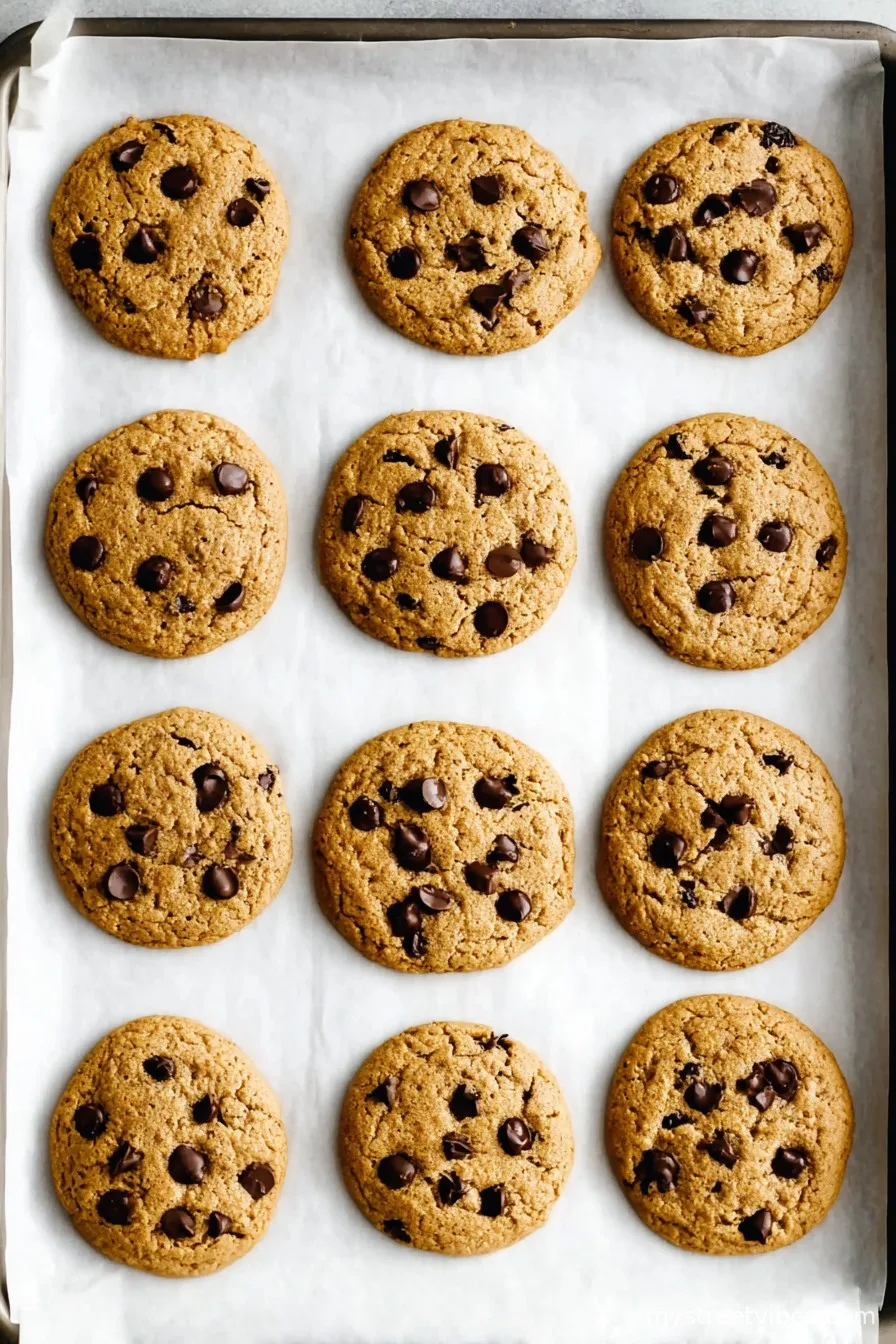
- Preheat your oven to 350°F (about 180°C). Line a baking tray with parchment or, if you’re like me and run out halfway, just grease it with butter. Slightly less Instagrammable, but who cares?
- In one bowl, whisk your flour, baking soda, and salt. Use a fork if you can’t be bothered finding your whisk. No one has to know.
- In another (bigger) bowl, mix melted butter, brown sugar, and white sugar until it’s all kind of pasty. I use a wooden spoon because why dirty more gadgets? Add your egg and vanilla. Stir till it’s glossy—looks weird, right? That’s normal.
- Tip the dry ingredients into the wet. Mix until just combined; don’t overthink it. (This is the bit where I usually sneak a bite of dough; do as you wish.)
- Stir in chocolate chips and nuts, if using. Actually, I find it works better if you toss in a few extra chocolate chips on top after scooping the dough. For, you know, curb appeal.
- Scoop about golf-ball sized dollops onto the tray. Give ‘em a little breathing room; cookies like their space.
- Bake for 10–12 minutes, or until the edges are golden and centers just set. Don’t wait for them to look fully cooked—take them out a smidge earlier, as they’ll keep cooking after you yank them from the oven.
- Cool on the tray for five minutes (like, actually wait, otherwise they fall apart), then transfer to a wire rack. Or just eat one warm—who am I to stop you?
Notes, a Few Disclaimers, and the Odd Mistake
- You might panic if the dough seems softer than “regular” cookie dough. Just go with it—it bakes up fine.
- Don’t skip the parchment if you want cookies to come off in nice rounds. Once, mine fused to the tray—my dog ended up with those, lucky thing.
- Cookies do taste even better the next day, but who are we kidding?
If You Feel Like Experimenting (Variations That Kinda Worked)
- Tried using raisins and oats instead of chips—result was… let’s call it “rustic.” Stick with chocolate, mostly.
- Sub in peanut butter chips for half the chocolate: unexpectedly amazing.
- Replace half the butter with mashed banana for a soft-baked, almost muffin-like cookie. Odd, but enjoyable with coffee!
Kit You Need (and What To Do If You Don’t Have It)
- Mixing bowls (obviously; though a big saucepan and a cereal bowl have gotten me through in a pinch)
- Wooden spoon or sturdy spatula (metal one if that’s all you have—just be gentle)
- Baking tray and parchment (or, worst case, tinfoil and a bit of butter; cookies may be extra crispy at the edge)
- Wire rack for cooling (or a clean chopping board; works fine, just not as “Pinteresty”)
How To Store (Assuming You Have Extras)
Stick cookies in an airtight tub at room temp. Probably good for up to four days—but honestly, in my house, they never last more than a day! I have stashed a few in the freezer, between layers of parchment, and they thaw out great—really, no one notices a thing. Or just eat them frozen; secretly excellent with tea.
Serving—Make It Your Own
I like these with a mug of milky tea, mostly because that’s how my gran did it (and she knew her comfort foods). My kids like to sandwich a scoop of vanilla ice cream between two cookies—a bit excessive, but downright delicious.
Things I Learned The Hard Way (Pro Tips)
- I once tried to bake two trays at once. Cookies on the bottom burned to a weird caramel charcoal. Don’t go there; one tray at a time is worth the wait.
- Let the butter cool for a minute before stirring it in. If it’s piping hot, sometimes you end up with “scrambled egg” bits—yuck.
- If your cookies look pale at 12 minutes, trust your gut and leave ‘em in for another minute, but watch closely. The line between “just right” and “hockey puck” is a thin one.
So, You’ve Got Questions?
Can I use coconut flour instead?
Short answer, not as a direct swap—it soaks up liquid like a sponge and the cookies will be weirdly dry. If you’re curious, check out this handy flour guide by Minimalist Baker, which saved me a few missteps.
Is this recipe dairy-free?
Not as written, but I have friends who swap in plant-based butter and chocolate chips—seems to work fine. I’ve even tried olive oil once. It was, um, “interesting.” Let’s just leave it there.
Do I need to chill the dough?
Honestly, I almost never do. Some people swear by it for texture (see Sally’s thoughts on chilling dough), but I’m impatient, and it still turns out great.
Why do my cookies fall apart?
Gluten-free cookies are delicate little creatures. Make sure you let them cool a bit before moving. Or just embrace the crumbly chaos and call them “cookie clusters” (kids love it!).
All right, that’s my long-winded guide! If you try these, let me know how they go, or if you end up inventing your own “cookie pizza.” Who knows, maybe it’s the next big thing.
Ingredients
- 2 cups gluten-free all-purpose flour blend
- 1 teaspoon baking soda
- 1/2 teaspoon salt
- 1/2 cup unsalted butter, softened
- 1/2 cup coconut oil, melted
- 1 cup packed brown sugar
- 1/2 cup granulated sugar
- 2 large eggs
- 2 teaspoons pure vanilla extract
- 1 1/2 cups semisweet chocolate chips
Instructions
-
1Preheat the oven to 350°F (175°C) and line two baking sheets with parchment paper.
-
2In a medium bowl, whisk together the gluten-free flour blend, baking soda, and salt.
-
3In a large bowl, cream the softened butter, melted coconut oil, brown sugar, and granulated sugar until light and fluffy.
-
4Add the eggs and vanilla extract to the creamed mixture and mix until combined.
-
5Gradually add the dry ingredients to the wet mixture, stirring until just combined. Fold in the chocolate chips.
-
6Drop rounded tablespoons of dough onto the prepared baking sheets. Bake for 10-12 minutes or until the edges are lightly golden. Allow to cool for a few minutes before transferring to a wire rack.
CLICK FOR NUTRITION INFO
↑
Approximate Information for One Serving
Serving Size:
1 serving
Calories:
160cal
Protein:
2 gg
Fat:
7 gg
Saturated Fat:
0g
Trans Fat:
0g
Cholesterol:
0mg
Sodium:
0mg
Potassium:
0mg
Total Carbs:
23 gg
Fiber:
0g
Sugar:
0g
Net Carbs:
0g
Vitamin A:
0
Vitamin C:
0mg
Calcium:
0mg
Iron:
0mg
Nutrition Disclaimers
Number of total servings shown is approximate. Actual number of servings will depend on your preferred portion sizes.
Nutritional values shown are general guidelines and reflect information for 1 serving using the ingredients listed, not including any optional ingredients. Actual macros may vary slightly depending on specific brands and types of ingredients used.
To determine the weight of one serving, prepare the recipe as instructed. Weigh the finished recipe, then divide the weight of the finished recipe (not including the weight of the container the food is in) by the desired number of servings. Result will be the weight of one serving.
Did you make this recipe?
Please consider Pinning it!!