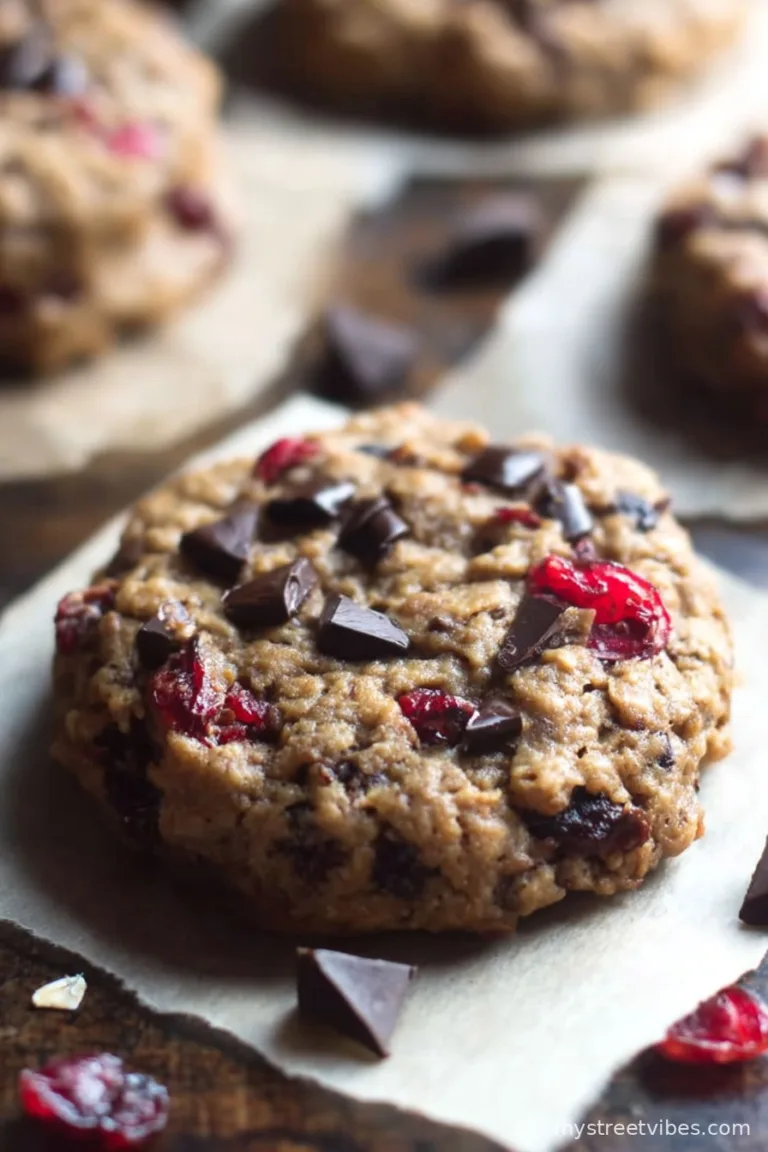
Let Me Tell You About These Cookies…
Alright, so here’s the thing: I literally stumbled (truly, almost tripped over the cat) into making Flourless Chocolate Chip Cookies one night when I realized I was out of flour, but wanted something sweet after a long Tuesday—rainy, too. You ever get that stubborn craving where nothing but homemade cookies will do? This recipe was born from that precise crossroads. My first attempt, you should know, ended in more of a cookie… puddle. Not going to say ‘disaster,’ but, well, let’s just say, lesson learned about parking on parchment paper instead of lining the tray like my mom always did. Now, though, I honestly crave these cookies all on their own—even when I do have flour hanging around.

Why You’ll Love This (A.K.A. When I Make These…)
I make these whenever I want to feel less guilty about eating half the batch straight off the tray (hey, no flour, so it feels a little virtuous, doesn’t it?). My family goes bonkers for them because they’re a bit gooey in the middle—sort of half cookie, half fudge. Oh, and if you’re wondering—they’re so easy, you can absolutely get away with multitasking (like, texting or pretending to tidy up the kitchen as you go). But, my actual favorite part? No dragging out the mixer. I once made these while my friend Nora called to announce she was popping by in twenty minutes. We still laugh about how the kitchen looked, but the cookies? Gone within ten minutes.
What Goes In ‘Em (with My Swaps)
- 1 cup creamy peanut butter (I’ve tried almond butter; not bad, just a tad drier. Sunflower seed butter works in a pinch but the flavor’s a bit earthy, you know?)
- 3/4 cup (150g) light brown sugar (Granulated will do if you’re out; doesn’t melt quite as smoothly but it’s fine. My gran always used Muscovado, swore by it!)
- 1 large egg (Or, truth be told, I once subbed in a flax egg—it kinda worked for my vegan cousin. Little more crumbly, but edible.)
- 1 teaspoon vanilla extract (No drama if you just glug a splash in. I sometimes forget it and nobody notices.)
- 1/2 teaspoon baking soda (Don’t skip this—it does all the lifting!)
- A pinch of salt (Or, you know, a tiny heap if you’re into salty-sweet.)
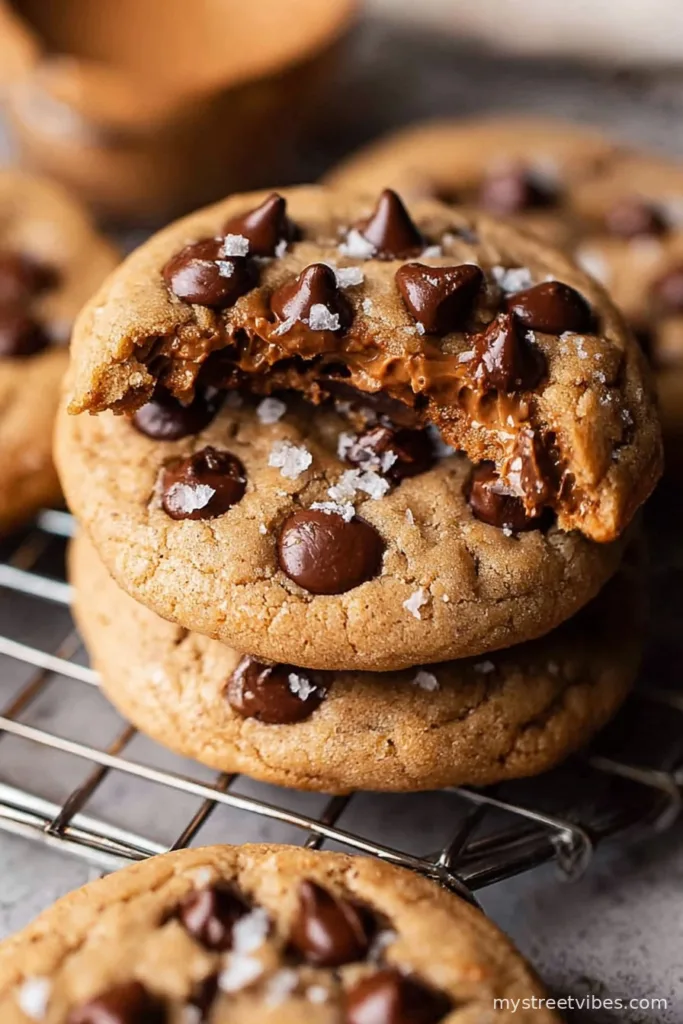
- 1 cup chocolate chips (Honestly, handfuls. Dark, milk, vegan, whatever’s lurking in the back of the pantry.)
How I Get These Together (Trust Me, It’s Easy)
- Preheat your oven to 350°F (175°C). Or do that first, then forget and have to wait for it to finish halfway through mixing—happens every time.
- Dump the peanut butter and brown sugar together in a bowl. Stir together with a wooden spoon or a sturdy spatula (don’t worry if it looks clumpy at first, it comes together!).
- Crack in the egg, pour your vanilla in, and sprinkle in the baking soda and that pinch of salt. Mix ‘til it’s all one color. This is where I usually sneak a taste—you know, for science.
- Toss in those chocolate chips and give everything one last stir. I never measure them properly. You shouldn’t either—life’s too short for stingy chocolate.
- Spoon dough by the tablespoon onto a parchment-lined tray. Spacing is smart; they do spread a bit. Press them down a tad unless you like ‘em thicker (I sometimes ditch formality and just use my fingers instead of a spoon—less washing up).
- Bake for 9 to 11 minutes—edges should look set, but the tops will seem a bit puffy and soft. Don’t panic! They’ll flatten as they cool.
- Let them cool on the tray for 5 (ish) minutes. Any sooner, and you may end up with a cookie pile instead of actual cookies. Not that anyone in my house minds.

Notes I Wish I Knew Sooner
- If your cookies look a little oily right out of the oven, don’t stress—the oil reabsorbs as they cool.
- They’ll firm up as they sit; sometimes I think these taste even better on day two (if, by some minor miracle, you have leftovers).
- Skip natural peanut butter if you like a chewier result. I’ve gone the natural route, and, well, they’re more tender, but with that, sometimes they end up too crumbly to pass around without losing a few soldiers to the countertop.
The Variations I’ve Dabbled In (and One That Bombed)
- Almond butter—nuttier if that’s your thing
- White chocolate—fancy if you’re feeling flash, though I prefer good ol’ dark
- Added a pinch of cinnamon and even some orange zest one winter because I was feeling all Great British Bake Off—surprisingly good
- One time I tried coconut flakes. Honestly, oddly chewy; kinda toothsome, but not a repeat

Stuff You’ll (Kinda) Need
- Baking tray (or just the back of a roasting pan—done that in friends’ kitchens more than once)
- Parchment paper, but if you’re fresh out, just grease up that pan—totally fine, might stick a bit but oh well
- Mixing bowl
- Something to stir with (big spoon, spatula, even a clean hand in my more rustic moments—I won’t judge)
How To Store ‘Em (or, Rather, How I’d Try To)
Pop them into a covered container. Room temp is perfect—maybe up to 3 days (though honestly, in my house it never lasts more than a day!). If you want them to last longer, I suppose you could freeze them, but I’ve never managed that. One time tried hiding some in the bread bin. Didn’t work—kids found ’em straight away.
How We Serve ‘Em (Or Eat Straight Off The Sheet)
Warm with a scoop of vanilla ice cream is the move in our house. Alternatively, sandwich two together around some peanut butter for a serious treat. Sometimes I sneak a couple into the lunchbox—it’s a bit of a mum hack, but hey, whatever works.
Pro Tips (Otherwise Known As Things I’ve Messed Up)
- Don’t overbake—I once got distracted by a phone call from Auntie Pam and came back to dark brown frisbees; crispy edges are lovely but burnt bottoms, not so much.
- Actually, I find it works better if you let the dough sit for a minute or two before scooping out; not sure why, maybe gives the baking soda time to mingle?
- With natural nut butters, stir like your life depends on it—oil separation is real, trust me.
FAQ: The Real Questions Folks Have Asked (Or Texted Me At 9pm)
- Do these work without eggs? Sort of! I’ve used flax eggs (1 tbsp ground flax + 2.5 tbsp water mixed and left for 5 mins). A bit softer, but still cookie-like.
- Can I use chunky nut butter? Sure, if you want nutty bits throughout. Actually, thinking about it, it makes them a bit more like a Clif bar. In a good way.
- They seem really soft. Did I mess up? Nope. They’ll set up as they cool. Think soft and fudgy, not crispy—unless you seriously overbake.
- Why do mine spread loads? Probably too much sugar or you skipped the parchment. Or your oven runs hot (mine’s temperamental—bakes faster than it says on the dial!)
- Can I skip the salt? Well, you can, but honestly it’s the difference between tasty and ta-da.
- What’s the best chocolate to use? Whatever you’d eat out of hand. I’ve even chopped up a bar of Dairy Milk in a pinch. Or, worst case, those mini chocolate balls left over from Christmas. It’s all chocolate, right?
And just so you know, even if your cookies end up a bit too brown or crumble when you try to move them—they’ll still taste about a thousand times better than anything store-bought. Plus, you can tell anyone in the house they’re “healthyish” (no flour! more protein!). Not strictly true, but I won’t tell if you don’t.
Ingredients
- 1 cup creamy peanut butter
- 2/3 cup light brown sugar, packed
- 1 large egg
- 1/2 teaspoon baking soda
- 1 teaspoon vanilla extract
- 1/2 cup semisweet chocolate chips
- 1/4 teaspoon salt
- 1/4 cup chopped walnuts (optional)
Instructions
-
1Preheat the oven to 350°F (175°C) and line a baking sheet with parchment paper.
-
2In a medium bowl, combine peanut butter, brown sugar, and egg. Mix until smooth and creamy.
-
3Stir in baking soda, vanilla extract, and salt until evenly combined.
-
4Fold in chocolate chips and walnuts, if using.
-
5Drop tablespoon-sized scoops of dough onto the prepared baking sheet, spacing them about 2 inches apart.
-
6Bake for 10-12 minutes or until the edges are set and tops look slightly cracked. Cool on the baking sheet for a few minutes before transferring to a wire rack.
CLICK FOR NUTRITION INFO
↑
Approximate Information for One Serving
Serving Size:
1 serving
Calories:
160 caloriescal
Protein:
4gg
Fat:
10gg
Saturated Fat:
0g
Trans Fat:
0g
Cholesterol:
0mg
Sodium:
0mg
Potassium:
0mg
Total Carbs:
15gg
Fiber:
0g
Sugar:
0g
Net Carbs:
0g
Vitamin A:
0
Vitamin C:
0mg
Calcium:
0mg
Iron:
0mg
Nutrition Disclaimers
Number of total servings shown is approximate. Actual number of servings will depend on your preferred portion sizes.
Nutritional values shown are general guidelines and reflect information for 1 serving using the ingredients listed, not including any optional ingredients. Actual macros may vary slightly depending on specific brands and types of ingredients used.
To determine the weight of one serving, prepare the recipe as instructed. Weigh the finished recipe, then divide the weight of the finished recipe (not including the weight of the container the food is in) by the desired number of servings. Result will be the weight of one serving.
Did you make this recipe?
Please consider Pinning it!!