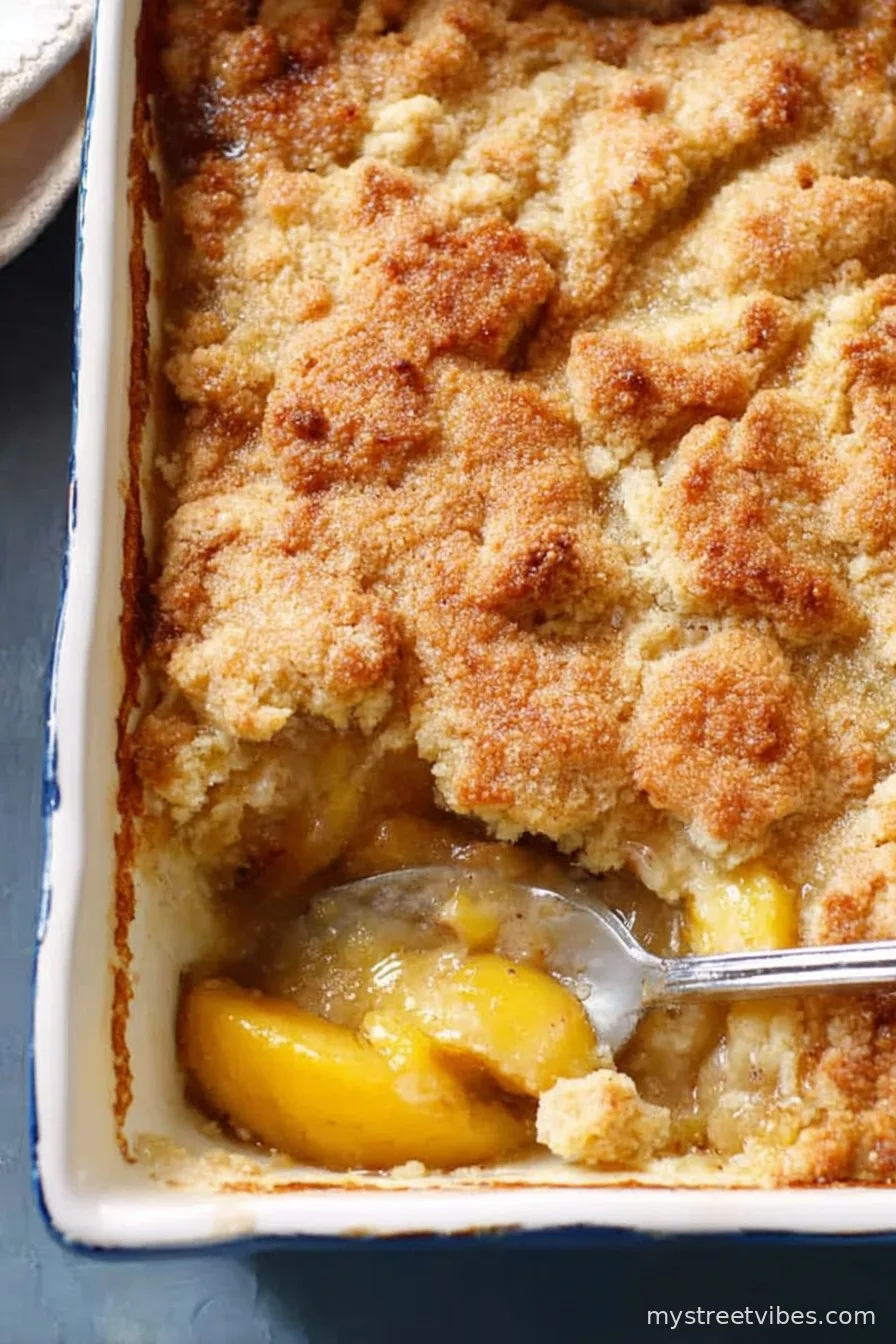
Let Me Tell You About This Peach Cobbler…
Okay, story time: I actually started making this easy peach cobbler after I messed up a birthday cake – seriously, the whole thing looked like a pancake crossed with a paperweight (don’t ask, it happens). But peaches were in season, my neighbor had just dropped off WAY too many, and I thought, “Can’t be that tricky, right?” Turns out, it wasn’t. If you’re after a friendly, lazy dessert that feels like a hug from a Southern auntie you never met, this one is it. Sometimes I even eat it for breakfast (don’t tell my kids).
Why I Keep Making This
I make this when I want to feel instantly like some chill homesteader, but I only have 15 minutes until something else needs my attention. My family goes nuts for it because it’s that dessert you can’t really mess up (although last summer, I did think canned peaches would be easier — spoiler: fresh really is better, but we ate every bite anyway). Plus, I get to use up leftover peaches and it makes the house smell like someone’s baking love into the walls. Don’t get me started on the crispy top – half the time I end up picking at it with a spoon right from the dish, which my partner says is “stealing,” but if you’re the cook, that’s just sampling, right?
What You’ll Need (And What You Can Swap)
- Peaches: 5-6 fresh, ripe ones are amazing, but canned or frozen peach slices will do (just pat them dry a bit). My grandmother always used White Cling peaches, but honestly, any juicy one works. Don’t stress.
- Sugar: 1 cup. Sometimes I cut it down to 3/4 cup if the peaches are super sweet – or once, I subbed in half brown sugar and it was extra cozy.
- All-Purpose Flour: 1 cup. You can use self-raising and skip the baking powder if you want. Or even cake flour if it’s what you’ve got in the cupboard.
- Baking Powder: 2 teaspoons. Unless your flour is already self-raising.
- Milk: 3/4 cup whole milk. Oat or almond milk in a pinch – no one’s perfect.
- Butter: 1/2 cup (one stick); melted. If you’re watching your dairy, coconut oil totally works, but you lose that buttery magic a bit.
- Ground cinnamon: About a teaspoon – sometimes I go wild and add a pinch of nutmeg.
- Optional: Lemon juice (just a splash over the peaches, trust me), vanilla extract, a little pinch of salt.
How I Throw It Together
- Prep those peaches. If you’re working with fresh, peel ’em, pit ’em, then slice them up – or don’t peel, it’s rustic! For canned or frozen, just drain them well; otherwise it gets a bit soupy (not a tragedy, just more cobbler juice for ice cream).
- Sweeten the fruit. Mix the peaches with half the sugar, cinnamon, and that splash of lemon juice in a bowl. Let them sit about 10 mins so the juices do their magic. Sometimes I start this, then forget and wander off – doesn’t seem to hurt it.
- Get your oven hot. 350°F (175°C) is your friend. Toss a stick of butter into your baking dish (8×8 inch or whatever’s clean) and put it in the oven while it heats so the butter melts right in. This is where I usually sneak a taste of the peaches. For quality control, obviously.
- Make the batter. In a mixing bowl, whisk together flour, the rest of the sugar, baking powder, salt (if using) and milk until just combined. Don’t overthink it – lumpy is fine.
- Pour and pile. Pull your dish out, swirl that melted butter around, and pour in the batter. It’ll look weird and floaty with butter pools, but that’s the magic. Then spoon peaches (and all their syrupy juice) over the top. Don’t stir it! It bakes into itself. Kind of zen, honestly.
- Bake. 40 to 50 mins, or until the top is golden and crisp at the edges. Sometimes I get distracted and leave it an extra five – still great, just more caramelized; maybe try it?
Some Cobbler Notes (a.k.a. Lessons Learned)
- Once I dumped all the sugar in the batter instead of dividing – it still tasted like summer, but the peaches weren’t syrupy. You can just wing it in a pinch.
- If you use overly juicy peaches, put the baking dish on a sheet tray; I learned this after a sticky oven situation. Whoops.
- Honestly, this tastes as good cold from the fridge, maybe even better next day (if you have any left).
Cobbler Experiments That (Mostly) Worked
- Berry cobbler: Threw in a handful of blueberries last time – gorgeous color, great flavor.
- Apple-peach cobbler: Added a sliced Granny Smith once when peaches were running low. Not bad, but the apples didn’t get as soft – texture was odd. Probably won’t repeat that one.
- Extra crunchy top: Sprinkled a little coarse sugar on top halfway through. Good crunch, though it all melted the first time because I added it too early.
Stuff You Might Want (But Don’t Panic If You Don’t)
- Baking dish (about 8-inch square). But I’ve used a weird oval casserole and, once, a pie plate – still worked!
- Mixing bowls, obviously. But if you’re feeling lazy, one big bowl is fine.
- Whisk or fork. I’m not fancy.
- If you’re peeling peaches: I actually saw someone use a clean pot scrubber in lieu of a peeler — pretty resourceful, I guess.
How I Keep (or Don’t Keep) Leftovers
This keeps fine in the fridge for 2-3 days, just covered with foil or whatever plate you can pop on top. But honestly, in my house it never lasts more than a day, so… can’t say for sure. If you somehow have leftovers, it reheats well in the microwave (or cold, straight from the dish if no one’s watching).
Serving This Up – My Way
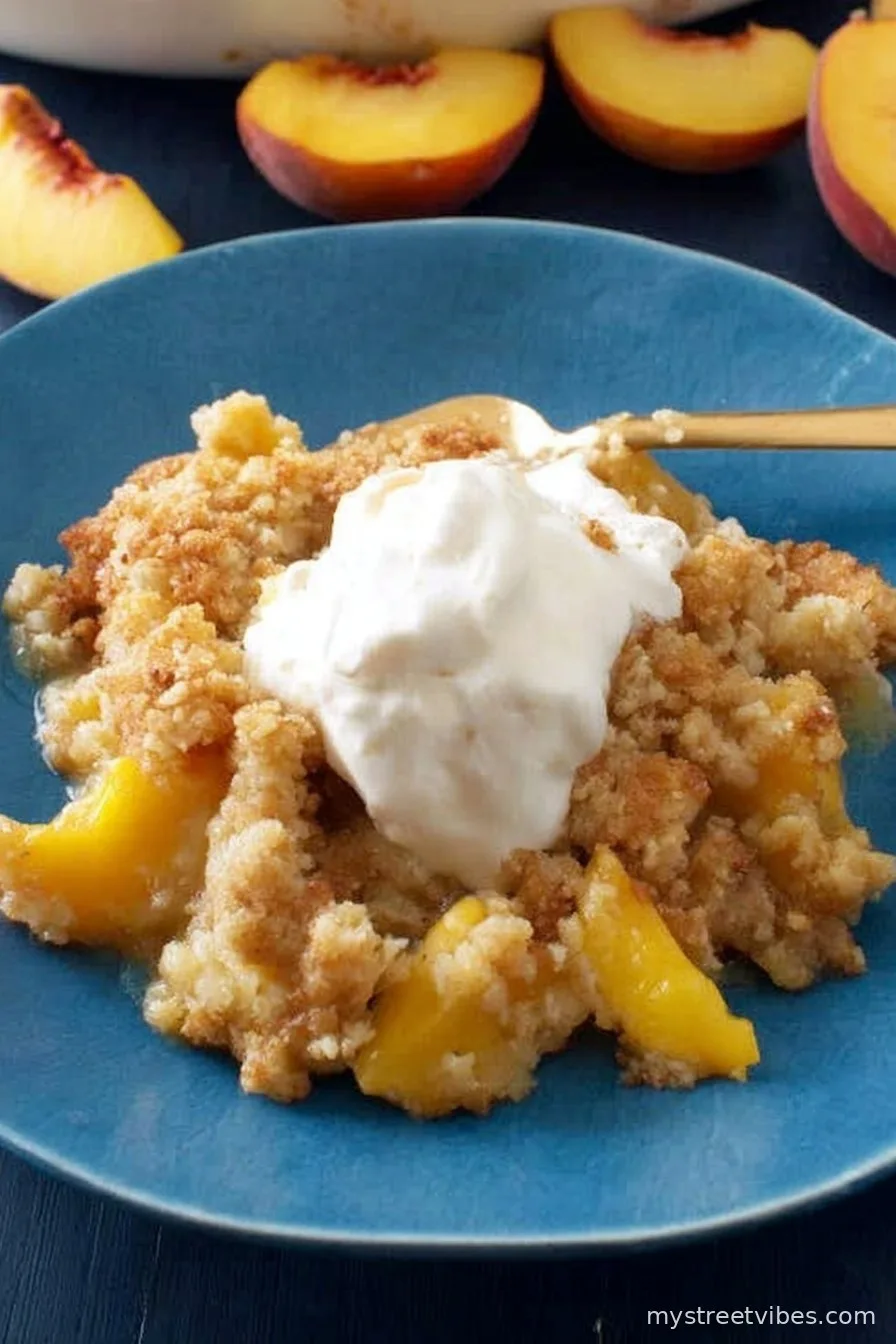
Always warm, always with vanilla ice cream. Or whipped cream if you’re out of ice cream – but, like, don’t tell my cousin Jess I said that because she swears only ice cream is legit. Sometimes, just a splash of cream poured straight over, British style (picked that idea up here), and it’s just as lush.
Cobbler Things I Wish I’d Known
- I once tried rushing the batter (didn’t let the peaches rest) and regretted it because the fruit didn’t turn syrupy enough. It’s worth waiting just a few extra minutes.
- Don’t fear the butter swimming on top before baking – it always settles. I panicked the first time, but now I kind of like watching it do its thing.
Cobbler Q&A – Real Questions, Real Talk
- “Can I use nectarines or plums?” — Oh, totally. I’ve swapped in nectarines, and once plums (super tart, but in a good way). Maybe try half and half if you’re feeling adventurous.
- “Do I have to peel the peaches?” — Nah, unless the fuzz bothers you. Sometimes I’m too lazy, and no one ever complains.
- “Why is my cobbler sometimes doughy?” — Usually means it was underbaked. But also, it’s supposed to be a bit gooey where fruit and batter meet. That’s the magic bit, at least in my opinion.
- “Can I make it gluten free?” — I’ve had decent luck (tried this version), though the texture’s a tad different. Worth making if you’re accommodating folks!
- “How do I get a crispier top?” – Try a sprinkle of turbinado sugar halfway through; or broil for a minute at the end (but watch it like a hawk!). On second thought, don’t walk away during broiling – learned that the hard way.
Need more cobbler inspiration? Smitten Kitchen’s take on peach cobbler is a fun riff to try if you’re aiming for something fancier. But honestly, simple is best most days.
(And just a quick mishap confession: one time I accidentally used salt instead of sugar in the batter. It was… unique. My dad still brings it up, thanks Dad!)
Ingredients
- 4 cups sliced fresh or canned peaches, drained
- 1 cup granulated sugar
- 1 cup all-purpose flour
- 1 cup milk
- 1/2 cup unsalted butter, melted
- 1 1/2 teaspoons baking powder
- 1/4 teaspoon salt
- 1/2 teaspoon ground cinnamon
Instructions
-
1Preheat the oven to 350°F (175°C). Place the melted butter in a 9×13-inch baking dish.
-
2In a medium bowl, mix together flour, sugar, baking powder, and salt.
-
3Gradually stir in milk to form a smooth batter. Pour the batter evenly over the melted butter in the baking dish.
-
4Arrange sliced peaches on top of the batter. Sprinkle with ground cinnamon.
-
5Bake for 40 minutes, or until the top is golden brown and set. Serve warm with a scoop of vanilla ice cream if desired.
CLICK FOR NUTRITION INFO
↑
Approximate Information for One Serving
Serving Size:
1 serving
Calories:
290 caloriescal
Protein:
3 gg
Fat:
9 gg
Saturated Fat:
0g
Trans Fat:
0g
Cholesterol:
0mg
Sodium:
0mg
Potassium:
0mg
Total Carbs:
50 gg
Fiber:
0g
Sugar:
0g
Net Carbs:
0g
Vitamin A:
0
Vitamin C:
0mg
Calcium:
0mg
Iron:
0mg
Nutrition Disclaimers
Number of total servings shown is approximate. Actual number of servings will depend on your preferred portion sizes.
Nutritional values shown are general guidelines and reflect information for 1 serving using the ingredients listed, not including any optional ingredients. Actual macros may vary slightly depending on specific brands and types of ingredients used.
To determine the weight of one serving, prepare the recipe as instructed. Weigh the finished recipe, then divide the weight of the finished recipe (not including the weight of the container the food is in) by the desired number of servings. Result will be the weight of one serving.
Did you make this recipe?
Please consider Pinning it!!