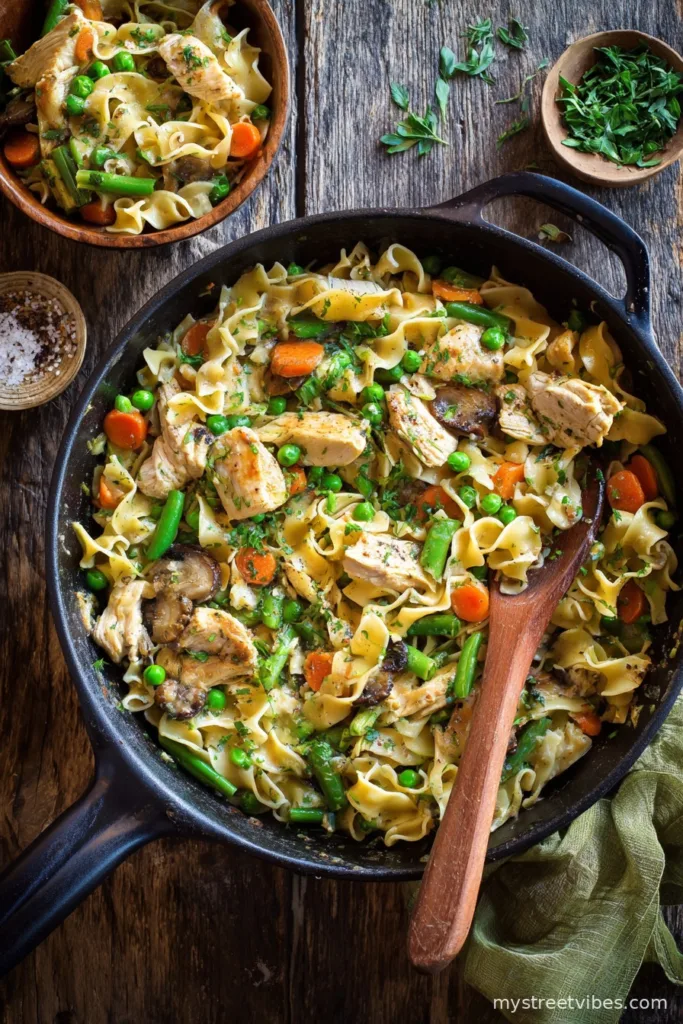
How This One Pan Chicken Noodles Recipe Saved My Tuesday
Hey you. So you know those days – the ones where everything seems a bit sideways? Well, that’s exactly the kind of day I first stumbled onto this easy one pan chicken noodles recipe. My son showed up at the door starving (“Mum, I could eat a shoe”) and I’d already promised my daughter we could watch that dreadful cartoon again. So, this noodles recipe? It’s my Tuesday-evening hero. And if you’ve ever wanted a dinner that basically cooks itself while you wrangle children/answer work emails/panic over laundry, trust me, this is it.
Also, full disclosure, if you see a stray noodle under the fridge later, it’s not from me – probably. Anyway, let’s get into it.
Why You’ll Love This (And Why I Keep Making It… Even When Not Desperate)
I make this when: I’m tired, we’re low on groceries, or frankly just craving something that feels comforting but only uses like, one pan (I’m really not about that “every dish in the kitchen” clean-up life).
My family goes mad for it because it’s got all the good stuff: juicy chicken, slurpable noodles, and a saucy-ness that somehow makes everyone happy (even the picky niece who makes faces at carrots – though honestly, she still eats them if I sneak ‘em in chopped really small). And if you’re prone to burning things (not calling anyone out…I do it too), you’ll appreciate how forgiving this recipe actually is.
Ingredients (With My Usual “Whatever’s In The Fridge” Options)
- 2 chicken breasts, diced (but I’ve used thighs or leftover roast chicken before – works grand!)
- 200g (about 7 oz) dried egg noodles – any noodle will do if you’re desperate. Rice noodles, those instant ramen bricks (sans spice packet), whatever.
- 1 red bell pepper, sliced (green is fine – my grandmother always said “colour matters,” but she was also, um, biased)
- 1 carrot, peeled and chopped small (or grated if you want to be sneaky)
- 3 cloves garlic, minced (I admit, I sometimes just do two when I’m being lazy)
- 2 tablespoons soy sauce (I use light, but dark is ok too. Coconut aminos work in a pinch if you’re avoiding soy.)
- 1 tablespoon oyster sauce (optional, but makes it more… oomphy)
- 2 teaspoons honey (or brown sugar; maple syrup once, but that got a bit weird, honestly)
- 2-3 cups chicken stock (homemade if you’re feeling saintly; any store stuff is fine. Stock cubes dissolved in hot water? I’ve done it!)
- Handful chopped green onions (I skip it if I forget to buy them. Doesn’t matter.)
- Black pepper to taste
- Oil – for frying (olive oil, veg oil, or whatever you’ve got except maybe coconut… unless that’s your thing)
Let’s Get Cooking (Don’t Panic, It’ll Come Together)
- Sizzle time: Splash a little oil in your biggest frying pan (I use a 12-inch nonstick, but any frying pan or even a wok will do in a pinch). Chuck the diced chicken in, sprinkle with a bit of pepper, and fry until it’s nicely golden on the outside. Don’t fuss too much over perfection. I usually have to poke around to make sure it’s not still pink and, whatever, I’ve eaten worse on camping trips. Toss it onto a plate temporarily.
- Fragrant business: In the same pan (no need to wipe it, honestly), add your garlic. Give it like 30 seconds—don’t walk away, that stuff burns so quick. Add your chopped carrots and peppers, let them soften just a bit. Should smell pretty great by now.
- Saucy noodles appear: Slide the chicken back in, then add noodles, soy sauce, oyster sauce, honey, and 2 cups of the stock. Stir it all up, making sure those noodles get a chance to snuggle down in the liquid. If bits are sticking out, press them in gently. Cover with a lid (or, if your pan has no lid, foil is fine—or a big plate, just don’t burn yourself).
- Chill for about 8-10 minutes: Let the noodles simmer gently; I rotate/flip them halfway through if they’re clumping up; add more stock if it seems dry. This is the bit where I usually sneak a taste (for purely scientific reasons… and because the noodles always call to me early). Don’t stress if it looks kinda strange half way. Sometimes it goes all sticky for a minute and then sorts itself out by the end.
- Finishing touches: Take off the lid. Let things bubble for another minute or two if it seems soupy—you want most of the liquid gone but still a bit saucy. Stir in green onions. Taste it. Add more soy if you’re feeling wild. Serve hot. Try not to eat it straight from the pan like I do sometimes (no shame if you do though)!
Notes from My Years of Noodle Madness
- Once I forgot the honey, and honestly it was fine – just less glossy, more savoury (which my weird uncle actually preferred).
- It’s possible to overcook the noodles if you look away for too long, so I try to hover a bit. But if they go a bit mushy? Call it “extra cozy.”
- On second thought: if you’re doubling the recipe, add the noodles in batches – or they can fuse together into a sort of noodle-pancake. Still tasty, just… unique in texture.
My Tried (and… Sometimes Failed) Variations
- Swapped chicken for tofu: It actually soaks up the flavour brilliantly, but crisp the tofu first or it gets weirdly soggy. My partner didn’t notice – success!
- Thai-style experiment: Added a squeeze of lime and a swirl of peanut butter (see Budget Bytes’ peanut noodles for inspo) – kids thought I was a genius.
- Attempted with spaghetti instead of noodles. Not my proudest moment. It kinda… lacked soul? But if it’s all you’ve got, do what makes you happy!
- Cabbage instead of bell pepper: Actually, that worked. Chopped super thin, it blends right in.
What If I Don’t Have… The Right Pan?
I bang on about a large non-stick frying pan or a wok, but if you’ve only got a big pot, that’s honestly fine. If it’s shallow, maybe just stir a bit more so nothing sticks. I love my old battered skillet for this (bought at a car boot sale for a fiver), but don’t let lack of fancy cookware stop you. Heck, you could even try a Dutch oven, though it’s a bit heavy when tossing the noodles about – live dangerously, I say.
How to Store: As If There’ll Be Any Left
This keeps in the fridge for up to two days just fine – though honestly, in my house it never lasts more than a day! Stick it in a lidded container and reheat gently (if you remember). I think it tastes even better the next day, all the flavours get cozy together. If it’s gone a bit thick, splash in a little extra water or stock before microwaving.
How We Actually Eat This (Not Just Plated Nicely for Instagram)
I like mine with a little extra soy sauce drizzled on top. The kids ask for a drizzle of sweet chili sauce, which I blame on my sister for getting them hooked (she brings spicy recipes like this from her travels). My partner swears by loading it into a bowl and sprinkling some roasted peanuts on top for crunch. We once tossed in a fried egg per person—delicious chaos. Try whatever makes you happy.
Pro Tips I Learned The Hard Way
- I once tried rushing the simmer time. Bad idea – the noodles were still crunchy in parts and I had to pretend that was the plan. So, patience actually matters here.
- Don’t walk away when the garlic goes in! Even just for a quick text, it’ll be burnt and you’ll have to start over (it smells so sad when burnt, too).
- Actually, I find it works better if you let everything sit in the pan for a few minutes off the heat before serving – it thickens up nicely, almost like magic.
FAQ (Yes, These Really Came In… Sometimes Late at Night)
- Q: Can I make this gluten-free?
A: Absolutely! Use gluten-free noodles (rice, buckwheat, whatever you like) and swap the soy for tamari. Just be aware, the texture sometimes changes a bit – not better or worse, just…different. - Q: Can I freeze leftovers?
A: You can, but to be brutally honest, the noodles go mushy when reheated. If you aren’t a texture person, you might not care! If you are, maybe just halve the recipe instead. - Q: Is this spicy?
A: Not as written, but you can easily toss in some chili flakes, sriracha, or even chopped fresh chili. My uncle once added his homemade scotch bonnet sauce – regretted it instantly but, you live and learn. - Q: Do I have to use chicken?
A: Absolutely not. Pork strips, tofu, prawns, or whatever’s doing laps in your fridge. It’s all good. - Q: One pan really? What about the plate for the chicken?
A: Fair point. I sometimes just push the chicken to the edge of the pan if I’m feeling extra lazy (don’t tell my mum – food safety police and all).
For more noodle inspiration (because one can never have too many options), I sometimes browse Serious Eats’ one-pot recipes on those days when I’m feeling adventurous—or just procrastinating doing the dishes.
There you go, my friend. You’ve got zero excuses now. Try my easy one pan chicken noodles—just don’t blame me when the plate gets licked clean!

Ingredients
- 2 boneless, skinless chicken breasts, sliced
- 200g egg noodles, uncooked
- 1 tablespoon vegetable oil
- 1 red bell pepper, sliced
- 1 carrot, julienned
- 2 cloves garlic, minced
- 2 cups chicken broth
- 3 tablespoons soy sauce
- 1 tablespoon oyster sauce
- 2 green onions, sliced
Instructions
-
1Heat vegetable oil in a large pan over medium-high heat. Add sliced chicken breasts and cook until lightly browned, about 3–4 minutes.
-
2Add the minced garlic, bell pepper, and carrot to the pan. Sauté for 2–3 minutes until vegetables begin to soften.
-
3Pour in the chicken broth, soy sauce, and oyster sauce. Stir well to combine.
-
4Add the uncooked egg noodles to the pan, submerging them in the liquid. Cover and simmer for 8–10 minutes, stirring occasionally, until noodles are cooked and most liquid is absorbed.
-
5Uncover and cook for another 2 minutes to thicken the sauce if needed. Stir in the sliced green onions. Serve hot.
CLICK FOR NUTRITION INFO
↑
Approximate Information for One Serving
Serving Size:
1 serving
Calories:
390cal
Protein:
28 gg
Fat:
9 gg
Saturated Fat:
0g
Trans Fat:
0g
Cholesterol:
0mg
Sodium:
0mg
Potassium:
0mg
Total Carbs:
48 gg
Fiber:
0g
Sugar:
0g
Net Carbs:
0g
Vitamin A:
0
Vitamin C:
0mg
Calcium:
0mg
Iron:
0mg
Nutrition Disclaimers
Number of total servings shown is approximate. Actual number of servings will depend on your preferred portion sizes.
Nutritional values shown are general guidelines and reflect information for 1 serving using the ingredients listed, not including any optional ingredients. Actual macros may vary slightly depending on specific brands and types of ingredients used.
To determine the weight of one serving, prepare the recipe as instructed. Weigh the finished recipe, then divide the weight of the finished recipe (not including the weight of the container the food is in) by the desired number of servings. Result will be the weight of one serving.
Did you make this recipe?
Please consider Pinning it!!