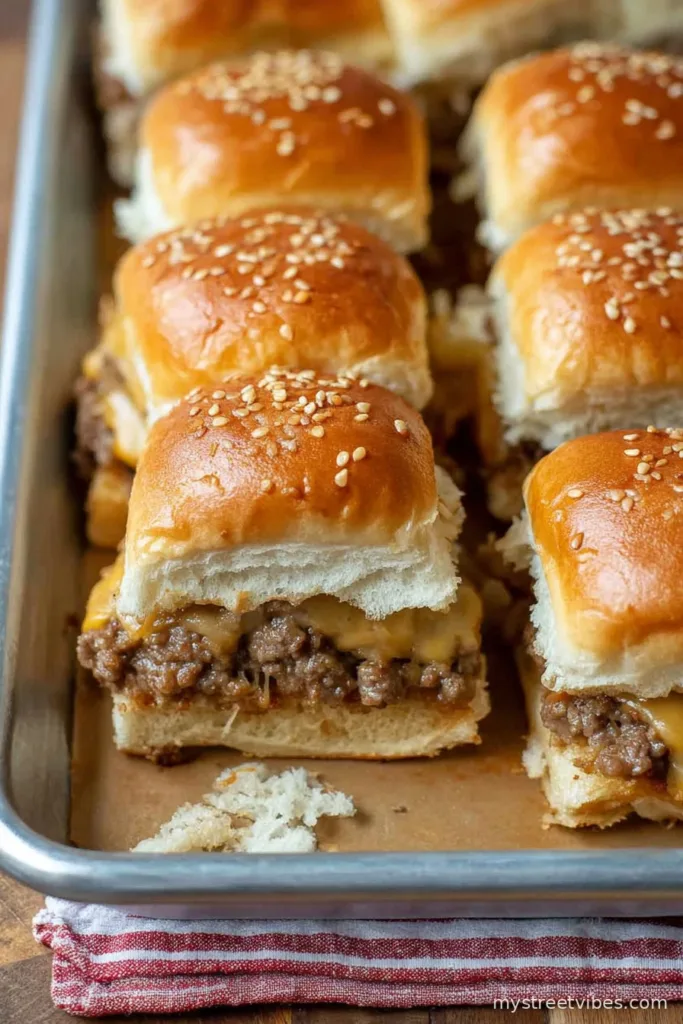
Let’s Talk About These Cheeseburger Sliders
Okay, so imagine this: it’s game night, cousins are all over, someone (usually me) is crying “what’s for dinner?” and the kitchen’s full of hungry faces laughing at whatever disaster’s happening on TV. This is when I pull out my not-so-secret weapon: Cheeseburger Sliders with Hawaiian Rolls. They vanish in, like, 17 seconds flat. Maybe it’s the melty cheese or maybe it’s just the soft, sweet rolls holding everything together—either way, it’s dangerously good. And I’ll admit, once I got the hang of these, I started making them just for myself, on nights when it’s just me and some Netflix. They’re really that comforting.

Why You’ll Absolutely Keep Coming Back for These
I make this when there’s no time for grilling (or, to be honest, I don’t feel like cleaning the grill—that thing collects stray spiders all year and it’s always a drama). My family loses it for the buttery tops and all that gooey cheese—it’s the only dinner where nobody grumbles about onions (miracle!). Oh, and if I have a bad day? Cheeseburger sliders. Good day? Still cheeseburger sliders. Actually, once I tried to cut corners by using cheap cheese; don’t do that. It’s just… not the same. But hey, they’re still good after two reheats, and you can’t say that about everything.
Ingredients (You’ve Got Choices)
- 1 pound (about 450g) ground beef – or ground turkey if you’re feeling a little healthier (sometimes I sneak in half and half, shhh)
- 1 small yellow onion, finely chopped (I’ve used red onion in a pinch—it’s fine)
- Salt and black pepper, to taste (not gonna lie, I’m heavy-handed)
- 1/2 teaspoon garlic powder (or just smash a clove in if you’re fancy)
- 12-pack Hawaiian sweet rolls (Kings or honestly, whatever’s on sale—the off-brands work too)
- 6 slices cheddar cheese (the pre-sliced kind, but tearing pieces off a block works in a pinch; Monterey Jack is great too!)
- 6 slices American cheese (optional, but makes it super creamy—sometimes I mix it up with Swiss if I’m feeling wild)
- 1/4 cup diced pickles (I’ll sub in relish if I can’t find actual pickles, but it’s messier)
- 1/3 cup ketchup (or barbecue sauce if you want a twist—my neighbor does this and says it’s life-changing)
- 2 tablespoons yellow mustard (grainy, Dijon, whatever you love)
- 2 tablespoons unsalted butter, melted (once I used garlic butter by accident and whoa, not bad!)
- 1 tablespoon sesame seeds (totally optional, but it feels “fancy”)
The Way I Roll: How to Make These Sliders
- Preheat your oven to 350°F (175°C). Get out a 9×13 inch baking dish (or whatever you have that fits the rolls—I’ve used an old roasting pan and nobody complained).
- Heat a skillet over medium. Toss in the ground beef and chopped onions. Cook until the beef isn’t pink at all and the onions are nice and soft—which might take 6-7 minutes. Toss in the salt, pepper, and garlic powder. I usually sneak a little taste here (don’t judge!).
- Drain off any extra fat (or don’t, I call that “flavor”).
- Slice the whole slab of Hawaiian rolls horizontally, knife level like you’re splitting a massive bagel. Don’t pull them apart, just slice all at once (this is where things sometimes wobble—go slow!). Place the bottoms in your baking dish.
- Spread the beef onion mix all over the roll bottoms. Top with both kinds of cheese (you can layer, or just mix them up—there’s no slider police). Scatter on diced pickles. Dollop ketchup and mustard here and there; don’t overthink it, just get it pretty even.
- Stick the roll tops back on. Brush with the melted butter—don’t forget those edges. Sprinkle sesame seeds over the top. Or, if you’re out, I’ve even used a little sea salt—tastes great.
- Bake uncovered for about 15 minutes, or until the cheese is bubbling and everything’s golden brown up top. If your oven runs hot, check at 12 minutes just in case (I once scorched the top and still ate every bite, so really, it’s hard to ruin these).
- Let them sit for 2-3 minutes (I know, patience is tough). Then slice into mini squares. Or just pull them apart, which honestly is faster and way more fun.
Sometimes Useful Notes
- If you prep ahead and assemble earlier in the day, stick them in the fridge—add 3 minutes to the baking time unless you like cold cheese (I don’t).
- Tried making this with ground chicken once; eh, not my fave. Beef or turkey is just tastier.
- Don’t stress if the cheese oozes out and fries itself along the pan edges. That’s the best part!
- I often use cheddar, but Colby Jack is also a winner (Mom used to swear by it in the ‘90s for reasons unknown).
Variations (and Some Flops)
- Swap in barbecue sauce for ketchup—it’s a little southern, super zingy.
- Jalapeño slices on top of the beef layer, for spice heads. But be warned—last time the kids complained about “spicy mouths.” Oops.
- Tried making them with pretzel rolls once. Look, I love soft pretzels, but honestly? Too salty, kinda weird texture. Wouldn’t do that again.
- You can do a “pizza slider” version by adding a little marinara and pepperoni (off topic, but surprisingly awesome).

Equipment (but…)
You technically want a 9×13 baking dish here. But I’ve used a couple cake pans arranged side by side when I couldn’t find it (why are all my pans in the basement anyway?). A decent serrated bread knife helps with slicing the rolls straight, but I’ve “hacked” it with a regular steak knife and a lot of hope.
Storing Them—Not That You’ll Need To
Just toss any leftovers in an airtight container in the fridge. I think they taste better the next day honestly, maybe because the flavors sort of squish together overnight. Reheat in the oven at 300°F for 8-10 minutes and they’re like new. But, real talk, these rarely make it past day one around here.
Want to Make Them Extra Special?
Serve these with a big bowl of kettle chips and some crunchy dill pickles on the side. Or, sometimes when we’re feeling like it’s a picnic (even if we’re just at the kitchen table), I’ll do homemade coleslaw. Oh, and my cousin dumps a little hot sauce on his—I’m not brave enough, but you do you.
Pro Tips (The Hard Way)
- Don’t rush the beef and onions—if you push the heat, you’ll end up with weird chewy bits. I did it once when I was distracted by the dog and regretted it instantly.
- Cheese: don’t skimp. Actually, using a little extra is never a bad thing.
- Letting them sit after baking? Seriously, just a few minutes. Otherwise you’ll burn your tongue in the scramble, and you won’t enjoy that first bite as much as you could’ve. I would know…
FAQ (From Actual People—Okay, Mostly Family)
- Can I freeze these? Sure thing, but honestly, the texture gets a little weird after thawing. Still edible, just softer. I’d just eat ‘em fresh.
- No Hawaiian rolls where I live—help? I’ve used dinner rolls or even squishy potato rolls. It’s a slightly different vibe but totally still delicious. I once tried old hot dog buns; not my best work, but it’ll do in a true pinch.
- Can I prep these ahead of time? Yep, assemble everything except the butter and seeds, cover, stick in the fridge, and just finish right before baking. Actually, I think the flavors get even better if they sit for an hour or two.
- Do I have to use both cheeses? Nope, just use what you’ve got. I like the creamy mix, but all cheddar is solid too (sometimes that’s all I have!).
By the way, if you make these for breakfast, let me know—I tried that once with an egg in the middle. Was it good? Sort of. Was it weird? Oh, definitely. Thanks for hanging out in the kitchen with me, at least virtually!
Ingredients
- 1 pound (about 450g) ground beef – or ground turkey if you’re feeling a little healthier (sometimes I sneak in half and half, shhh)
- 1 small yellow onion, finely chopped (I’ve used red onion in a pinch—it’s fine)
- Salt and black pepper, to taste (not gonna lie, I’m heavy-handed)
- 1/2 teaspoon garlic powder (or just smash a clove in if you’re fancy)
- 12-pack Hawaiian sweet rolls (Kings or honestly, whatever’s on sale—the off-brands work too)
- 6 slices cheddar cheese (the pre-sliced kind, but tearing pieces off a block works in a pinch; Monterey Jack is great too!)
- 6 slices American cheese (optional, but makes it super creamy—sometimes I mix it up with Swiss if I’m feeling wild)
- 1/4 cup diced pickles (I’ll sub in relish if I can’t find actual pickles, but it’s messier)
- 1/3 cup ketchup (or barbecue sauce if you want a twist—my neighbor does this and says it’s life-changing)
- 2 tablespoons yellow mustard (grainy, Dijon, whatever you love)
- 2 tablespoons unsalted butter, melted (once I used garlic butter by accident and whoa, not bad!)
- 1 tablespoon sesame seeds (totally optional, but it feels “fancy”)
Instructions
-
1Preheat your oven to 350°F (175°C). Get out a 9×13 inch baking dish (or whatever you have that fits the rolls—I’ve used an old roasting pan and nobody complained).
-
2Heat a skillet over medium. Toss in the ground beef and chopped onions. Cook until the beef isn’t pink at all and the onions are nice and soft—which might take 6-7 minutes. Toss in the salt, pepper, and garlic powder. I usually sneak a little taste here (don’t judge!).
-
3Drain off any extra fat (or don’t, I call that “flavor”).
-
4Slice the whole slab of Hawaiian rolls horizontally, knife level like you’re splitting a massive bagel. Don’t pull them apart, just slice all at once (this is where things sometimes wobble—go slow!). Place the bottoms in your baking dish.
-
5Spread the beef onion mix all over the roll bottoms. Top with both kinds of cheese (you can layer, or just mix them up—there’s no slider police). Scatter on diced pickles. Dollop ketchup and mustard here and there; don’t overthink it, just get it pretty even.
-
6Stick the roll tops back on. Brush with the melted butter—don’t forget those edges. Sprinkle sesame seeds over the top. Or, if you’re out, I’ve even used a little sea salt—tastes great.
-
7Bake uncovered for about 15 minutes, or until the cheese is bubbling and everything’s golden brown up top. If your oven runs hot, check at 12 minutes just in case (I once scorched the top and still ate every bite, so really, it’s hard to ruin these).
-
8Let them sit for 2-3 minutes (I know, patience is tough). Then slice into mini squares. Or just pull them apart, which honestly is faster and way more fun.
CLICK FOR NUTRITION INFO
↑
Approximate Information for One Serving
Serving Size:
1 serving
Calories:
290 caloriescal
Protein:
15gg
Fat:
16gg
Saturated Fat:
0g
Trans Fat:
0g
Cholesterol:
0mg
Sodium:
0mg
Potassium:
0mg
Total Carbs:
22gg
Fiber:
0g
Sugar:
0g
Net Carbs:
0g
Vitamin A:
0
Vitamin C:
0mg
Calcium:
0mg
Iron:
0mg
Nutrition Disclaimers
Number of total servings shown is approximate. Actual number of servings will depend on your preferred portion sizes.
Nutritional values shown are general guidelines and reflect information for 1 serving using the ingredients listed, not including any optional ingredients. Actual macros may vary slightly depending on specific brands and types of ingredients used.
To determine the weight of one serving, prepare the recipe as instructed. Weigh the finished recipe, then divide the weight of the finished recipe (not including the weight of the container the food is in) by the desired number of servings. Result will be the weight of one serving.
Did you make this recipe?
Please consider Pinning it!