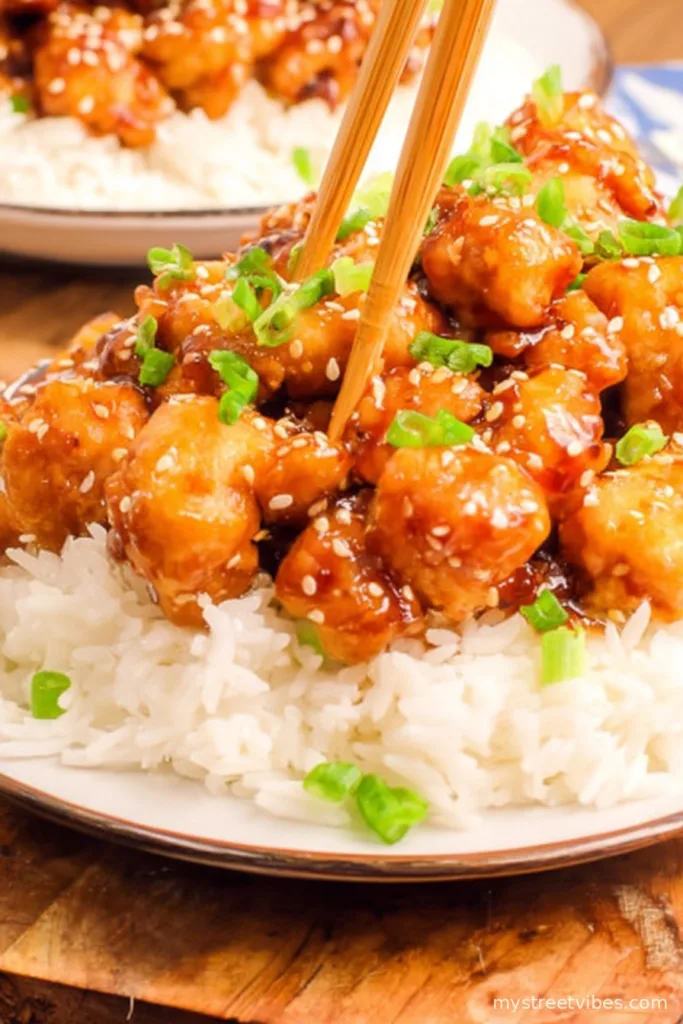
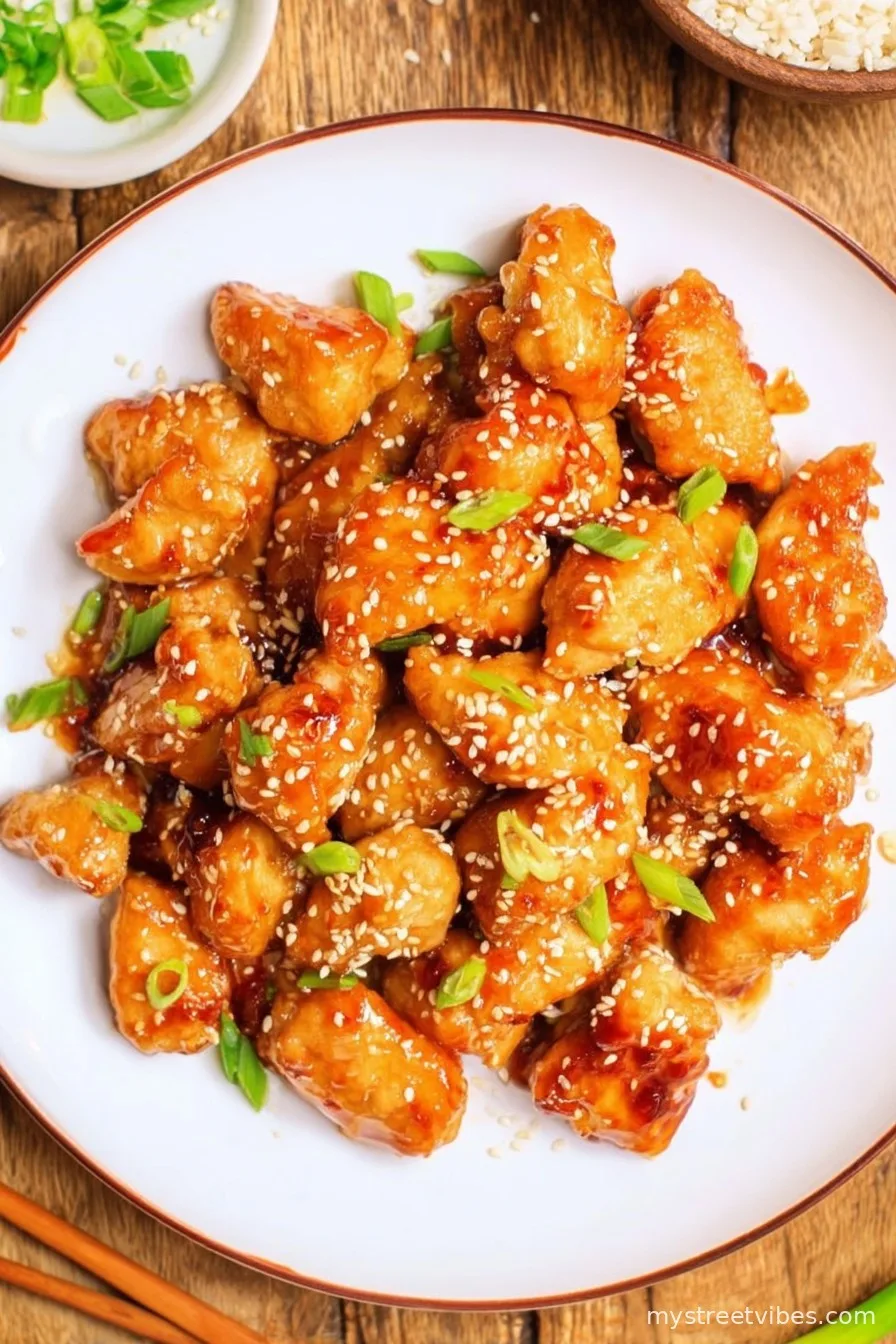
You Have to Try This Baked Honey Sesame Chicken
I still remember the first time I made this Baked Honey Sesame Chicken for my (very skeptical) sister—she looked at the tray like I’d lost my marbles. By the time she was licking her fingers, well, let’s just say I didn’t hear any complaints. The sauce sort of sticks to the pan, but you scrape it up and it’s absolute gold. If you’re someone who’s always managed to slightly over-crisp the chicken (guilty, right here), this technique will actually work in your favor.
Why You’ll Love Making This
I make this when I want something that feels like takeout but I don’t want the delivery driver seeing me in my mismatched pajamas again. My family goes nuts for it—especially when I actually remembered to buy sesame seeds. Occasionally, I forget, and honestly, nobody yells (but I hear about it for weeks). If you’re tired of dredging chicken for 20 minutes, this is quite forgiving. No deep frying, no wrestling with a pot of hot oil—it’s as easy as finding where the kids hid the oven mitts, well, almost.
Here’s What You’ll Need (Plus a Few Shortcuts)
- 500g boneless, skinless chicken thighs (or breasts—I sometimes just use whatever’s in the freezer)
- 2 tablespoons cornstarch (flour works in a pinch, but it’s not quite as dreamy)
- Salt and pepper, a good sprinkle of each
- 2 tablespoons toasted sesame oil (or honestly, plain oil works if you forget this one)
- 3 tablespoons honey (my gran swore by local clover honey, but supermarket squeezy honey is fine)
- 2 tablespoons soy sauce (I use low sodium because, well, I’d like my ankles to continue existing)
- 2 cloves garlic, minced, or those pre-minced jars if you’re feeling lazy
- 1 tablespoon rice vinegar (but apple cider vinegar will do if that’s what’s in your cupboard)
- 1 tablespoon sesame seeds (optional, according to my kids)
- 1 green onion, chopped, for a bit of color (optional but looks fancy!)
Let’s Get Cooking! (Step-by-Step, but Casual)
- Preheat your oven to 200°C/400°F. I sometimes forget and have to wait—honestly, who doesn’t?
- Pat the chicken dry (not strictly necessary but it helps the coating stick); then, cut it into bite-sized bits. If you want to go big or tiny, your call. Toss them in a mixing bowl.
- Add in cornstarch, salt, pepper. Give it a toss—use your hands if you don’t mind getting a bit messy. Don’t be shy.
- Line a baking tray with parchment (less scrubbing later). Drizzle or brush it with a bit of sesame oil. Arrange the chicken in a single layer. Little overlap is fine—it’s not rocket science.
- Bake for about 18–22 minutes. Halfway through, flip or toss them a bit so they brown somewhat evenly. This is usually when I start making the sauce—and/or sneak a taste (I can’t help it). Don’t worry if the chicken looks a bit pale at this point, it won’t matter.
- While the chicken finishes up, in a saucepan, combine the honey, soy sauce, garlic, vinegar, and the rest of the sesame oil. Bring it to a gentle simmer. When it starts to bubble, turn it down and stir for a minute or two—til it thickens just a tiny bit. (Actually, sometimes it doesn’t thicken much, but it’s still tasty.)
- Pour the sauce over the baked chicken. Toss well so that every piece is shiny. It might look a bit odd and glossy—trust me, it’s meant to.
- Sprinkle with sesame seeds, chopped green onions, or nothing at all if you’re out of patience. Pop back in the oven for 2–3 more minutes if you want the sauce to get sticky.
- Serve it while it’s hot, or—controversial opinion—I genuinely think this tastes even better the next day, cold from the fridge. But who am I to judge?
Notes, AKA What I Learned the Hard Way
- Don’t crowd the pan too much; the chicken won’t crisp right. But honestly, if you do, it still tastes good, just less crispy.
- I tried cutting the honey way down once—not great. Ended up super salty.
- The sauce does burn onto the tray a little—just soak it afterward, or line with foil if you really want zero cleanup.
- If you like spicier food, toss in a pinch of chili flakes; it perks things right up.
Variations I’ve Played With (Some Work, Some Not…)
- Swap chicken for tofu chunks—surprisingly nice, but you’ll want to press the tofu well.
- Used maple syrup instead of honey once when I ran out; honestly, not my favorite, but my neighbor loved it (go figure).
- Tossed in broccoli with the chicken. It worked, except my youngest ate only the broccoli and left the chicken—go figure.
Equipment Corner (and When You Don’t Have It)
I always use a big rimmed baking tray (easier for sauce containment), but when mine was MIA (thanks to a lasagna disaster), I just crammed everything in a casserole dish—needed a couple more stirs but worked fine. A brush is handy for oil but, honestly, your fingers or a spoon does the job. No parchment? Greasing the tray is better than nothing.
Storing Leftovers (If You Somehow Have Any)
It keeps two or three days in an airtight container in the fridge—though, to spill the beans, in my house it never lasts more than a day! It’s kind of addictive cold, standing over the fridge, fork in hand.
How I Like to Serve It (But You Do You)
This is brilliant on steamed jasmine rice, with a heap of stir-fried greens on the side. Sometimes I stuff leftovers into a tortilla for a sort of “Asian taco” lunch, which my kids now request (and my partner finds slightly odd). Oh—if you’re looking for a good rice cooker, I’ve had decent luck with this Serious Eats guide for recommendations.
A Few Honest Pro Tips
- I once rushed the baking and skipped flipping the chicken halfway—the bottom bits went soggy, so don’t do that unless you want a lesson in mush.
- If your honey’s crystalized, just zap it (lid off!) in the microwave for a few seconds; don’t stress.
- The sauce gets thicker as it cools, so if it looks too runny in the pan, give it a moment before panicking. Or just pour it anyway, it thickens up a bit in the oven.
- Oh, and this baked katsu recipe gave me some inspiration for making even crispier coatings—if you’re curious to experiment further.
Questions People (Actually) Ask Me
- “Can I make this ahead?”
Totally. Actually, I think the flavors are better after a night in the fridge, but maybe that’s just me. - “Do I really need sesame oil?”
Nope—olive oil or veggie oil works if need be. It’ll just be a little less nutty-smelling. - “Can I double the sauce?”
Oh, for sure. My family likes things extra saucy, so I nearly always do. - “How do I make it gluten free?”
Just use tamari instead of regular soy sauce and double-check the cornstarch. Easy fix. - “Do kids like it?”
Well, at least mine do, and that’s no small feat, believe me! - “What if I undercook/overcook the chicken?”
Eh, just pop it back in the oven or douse it with more sauce. It’s pretty forgiving. Just try not to char it—unless you like a bit of, let’s say, ‘patina.’ - “Can I freeze it?”
Could you? Sure. But the texture changes a bit—still, it’s not the end of the world if you do.
(If you have questions I haven’t answered here, just ask! I’ve probably tried it already, possibly with mixed results.)
So, that’s my slightly scatterbrained guide to Baked Honey Sesame Chicken. If you give it a whirl, let me know how it goes—or what risks you take that I haven’t even dreamed up yet!

Ingredients
- 1 lb boneless, skinless chicken breasts, cut into bite-sized pieces
- 2 tablespoons cornstarch
- 2 tablespoons vegetable oil
- 1/3 cup honey
- 1/4 cup soy sauce
- 2 tablespoons ketchup
- 1 tablespoon rice vinegar
- 1 tablespoon sesame oil
- 2 cloves garlic, minced
- 1 tablespoon sesame seeds
- 2 green onions, sliced
Instructions
-
1Preheat oven to 400°F (200°C). Line a baking sheet with parchment paper or lightly grease it.
-
2Toss chicken pieces with cornstarch until evenly coated. Spread chicken in a single layer on the prepared baking sheet.
-
3Drizzle vegetable oil over the chicken and bake for 20 minutes, turning halfway, until golden and cooked through.
-
4While the chicken bakes, whisk together honey, soy sauce, ketchup, rice vinegar, sesame oil, and minced garlic in a saucepan. Simmer over medium heat for 5 minutes until slightly thickened.
-
5Remove chicken from oven and transfer to a large bowl. Pour the sauce over the chicken and toss well to coat.
-
6Garnish with sesame seeds and sliced green onions before serving.
CLICK FOR NUTRITION INFO
↑
Approximate Information for One Serving
Serving Size:
1 serving
Calories:
350cal
Protein:
28 gg
Fat:
12 gg
Saturated Fat:
0g
Trans Fat:
0g
Cholesterol:
0mg
Sodium:
0mg
Potassium:
0mg
Total Carbs:
32 gg
Fiber:
0g
Sugar:
0g
Net Carbs:
0g
Vitamin A:
0
Vitamin C:
0mg
Calcium:
0mg
Iron:
0mg
Nutrition Disclaimers
Number of total servings shown is approximate. Actual number of servings will depend on your preferred portion sizes.
Nutritional values shown are general guidelines and reflect information for 1 serving using the ingredients listed, not including any optional ingredients. Actual macros may vary slightly depending on specific brands and types of ingredients used.
To determine the weight of one serving, prepare the recipe as instructed. Weigh the finished recipe, then divide the weight of the finished recipe (not including the weight of the container the food is in) by the desired number of servings. Result will be the weight of one serving.
Did you make this recipe?
Please consider Pinning it!!