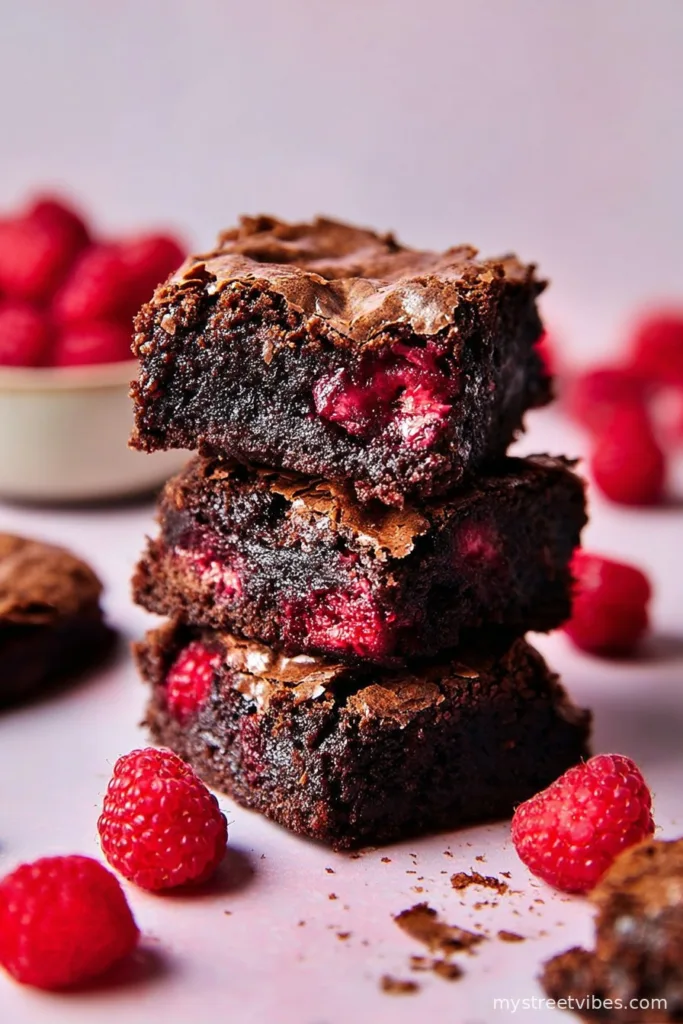
Let me tell you, raspberry brownies are basically my secret weapon when I want to look like I’ve got my act together—especially at family get-togethers. There was this one rainy Saturday, the kids were climbing the walls, and my mate Jamie popped round unexpectedly (classic Jamie). I had about five minutes to whip up something before we all starved; these gooey, chocolatey, sort-of-fruity brownies saved my bacon. I’ll forever associate their smell with a kitchen full of laughter and a ridiculous amount of raspberry-stained fingers. These brownies just hit different, you know?

Why You’ll Love These Raspberry Brownies
I make these whenever raspberries start showing up in market stalls, or honestly when I spot a good deal on the frozen ones. My family goes a bit bonkers for them (the brownies, that is, not the raspberries on their own—apparently fruit is only exciting if it’s covered in chocolate). When I’m in a mood and don’t want to fuss with fancy desserts, this is my lazy “crowd-pleaser.” Plus, if the brownies sink a bit in the middle, people think you meant for them to be extra fudgy. Win-win! Also, it took me ages to get this balance right so the berries don’t just sog out the whole thing… trust me, you won’t get a sad, sunken mess—unless you really overdo it with the berries. Been there.
Ingredients You’ll Need (And a Few Substitutions if You’re in a Pinch)
- 150g dark chocolate (70 percent if you can, but just raid your stash – I once used Easter bunny leftovers, much to the kids’ dismay. It worked!)
- 100g unsalted butter (but I’ll use salted if that’s all I’ve got; just skip half the salt later)
- 200g granulated sugar (sometimes I go half brown sugar for chewiness—totally optional)
- 2 large eggs
- 1 tsp vanilla extract (I’ve used vanilla bean paste when feeling posh – slightly more floral, but not a game-changer)
- 90g plain flour (don’t stress, a heaping 3/4 cup works if you don’t have scales; my gran swore by sifting, I forget half the time)
- 1/4 tsp fine salt (I’ve just used a pinch now and then, honestly)
- 125g fresh raspberries (frozen work too, toss ’em in straight from the freezer, slightly tart ones are best!)
- Optional: a handful (about 50g) chopped walnuts or pecans – sometimes I add, sometimes not
How to Make Raspberry Brownies (With a Few Personal Tricks)
- First off, preheat your oven to 180°C (that’s about 350°F for my stateside pals), and line an 8-inch (20cm) square tin with baking paper. I overlap the paper so I can lift them out easily. If you forget, just butter like mad.
- Break up the chocolate and melt it with the butter. I do this gently over a pan of simmering water, but if the microwave is calling to you, go for bursts of 20 seconds, stirring between each zap. Don’t scorch it! (This is where I usually nick a spoonful to “check” the flavor. Occupational hazard.)
- Whisk in the sugar, followed by the eggs one at a time. Throw in the vanilla extract too. It’ll look suspiciously shiny—don’t panic.
- Sift in (or just dump, if we’re being real) the flour and salt. Gently fold it until the streaks just disappear. Don’t over-mix or it gets cakey instead of squidgy. My brownies have suffered that fate more than once—learn form me!
- Fold in about two-thirds of the raspberries and the nuts if you’re using ’em. Get ready for the batter to look a bit lumpy. That’s normal, promise.
- Scrape the lot into your lined tin, smooth it out (ish—perfection not needed), and then dot the rest of the raspberries on top, pressing them in a smidge. Mine always look like they’re drowning, but they pull through in the oven.
- Bake for 28–32 minutes. You want the edges set and the center still a little fudgy. Do the old toothpick check—should come out with a few sticky bits, not totally clean. If it looks wobbly in the middle, give it another minute or two. Ovens vary; I once overbaked these and regretted it bitterly.
- Let the brownies cool in the tin, then lift ’em out. This is probably the hardest part—waiting. Patience, grasshopper! Once cool, cut into squares (mine are never even, and nobody’s ever complained).

My Notes (a.k.a. What I Learned the Hard Way)
- If using frozen raspberries, don’t thaw—they’ll turn the batter pink and watery (learned that one the messy way).
- I think these actually taste even better the next day. The flavors meld, but honestly, they rarely last long enough at mine to test that theory thoroughly!
- Worried about too much goo? Chill ’em for 30 minutes before slicing.
Variations I’ve Tried (And a Few That Flopped)
- I swapped in white chocolate chunks once—delightful.
- Orange zest: surprisingly good (though my kids side-eyed me at first).
- Cherries instead of raspberries: a bit too sweet for my liking, but hey, you might love it.
- I tried mixing in shredded coconut… tastes fine but the texture was a bit strange, so maybe skip that experiment unless you’re feeling brave.

Equipment Stuff (But Don’t Buy Anything Fancy Just for This)
- 8-inch (20cm) square baking tin—if you only have a round tin, just go for it (and maybe adjust the timing a smidge).
- Bowl, whisk, spatula. If you don’t have a whisk, a good fork works in a pinch (done that too many times). Literally just melt chocolate, combine, bake—it’s not precious.
Storage (as If You’ll Have Leftovers!)
I mean, technically, you can keep these in an airtight container for up to four days at room temp or in the fridge if it’s roasting. But honestly, in my house it never lasts more than a day—and sometimes I have to hide a piece behind the ketchup just to get a taste with my morning coffee.
How We Serve ‘Em (Spoiler: Everyone Fights for a Corner Piece!)
I absolutely love these with a little scoop of vanilla ice cream, or even a big dollop of thick Greek yogurt (my husband’s weird but inspired suggestion), and sometimes more fresh raspberries for good measure—just to look like you care about fruit. Sometimes we do a brownie sundae bar; the kids go wild decorating their own squares. Just don’t ask me to clean up the sprinkles after.
Lessons from the Brownie Trenches (aka My Pro Tips)
- I once tried rushing the cooling step—ended up with molten chocolate everywhere and very floppy squares. Let them cool, even if it feels like torture.
- Ditch the urge to keep checking the oven every five minutes. It only lets the heat out, and (somehow) the brownies are always better when you leave them alone.
- Don’t use too much flour—makes them dry, and a dry brownie is a crime, frankly.
Some Burning Questions (That Actually Get Asked!)
- Can I use vegan butter or flax eggs? – Yup, I’ve tried vegan butter, works fine! Never done the flax egg myself, but my friend swears by it. Texture gets a little softer though, so maybe cool them well before slicing.
- Can I double this recipe for a crowd? – Sure thing, just bake in a larger dish, 9×13-inch-ish, and add about 10 minutes to the time (but check early!).
- Do frozen berries go soggy? – Not if you chuck them in straight from the freezer. If you defrost, they just sort of weep everywhere… not ideal.
- How do I get neat squares? – Use a hot knife, wipe between slices; or just embrace the wonky rustic look. Tastes the same either way!
- Can I make these without nuts? – Absolutely, leave them out. Just makes them a bit denser which, actually, is kind of the point, right?
Okay, slight tangent—I once got sucked into a rabbit hole reading about the difference between brownies and blondies (turns out blondies are the vanilla cousins?), and lost track of time. Suffice it to say, if you ever want to procrastinate, start googling dessert history! But for now, trust me: these raspberry brownies are the weekend pick-me-up you didn’t know you needed.
Ingredients
- 150g dark chocolate (70 percent if you can, but just raid your stash – I once used Easter bunny leftovers, much to the kids’ dismay. It worked!)
- 100g unsalted butter (but I’ll use salted if that’s all I’ve got; just skip half the salt later)
- 200g granulated sugar (sometimes I go half brown sugar for chewiness—totally optional)
- 2 large eggs
- 1 tsp vanilla extract (I’ve used vanilla bean paste when feeling posh – slightly more floral, but not a game-changer)
- 90g plain flour (don’t stress, a heaping 3/4 cup works if you don’t have scales; my gran swore by sifting, I forget half the time)
- 1/4 tsp fine salt (I’ve just used a pinch now and then, honestly)
- 125g fresh raspberries (frozen work too, toss ’em in straight from the freezer, slightly tart ones are best!)
- Optional: a handful (about 50g) chopped walnuts or pecans – sometimes I add, sometimes not
Instructions
-
1First off, preheat your oven to 180°C (that’s about 350°F for my stateside pals), and line an 8-inch (20cm) square tin with baking paper. I overlap the paper so I can lift them out easily. If you forget, just butter like mad.
-
2Break up the chocolate and melt it with the butter. I do this gently over a pan of simmering water, but if the microwave is calling to you, go for bursts of 20 seconds, stirring between each zap. Don’t scorch it! (This is where I usually nick a spoonful to “check” the flavor. Occupational hazard.)
-
3Whisk in the sugar, followed by the eggs one at a time. Throw in the vanilla extract too. It’ll look suspiciously shiny—don’t panic.
-
4Sift in (or just dump, if we’re being real) the flour and salt. Gently fold it until the streaks just disappear. Don’t over-mix or it gets cakey instead of squidgy. My brownies have suffered that fate more than once—learn form me!
-
5Fold in about two-thirds of the raspberries and the nuts if you’re using ’em. Get ready for the batter to look a bit lumpy. That’s normal, promise.
-
6Scrape the lot into your lined tin, smooth it out (ish—perfection not needed), and then dot the rest of the raspberries on top, pressing them in a smidge. Mine always look like they’re drowning, but they pull through in the oven.
-
7Bake for 28–32 minutes. You want the edges set and the center still a little fudgy. Do the old toothpick check—should come out with a few sticky bits, not totally clean. If it looks wobbly in the middle, give it another minute or two. Ovens vary; I once overbaked these and regretted it bitterly.
-
8Let the brownies cool in the tin, then lift ’em out. This is probably the hardest part—waiting. Patience, grasshopper! Once cool, cut into squares (mine are never even, and nobody’s ever complained).
CLICK FOR NUTRITION INFO
↑
Approximate Information for One Serving
Serving Size:
1 serving
Calories:
210 caloriescal
Protein:
3gg
Fat:
10gg
Saturated Fat:
0g
Trans Fat:
0g
Cholesterol:
0mg
Sodium:
0mg
Potassium:
0mg
Total Carbs:
27gg
Fiber:
0g
Sugar:
0g
Net Carbs:
0g
Vitamin A:
0
Vitamin C:
0mg
Calcium:
0mg
Iron:
0mg
Nutrition Disclaimers
Number of total servings shown is approximate. Actual number of servings will depend on your preferred portion sizes.
Nutritional values shown are general guidelines and reflect information for 1 serving using the ingredients listed, not including any optional ingredients. Actual macros may vary slightly depending on specific brands and types of ingredients used.
To determine the weight of one serving, prepare the recipe as instructed. Weigh the finished recipe, then divide the weight of the finished recipe (not including the weight of the container the food is in) by the desired number of servings. Result will be the weight of one serving.
Did you make this recipe?
Please consider Pinning it!