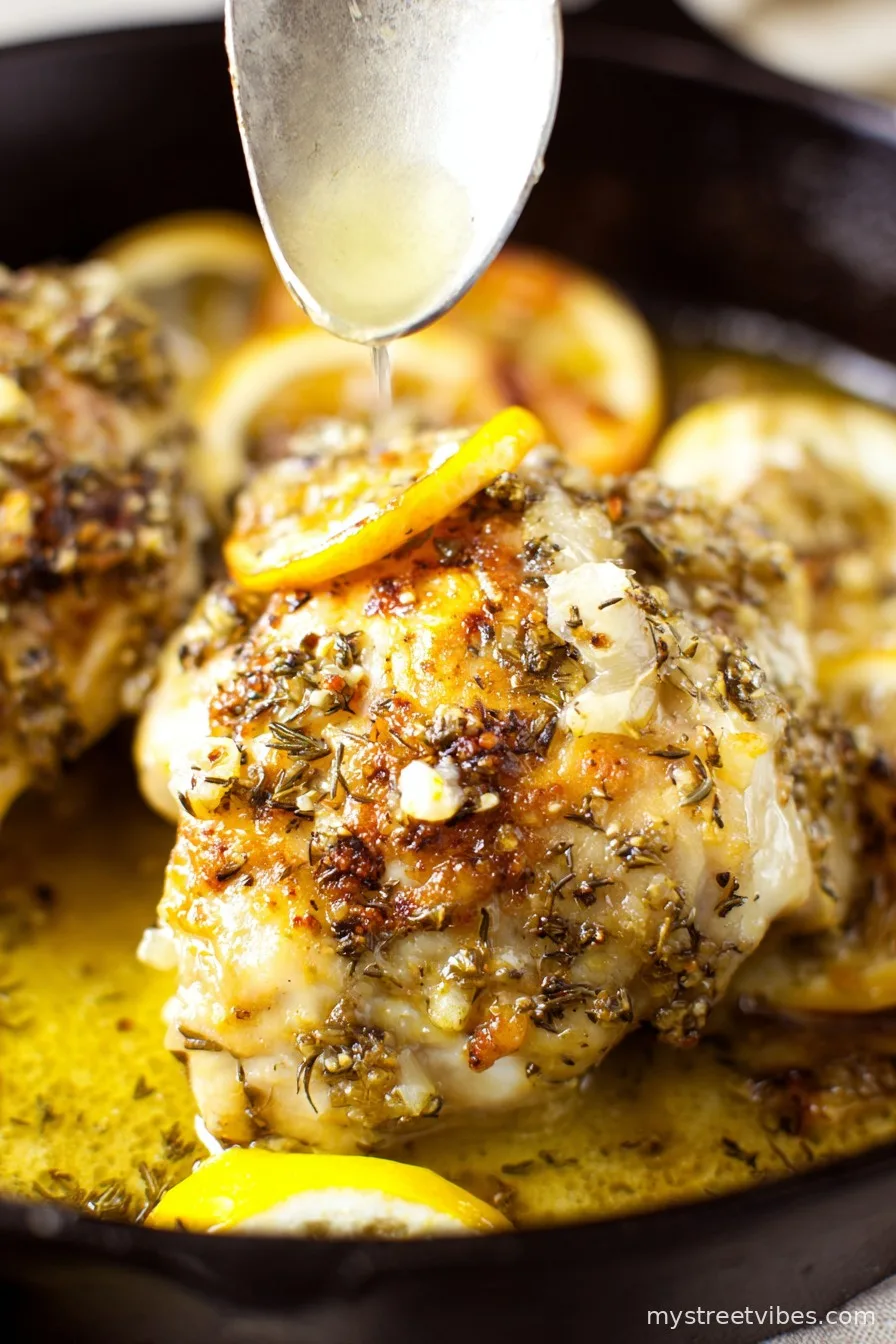
If You’ve Ever Had A Chicken Crisis…
I first made Ina Garten’s Lemon Chicken on a Tuesday so rainy the dog even looked disgusted. I remember thinking, “Easy roast chicken, super elegant, how hard can this be?” Well, guess who didn’t read ahead and got halfway before realizing there was no garlic left (my kingdom for a bulb!). Anyway, I’ve made it so many times since—and usually remember the garlic now—that this recipe’s sort of woven itself right into our family lore. It’s juicy. It’s bright. Honestly, it gets more compliments than I do at Sunday lunch. Oh, and there’s this one time I zested a lemon straight into my coffee. Not ideal.
Why This Chicken’s Always On Repeat
I make this for everyone—honestly, even the picky eaters at the table seem to love it. My little brother practically licks the plate (he’ll deny it, but I’ve seen it). It’s perfect for those times when I’m craving dinner that feels special, but I don’t have the brain space to fuss over five pans. Plus, there’s something about the smell of garlic, rosemary, and lemon drifting around that makes everyone think I spent way more effort than I actually did. And—confession time—yes, I used to wrestle with getting the skin crispy, but a little patience (and actually drying off the chicken, who knew?) fixed that right up.
Here’s What You’ll Need (Or Not!)
- 1 (about 5-pound) roasting chicken (sometimes I just grab two smaller ones if the shop’s out, works fine!)
- Kosher salt (or just regular table salt, which is what my neighbor uses—her chicken’s still great)
- Freshly ground black pepper (but pre-ground is totally manageable if you’re in a rush — I can’t always be fancy)
- 1 large bunch fresh thyme (I ran out once and tossed in some dried Italian herbs; not the same, but still tasty)
- 1 lemon, halved (any lemon will do, Meyer if you want to feel posh)
- 1 head garlic, sliced in half crosswise (I’ve even skipped this when tragically garlic-less)
- 2 tablespoons melted butter (or olive oil, which makes me feel a bit more Mediterranean—use what you’ve got)
- 1 large yellow onion, thickly sliced (red onion works but makes it slightly sweeter, weirdly?)
- 1 cup chicken broth (boxed, homemade, or just water with a bouillon cube if you’re me on a Monday)
- 8 small Yukon Gold potatoes, halved (I’ve swapped in carrots or whatever root veg is flopping around my fridge)
How I Actually Make Ina’s Lemon Chicken
- Preheat your oven to 425°F (220°C). I sometimes forget and realize halfway in, so if you do too, just wait it out.
- Take the chicken out of the fridge about 30 minutes before you want to roast it. Pat it super dry inside and out (like, weirdly dry—gives crispier skin apparently. Science!).
- Salt and pepper the cavity really well. Stuff in the bunch of thyme, both lemon halves, and that crosswise-cut garlic head (some days I toss in a rosemary twig for fun).
- Brush the outside with melted butter (I admit, sometimes I just drizzle olive oil and kind of massage it in like a spa day), then sprinkle a generous rainstorm of salt and pepper over the whole chicken.
- Grab a roasting pan; scatter the onion slices in the bottom. Place the chicken breast-side up, sitting like a queen on her onion throne. Tie the legs with kitchen string (or not—sometimes I skip this and nothing chaotic happens).
- Surround the chicken with those halved potatoes (or your chosen root veggies), and pour the chicken broth into the pan, but not on the chicken (once I did that and couldn’t get the skin to crisp—it’s fine, but don’t).
- Roast for 1 hour 15 minutes, or until the juices run clear when you cut between a leg and thigh. At 45 mins, I usually snag a potato just to check if things are headed in the right direction. Sometimes they need an extra splash of broth halfway, especially if your oven’s got opinions.
- Take the chicken out and let it rest, tented with foil, for 10-15 minutes. This is vital. Slicing too soon = sadness.
- Carve it up (as best you can—I’m still not elegant at this) and serve everything with those dreamy roasted potatoes and onions, ladling the pan juices over the top. If you want to get all fancy, scatter a bit of extra fresh thyme at the end.

Little Discoveries (Real Notes from Experience)
- Letting the chicken sit outside the fridge is not optional (unless dry, tough chicken is the vibe you want).
- I’ve found that if you crowd the pan too much, nothing browns properly. Give those potatoes some elbow room.
- Apparently, tying the legs helps keep the breast juicy, but I always forget and it turns out fine. Your mileage may vary.
Swaps and Experiments I’ve Tried (Honesty Incoming)
- Used sage instead of thyme—delicious, but probably too strong for some.
- Sweet potatoes instead of Yukon Golds. They got a bit mushy, but still very edible.
- Tried skipping the onion once: tasted a bit flat, wouldn’t recommend, but if you’re out, add another potato and move on with your day.

What You’ll Need (But Not Always)
- Roasting pan or big oven-safe dish. Don’t have one? An old casserole dish with tinfoil works; just lower the temp by 10 degrees maybe.
- Kitchen string, which I never actually have. Dental floss (the plain stuff, not minty!) works in an emergency.
- Cutting board for carving. Ignore the pristine chef videos—just embrace the mess.
How Long Does It Keep? (In Theory…)
Technically, leftovers go in the fridge for up to three days. But let’s be serious: it rarely survives till morning in my house. If it does, cold lemon chicken sandwiches are ace for lunch! Or tuck the extra bits into wraps and act like you’re that organized.
Serving Suggestions—What We Actually Do
I love this chicken with a big green salad and a crusty loaf to mop up the pan juices. Sometimes we throw in steamed green beans for color (but that’s mainly so I feel healthy). My uncle always wants extra lemon slices for squeezing at the table, so I slice up another and let him go nuts.
Pro Tips, Learned the Hard Way
- Do NOT rush the resting step. One time I did and ended up with a puddle of juice and sort of sad chicken slices (learned the hard way!).
- Actually, drying the chicken before the oven is more important than I thought. Soggy skin is a letdown.
- If you’re hoping for brown, crispy potatoes, make sure they aren’t sitting in too much broth. Or take them out and crisp them under the broiler for a few mins while the chicken rests.
FAQ—Stuff Folks Actually Ask Me All the Time
- Can I make this with boneless chicken breasts? You can, just don’t expect the same juicy results (been there, done that, a bit dry!). Maybe lower the cook time and use a thermometer just to be sure.
- What if I don’t have fresh thyme? Dried thyme is fine—just use less (it’s stronger). Or honestly, any herby blend will work in a pinch.
- Does it really matter what kind of potato I use? Not too much. Yukon Golds are my fave for their buttery texture, but honestly any potato I pull from the bin works, unless it’s actually sprouting. Then…maybe not.
- How do I know when the chicken is done? Check if the juices run clear between the thigh and the body. Or use a meat thermometer—165°F in the deepest part is spot on. Don’t just guess (like I used to).
- Can I prep anything ahead? Yep! Sometimes I chop the onions, potatoes and get the lemon and garlic ready earlier in the day. Makes things way less panicky round dinnertime.
Anyway, if you make this, let me know how it turns out! Or if you accidentally end up zesting lemons onto your coffee, you’re in good company. Happy roasting!
Ingredients
- 1 (about 5-pound) roasting chicken (sometimes I just grab two smaller ones if the shop’s out, works fine!)
- Kosher salt (or just regular table salt, which is what my neighbor uses—her chicken’s still great)
- Freshly ground black pepper (but pre-ground is totally manageable if you’re in a rush — I can’t always be fancy)
- 1 large bunch fresh thyme (I ran out once and tossed in some dried Italian herbs; not the same, but still tasty)
- 1 lemon, halved (any lemon will do, Meyer if you want to feel posh)
- 1 head garlic, sliced in half crosswise (I’ve even skipped this when tragically garlic-less)
- 2 tablespoons melted butter (or olive oil, which makes me feel a bit more Mediterranean—use what you’ve got)
- 1 large yellow onion, thickly sliced (red onion works but makes it slightly sweeter, weirdly?)
- 1 cup chicken broth (boxed, homemade, or just water with a bouillon cube if you’re me on a Monday)
- 8 small Yukon Gold potatoes, halved (I’ve swapped in carrots or whatever root veg is flopping around my fridge)
Instructions
-
1Preheat your oven to 425°F (220°C). I sometimes forget and realize halfway in, so if you do too, just wait it out.
-
2Take the chicken out of the fridge about 30 minutes before you want to roast it. Pat it super dry inside and out (like, weirdly dry—gives crispier skin apparently. Science!).
-
3Salt and pepper the cavity really well. Stuff in the bunch of thyme, both lemon halves, and that crosswise-cut garlic head (some days I toss in a rosemary twig for fun).
-
4Brush the outside with melted butter (I admit, sometimes I just drizzle olive oil and kind of massage it in like a spa day), then sprinkle a generous rainstorm of salt and pepper over the whole chicken.
-
5Grab a roasting pan; scatter the onion slices in the bottom. Place the chicken breast-side up, sitting like a queen on her onion throne. Tie the legs with kitchen string (or not—sometimes I skip this and nothing chaotic happens).
-
6Surround the chicken with those halved potatoes (or your chosen root veggies), and pour the chicken broth into the pan, but not on the chicken (once I did that and couldn’t get the skin to crisp—it’s fine, but don’t).
-
7Roast for 1 hour 15 minutes, or until the juices run clear when you cut between a leg and thigh. At 45 mins, I usually snag a potato just to check if things are headed in the right direction. Sometimes they need an extra splash of broth halfway, especially if your oven’s got opinions.
-
8Take the chicken out and let it rest, tented with foil, for 10-15 minutes. This is vital. Slicing too soon = sadness.
-
9Carve it up (as best you can—I’m still not elegant at this) and serve everything with those dreamy roasted potatoes and onions, ladling the pan juices over the top. If you want to get all fancy, scatter a bit of extra fresh thyme at the end.
CLICK FOR NUTRITION INFO
↑
Approximate Information for One Serving
Serving Size:
1 serving
Calories:
540 caloriescal
Protein:
41 gg
Fat:
28 gg
Saturated Fat:
0g
Trans Fat:
0g
Cholesterol:
0mg
Sodium:
0mg
Potassium:
0mg
Total Carbs:
32 gg
Fiber:
0g
Sugar:
0g
Net Carbs:
0g
Vitamin A:
0
Vitamin C:
0mg
Calcium:
0mg
Iron:
0mg
Nutrition Disclaimers
Number of total servings shown is approximate. Actual number of servings will depend on your preferred portion sizes.
Nutritional values shown are general guidelines and reflect information for 1 serving using the ingredients listed, not including any optional ingredients. Actual macros may vary slightly depending on specific brands and types of ingredients used.
To determine the weight of one serving, prepare the recipe as instructed. Weigh the finished recipe, then divide the weight of the finished recipe (not including the weight of the container the food is in) by the desired number of servings. Result will be the weight of one serving.
Did you make this recipe?
Please consider Pinning it!