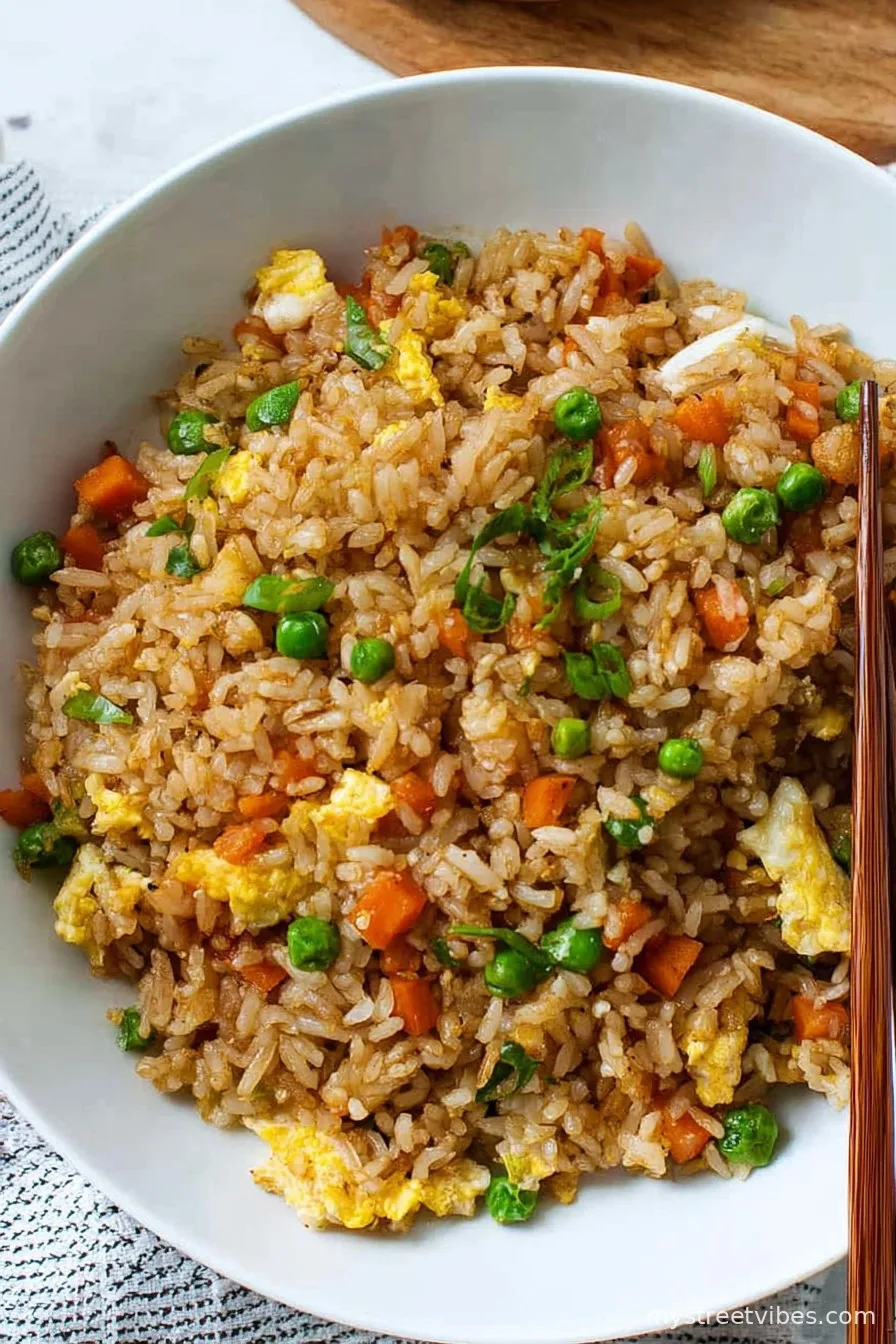
Let Me Tell You About My Go-To Fried Rice
Okay, real talk — sometimes, it’s 6:37PM (not 6:30 or 7, but right in that weird sweet spot), and I realize I totally spaced on dinner plans. Sound familiar? Easy Fried rice to the rescue! I started making this way back in college when all I had was a questionable frying pan and a rice cooker handed down from my aunt (which, tragically, never made it through the great moving accident of 2014). To this day, every time I make it, it reminds me of late-night kitchen improv sessions and that one roommate who always “sampled” half the finished bowl before anyone else got a chance — here’s looking at you, Dan.
Why This Stays On My Weekly Repeat List
I make this when I have mystery leftovers, or rice from last night’s takeout (since, let’s be honest, I always make too much). My family goes crazy for this because you can throw nearly anything into it and call it dinner. Sometimes I curse under my breath when I can’t find frozen peas, but actually, any veggie will do the trick. No kidding, one time I tossed in roasted brussels sprouts because it was all I had — not bad. (Don’t tell my kids they ate that and survived!)
Ingredients (with a Few Honest Substitutions)
- 3 cups cooked rice (leftover or day-old is THE move — fresh works, but it’s a little sticky for my taste)
- 2 eggs, lightly beaten (or sometimes just 1 egg if that’s all I’ve got, and nobody’s ever noticed)
- 1 small onion, diced (red or yellow, whatever’s rolling around in the drawer)
- 1 cup frozen peas and carrots (I swap with corn if that’s what I’ve got; honestly, fresh chopped veggies are fine too)
- 2 scallions, sliced (my grandmother always insisted on the green parts only, but I use the whole thing — less waste, right?)
- 2–3 tablespoons soy sauce (I use low-sodium because, well, salt, but regular is fine — Tamari also works if you’re gluten-free)
- 1 garlic clove, minced (in a pinch, garlic powder is okay — I won’t tell)
- 1 tablespoon sesame oil (or skip it, but it adds a nice toasty vibe)
- 1–2 tablespoons neutral oil (I always use canola, but any veggie oil works here — don’t stress it)
- Salt and pepper to taste (I usually barely add any, but taste and see what you like)
How I Pull This All Together
- First things first, prep everything before you start — seriously, once you get going it moves fast. Dice the onion, slice the scallions, measure stuff…or just wing it (I do sometimes, and it’s always edible!).
- Heat up a large skillet or wok over medium-high heat. Get it nice and hot, add 1 tablespoon of neutral oil. (If you don’t have a wok, don’t stress, a regular ol’ frying pan works too. I did this for years.)
- Toss in the onions and sauté for about 2 minutes until they start to look translucent (but not burnt — which happens to the best of us!). Throw in the garlic next and stir for a quick 30 seconds or so; this is where I usually sneak a taste and occasionally burn my tongue. Classic move.
- Add the peas and carrots (or whatever veggies you found buried in the freezer). Cook ’em until they’re heated through, maybe a couple minutes, maybe a bit more. Don’t worry if the colors look a little sad right now — soy sauce saves all.
- Slide all the veggies to one side of the pan; pour the beaten eggs onto the other side. Let them cook for a minute before you start scrambling. (I once tried to rush this and ended up with odd eggy globs — patience pays off, trust me.) When they’re soft scrambled, mix everything together.
- Now, in goes the rice. Scrape it in, break apart the clumps as best you can (cold rice will look a bit weird right now, but that’s good!). Stir everything up so the rice gets to know its vegetable and egg friends.
- Drizzle over soy sauce and sesame oil. Mix like the wind so everything gets coated. Taste and add salt and pepper if it needs it (sometimes I go heavy on pepper, especially if I’m feeling fiesty).
- Turn off the heat and top with those sliced scallions. Stand back and admire your work, then…dive in. Or pretend to wait until everyone’s at the table, but we all know how that goes.
A Few Notes from My Experience
- Day-old rice wins every time; fresh rice is just too sticky. If you have to use fresh, cool it in the fridge or freezer for a bit.
- Don’t crowd the pan — sometimes I try to double the recipe and regret it because things get mushy.
- If you’re feeling fancy, add a splash of oyster sauce or toss in some leftover roast chicken (never had a complaint about that).
Things I’ve Tried (and One I Won’t Repeat!)
- Tossed in leftover pulled pork once. Game changer.
- Used quinoa instead of rice for my “health kick” phase — surprisingly good, but not as “fried ricey” if you know what I mean.
- One mistake? I tried using cauliflower rice for a “keto” thing…let’s just say, some things are sacred (and my husband agreed, for once!).
- Sometimes I splash in a little chili oil for a fiery kick, but my kids run for the hills.

What If I Don’t Have a Wok? (Or Other Tools)
Honestly, a regular skillet is just fine — maybe takes a minute longer and you’ll have to move things around a bit more. I’ve even managed this in an ancient, slightly warped nonstick pan form my college days (don’t judge). Wooden spoon, spatula, whatever you’ve got — just keep things moving.
How to Store Fried Rice (Though… Does It Ever Last?)
Store leftovers (if any survive) in an airtight container in the fridge. It’ll stay good for about two days. Honestly, in my place it barely makes it past breakfast the next morning. Cold fried rice with a splash of soy for breakfast? Don’t knock it till you try it.
How We Like to Serve It (Tradition, Sort Of)
Sometimes I plate it up with extra scallions on top, maybe a quick squeeze of sriracha if I’m feeling bold. My partner insists on a slice of lime on the side, but that’s their thing. Once in a while I’ll round things out with leftover grilled chicken or tofu — or just serve as is and let everyone fend for themselves.
Pro Tips (Learned the Hard Way)
- Don’t dump all the soy sauce in at the start — add, taste, repeat. I once created soy-soup by accident.
- If you use fresh rice, don’t panic when it clumps; just break it up as best you can or add a splash of water to loosen.
- Let your pan get properly hot before you start. Cold pan equals soggy rice, sigh.
FAQ (Not-So-Serious Answers to Real-Life Friend Questions)
- Can I freeze fried rice? Yep, you sure can. Freeze in portions, reheat in microwave or skillet. On second thought, I’ve noticed the veggies get a bit mushy — but still tastes good.
- Is soy sauce a must? I’d say… almost, but you can sub coconut aminos or even tamari (my neighbor tried Worcestershire once… and, well, it worked shockingly well!).
- What about fancy add-ins? Absolutely — shrimp, leftover roast anything, even pineapple if you feel tropical. Just avoid raw potatoes (tried that, and…nope).
- Do I really need sesame oil? Nah — it adds a nice touch, but I’ve made this plenty without it and no one’s complained yet.
- Why is my fried rice mushy? Usually it’s too much moisture or crowding the pan (guilty!). Sometimes using warm rice just does that — give it some chill time next try.
Oh, before I forget (classic me) — turn on some music while you cook. Everything tastes better with a bit of a groove, especially if you do a happy dance while stirring. Enjoy, and let me know if you come up with any wild substitutions I should try… unless it’s raw potatoes, then let’s just agree to disagree!
Ingredients
- 3 cups cooked rice (leftover or day-old is THE move — fresh works, but it’s a little sticky for my taste)
- 2 eggs, lightly beaten (or sometimes just 1 egg if that’s all I’ve got, and nobody’s ever noticed)
- 1 small onion, diced (red or yellow, whatever’s rolling around in the drawer)
- 1 cup frozen peas and carrots (I swap with corn if that’s what I’ve got; honestly, fresh chopped veggies are fine too)
- 2 scallions, sliced (my grandmother always insisted on the green parts only, but I use the whole thing — less waste, right?)
- 2–3 tablespoons soy sauce (I use low-sodium because, well, salt, but regular is fine — Tamari also works if you’re gluten-free)
- 1 garlic clove, minced (in a pinch, garlic powder is okay — I won’t tell)
- 1 tablespoon sesame oil (or skip it, but it adds a nice toasty vibe)
- 1–2 tablespoons neutral oil (I always use canola, but any veggie oil works here — don’t stress it)
- Salt and pepper to taste (I usually barely add any, but taste and see what you like)
Instructions
-
1First things first, prep everything before you start — seriously, once you get going it moves fast. Dice the onion, slice the scallions, measure stuff…or just wing it (I do sometimes, and it’s always edible!).
-
2Heat up a large skillet or wok over medium-high heat. Get it nice and hot, add 1 tablespoon of neutral oil. (If you don’t have a wok, don’t stress, a regular ol’ frying pan works too. I did this for years.)
-
3Toss in the onions and sauté for about 2 minutes until they start to look translucent (but not burnt — which happens to the best of us!). Throw in the garlic next and stir for a quick 30 seconds or so; this is where I usually sneak a taste and occasionally burn my tongue. Classic move.
-
4Add the peas and carrots (or whatever veggies you found buried in the freezer). Cook ’em until they’re heated through, maybe a couple minutes, maybe a bit more. Don’t worry if the colors look a little sad right now — soy sauce saves all.
-
5Slide all the veggies to one side of the pan; pour the beaten eggs onto the other side. Let them cook for a minute before you start scrambling. (I once tried to rush this and ended up with odd eggy globs — patience pays off, trust me.) When they’re soft scrambled, mix everything together.
-
6Now, in goes the rice. Scrape it in, break apart the clumps as best you can (cold rice will look a bit weird right now, but that’s good!). Stir everything up so the rice gets to know its vegetable and egg friends.
-
7Drizzle over soy sauce and sesame oil. Mix like the wind so everything gets coated. Taste and add salt and pepper if it needs it (sometimes I go heavy on pepper, especially if I’m feeling fiesty).
-
8Turn off the heat and top with those sliced scallions. Stand back and admire your work, then…dive in. Or pretend to wait until everyone’s at the table, but we all know how that goes.
CLICK FOR NUTRITION INFO
↑
Approximate Information for One Serving
Serving Size:
1 serving
Calories:
285cal
Protein:
7 gg
Fat:
9 gg
Saturated Fat:
0g
Trans Fat:
0g
Cholesterol:
0mg
Sodium:
0mg
Potassium:
0mg
Total Carbs:
43 gg
Fiber:
0g
Sugar:
0g
Net Carbs:
0g
Vitamin A:
0
Vitamin C:
0mg
Calcium:
0mg
Iron:
0mg
Nutrition Disclaimers
Number of total servings shown is approximate. Actual number of servings will depend on your preferred portion sizes.
Nutritional values shown are general guidelines and reflect information for 1 serving using the ingredients listed, not including any optional ingredients. Actual macros may vary slightly depending on specific brands and types of ingredients used.
To determine the weight of one serving, prepare the recipe as instructed. Weigh the finished recipe, then divide the weight of the finished recipe (not including the weight of the container the food is in) by the desired number of servings. Result will be the weight of one serving.
Did you make this recipe?
Please consider Pinning it!