A Quick Chat About How I Fell for Keto Pizza Skillet
You know how sometimes you just crave pizza, but your fridge is crying out, “Please…not another dough-based carb-fest!”? That’s exactly where this Keto Pizza Skillet came into my life. I was knee-deep in one of those never-ending busy weeks—kids yelling, husband asking if I’ve seen his lost “work-from-home pants” (really, Steve?), and the dog looking up at me like, please, anything but salad again. I used to think keto meant I’d given up on pizza forever, but one night I sort of frankensteined this skillet version together, and it just…worked. Well, after a few sticky experiments. First time I tried, my cheese got all weird and separated, which was almost tragic, but that’s another story for another bowl of regret.
Why You’ll Pretty Much Fall in Love With This One
I make this Keto Pizza Skillet whenever I’m short on time (which is, you know, most days), but really want something hot and comforting after work. My family? They basically cheer when this arrives at the dinner table. Mostly because it smells exactly like a regular pizza, but also because no one’s fighting over the last slice or crying about pineapple on pizza (don’t get me started). There’s no waiting for dough to rise; and if I’m being honest, sometimes that one-pan hack is the only thing standing between me and just ordering takeout—again.
- I make this when it’s raining, too. Makes the whole house smell like an Italian pizzeria, but without hauling out the pizza stone buried under the slow cooker in the back of the cupboard.
- If you ever forgot to thaw something for dinner (oh, the joy!), this is pretty forgiving. I’ve used frozen ground beef a few times, just needed longer in the skillet.
- And if you ever burned the cheese under the broiler (like I did once while on a TikTok rabbit hole), it’s still edible, just extra crispy. That’s a win, right?
Grab These Ingredients (Or What’s Close Enough)
- 500g ground beef or Italian sausage (I sometimes use turkey mince if that’s all I’ve got—tastes a bit lighter)
- 1 tsp dried Italian herbs (my grandmother always insisted on the stuff from the Italian market, but honestly any brand works fine)
- 1/2 tsp garlic powder (or a couple of fresh cloves if you’re feeling brave and don’t have a date later)
- 1/2 tsp onion powder
- 1 cup sugar-free marinara sauce (Rao’s if you feel fancy, or just whatever store brand is on sale)
- 2 cups shredded mozzarella (sometimes I toss in cheddar; gives it a nice kick)
- 1/2 cup grated parmesan
- 1/2 cup chopped bell pepper (red’s sweeter, green’s more bitey, both work!)
- 1/4 cup sliced black olives (totally optional, unless you’re my sister, then they’re non-negotiable)
- Handful of sliced pepperoni (about 60g; or skip it if you don’t eat pork, salami can work too)
- Drizzle of olive oil
- Salt & pepper to taste (go gentle, the cheese is salty already!)
How to Actually Throw This Keto Pizza Skillet Together
- Sizzle the Meat: Grab your biggest nonstick skillet—cast iron is best, but honestly any decent frying pan will do. Medium heat. Drizzle a bit of olive oil in, then add the ground beef or sausage. Mash it up with a wooden spoon until browned and cooked through—about 6-8 minutes. Don’t freak out if you see some juices. Just let it cook off or spoon it away. (Here’s where I usually sneak a taste. Perks of being the cook, right?)
- Add Herbs & Flavors: Sprinkle over the garlic powder, onion powder, and Italian herbs. Give it a solid stir and let things get fragrant. If things start sticking, a splash of water sorts it out, I promise.
- Layer the Veg: Toss in the bell pepper, and let it soften a bit, maybe 2-3 minutes. If you’re using mushrooms or hiding spinach in it (not judging), this is the time. Or not. No rules here.
- Pour in Sauce: Pour that marinara right over the meat mixture. Mix it around so everything’s nice and coated. Doesn’t have to be pretty! Lower the heat so it does a slow bubble—like a cat purring, not volcanically erupting.
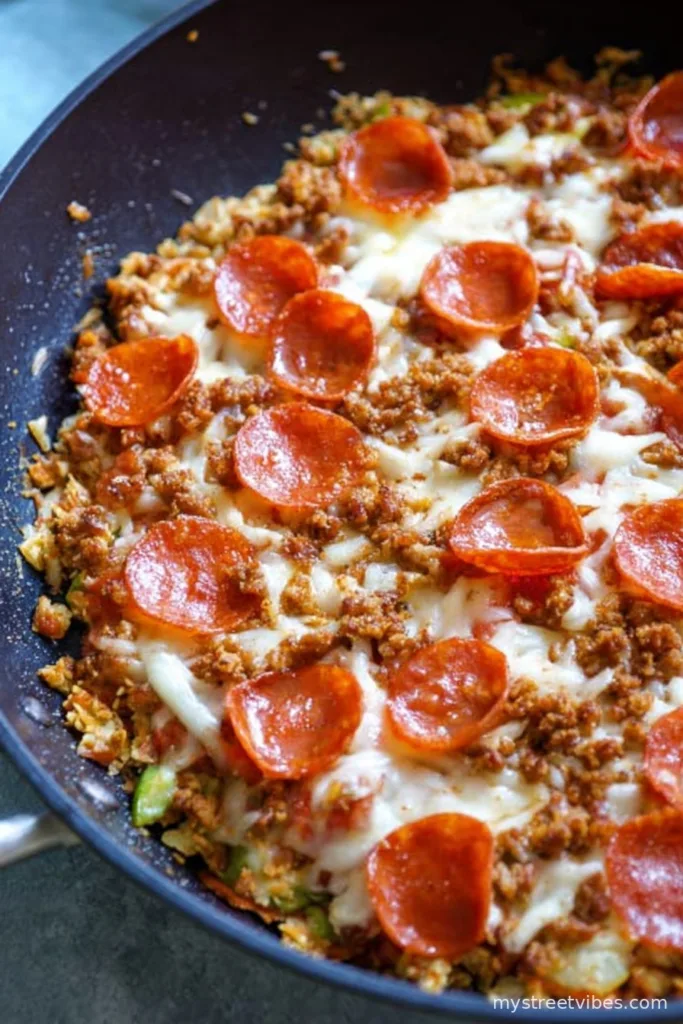
- Make it Pizza-y: Scatter the mozzarella, parmesan, and olives all over. I usually plop pepperoni slices on top like buttons. No science, just make it look like a pizza. Kids sometimes fight about who gets the piece with the most pepperoni; oh well.
- Cover & Melt: If your skillet’s got a lid, pop it on. Otherwise, foil works okay. Let it sit on low for about 5-7 minutes until the cheese is oozy and gooey. Actually, I find it works better if you remove the lid the last minute so the top doesn’t get too soggy.
- Serve: Take it off the heat, let it cool just for a sec (molten cheese = mouth injury, ask me how I know), then cut into wedges or just scoop straight from the pan. Look, sometimes we eat this right out of the skillet. Judge if you want.
Some Notes On What Actually Works (And What…doesn’t)
- I tried the low-fat cheese once—don’t recommend it unless you love rubbery pizza
- If you use a cast-iron skillet, I think the crispy edge bits are the best part
- Once, I used leftover roast chicken instead of beef; tasted more like BBQ pizza but still pretty good
- Kids will eat this, as long as there’s enough cheese to hide the veggies. It’s a science all its own
- Honestly, I think this tastes better the next day (if there’s any left, which…rarely happens)
If You Want to Mix Things Up
- I’ve thrown in jalapeños for a spicy kick—surprisingly good, maybe too spicy for the littlest ones but hey, more for me
- Try pesto instead of marinara. Turns out green and looks a little odd, but hearty and delicious
- One time I tried making this with cauliflower rice as a ‘base’—would not recommend unless you really love cauliflower. Like, really love it
- You can make it vegetarian, just pile on sautéed mushrooms and skip the meat. Still hearty
What If You Don’t Have a Skillet?
Look, if you don’t have that trusty skillet, any oven-safe frying pan works. I’ve also dumped everything in a casserole dish and finished under the broiler—it’s not the same, but it ain’t bad. Here’s a skillet buying guide I used when mine finally gave up the ghost (don’t buy the super cheap ones; trust me, I learned). Or, just use whatever you’ve got and call it rustic!

Storing This—But Honestly, Will You Even Need To?
Officially, you can pop leftovers in an airtight container and stash in the fridge for up to 3 days. In my house, there are never leftovers past day one, but I imagine this would reheat well in the microwave (not that I’ve ever had a chance). If you want more texture, put it back in the skillet with a splash of water. Freezing? Yeah, did that once—not quite as good as fresh but still edible.
How We Eat It (Serving Suggestions and Familial Shenanigans)
I sometimes serve this right in the skillet (partly because I’m lazy about dirtying extra plates, but also because it keeps warm longer). If I have a bit more time, we’ll make a quick salad on the side—arugula with lemon is best with the rich cheese. On weekends, my youngest insists on dipping each bite in hot sauce (go figure) and once, my husband tried putting a fried egg on top. Was surprisingly not awful.
Oh—if you need a keto-friendly garlic bread, KetoConnect has a fun recipe. I’ve made it with this and no one argued.
A Few Humbling Pro Tips (Basically, Learn From My Chaos)
- I once rushed the browning step—meat turned out too watery and bland. Don’t skip or rush this, it’s worth the extra patience!
- Don’t add the cheese too soon or it’ll disappear into the sauce. Actually, I find it works better if you let the sauce thicken a little first
- If your cheese is extra stringy, give it a minute off heat to settle before you eat—or you’ll be pulling cheese strings to the next room, like some sort of food magician. Not a bad thing, actually!
Your Questions, Answered (Or At Least, Attempted)
- Can I use ground chicken or turkey? Yep, done it myself. A bit lighter in taste, but still yummy. Maybe add more seasoning if you do
- Do I have to use marinara? Nope. Any kind of tomato sauce works, just check for added sugar if you’re strict keto. Once used salsa instead. That was…wild
- Is this kid-friendly? In my (limited) experience, yes! If you hide the veggies under the cheese, they won’t even notice (parenting hack #101)
- What if I don’t have Italian seasoning? Just sprinkle in oregano, basil, and maybe a bit of thyme. Or whatever green herbs you find in the cabinet; I won’t tell
- Can I bake this instead of stovetop? Totally. Transfer to a casserole, bake at 375°F/190°C for about 15 minutes til the cheese bubbles. Easier if you want to leave it unattended
- Is this really pizza? Look, it might not win over pizza snobs, but for me? It hits the spot every time
So that’s the real story of how I make Keto Pizza Skillet in my house. Some days neat, other days a mess, always delicious. And if you do end up with leftovers, do me a favor: try it cold from the fridge for breakfast? It’s a little odd, but somehow…kind of great. Let me know how it goes!

Ingredients
- 1 lb ground Italian sausage
- 1 cup shredded mozzarella cheese
- 1/2 cup low sugar marinara sauce
- 1/2 cup sliced pepperoni
- 1/4 cup sliced black olives
- 1/2 small green bell pepper, diced
- 1/4 cup grated Parmesan cheese
- 1 tsp Italian seasoning
Instructions
-
1Preheat your oven broiler. Heat a large oven-safe skillet over medium-high heat.
-
2Add ground Italian sausage to the skillet and cook until browned, breaking apart with a spatula.
-
3Reduce the heat to medium and spread marinara sauce evenly over the sausage.
-
4Sprinkle mozzarella cheese over the sauce. Top with pepperoni, black olives, and green bell pepper.
-
5Sprinkle Italian seasoning and Parmesan cheese over the top.
-
6Transfer the skillet to the oven and broil for 2-3 minutes, or until the cheese is bubbly and golden. Serve hot.
CLICK FOR NUTRITION INFO
↑
Approximate Information for One Serving
Serving Size:
1 serving
Calories:
390cal
Protein:
25 gg
Fat:
30 gg
Saturated Fat:
0g
Trans Fat:
0g
Cholesterol:
0mg
Sodium:
0mg
Potassium:
0mg
Total Carbs:
6 gg
Fiber:
0g
Sugar:
0g
Net Carbs:
0g
Vitamin A:
0
Vitamin C:
0mg
Calcium:
0mg
Iron:
0mg
Nutrition Disclaimers
Number of total servings shown is approximate. Actual number of servings will depend on your preferred portion sizes.
Nutritional values shown are general guidelines and reflect information for 1 serving using the ingredients listed, not including any optional ingredients. Actual macros may vary slightly depending on specific brands and types of ingredients used.
To determine the weight of one serving, prepare the recipe as instructed. Weigh the finished recipe, then divide the weight of the finished recipe (not including the weight of the container the food is in) by the desired number of servings. Result will be the weight of one serving.
Did you make this recipe?
Please consider Pinning it!!