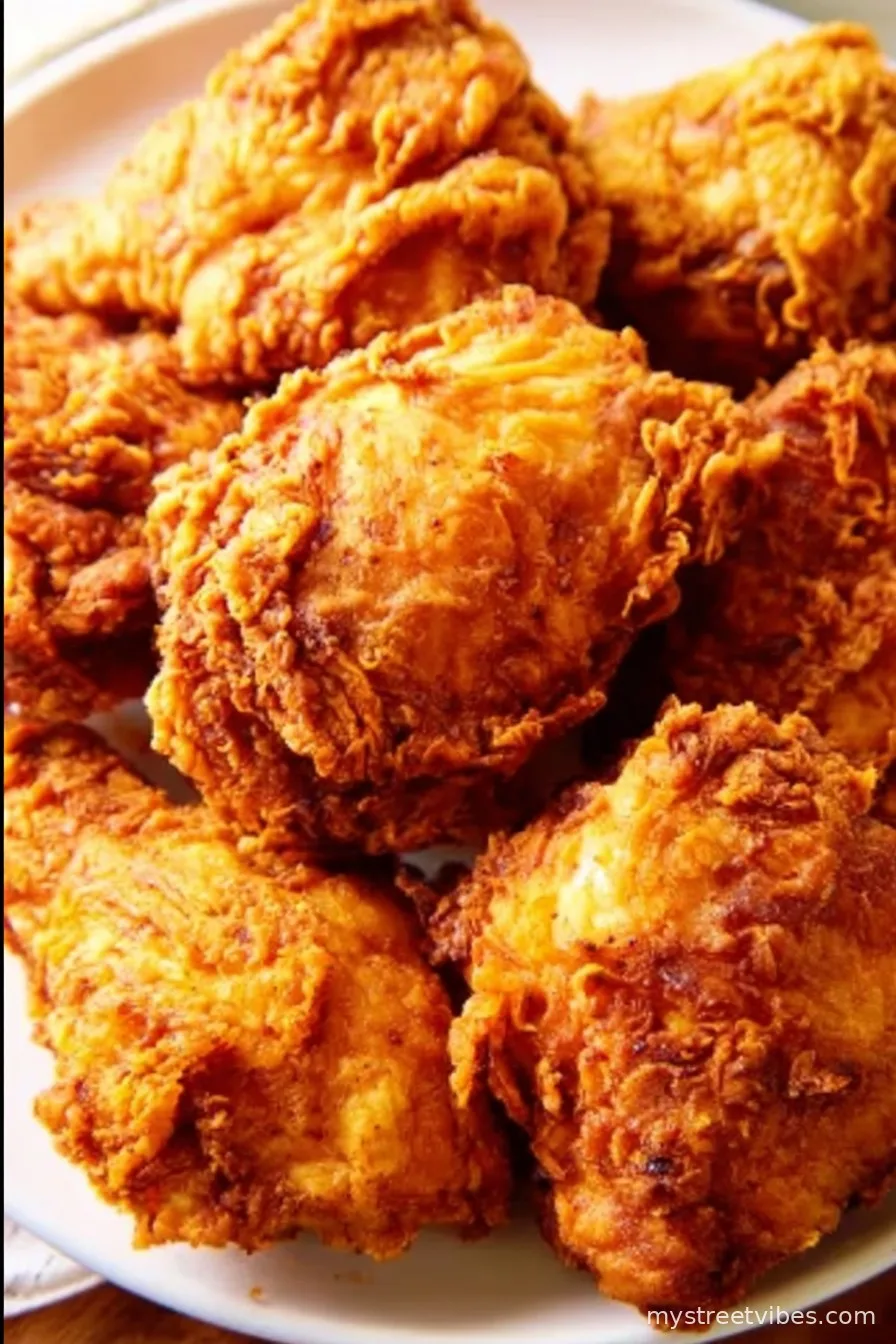
Let’s Talk About This Southern Fried Chicken—You Ready?
You know, sometimes dinner just needs to be a bigger deal. Like those long summer evenings when folks stop by and everyone’s just hungry (and probably a touch nosey)? Well, this Southern fried chicken is my go-to. I still remember burning my hand on the oil as a kid because I couldn’t wait. Mom just said, “That’s how you learn.” Anyway, the smell alone would fill the whole porch—and if you didn’t get to the table fast, you’d get stuck with a wing and nothing else. Not that I minded wings, really, but let’s be honest—everyone’s chasing a drumstick.
Why You’ll Love This (Well, At Least I Do!)
I make this when my cousins come over and want something “real.” It’s practically a bribe. My family goes a little wild for the crispy skin (and I may have had to hide a couple of pieces now and then). And if we’re talking honesty—sometimes I mess up a batch if I’m distracted and it still turns out better than half the restaurant versions. That buttermilk soaking step annoyed me for ages (‘cuz who plans ahead?)—but actually, I find it works better if you let it sit overnight. Or at least for a song or two from the oldies radio. Wouldn’t skip the hot sauce, either, unless you like life bland.
Here’s What You’ll Need (and Maybe What You Don’t)
- 1 broiler chicken (cut into 8 or so pieces) – though, when in a rush, just use drumsticks or thighs. Bone-in is nicer but don’t fret if you’ve got boneless
- 2 cups buttermilk – whole milk with a splash of vinegar will do in a pinch (my neighbor swears by kefir, but I haven’t tried it)
- 1 tablespoon hot sauce – I toss in more if I’m feeling bold; totally optional
- 2 cups all-purpose flour – Grandma swears by White Lily but honestly, it all works out
- 2 teaspoons paprika
- 1 1/2 teaspoons garlic powder
- 1 teaspoon each: onion powder, salt, ground black pepper, and cayenne (sometimes I double up the cayenne for a kick, not always accidentally)
- 1/2 teaspoon dried thyme (sometimes I forget this, can’t tell much of a diff!)
- Oil for frying (peanut oil tastes best, but vegetable oil works fine—I once used canola since that’s all I had, tasted just dandy)
Alright, Here’s How I Fry It Up—Step by Step (Kind Of)
- Soak the chicken: Toss your chicken pieces into a big bowl. Pour over the buttermilk and hot sauce; squiggle everything around so it’s nice and coated. Cover and let it chill in the fridge for anywhere from 3 hours to overnight (overnight is dreamy, but sometimes I totally forget and only do an hour. Not the end of the world).
- Mix up the coating: In a big brown paper bag (this is my favorite part—so much easier), dump in the flour, paprika, garlic powder, onion powder, salt, pepper, cayenne, and thyme. Give it a shuffle or shake. If you don’t have a bag, just use a big bowl; nothing fancy needed.
- Coat the chicken: Fish pieces out of the buttermilk (don’t wipe ’em off too much) and drop them into the flour mix. Shake, shimmy, make sure they’re buried up nice. This is where I usually sneak a sample of the flour just to see if it’s spicy enough—probably not recommended but hey, it’s tradition around here.
- Frying time: Heat 1 1/2 inches of oil in a Dutch oven (or big, deep skillet) to about 350°F (or until a pinch of flour sizzles and floats). Working in batches (don’t crowd the pan, please!) fry chicken pieces skin-side down first for 8–10 minutes per side, flipping once, until golden and cooked through. Sometimes it takes longer, especially with big thighs, so if you jab a knife in and the juice isn’t clear, give it a few more minutes—but not forever. Rest pieces on a rack over a baking sheet to keep ’em crispy (paper towels just make them sad and soggy, honestly).
Sweet Notes (Ask Me About My Mistakes)
- If you accidentally scorch one piece, just call it “blackened style” and keep serving with a smile.
- I once forgot to let the chicken rest after frying—was still good, just not as crunchy. Let it rest, at least five minutes. It’s worth it.
- Oh—and if the first batch comes out extra dark, turn down the temp, let the oil cool for a spell. It’s the impatient cook’s curse.
Variations (Some Better Than Others…)
- Try a splash of pickle juice in the buttermilk if you’re feeling Old South. Tastes zippier!
- I tried a gluten-free flour—hmm, not my favorite, but my cousin loved it. Texture was…different.
- There’s a “sweet tea” brine version I saw once—honestly, didn’t work for me. The chicken tasted odd, maybe you’ll have better luck?

Equipment—But Don’t Stress It
- A Dutch oven or heavy-bottomed skillet is ideal (but sometimes I use my ugly old soup pot and it works fine—just check your oil depth)
- Tongs help, but in a pinch? A couple of forks do the trick (just watch your knuckles!)
- Cooling rack + sheet tray for crispy bits—Not essential, but it really helps
Staying Fresh (But Spoiler: Hardly Any Leftovers)
Technically, you can keep leftovers in the fridge for 2–3 days, wrapped up tight. Reheat in a 350°F oven so you don’t end up with soggy sadness. But honestly, in my house it never lasts more than a day! Cold fried chicken for breakfast, though? I’m not above it.
Serving Suggestions—What’s Your Family Do?
We always pair it with fluffy mashed potatoes and collard greens (or sometimes just white bread to mop up the juices; don’t judge). Sweet tea on the side is sort of non-negotiable—unless it’s lemonade season. Oh, and if it’s Sunday, I’ll do mac and cheese too. Nothing fancy for garnish—just a big platter and some napkins.
Pro Tips—Learned the Hard Way
- I once tried rushing the oil heating—bad idea. The outside burnt, inside was, well, still trying to cross the road.
- If the breading won’t stick, stick it back in the fridge for 15 minutes after dredging. Actually, I think this makes it crunchier anyway.
- Clean as you go—or you’ll be living with flour footprints for a week. Speaking from experience here.
Chicken Chat: Real (Frequently Asked) Questions
- Can I skip the buttermilk soak? Kinda, but your chicken won’t be as juicy. I’ve tried—only do it if you’re in a rush or seriously impatient.
- Is it spicy? Only if you want it to be! Honestly it’s mild unless you crank up the hot sauce/cayenne, so feel free to noodle with the seasoning.
- What oil do you use? Peanut oil is classic, but I’ve used regular veggie oil more times than I can count (cheaper too!)
- Can I oven-bake it? Well, technically sure, but it’s never quite the same. Still, if you do—crank up the heat, use a wire rack, spray the heck out of the coating with oil first.
- What’s the best cut? Drumsticks for the kids, thighs for everyone else. But really, use whatever’s hiding in your freezer.
- Can I freeze it? Probably, but honestly by the time I’ve thought about it, it’s been devoured already. If you do, reheat in an oven (never the microwave if you want any crunch left).
Now, totally off-topic, but have you ever wondered why some people call it a cookout and others say barbecue? I mean, does it matter when there’s fried chicken? On second thought, maybe that’s just a thing in my family—either way, enjoy, and don’t forget to sneak a little extra coating onto your favorite piece… chef’s privilege!
Ingredients
- 8 pieces bone-in chicken (legs and thighs preferred)
- 2 cups buttermilk
- 2 cups all-purpose flour
- 1 tablespoon paprika
- 1 teaspoon garlic powder
- 1 teaspoon onion powder
- 1 teaspoon salt
- 1 teaspoon black pepper
- 1/2 teaspoon cayenne pepper
- Vegetable oil, for frying
Instructions
-
1In a large bowl, combine the chicken pieces with buttermilk. Cover and refrigerate for at least 1 hour or overnight for best flavor.
-
2In another bowl, mix together the flour, paprika, garlic powder, onion powder, salt, black pepper, and cayenne pepper.
-
3Remove the chicken from the buttermilk, letting the excess drip off. Dredge each piece in the seasoned flour mixture, pressing gently to coat well.
-
4Pour vegetable oil into a large, heavy skillet or Dutch oven to a depth of about 1 inch. Heat the oil to 350°F (175°C).
-
5Fry the chicken in batches, being careful not to overcrowd the pan. Fry each piece for 15-20 minutes, turning occasionally, until golden brown and cooked through.
-
6Transfer the fried chicken to a wire rack or paper towel-lined plate to drain. Let rest briefly before serving.
CLICK FOR NUTRITION INFO
↑
Approximate Information for One Serving
Serving Size:
1 serving
Calories:
520 caloriescal
Protein:
32gg
Fat:
32gg
Saturated Fat:
0g
Trans Fat:
0g
Cholesterol:
0mg
Sodium:
0mg
Potassium:
0mg
Total Carbs:
28gg
Fiber:
0g
Sugar:
0g
Net Carbs:
0g
Vitamin A:
0
Vitamin C:
0mg
Calcium:
0mg
Iron:
0mg
Nutrition Disclaimers
Number of total servings shown is approximate. Actual number of servings will depend on your preferred portion sizes.
Nutritional values shown are general guidelines and reflect information for 1 serving using the ingredients listed, not including any optional ingredients. Actual macros may vary slightly depending on specific brands and types of ingredients used.
To determine the weight of one serving, prepare the recipe as instructed. Weigh the finished recipe, then divide the weight of the finished recipe (not including the weight of the container the food is in) by the desired number of servings. Result will be the weight of one serving.
Did you make this recipe?
Please consider Pinning it!!