So this started with a rainy Tuesday
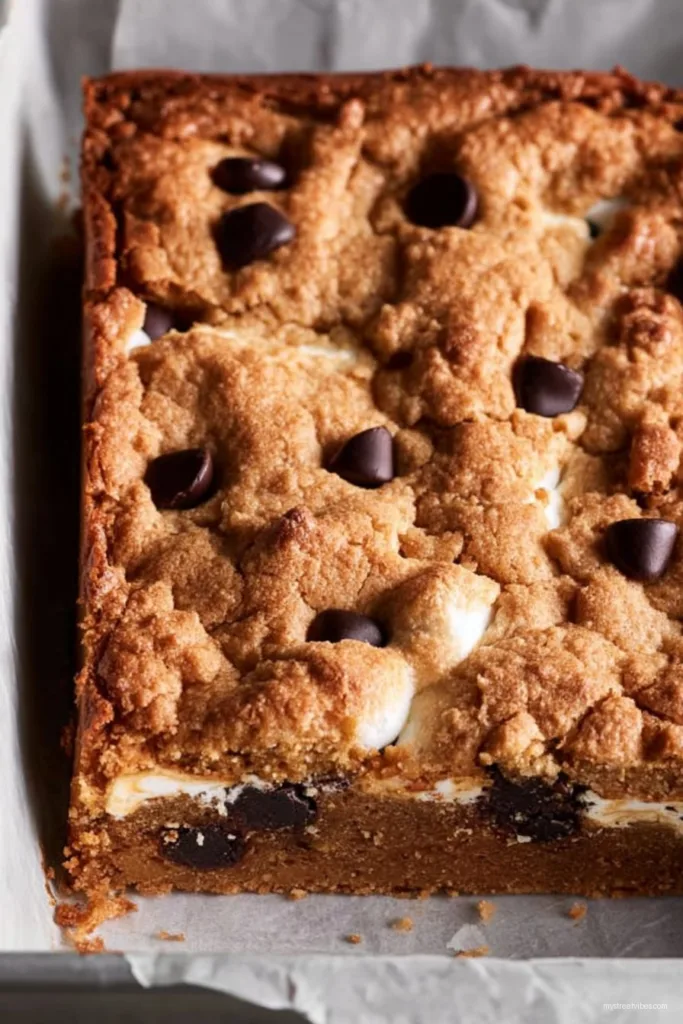
I made these S’mores Cookie Bars the first time on a rainy Tuesday when the power flickered, the dog was snoring, and I was craving that campfire thing without getting smoke in my hair. I figured, why not bake the whole memory into a pan and call it dinner dessert. They came out golden and gooey and, listen, I had to hide a corner square behind the spice rack or my family would have sniffed it out in two seconds flat.
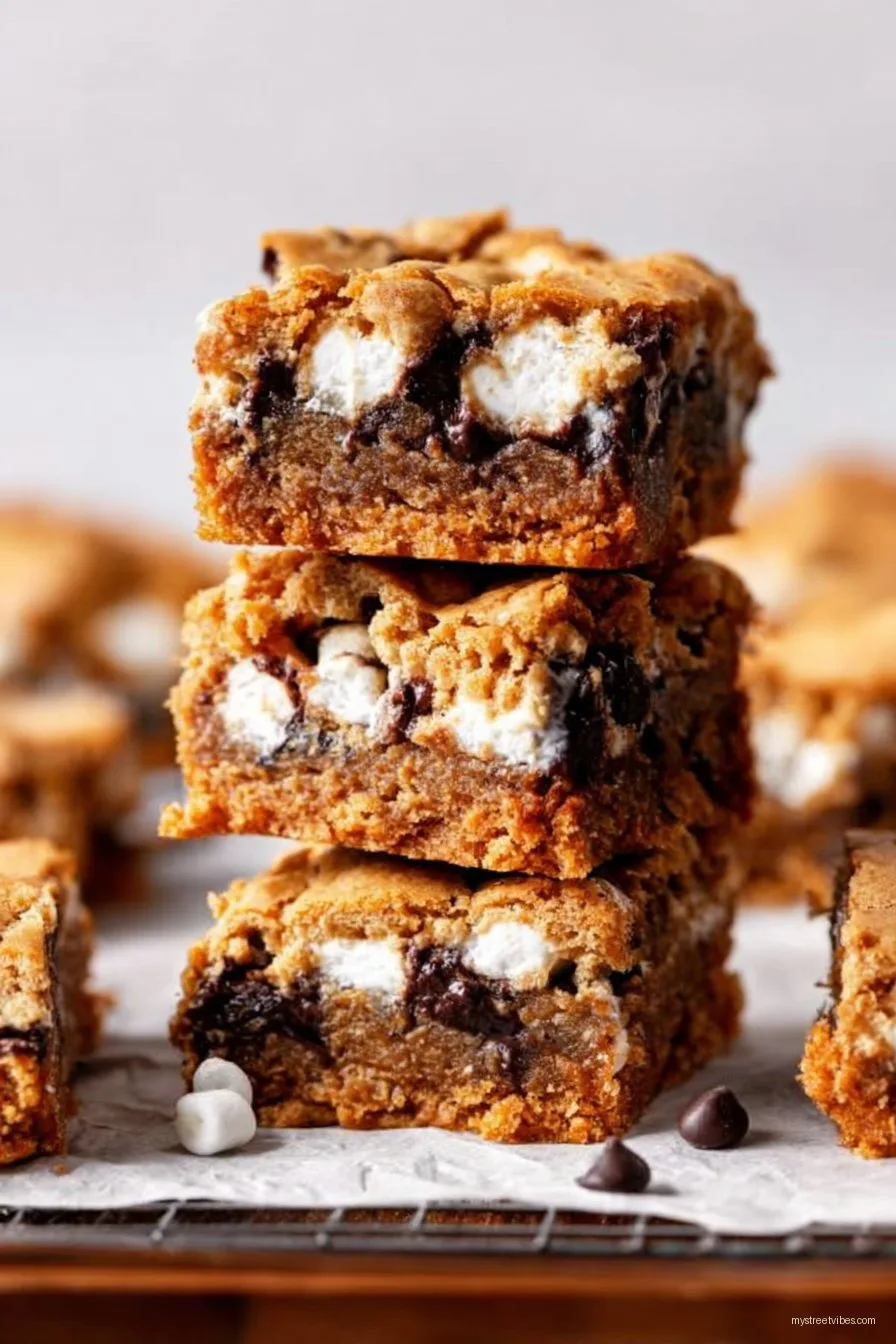
I’ll be honest, I used to slightly overbake them because I thought bars should slice neat like a tidy little book. Nope. These are better a little messy, soft in the middle with chocolate puddles. Which, by the way, is where happiness lives.
Why I keep making these
- I make this when the afternoon goes sideways and I want a one bowl bake that still feels special. Also when we have surprise guests and I need a show off dessert that takes very little brain power.
- My family goes a bit bonkers for these because they taste like a campfire and a cookie had a cozy little meet cute. The marshmallow toasts on top, and people start hovering in the kitchen like birds at a picnic.
- I used to fight with sticky marshmallow strings sticking to the knife, but actually, I find it works better if you chill the pan fifteen minutes before cutting. Tiny pause, huge payoff.
- And when I am out of a thing, I swap and move on. No one has ever noticed unless I tell them. Which I do, because I cannot keep a secret when chocolate is involved.
The ingredients, with my little notes
- 1 cup unsalted butter, melted and slightly cooled 225 g. If all you have is salted butter, just skip the added salt and you’re grand.
- 1 cup light brown sugar, packed 200 g, plus 1 by 4 cup granulated sugar 50 g. My grandmother always insisted on a certain brand, but honestly any version works fine.
- 1 large egg plus 1 egg yolk, room temp if you remember, but if not, no stress.
- 2 teaspoons vanilla extract. I sometimes use a splash of maple when I’m feeling fall-ish.
- 2 cups all purpose flour 250 g. If you like to read up on flour types, the folks at King Arthur Baking explain it beautifully.
- 1 cup finely crushed graham crackers about 8 full sheets, plus an extra handful for sprinkling. I have swapped in digestive biscuits when that’s what I had and it was lovely.
- 1 teaspoon baking powder and 1 by 2 teaspoon baking soda. Yes, both. They make it puff just right.
- 1 by 2 teaspoon fine sea salt. If your butter is salted, use a pinch or none.
- 1 by 2 to 3 by 4 cup chocolate chips or chunks 100 to 130 g. I like a mix of milk and dark. For melty science, I adore this read at Serious Eats.
- 2 cups mini marshmallows or cut up big ones with scissors tossed in a tiny bit of oil so they dont stick to everthing. If you only have big marshmallows, kitchen scissors are your best mate.
How I put it together
- Heat the oven to 350 F 175 C. Line a 9 by 13 inch pan with parchment, letting some hang over so you can lift later. I call this the escape hatch.
- In a big bowl, whisk the melted butter with the brown and granulated sugar until glossy and smooth, about 30 seconds. This is where I usually sneak a taste, purely for quality control.
- Whisk in the egg, then the extra yolk, then the vanilla. If it looks a bit separated, don’t worry, it always does right before it comes together.
- In another bowl, stir together the flour, crushed grahams, baking powder, baking soda, and salt. Or, if you hate dishes, sprinkle them right over the wet mix and fold. I do both depending on my energy level.
- Fold the dry into the wet until just combined. It will be a soft dough, not runny and not stiff. Toss in the chocolate and give it two or three gentle stirs. Save a small handful for the top if you’re feeling fancy.
- Press about two thirds of the dough into the lined pan. I use damp fingertips or the back of a measuring cup. It doesn’t need to be perfect. Rustic is our friend.
- Scatter the marshmallows evenly. Dot the remaining dough on top in little spoonfuls, leaving peeks of marshmallow showing. Sprinkle that extra handful of graham crumbs and the reserved chocolate.
- Bake 20 to 24 minutes until the edges are set and golden and the top has toasty spots. If the top browns too quick, tent loosely with foil for the last few minutes. Pull it form the oven and let it cool 30 to 45 minutes so it settles down. I know, waiting is not my gift either.
- For cleaner slices, slide the pan into the fridge for 15 to 20 minutes. Then lift by the parchment and cut with a warm knife run it under hot water and wipe between cuts. Or just attack it with a fork at the counter. I won’t judge.
Loose notes from my kitchen
- If your marshmallows are very fresh and super bouncy, they might puff a lot. It looks wild, then deflates as it cools. On second thought… I like that dramatic rise.
- Butter temperature matters. Too hot and it can make the dough greasy. If that happens, chill the bowl for 10 minutes and carry on.
- I once tried only granulated sugar. The bars were fine but a wee bit sandy. Brown sugar adds chew and that cozy flavor.
- Pressing down the dough lightly before baking helps it bake more evenly. But dont mash it into the pan like you’re mad at it.
Variations I’ve toyed with
- Peanut butter swirl: Warm 2 to 3 tablespoons peanut butter until pourable and zigzag it over the marshmallows before the top dough. Big hit with the peanut butter crew.
- Coconut crunch: Add 1 by 2 cup toasted coconut to the dough and a sprinkle on top. It smells like a beach holiday.
- Salted caramel try: I drizzled jarred caramel over the top once. Looked amazing, but it bubbled and got a bit too sweet and sticky for me. If you try, go light and pull a minute earlier.
- Gluten free path: Swap in a good 1 to 1 baking blend and use gluten free graham style cookies. Texture is slightly softer, still fab.
What you might need equipment wise
- 9 by 13 inch metal baking pan gives the best edges. I say metal is essential for even browning. Then again, I’ve baked these in a glass dish and just reduced the heat to 335 F and added a few minutes. So, you do have options.
- Parchment paper for that lift and slice moment. If you’re out, butter the pan generously and dust with flour. It works, just be gentle when removing.
- A big bowl and a sturdy spoon. Stand mixer is lovely, but truly, not required. Less to wash, too.
- Kitchen scissors for cutting big marshmallows. I learned that trick on Food52 and never looked back.
How to store them, in the real world
Keep the bars in an airtight container at room temp for 2 to 3 days. They stay soft. If your kitchen is warm, pop them in the fridge and bring to room temp before serving so the chocolate relaxes. They also freeze well for up to a month. Wrap individual squares, then bag them. Though honestly, in my house it never lasts more than a day.
How we like to serve
- Warm a square for 10 to 15 seconds and add a spoon of vanilla ice cream. Yes, it melts into the marshmallow crevices. Yes, it’s bliss.
- Take them on a picnic still in the pan, and pass around a little knife. Everyone carves the corner they want. Slightly chaotic, very fun.
- Family tradition alert: we sprinkle a pinch of flaky salt over the warm top, just a whisper. Wakes everything up.
Pro tips I learned the hard way
- I once tried rushing the cool time and cut right away, regretted it because the marshmallow smeared like a sticky comet. Give it it’s little rest.
- Overmixing makes the crumb tougher. When the flour disappears, stop. The dough should feel a bit soft and plush, not tight.
- Let your butter cool slightly after melting. Hot butter can scramble the egg and then you’ll be fishing out tiny egg bits. Been there.
- Save a handful of chocolate for the top so you get those shiny puddles. If you mix it all in, the top looks a bit plain.
FAQ from folks who’ve asked me
Can I use marshmallow fluff instead of marshmallows
Short answer, yes, but go easy. Dollop spoonfuls and leave space. It spreads a lot and can get runny. Tastes great though.
Do I need to chill the dough
Nope. This is a mix and bake situation. If your dough feels very soft, a quick 10 minute chill will make it easier to handle.
What if I only have milk chocolate
Use it. It will be sweeter, so I like to add a pinch more salt on top. Dark chocolate lovers, you’re fine too. Mix and match, live a little.
Can I halve the recipe
Yes, bake in an 8 inch square pan and start checking at 18 minutes. The center should still have a gentle wiggle when you nudge the pan.
My top browned fast help
Slide a piece of foil on top for the last minutes of baking. Also try the middle rack. Ovens can be quirky, mine likes to run hot on the left, go figure.
Are they better the next day
I tend to think the flavor settles and deepens by day two, if they make it that long. The edges get chewy, the middle stays soft. Kinda perfect.
And a small digression, because why not. If you ever find yourself with one lonely square and a quiet evening, make tea, sit by the window, and eat it slowly. It tastes even better when you can hear the street sounds and let the chocolate do its thing, like a tiny encore after dinner.