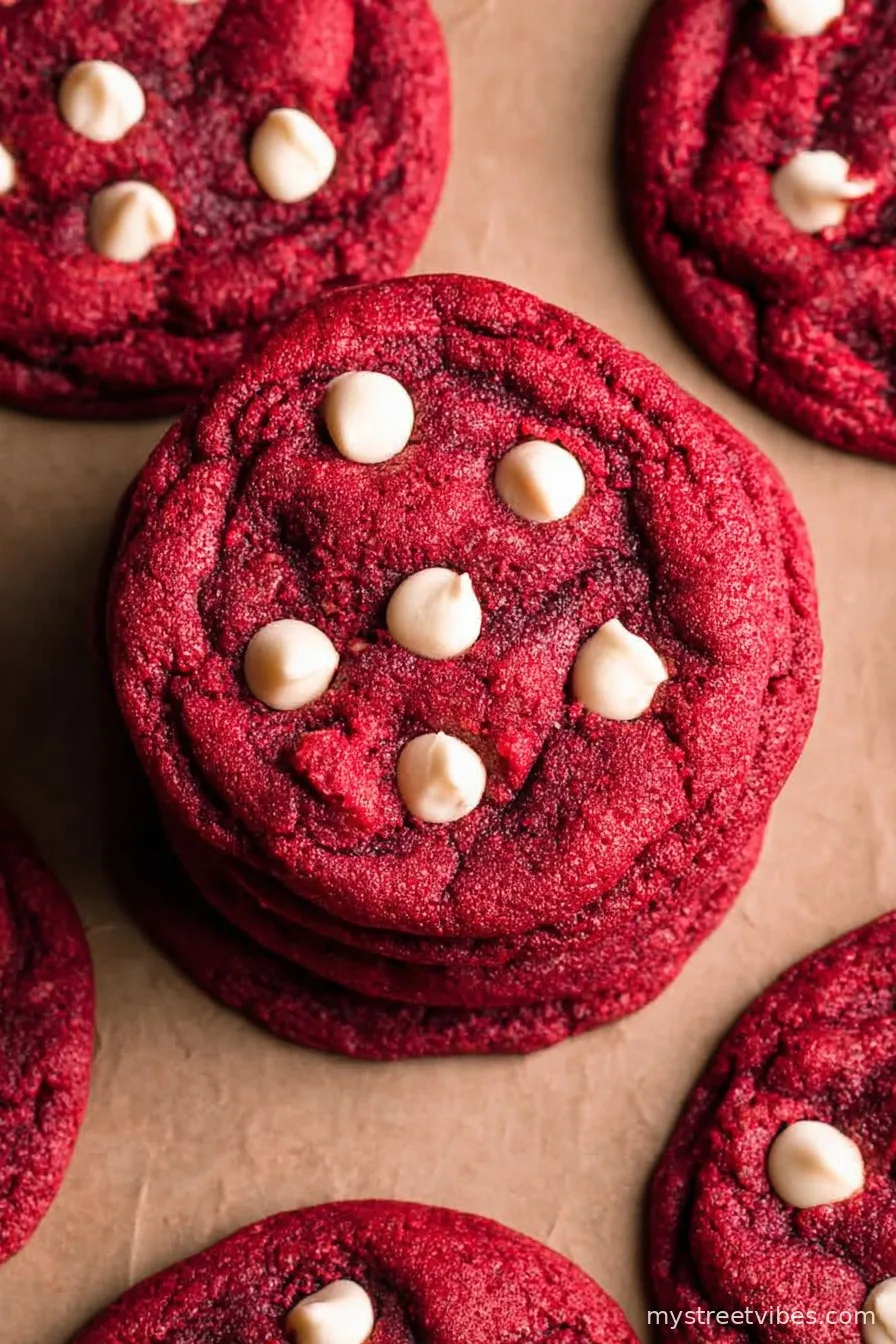
Let Me Tell You About These Red Velvet Cookies…
Okay, so here’s the story—I first baked these red velvet cookies one snowed-in Saturday when the whole house was craving something sweet but I was out of patience for complicated desserts. There’s just something about red velvet; it looks fancy even when you’re in pajamas. I botched the first batch (used baking soda instead of powder, whoops) but the second try was absolute magic. Honestly, I think my cousin still tells people about those cookies like it’s a family legend.
And even if you’re not a baking whiz, these cookies will make you feel like you’ve got some real kitchen swagger. Not to get too sappy, but every time I roll these out, it turns an ordinary day into something worth chatting about over a cuppa. Also, I once dropped one on the floor and my dog beat me to it – so there’s that.
Why You’ll Love Making (and Eating) These
I make these whenever my crew starts dropping not-so-subtle hints for something sweet and cozy. My kids say eating them feels like a “party in your mouth” (actual quote) and my neighbor appears at my door like clockwork if she catches a whiff. Oddly enough, the dough is super forgiving—even if you get flour all over the counters (which I do, every single time). I sometimes get impatient and skip chilling the dough; the cookies turn out fine—just a bit flatter, but trust me, no one complains. Also, they’re red, and there’s honestly something a bit fun about eating a cookie that brightens up your plate. Have you ever seen people grin from ear to ear staring at a cookie? It’s a thing.
Here’s What You’ll Need (and My Substitute Secrets)
- 1 and 1/2 cups all-purpose flour (sometimes I cheat and use self-raising if that’s what’s open—lazy day win)
- 1/4 cup unsweetened cocoa powder (Grandma swears by Hershey’s, but I’ve used the off-brand with zero complaints)
- 1 teaspoon baking powder
- 1/4 teaspoon salt (I’ve skipped it by accident; cookies survived just fine, honestly)
- 1/2 cup unsalted butter, room temp (in a pinch, margarine will work – not quite as rich, but does the trick)
- 3/4 cup granulated sugar
- 1/4 cup packed brown sugar (the dark kind is lovely, but light works too)
- 1 large egg (once I was out and used flaxseed meal with water—it’s okay, but classic egg is best)
- 2 teaspoons vanilla extract (imitation is fine if that’s what you’ve got, shh, don’t tell the purists)
- 1 tablespoon red food coloring (liquid or gel—it looks wild mixing in, almost alarming)
- 3/4 to 1 cup white chocolate chips (regular chocolate works, but white just pops)
How I Actually Make These (and You Can Too)
- Preheat that oven to 350°F (175°C). Seriously, don’t wait until you’re halfway done like I always do.
- Grab a mixing bowl and toss in your flour, cocoa powder, salt, and baking powder. Give it a little whisk. If your cocoa is lumpy, just squish it with the back of a spoon. Wonky measurements? No biggie.
- In a (somewhat bigger) bowl, cream the softened butter and both sugars together. I use an old electric mixer, but there have definitely been days where I just use pure elbow grease and a wooden spoon. Works—eventually!
- Crack in your egg, add the vanilla, and pour in the red food color. Beat until smooth. This is where it usually looks a bit weird, like a science experiment gone rogue. Don’t fret.
- Gradually add your dry mix into the wet. I split it into 2-3 lots—less flour tornado that way. The dough’s thick and a bit sticky. Honestly, don’t even try to keep your hands clean.
- Fold in those white chocolate chips. Sometimes I get fancy and add a smattering more than called for. “For luck.”
- Scoop out balls—about a heaped tablespoon each—onto a baking tray lined with parchment because I absolutely hate scrubbing trays. Leave a bit of distance between them; they’ll spread.
- If you’ve got time, chill the tray in the fridge for like 15 minutes. If not, straight into the oven they go (and yes, they still taste awesome).
- Bake for 10-12 minutes. The tops should look soft-set. I always poke one just to double check. Don’t worry if they feel wobbly; they firm up as they cool.
- Let cookies cool on the tray for a bit (if you can wait), then move to a rack. Or just eat one warm and call it “quality control.” I do.

Notes: True Tales of Cookie Triumph (and Goofs)
- If you use too much food coloring, your hands WILL look like you lost a fight with a paint pot.
- Once forgot the vanilla—cookies were fine but a bit meh. Never again.
- Chilling the dough helps make them thick, but let’s be real: impatience wins sometimes.
- Room temp butter is easier to cream, but I’ve microwaved mine into a melty puddle once and just went with it (didn’t ruin anything).
Variations I’ve Experimented With (Spoiler: Not All Worked)
- Chocolate chips: I swapped in dark choc chips for the white a few times—super rich, thumbs up from my sister.
- Nuts: Pecans add a lovely crunch, but my kids “stage a protest” if I try it now.
- No food coloring: The cookies taste the same (shocking, I know) but are just regular brown cookies. Still tasty, but my heart missed the color.
- Stuffed with cream cheese: Tried once, big old mess. The cheese leaked everywhere. Maybe there’s a secret, but I don’t know it yet.

Kit You’ll Need (and How to Wing It)
- Baking tray (cookie sheet, or even a pizza pan in a pinch – just don’t use a non-oven-safe plate, learned that the hard way)
- Mixing bowls, at least two. Though, yes, I’ve rinsed and reused one if I’m short on dishes.
- Electric mixer or a trusty spoon and strong arm. The latter builds character.
- Parchment paper is a game-changer for easy cleanup, but I’ve buttered a tray when I ran out and it was fine. Just stickier.
How to Store (If You Actually Have Leftovers)
You can store these in an airtight container for about 4 days—though, honestly, in my house they barely last through the afternoon. I once hid a few in the bread bin, only to forget and find them three days later; they were even a bit softer, actually. Oh, you could freeze the dough balls, too—they bake up fine straight form the freezer, just give ’em a couple extra minutes.
Serving Ideas: From Afternoon Snack to Dessert Platter
I like serving them with a cold glass of milk, partly because it feels nostalgic and partly because it just works. Sometimes I dust them with a bit of powdered sugar, which makes me feel extra fancy (even if the kitchen’s a disaster behind me). For birthdays, my daughter insists on tucking a candle into a warm one and declaring it “cookie cake.” Your call.
Lessons Learned (AKA Pro Tips You’ll Want Sooner or Later)
- Don’t rush the creaming step. I once just barely mixed the butter and sugars and the cookies were a bit gritty. Not in a good way.
- Letting the cookies cool makes them less likely to break—though warm broken cookies are still pretty great, if you’re me.
- If you mess up the food coloring or forget it, no worries. They’ll still get gobbled up anyway, so no need to rush out to the shop.
Real FAQs (Because People Actually Ask Me This Stuff)
- Do I have to use red food coloring?
Nope! The cookies will taste just as delicious; they’ll look like regular chocolate cookies though. Still good, just not that classic red velvet vibe. - What if I don’t have white chocolate chips?
Use any chocolate you’ve got—seriously. I’ve chopped up chocolate bars, or even tossed in marshmallows once (got a bit gooey, but yum). - Can I halve the recipe?
Yup, I’ve done it plenty of times (especially when I’m home alone—dangerous otherwise). Just eyeball the egg; crack and whisk it, then use roughly half. - Why are my cookies flat?
Probably the butter got too warm, or (like me) you skipped the chill step. Happens all the time—still tasty! - Do they taste better the next day?
Oddly, I think so. Something about that overnight magic makes the flavors cozier and deeper. But who can resist that long?
And there you have it, friend—my not-so-polished, honest-to-goodness red velvet cookie guide. Let me know if you try a wild variation or drag someone into the kitchen to bake along; I think half the fun is swapping stories with the cookies warm out of the oven.
Ingredients
- 1 1/2 cups all-purpose flour
- 1/4 cup unsweetened cocoa powder
- 1 teaspoon baking soda
- 1/2 teaspoon salt
- 1/2 cup unsalted butter, softened
- 3/4 cup granulated sugar
- 1/4 cup brown sugar, packed
- 1 large egg
- 1 tablespoon milk
- 2 teaspoons vanilla extract
- 1 tablespoon red food coloring
- 1 cup white chocolate chips
Instructions
-
1Preheat oven to 350°F (175°C). Line two baking sheets with parchment paper.
-
2In a medium bowl, whisk together flour, cocoa powder, baking soda, and salt.
-
3In a large bowl, cream together the butter, granulated sugar, and brown sugar until light and fluffy.
-
4Beat in the egg, milk, vanilla extract, and red food coloring until well combined.
-
5Gradually add the dry ingredients to the wet ingredients, mixing just until combined. Fold in the white chocolate chips.
-
6Drop rounded tablespoons of dough onto prepared baking sheets, spacing 2 inches apart. Bake for 10-12 minutes or until edges are set. Cool on the baking sheet for 5 minutes, then transfer to a wire rack to cool completely.
CLICK FOR NUTRITION INFO
↑
Approximate Information for One Serving
Serving Size:
1 serving
Calories:
120 caloriescal
Protein:
2gg
Fat:
6gg
Saturated Fat:
0g
Trans Fat:
0g
Cholesterol:
0mg
Sodium:
0mg
Potassium:
0mg
Total Carbs:
16gg
Fiber:
0g
Sugar:
0g
Net Carbs:
0g
Vitamin A:
0
Vitamin C:
0mg
Calcium:
0mg
Iron:
0mg
Nutrition Disclaimers
Number of total servings shown is approximate. Actual number of servings will depend on your preferred portion sizes.
Nutritional values shown are general guidelines and reflect information for 1 serving using the ingredients listed, not including any optional ingredients. Actual macros may vary slightly depending on specific brands and types of ingredients used.
To determine the weight of one serving, prepare the recipe as instructed. Weigh the finished recipe, then divide the weight of the finished recipe (not including the weight of the container the food is in) by the desired number of servings. Result will be the weight of one serving.
Did you make this recipe?
Please consider Pinning it!!