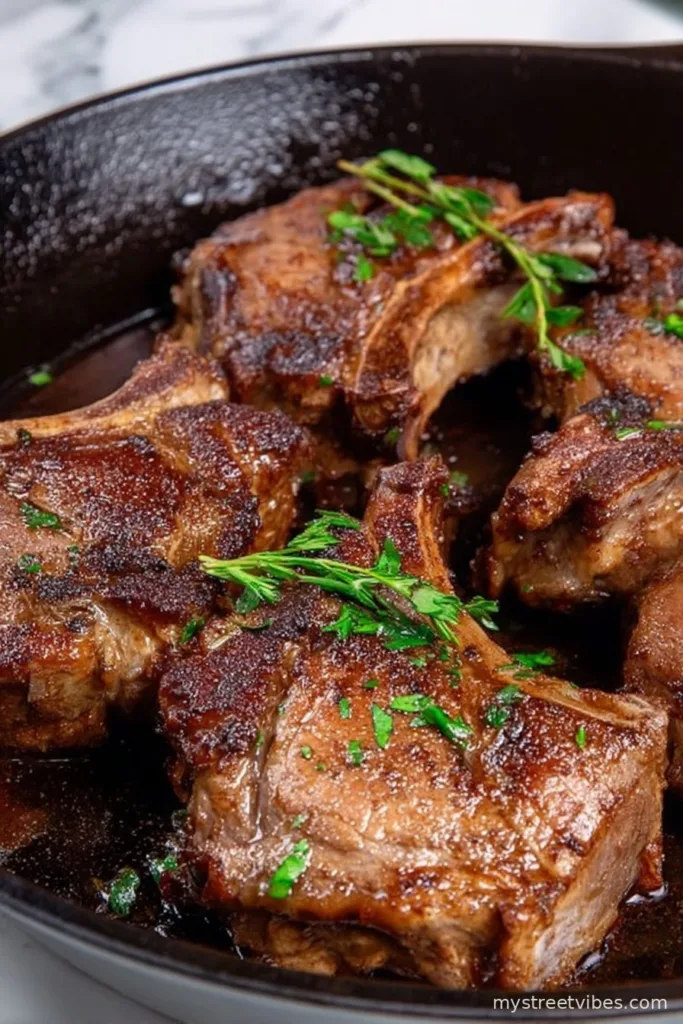
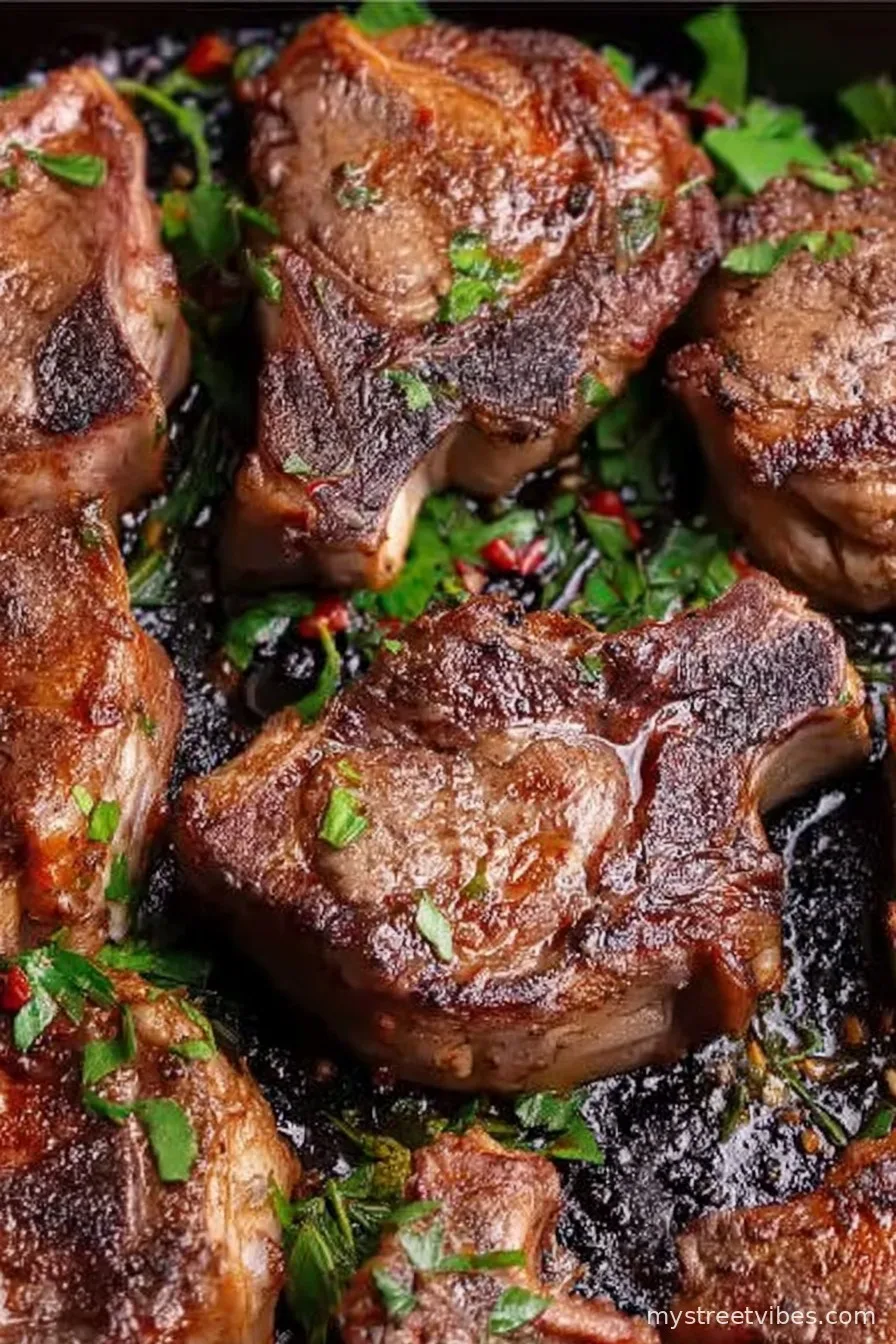
The Truth About My Favorite Pan-Seared Lamb Chops
So, you know how everyone claims their recipe is the best? Well, I won’t say these pan-seared lamb chops will change your life, but my sister still texts me photos every time she makes them – slightly burnt bits and all. Actually, they’re one of those weeknight wins that somehow feel (and taste) way fancier than the effort involved. Plus—I messed up the first time I cooked lamb at my place and nuked it pretty good (don’t ask)—so if I can get these juicy and not like shoe leather, you absolutely will too.
Why You’re Gonna Love Making These
I make these when someone’s coming over and I want to trick them into thinking I’ve got my act together, or honestly, just when I spot lamb on sale at Morrisons. (Pro tip – buy the big family pack. Freeze half, regret nothing.) My family goes absolutely mad for these chops—“Is there more?” is the main feedback. I used to worry about overcooking lamb (and maybe undercooking it too) but this method’s basically foolproof. And—admittedly—the sizzle in the pan is a little addictive. Does anyone else stand around for that part instead of prepping sides? Just me?
What You’ll Need (Substitutions Make It Yours)
- 6 lamb chops (I usually buy the nicely marbled ones—shoulders or rib chops both work. Once I tried with less fatty loin chops; not as good, but still fine in a pinch)
- 2 tbsp olive oil (or that odd rapeseed oil at the back of the cupboard if you run out—nobody’s judging)
- 2 cloves garlic, smashed (or, let’s be real, a heaping spoon of the jarred stuff if it’s a weeknight)
- Fresh rosemary, couple of sprigs (dried will do, though my gran swore by fresh)
- A few big pinches of flaky sea salt (table salt works—just go easy)
- Black pepper, freshly cracked if possible
- Butter, about a good knob (say, 2 tbsp—it melts in the pan later, so no exact science)
- (Optional: a squeeze of lemon to finish—honestly, sometimes I forget and only notice after dinner)
How I Cook Pan-Seared Lamb Chops (With Some Wiggle Room)
- Getting Ready: Take your lamb chops out of the fridge about 20 minutes before—if you forget, don’t sweat it. Just not straight form the cold, otherwise it doesn’t cook as evenly. Pat them dry (kitchen roll, tea towel, whatever’s clean) and season with salt, pepper, and—why not—some rosemary if you’re feeling fancy.
- Heat up the pan: Medium-high. Pour in oil and swirl it around; it should shimmer but not smoke. You want the pan hot enough so you get that amazing sizzle. (This is usually where I get distracted and almost forget the garlic, ha!)
- In go the chops: Lay them down in a single layer, don’t crowd them. If your pan’s tiny, do this in batches. Press down a bit so they get a nice crust, leave ‘em alone for about 3–4 minutes. Don’t fuss with ‘em too much. This stage always looks less pretty than I expect—somehow lamb never browns as Instagram-perfect as beef but trust me, keep going.
- Flip, Butter, Garlic: Flip your chops, toss in that knob of butter, the smashed garlic, and another sprig of rosemary. Tilt the pan slightly and spoon the garlicky, herby butter over the chops for 1–3 more minutes. (I usually sneak a little prod to check doneness—if it’s too squishy, it’s rare. Too firm? You’ve gone a bit far but honestly, still tasty.)
- Rest and Taste: Move them to a plate, loosely cover with foil or an upside-down bowl—whatever you have lying around. Let them rest for like 5 mins, though in reality I usually can’t wait that long. If you have lemon, squeeze a bit on now. (No lemon? Not a deal breaker.)
Notes from My Many, Many Attempts
- It’s totally fine if some chops are thicker than others—they cook at different tempos, just pull the thinner ones off a little earlier.
- I once tried pre-salting overnight, and honestly found zero difference. Maybe it’s just me?
- Leftover pan juices make killer gravy—or if you’re a dipper, just mop up with bread!
- Lamb that’s rested properly will look a little pink inside, even if you think it’s overdone. That’s normal.
Variations and Experiments (Some More Successful Than Others)
Sometimes I swap rosemary for thyme—super fragrant! I tried marinating overnight with yogurt once, which worked out okay but made the crust a bit weird (flavor was great, though). Paprika’s a fun twist, brings some smokiness. Oh, and I did once try a honey-mustard glaze—let’s just never speak of it again.
Got the Right Gear? Here’s What Actually Matters
- Heavy skillet or frying pan: Cast iron is ace, but I’ve used a battered non-stick before and it was still pretty solid. If all you have is a grill pan, go for it—just brush oil on the meat.
- Tongs: Or, if you’re me, a clean fork will do in a pinch, just don’t burn your hand like I did once.
- Kitchen timer (optional): Most of the time I just use the clock on my microwave—who has time to mess with extra gadgets?
Storing Leftovers (Though, Let’s Be Real…)
If against all odds you have leftovers, wrap ’em up and stick in the fridge—good for 2 days. They’re actually quite tasty cold, sliced in a salad the next day. But honestly, in my house, these never make it past midnight; someone always finds them before I do.
What to Serve With (According to My Crew)
My lot loves these chops with some smashed potatoes and a farm-shop salad. Sometimes I’ll cheat and throw together a packet couscous (try this quick one from BBC Good Food if you need a side). A glass of red and my loud uncle, that’s honestly our family tradition, for better or worse.
Lessons Learned the Not-So-Easy Way (Pro Tips)
- I once tried rushing the rest time—total regret. Meat went dry almost instantly. Wait the five minutes, even if you’re starving.
- Don’t pour on too much oil—your smoke alarm will not appreciate the gesture.
- Actually, I find it works better if you season right before cooking, not hours ahead. But maybe that’s just my kitchen?
Questions People Actually Ask Me (Or Text at Midnight)
- Do I have to use fresh rosemary? Nope—use what you’ve got. Dried, no herbs, or even a splash of Worcestershire if you’re feeling wild.
- Can I cook these on an outdoor grill? Sure thing! But just keep an eye as they cook fast and flames can be… unpredictable. Ask me how I know.
- How do I know when they’re done? Bit embarrassing, but I still poke them—medium-rare has a little ‘give’, well-done’s firm. Or use a thermometer (60C for rare, 70C for medium) if you’re into gadgets. Serious Eats has a full doneness guide if you’re a nerd for details.
- What should I do if my pan sticks? Ah, just scrape up the crispy bits and call it flavor! Or, next time use a bit more oil and a hotter pan.
- Can I freeze the leftovers? You can, but, honestly, lamb’s best eaten fresh or as a next-day salad. Freezing makes it a tad wooly, if that makes sense?
Anyway, don’t overthink it. These pan-seared lamb chops are way more forgiving (and customizable) than you’d think. Enjoy—and if you end up with a good story after making them, please send it my way. I collect these like old recipe clippings!

Ingredients
- 8 lamb chops, frenched (about 1-inch thick)
- 2 tablespoons olive oil
- 2 teaspoons fresh rosemary, finely chopped
- 2 teaspoons fresh thyme, finely chopped
- 3 cloves garlic, minced
- 1 teaspoon kosher salt
- 1/2 teaspoon freshly ground black pepper
- 1 tablespoon unsalted butter
Instructions
-
1Pat the lamb chops dry with paper towels and season both sides generously with salt and black pepper.
-
2In a small bowl, combine olive oil, rosemary, thyme, and minced garlic. Rub the mixture over the lamb chops, coating them evenly.
-
3Heat a large skillet over medium-high heat. When hot, add the lamb chops and sear for 3-4 minutes on each side, until a deep brown crust forms.
-
4Reduce the heat to medium. Add the butter to the pan and spoon the melted butter over the chops for another 1-2 minutes.
-
5Remove the lamb chops from the skillet and let them rest for 5 minutes before serving. Garnish with extra herbs if desired.
CLICK FOR NUTRITION INFO
↑
Approximate Information for One Serving
Serving Size:
1 serving
Calories:
340cal
Protein:
31 gg
Fat:
23 gg
Saturated Fat:
0g
Trans Fat:
0g
Cholesterol:
0mg
Sodium:
0mg
Potassium:
0mg
Total Carbs:
1 gg
Fiber:
0g
Sugar:
0g
Net Carbs:
0g
Vitamin A:
0
Vitamin C:
0mg
Calcium:
0mg
Iron:
0mg
Nutrition Disclaimers
Number of total servings shown is approximate. Actual number of servings will depend on your preferred portion sizes.
Nutritional values shown are general guidelines and reflect information for 1 serving using the ingredients listed, not including any optional ingredients. Actual macros may vary slightly depending on specific brands and types of ingredients used.
To determine the weight of one serving, prepare the recipe as instructed. Weigh the finished recipe, then divide the weight of the finished recipe (not including the weight of the container the food is in) by the desired number of servings. Result will be the weight of one serving.
Did you make this recipe?
Please consider Pinning it!!