Let’s Just Talk: Why These Meatballs Always Remind Me of Saturday Mornings
So, you know how breakfast can feel kinda… well, meh? That’s until you stumble (literally, for me—don’t ask) upon a recipe like these Maple Apple Breakfast Chicken Meatballs. The first time I made them, I actually dropped an egg on the floor, then realized I’d forgotten the apples in the fridge—classic. But something about tossing all those sweet, savory flavors into one bowl just reminds me of waking up at my grandma’s, slippers half-on, sniffing that warm, mapley smell drifting down the hallway. Still, no matter how many times I make these, I always manage to eat at least two straight from the pan. Zero guilt. Pro chef move? Eh, call it quality control.
Why Make Maple Apple Chicken Meatballs? I’ll Tell You…
I whip these up when I want breakfast that feels a bit more… special, but don’t want to fuss for hours (morning person? Not me). My family goes absolutely bonkers for this combo of apples and maple (sometimes it’s gone before it hits the table—Rory, I see you). And honestly, if I’m ever stuck with leftover apples about to turn, this is my secret weapon. There was one time I tried swapping ground turkey in a panic, but… okay, I’ll explain that disaster below. Oh, and if you’re sick of pancakes or just want to sneak protein into your morning, here it is!
Grab These Ingredients (Or Whatever’s Close Enough)
- 1 pound ground chicken (I’ve used turkey in a pinch—it’s not the same, but it’ll work if you drown it in syrup. Grandma swore by only chicken though.)
- 1 medium apple, peeled and diced tiny (I tend to grab Gala, but Granny Smith is fine if that’s lurking in your fruit bowl. Pear works if things get desperate.)
- 1/4 cup finely diced onion (sometimes I skip this out of pure laziness, and it’s still tasty, but don’t tell my mother-in-law.)
- 1 egg (the glue! Or use flaxseed and water if you’re out. Once I forgot entirely and they didn’t really hold, but hey, it was more like breakfast hash—still ate it.)
- 1/3 cup old-fashioned oats (or breadcrumbs if, like me, you didn’t realize you were out until it’s too late)
- 2 tablespoons maple syrup (use the real stuff or, honestly, whatever’s on sale at the shop; we’re not snobs here)
- 1 teaspoon salt (ish—go with your gut)
- 1/2 teaspoon ground black pepper
- 1/2 teaspoon dried sage (optional; I usually toss some in because it reminds me of holiday sausage)
- Dash of cinnamon (if you’re feeling fancy—it’s not a dealbreaker)
How I Actually Make These (Messiness and All)
- Start by preheating your oven to 400°F (200°C). Or don’t—sometimes I forget and stick ’em in a cold oven, they just take a bit longer. I tend to line a baking tray with parchment because I refuse to scrape baked-on meatball bits pre-coffee.
- In a big bowl, toss in the ground chicken, diced apple, onion, oats, egg, maple syrup, salt, pepper, sage, cinnamon—dump it all in, really. Get in there with your hands (or a fork if you’re squeamish; I won’t judge). Mix until it’s all sorta sticky and pretty uniform. This is when I usually sneak a taste. Just kidding. Raw chicken. Don’t.
- Scoop out meatballs about the size of a golf ball (or ping pong, if you prefer smaller bites). I just use a soup spoon. Roll ‘em gently. If the mix sticks, wet your palms—magic.
- Pop those meatballs onto the tray. Space isn’t crucial—mine usually end up snuggled up like puppies.
- Bake for 18-20 minutes, or until golden and cooked through. If you want them all caramelized and pretty, switch to broil for the last 2 min. But don’t walk away—I once burned mine into oblivion scrolling on my phone.
- Let them rest a bit—if you can resist. The smell makes this almost impossible.
Notes—AKA What I’ve Learned the Hard Way
- If your apples are extra juicy, pat them dry, or the mix gets too watery and the meatballs won’t hold. Trust me on this.
- Tried making these on the stovetop once and, honestly, the oven is less hassle. Less babysitting. Unless you like standing over a hot pan, in which case—have at it.
- Oats make things hearty, but breadcrumbs make them smoother. Pros and cons. Your call.
Variations—Some Worked, Some Were a Total Flop
- Turkey swap: It was… fine? But drier. I basically poured extra maple on top so the kids didn’t complain.
- Chopped pecans: Now this is great for a little crunch. About a handful in the mix.
- Vegan experiment: I tried jackfruit with oats once—wouldn’t repeat honestly. Texture was…questionable.
- Spice it up: A pinch of chili flakes if you like a bit of pep in your step. Grandma would shake her head, but I’m all for it.

No Fancy Tools? No Big Deal
I usually use a baking sheet and parchment. But if you’re short a sheet pan (my cousin once “borrowed” mine and it hasn’t returned), just use any oven-safe dish. If meatballs stick, a quick soak cleans it. I’ve also used a muffin tin in a pinch—seriously. It sort of works, just don’t expect round meatballs.
Storing Leftovers—If They Even Survive Breakfast
Pop leftovers in an airtight container and keep them in the fridge. They keep pretty well for 2-3 days, maybe four if you’re a risk-taker. But, honestly, in my house these are gone within a day. I sometimes hide a few at the back just for me—in the veggie drawer (don’t tell the kids).
How I Serve These (And You Probably Should, Too)
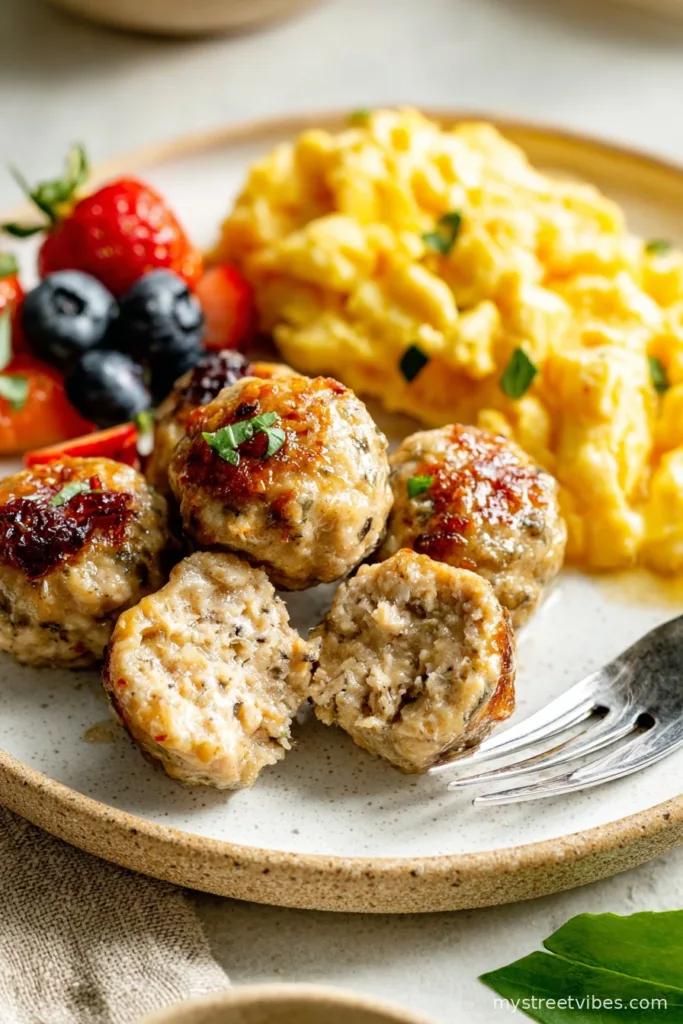
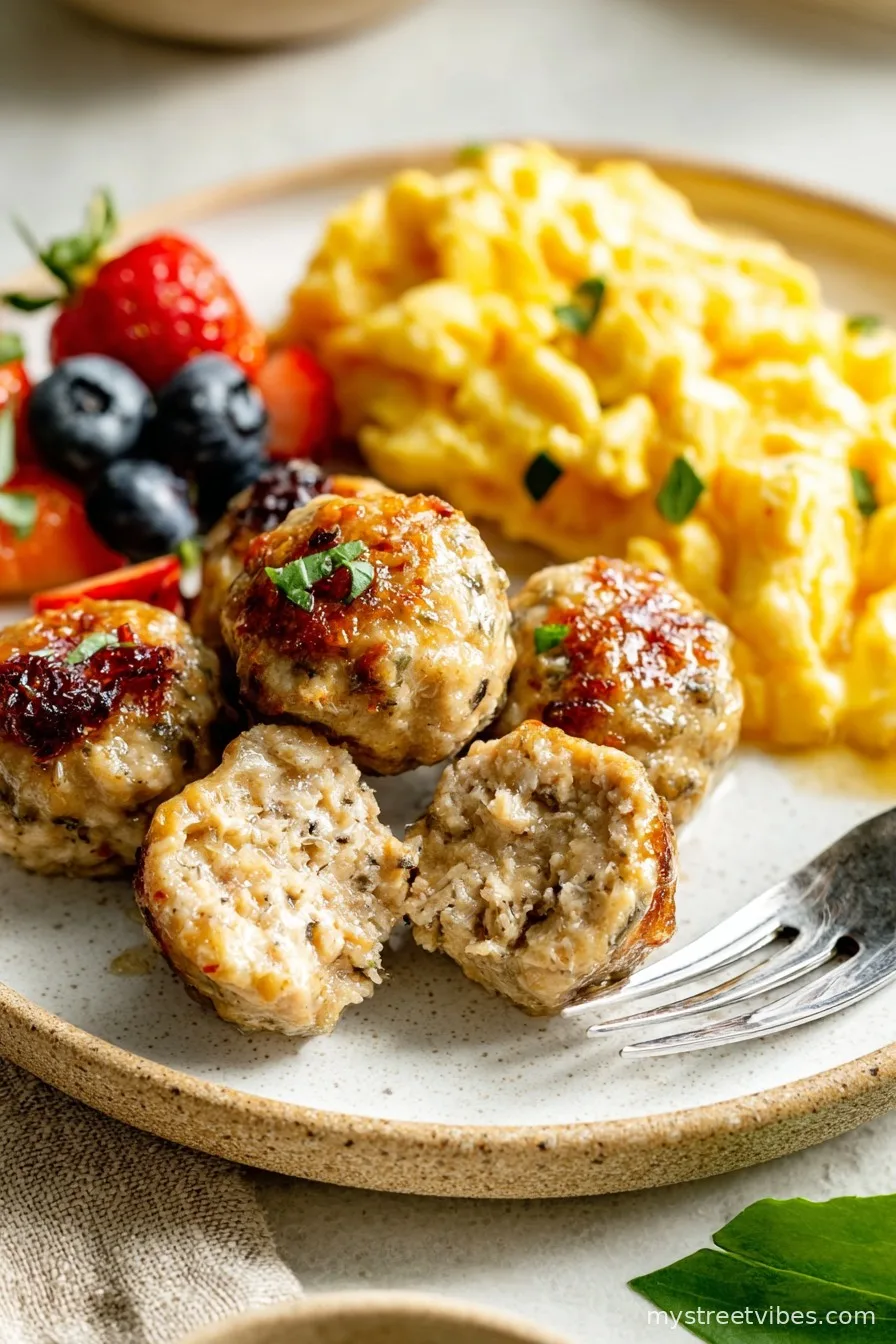
I love these beside scrambled eggs and a pile of roasted potatoes—proper big breakfast, you know? My partner always dunks them in a pool of maple syrup, which sounds wild but it’s fantastic. Sometimes I split them onto a toasted bun with a slice of cheddar for a killer breakfast sandwich. Christmas morning? We serve them on toothpicks—fancy party-style, with extra maple syrup, obviously.
Real-Life Pro Tips (Learned by Messing Up, Not in Culinary School)
- I once tried to rush the bake time (Impatient? Me?). Didn’t work—middle was all mush, not cute. Wait it out.
- Don’t skip the parchment paper unless you love scrubbing. I learned that the hard way.
- Actually, I find letting the mix chill for 10 minutes helps it hold together better. Only started doing this after the third batch fell apart—slow learner, apparently.
FAQs: Real Questions I’ve Gotten, Honest Answers
- Can I freeze these? Oh yeah! Lay them out on a tray to freeze, then toss in a bag. Great for stash-and-dash mornings. Thaw and reheat.
- Help—mine are kinda wet! What gives? Apples can be sneaky. Try blotting them, add a little more oats. Happens to the best of us; don’t sweat it.
- Is it weird to have chicken and apple together? I thought so too, but actually, the combo’s magic. Sweet, savory—just a big cozy hug for your tastebuds.
- Could I make tiny ones for a brunch party? Absolutely. I use a melon baller for mini bites. They cook super fast (maybe 12-14 min—keep an eye on ‘em!)
- I don’t have sage. Skip it? No biggie! Thyme or even just a pinch of mixed herbs works. Or go rogue—leave it out.
So that’s it—Maple Apple Breakfast Chicken Meatballs. Warm, homey, perfect for sloooow Sundays or hectic grab-and-go weekday mornings. Next time you’re looking at yet another sad bowl of cereal, remember there’s something tastier waiting (with just a little more effort, but trust me, it’s worth it).
Ingredients
- 1 pound ground chicken
- 1 medium apple, peeled and grated
- 1/4 cup pure maple syrup
- 1/4 cup breadcrumbs
- 1 large egg
- 1/2 teaspoon ground cinnamon
- 1/2 teaspoon salt
- 1/4 teaspoon black pepper
- 1 tablespoon olive oil
Instructions
-
1Preheat oven to 400°F (200°C) and line a baking sheet with parchment paper.
-
2In a large bowl, combine ground chicken, grated apple, maple syrup, breadcrumbs, egg, cinnamon, salt, and black pepper. Mix until just combined.
-
3With wet hands, shape the mixture into 1-inch meatballs and place them on the prepared baking sheet.
-
4Drizzle or brush the meatballs with olive oil.
-
5Bake for 18-20 minutes, or until meatballs are cooked through and golden brown.
-
6Serve warm, drizzled with additional maple syrup if desired.
CLICK FOR NUTRITION INFO
↑
Approximate Information for One Serving
Serving Size:
1 serving
Calories:
220 caloriescal
Protein:
20gg
Fat:
8gg
Saturated Fat:
0g
Trans Fat:
0g
Cholesterol:
0mg
Sodium:
0mg
Potassium:
0mg
Total Carbs:
17gg
Fiber:
0g
Sugar:
0g
Net Carbs:
0g
Vitamin A:
0
Vitamin C:
0mg
Calcium:
0mg
Iron:
0mg
Nutrition Disclaimers
Number of total servings shown is approximate. Actual number of servings will depend on your preferred portion sizes.
Nutritional values shown are general guidelines and reflect information for 1 serving using the ingredients listed, not including any optional ingredients. Actual macros may vary slightly depending on specific brands and types of ingredients used.
To determine the weight of one serving, prepare the recipe as instructed. Weigh the finished recipe, then divide the weight of the finished recipe (not including the weight of the container the food is in) by the desired number of servings. Result will be the weight of one serving.
Did you make this recipe?
Please consider Pinning it!!