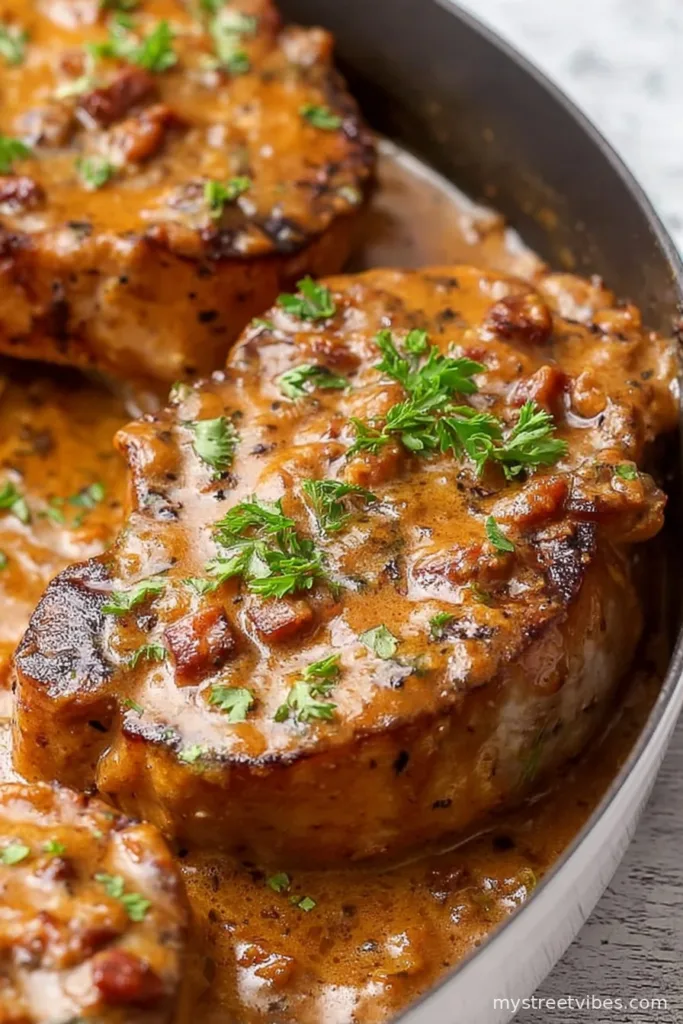
Let Me Tell You About My Smothered Pork Chops (and a Near-Disaster)
So, the first time I made these juicy & flavorful smothered Pork Chops, I managed to set off the smoke detector three times. Not kidding! I think the kids still joke about it. But, hey, it’s now the dish they ask for whenever there’s even a hint of a cold snap, or honestly, when anyone’s craving something that tastes like a hug. Pork Chops have this way of making a kitchen feel extra homey. Plus, it’s the recipe that definitely got me back in my family’s good graces after that slightly charred first attempt. I mean, who knew that gravy could cover a multitude of sins?

Why You’ll Love This (At Least, My Family Does!)
I make this when the weather turns dreary, or sometimes just because we need a little pick-me-up. My family goes nuts for it—especially my partner, who claims the gravy is “drinkable.” (That’s not exactly recommended, but no judgment if you try, ha!)
Actually, the biggest reason I come back to this recipe is that it forgives my tendency to get distracted. The pork chops stay juicy even if you’re busy wrangling kids, pets, or just scrolling for the 100th sourdough hack (don’t get me started on that rabbit hole).
What You’ll Need (and What You Can Swap)
- 4 bone-in pork chops, about 1 inch thick (if I’m in a hurry, boneless does work—even if grandma would call it a travesty)
- 1/2 cup all-purpose flour (sometimes I use cornstarch if we’re low—works fine, just a tad lighter)
- 1 teaspoon garlic powder (feel free to bump it up if you’re a garlic fiend, like me when nobody else is breathing near me)
- 1 teaspoon onion powder
- 1 teaspoon paprika (smoked is my secret weapon, but sweet paprika is totally fine)
- 1 teaspoon salt (I’m guilty of eyeballing, so maybe start with less if you’re unsure)
- 1/2 teaspoon black pepper
- 2 tablespoons olive oil (butter works too—just go low and slow so it doesn’t burn)
- 1 large onion, sliced thin (red or white, whichever is sulking in your crisper)
- 2 cloves garlic, minced (honestly, jarred works in a pinch—I won’t tell anyone)
- 2 cups chicken broth (I’ve even used veggie broth if we’re out—no one noticed, shh!)
- 1/2 cup heavy cream (milk is ok, but the sauce won’t be as dreamy—your call)
- 1 tablespoon Worcestershire sauce (optional, but I swear it adds a little mystery)
- Fresh parsley for garnish (totally optional, but it sure looks fancy)
How I Make Smothered Pork Chops (And Sometimes Improvise)
- Pat your pork chops dry with a paper towel. This is supposedly key for browning, but really, I just do it so they don’t splash everywhere later.
- Mix flour, garlic powder, onion powder, paprika, salt, and pepper on a big plate. Dredge each pork chop in the mix. Don’t stress if you miss a spot or two. Just cover most of it.
- Heat olive oil in a big skillet (cast iron is classic, but I’ve used a dollar store nonstick in a pinch—don’t judge). Medium-high heat. Sear the pork chops till golden brown, about 3–4 minutes per side. If anything sticks, scrape up those bits. That’s flavor.
- Take the pork out and set aside. In the same skillet, add your sliced onions. Lower the heat. Stir them around till soft and golden, about 5–7 minutes. I always sneak a spoonful here. Onions are unreal, right?
- Add minced garlic and cook for just a minute—don’t let it burn, or you’ll have to start again (I’ve done it, sigh).
- Sprinkle any leftover flour mixture into the onions. Stir well so you don’t end up with weird lumps. Don’t worry if it looks a bit pasty now—it’ll smooth out soon.
- Pour in your broth slowly, stirring as you go. Scrape up anything stuck to the pan – it all goes into the gravy.
- Add heavy cream and Worcestershire (if you’re feeling fancy). Let everything bubble up for a minute.
- Return the pork chops to the pan. Nestle them in, cover, and let simmer on low for about 20 minutes. (Or more! Pork is forgiving. Just don’t let the sauce dry up.)
- Check for doneness (should be juicy, not dry as shoe leather). If you need to, add a splash more broth. Sprinkle parsley on at the end, if you want to impress someone—maybe even yourself.
Things I Learned the Hard Way (Notes)
- Don’t skip the pan scraping—those browned bits are what make the gravy so good. Honestly, it took me too many tries to get this!
- If the sauce gets too thick, add more broth or even a little water. Don’t panic.
- I once tried doubling the cream (I love creamy sauce) and it was actually too much—lesson learned.
- This tastes even better the next day, but maybe that’s just me.
Variations (Some Winners and One Fail)
- I’ve thrown mushrooms in with the onions—not bad if you love earthy flavors.
- Using boneless chops: it’s faster, but the sauce doesn’t have quite as much flavor. Still, for busy nights, it’s fine.
- Once tried apple slices. It was…not great. Too sweet for my taste.

Equipment (And Handy Workarounds)
- Big skillet or frying pan (cast iron is dreamy, but honestly any sturdy pan will do in a pinch)
- Tongs or a sturdy fork (I once used chopsticks. Wouldn’t recommend, though.)
- Measuring cups and spoons – but I admit I sometimes eyeball the spices
How to Store Leftovers (If You Have Any…)
Pop any leftovers into an airtight container and keep in the fridge. They’ll stay good for about 3 days, but—truth—mine barely make it to tomorrow. Reheat in the microwave or gently on the stove with a splash of broth to loosen the sauce. I think the flavor deepens after a night’s rest (it’s like leftovers are the real secret ingredient sometimes).
How I Serve These Chops (The Cozy Way)
For me, it’s mashed potatoes every time. (And if you have to use instant, you didn’t hear it from me.) Steamed green beans or sweet corn are also regulars on the side. One of my kids swears by serving it over egg noodles—which is actually pretty tasty, so there you go. Oh! And a warm biscuit to mop up the gravy? Now we’re talking.
Let Me Tell You What Not to Do (My “Pro” Tips)
- Don’t try to rush the onions. I got impatient once, cranked the heat, and ended up with sad, burnt bits. Low and slow is worth it.
- If you skip the flour dredge, you won’t get that cozy, thick gravy—it just won’t be the same. Trust me, I learned the hard way.
Questions I Actually Get—Honestly
- “Can I make this ahead?” Yep! Actually, it tastes even better the next day. Just reheat gently so the pork stays juicy.
- “What if my gravy is lumpy?” Happens to the best of us. Just whisk it like mad (or use a sieve if you must—no shame). You can always add a touch more broth.
- “Is the Worcestershire sauce necessary?” Nah, it just adds a bit of oomph. If you don’t have it, don’t sweat it.
- “What’s the best pork chop cut?” Bone-in, hands down. But if boneless is on sale, go for it. The gravy covers all sins.
So that’s it—smothered pork chops, in all their saucy, homey glory. Hope you love them as much as my crew does. And if your smoke alarm goes off, just tell the family dinner’s really authentic tonight!
Ingredients
- 4 bone-in pork chops, about 1 inch thick (if I’m in a hurry, boneless does work—even if grandma would call it a travesty)
- 1/2 cup all-purpose flour (sometimes I use cornstarch if we’re low—works fine, just a tad lighter)
- 1 teaspoon garlic powder (feel free to bump it up if you’re a garlic fiend, like me when nobody else is breathing near me)
- 1 teaspoon onion powder
- 1 teaspoon paprika (smoked is my secret weapon, but sweet paprika is totally fine)
- 1 teaspoon salt (I’m guilty of eyeballing, so maybe start with less if you’re unsure)
- 1/2 teaspoon black pepper
- 2 tablespoons olive oil (butter works too—just go low and slow so it doesn’t burn)
- 1 large onion, sliced thin (red or white, whichever is sulking in your crisper)
- 2 cloves garlic, minced (honestly, jarred works in a pinch—I won’t tell anyone)
- 2 cups chicken broth (I’ve even used veggie broth if we’re out—no one noticed, shh!)
- 1/2 cup heavy cream (milk is ok, but the sauce won’t be as dreamy—your call)
- 1 tablespoon Worcestershire sauce (optional, but I swear it adds a little mystery)
- Fresh parsley for garnish (totally optional, but it sure looks fancy)
Instructions
-
1Pat your pork chops dry with a paper towel. This is supposedly key for browning, but really, I just do it so they don’t splash everywhere later.
-
2Mix flour, garlic powder, onion powder, paprika, salt, and pepper on a big plate. Dredge each pork chop in the mix. Don’t stress if you miss a spot or two. Just cover most of it.
-
3Heat olive oil in a big skillet (cast iron is classic, but I’ve used a dollar store nonstick in a pinch—don’t judge). Medium-high heat. Sear the pork chops till golden brown, about 3–4 minutes per side. If anything sticks, scrape up those bits. That’s flavor.
-
4Take the pork out and set aside. In the same skillet, add your sliced onions. Lower the heat. Stir them around till soft and golden, about 5–7 minutes. I always sneak a spoonful here. Onions are unreal, right?
-
5Add minced garlic and cook for just a minute—don’t let it burn, or you’ll have to start again (I’ve done it, sigh).
-
6Sprinkle any leftover flour mixture into the onions. Stir well so you don’t end up with weird lumps. Don’t worry if it looks a bit pasty now—it’ll smooth out soon.
-
7Pour in your broth slowly, stirring as you go. Scrape up anything stuck to the pan – it all goes into the gravy.
-
8Add heavy cream and Worcestershire (if you’re feeling fancy). Let everything bubble up for a minute.
-
9Return the pork chops to the pan. Nestle them in, cover, and let simmer on low for about 20 minutes. (Or more! Pork is forgiving. Just don’t let the sauce dry up.)
-
10Check for doneness (should be juicy, not dry as shoe leather). If you need to, add a splash more broth. Sprinkle parsley on at the end, if you want to impress someone—maybe even yourself.
CLICK FOR NUTRITION INFO
↑
Approximate Information for One Serving
Serving Size:
1 serving
Calories:
465cal
Protein:
39 gg
Fat:
28 gg
Saturated Fat:
0g
Trans Fat:
0g
Cholesterol:
0mg
Sodium:
0mg
Potassium:
0mg
Total Carbs:
17 gg
Fiber:
0g
Sugar:
0g
Net Carbs:
0g
Vitamin A:
0
Vitamin C:
0mg
Calcium:
0mg
Iron:
0mg
Nutrition Disclaimers
Number of total servings shown is approximate. Actual number of servings will depend on your preferred portion sizes.
Nutritional values shown are general guidelines and reflect information for 1 serving using the ingredients listed, not including any optional ingredients. Actual macros may vary slightly depending on specific brands and types of ingredients used.
To determine the weight of one serving, prepare the recipe as instructed. Weigh the finished recipe, then divide the weight of the finished recipe (not including the weight of the container the food is in) by the desired number of servings. Result will be the weight of one serving.
Did you make this recipe?
Please consider Pinning it!