Pulled Into the Kitchen by the Sweet Smell of Garlic
Okay, genuine moment here: If you’ve ever walked into my house and the kitchen smells somewhere between a candy shop and a Sunday roast, chances are I’m cooking my honey garlic sauce. (No shame in my game—it’s usually everywhere.) Once, I made a batch just to dip pizza crust into; my cousin thought I’d lost the plot, but then she took a bite and, well, now she’s hooked too. You can pop this honey garlic sauce on basically anything—throw it on chicken, drizzle it onto veg, spoon it over rice straight from the pot if you’re feeling lazy. I’ve done all three, sometimes in the same meal. No judgments, right?

Why I Keep Making This (Despite Sticky Hands)
I make this when dinner needs a bit of zip and I’m too tired for fancy stuff. My family goes a bit mad for it because it gives boring old chicken such a lift—the kind that makes them actually thank me at the table. The sticky sweetness mixed with garlic (and that sharp little soy hit) gets people excited. Not gonna lie, I used to utterly destroy the sauce by rushing the simmer, so trust me, take it slow-ish here. And if for some reason you end up with hands glued together from spilled honey, you’re in good company—just ask my apron.
What You’ll Need (and What Worked in a Pinch)
- 1/2 cup honey (I sometimes use agave when the honey jar is glued shut—what a pain)
- 4 garlic cloves, minced (or pre-minced garlic if it’s a busy weeknight; my grandmother swore by using fresh only but I won’t tell her if you don’t)
- 1/3 cup soy sauce (the salty kind, though I’ve accidentally used tamari—still good!)
- 2 tablespoons rice vinegar (apple cider vinegar works too, especially if it’s lingering in the pantry)
- 1 tablespoon cornstarch (sometimes called cornflour—I always get them mixed up; use arrowroot if that’s all you got)
- 2 tablespoons water (or chicken stock for a bit more oomph; sometimes I even use leftover pasta water)
- 1 teaspoon toasted sesame oil (skip if you can’t stand the stuff—it’s not vital, but I like the warmth)
- Optional: pinch of chili flakes (for that little nudge of heat—my uncle would dump in a whole teaspoon, wild man)
Here’s How I Do It
- In a small-ish saucepan, toss in the honey, soy sauce, minced garlic, and rice vinegar. Give it a rough stir—don’t stress if the honey clings to the spoon. That’s normal (I tend to just lick it off, to be honest).
- Set the saucepan over medium heat. Let it start to bubble around the edges—don’t let it boil like mad though, just a gentle simmer. This is where I usually sneak a taste (and burn my tongue).
- Mix the cornstarch and water together in a small bowl or even a mug until it’s a smooth, cloudy paste. It always looks a bit weird at this bit but it sorts itself out.
- Pour that paste into your saucepan, stirring constantly (it thickens quickly—don’t walk away to check Instagram, trust me).
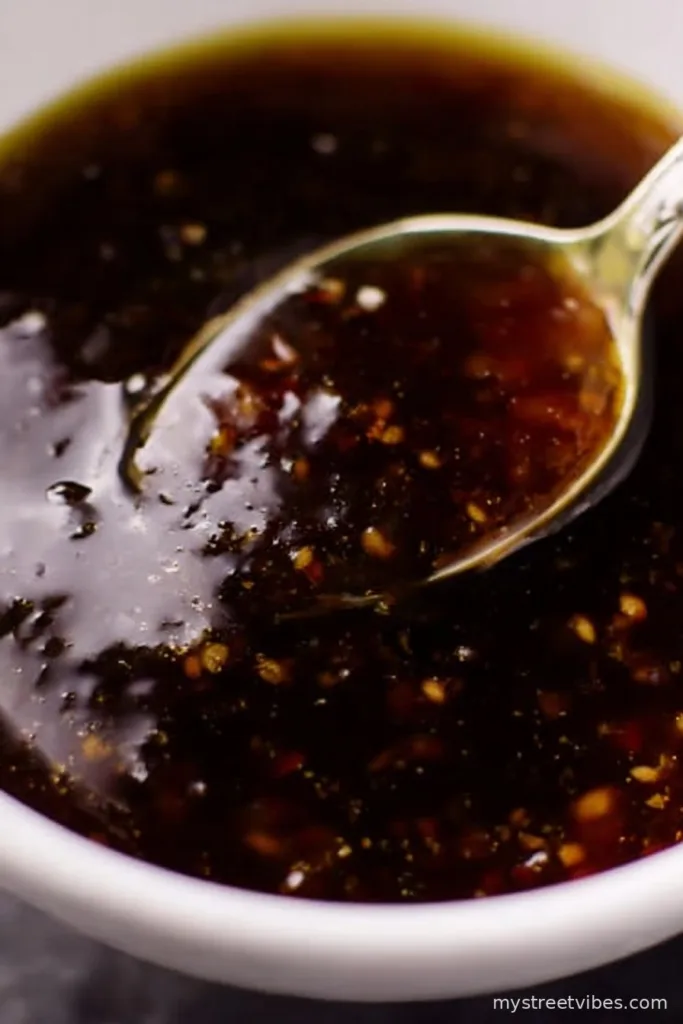
- Let it simmer gently for another 2–3 minutes, stirring every now and then until it gets glossy and thick-ish. Sometimes I add the sesame oil and chili flakes here for a little final punch.
- Take it off the heat and let it cool for a couple minutes; the flavors seem to come together if you don’t rush to serve it straight away. Actually, I find it’s better if you give it a moment—though if the crowd’s clamoring, go ahead.

Messy Notes From My Kitchen
- If you overcook the garlic it can get a bit bitter. Learned that the hard way, so now I keep an eagle eye out.
- If the sauce’s too thick, just add a dash more water or stock. Too thin? Simmer another minute. It’s forgiving (unlike fudge, which still haunts me).
- I sometimes double the garlic for extra oomph, but that can clear a room—it’s up to you!
Variations I’ve Toyed With (One I Regret)
- A squeeze of lemon at the end adds a zing—did that by accident once and now I kinda like it.
- A spoonful of peanut butter makes it creamy for stir-fry sauces (I know, sounds odd, but don’t knock it till you try it).
- Cinnamon? Nope, I tried it and, well, everyone made faces. Not recommended unless you’re adventurous (or stubborn).

Equipment Chat: Do You Really Need Fancy Stuff?
I use a small saucepan and a whisk—though a fork works just fine if, like me, you sometimes can’t find the whisk because it’s probably in the dishwasher (or, let’s be honest, the sink from last night).
How I Store It (ish)
Pop any leftovers in a jar or airtight tub in the fridge. It’ll keep for four days, maybe even a week, but honestly, in my house it never lasts more than a day! If it thickens up too much, I just microwave for 15 seconds and add a splash of water.
Serving It Up: The Fun Part
Poured over roasted chicken is a classic, but don’t sleep on mixing it through noodles, or using it as a veggie dip (even carrots love this stuff). At family BBQs, we sometimes use it like a glaze last minute. My favorite? Dipping crispy spring rolls right into the jar—straight-up bliss.
Some Pro Tips I Learned (the Hard Way)
- Don’t try to thicken with flour instead of cornstarch; it goes weirdly lumpy—believe me, it’s not worth the cleanup.
- I once tried throwing in garlic powder when I ran out of fresh but, actually, it works better if you just use a bit less or skip the garlic if in a pinch rather than substituting. Weird but true.
- Let the sauce cool before pouring into anything glass—once cracked a jar from pouring too hot, what a faff.
Questions People Actually Ask Me About This Stuff
Can you freeze it?
Technically, yeah, but the texture gets a bit odd (kinda gloopy). I probably wouldn’t unless you’re desperate.
Is it gluten-free?
If you use tamari instead of regular soy sauce, it usually is—but double check because some brands sneak wheat in there!
How spicy is it?
Pretty mild unless you go wild with the chili flakes (my uncle again). Tweak for your tastebuds—I’m never precise about it anyway.
What can I use it on?
Anything short of maybe cornflakes? (That’s a joke. Mostly.) Chicken, veg, tofu, salmon, even pizza crust if you’re feeling yourself.
Ingredients
- 1/2 cup honey (I sometimes use agave when the honey jar is glued shut—what a pain)
- 4 garlic cloves, minced (or pre-minced garlic if it’s a busy weeknight; my grandmother swore by using fresh only but I won’t tell her if you don’t)
- 1/3 cup soy sauce (the salty kind, though I’ve accidentally used tamari—still good!)
- 2 tablespoons rice vinegar (apple cider vinegar works too, especially if it’s lingering in the pantry)
- 1 tablespoon cornstarch (sometimes called cornflour—I always get them mixed up; use arrowroot if that’s all you got)
- 2 tablespoons water (or chicken stock for a bit more oomph; sometimes I even use leftover pasta water)
- 1 teaspoon toasted sesame oil (skip if you can’t stand the stuff—it’s not vital, but I like the warmth)
- Optional: pinch of chili flakes (for that little nudge of heat—my uncle would dump in a whole teaspoon, wild man)
Instructions
-
1In a small-ish saucepan, toss in the honey, soy sauce, minced garlic, and rice vinegar. Give it a rough stir—don’t stress if the honey clings to the spoon. That’s normal (I tend to just lick it off, to be honest).
-
2Set the saucepan over medium heat. Let it start to bubble around the edges—don’t let it boil like mad though, just a gentle simmer. This is where I usually sneak a taste (and burn my tongue).
-
3Mix the cornstarch and water together in a small bowl or even a mug until it’s a smooth, cloudy paste. It always looks a bit weird at this bit but it sorts itself out.
-
4Pour that paste into your saucepan, stirring constantly (it thickens quickly—don’t walk away to check Instagram, trust me).
-
5Let it simmer gently for another 2–3 minutes, stirring every now and then until it gets glossy and thick-ish. Sometimes I add the sesame oil and chili flakes here for a little final punch.
-
6Take it off the heat and let it cool for a couple minutes; the flavors seem to come together if you don’t rush to serve it straight away. Actually, I find it’s better if you give it a moment—though if the crowd’s clamoring, go ahead.
CLICK FOR NUTRITION INFO
↑
Approximate Information for One Serving
Serving Size:
1 serving
Calories:
65 caloriescal
Protein:
0.7 gg
Fat:
0.5 gg
Saturated Fat:
0g
Trans Fat:
0g
Cholesterol:
0mg
Sodium:
0mg
Potassium:
0mg
Total Carbs:
16 gg
Fiber:
0g
Sugar:
0g
Net Carbs:
0g
Vitamin A:
0
Vitamin C:
0mg
Calcium:
0mg
Iron:
0mg
Nutrition Disclaimers
Number of total servings shown is approximate. Actual number of servings will depend on your preferred portion sizes.
Nutritional values shown are general guidelines and reflect information for 1 serving using the ingredients listed, not including any optional ingredients. Actual macros may vary slightly depending on specific brands and types of ingredients used.
To determine the weight of one serving, prepare the recipe as instructed. Weigh the finished recipe, then divide the weight of the finished recipe (not including the weight of the container the food is in) by the desired number of servings. Result will be the weight of one serving.
Did you make this recipe?
Please consider Pinning it!