If we were hanging out in my kitchen right now, I’d hand you a warm bagel and say try this while the steam fogs your glasses. The first time I made Homemade Sourdough Bagels, my starter was grumpy and I accidentally boiled one for way too long, which looked tragic but tasted great. That is kind of the magic here. Bagels are forgiving once you relax a bit. Also, I have a tiny superstition about listening to a podcast while shaping them. Does it help the crumb? Probably not. But it does make the time pass and the dough behaves like a friendly dog leaning into your leg.
Why you’ll love this little bagel adventure
I make this when the starter is lively and I want breakfast to feel like a small victory. My family goes bananas for these because they get to pick their toppings and because warm bagels with butter are basically happiness on a plate. And yes, I used to struggle with the boiling stage, it splashes a bit, but once I started using a deeper pot and a gentle simmer I stopped doing the panic shuffle. If you like a bagel that is chewy but not jawbreaker tough, this is the one. Also, this dough smells incredible. Like cozy bakery vibes in your house, which is a mood all by itself.
What you’ll need ingredients
- Active sourdough starter 100 percent hydration 150g about 3 or 4 heaped tablespoons. If mine is sluggish, I feed it using this starter guide and give it a warm corner.
- Warm water 260g about 1 cup plus a splash. If your kitchen is chilly, slightly warmer water helps.
- Bread flour 450g about 3 and 3 quarter cups. I sometimes swap 50g for whole wheat if I am feeling virtuous. My grandmother swore by a specific brand, but honestly any decent bread flour works fine.
- Fine sea salt 10g about 1 and 3 quarter teaspoons.
- Barley malt syrup 25g about 1 tablespoon for the dough. Honey or brown sugar works when I am in a hurry.
- For boiling water: a big pot of water, 1 tablespoon barley malt syrup and 1 teaspoon baking soda. You can skip the syrup if you like a lighter color, but I love the bakery sheen.
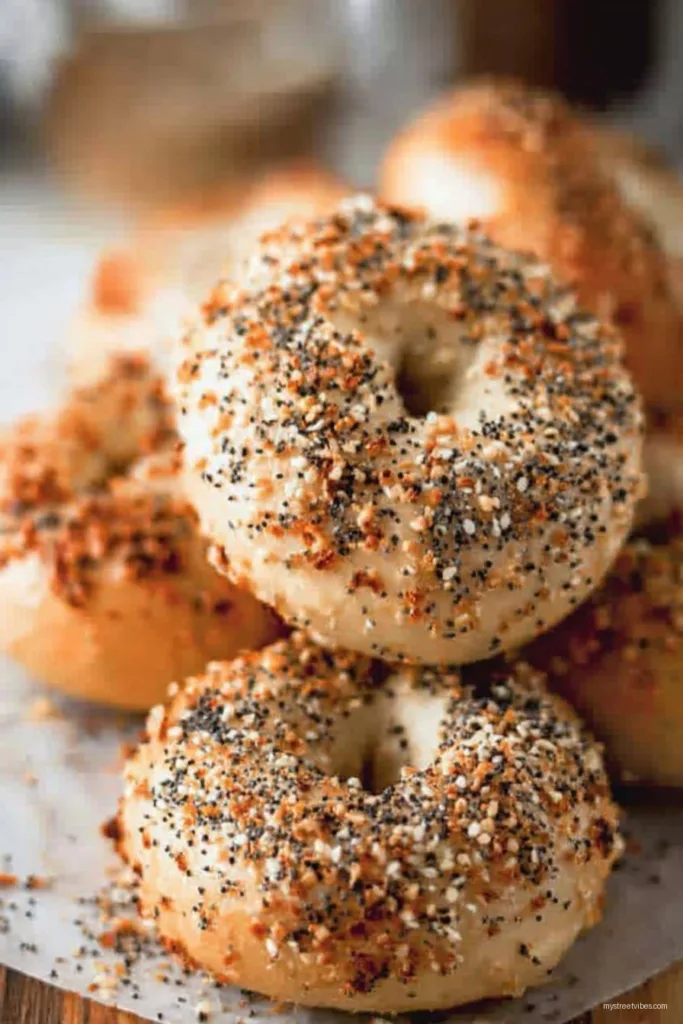
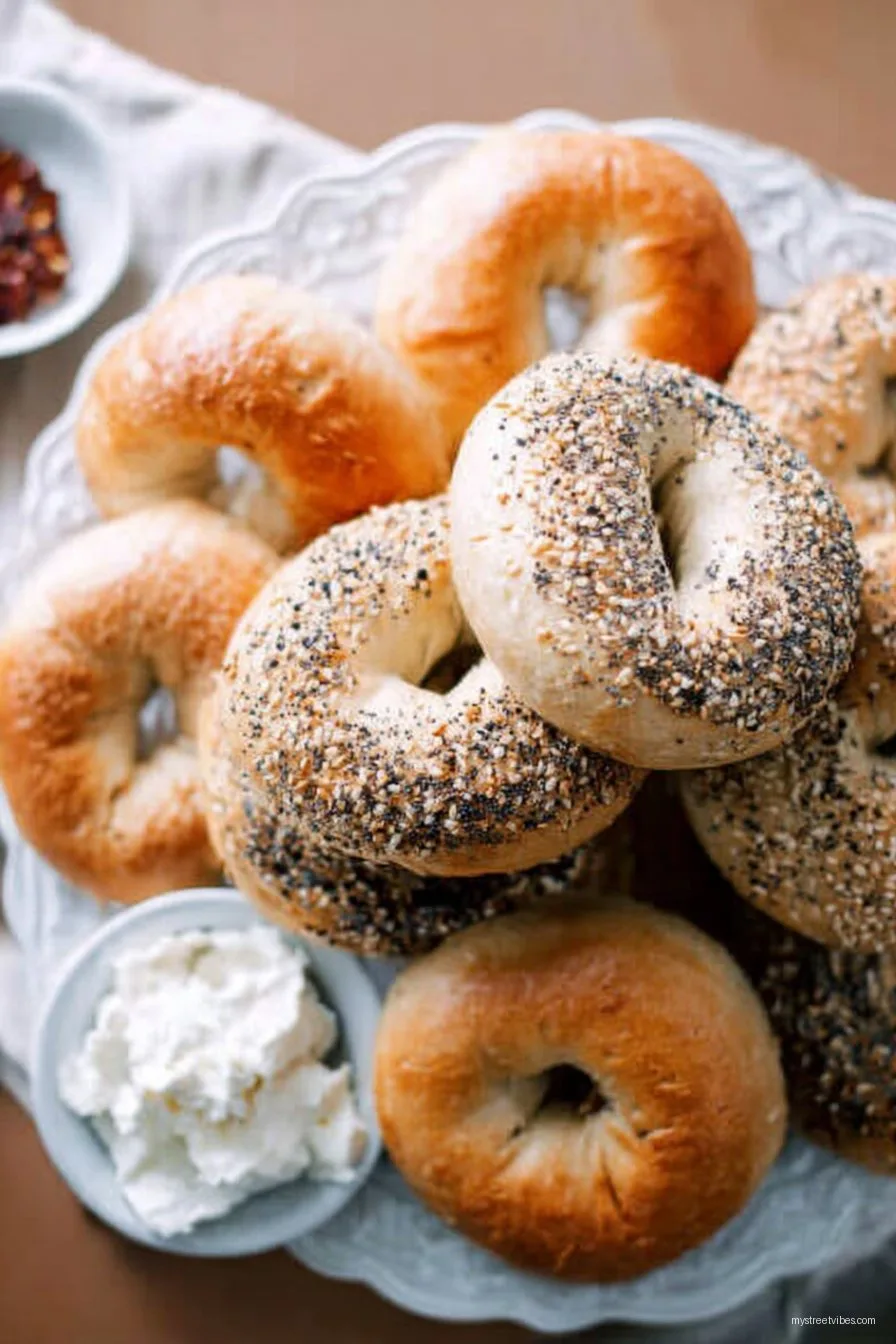
- Toppings: sesame, poppy, flaky salt, everything mix, a handful of minced onion, or just leave them plain and smug.
Optional bit that makes a difference: a quick dusting of cornmeal or semolina on the baking sheet so nothing sticks, trust me on this one.
Let’s make the dough
- Mix the wet stuff: In a big bowl, whisk the starter with the warm water until it looks milky and loose. This is where I usually take a tiny taste. It is tangy and oddly comforting.
- Bring it together: Stir in the barley malt syrup until dissolved. Add the flour and salt. Use a sturdy spoon or your hand to combine into a rough shaggy dough. It will look messy and a bit stubborn, do not worry if it looks weird at this stage it always does.
- Rest and fold: Let the dough sit for 20 minutes autolyse. Then do 3 sets of gentle stretch and folds over 45 minutes, every 15 minutes or so. Grab a side of the dough, stretch up and fold over itself, turn the bowl, repeat. The dough should go from scruffy to smoother, like it suddenly remembered its manners.
- Bulk ferment: Cover and let it rise at room temp until puffed and elastic, about 3 to 4 hours for a warm kitchen, 4 to 6 if cool. It wont necessarily double, and that is fine. I tend to think a slow puff gives better flavor.
- Chill to make life easier: Scrape the dough onto a lightly floured counter. Pre shape into 8 equal bits about 110 to 115g each. Cover and rest 15 minutes. Then tuck each piece into a tight ball. Pop them on a tray, cover, and refrigerate overnight 8 to 18 hours. This firms them up and makes shaping a breeze.
- Shape two ways: In the morning, take the dough out while you heat the oven to 240 C or 465 F and set up a big pot of water to boil. For shaping, you can go with the rope method roll a 9 inch rope and wrap around two fingers, pinch the seam or do the poke method poke a hole in the center and gently stretch until the hole is about 1 and a half inches wide. I prefer the poke because it is quick and consistent.
- Proof briefly: Place shaped bagels on parchment dusted with semolina. Cover and let them get slightly puffy, 20 to 30 minutes. If you poke one, it should slowly spring back like a lazy cat. If they are sluggish, give them another 10.
- Boil like you mean it: Add the barley malt syrup and baking soda to the simmering water, not a raging boil, just a steady burble. Drop in 2 or 3 bagels at a time, 30 to 45 seconds per side for a thinner crust, up to 60 per side for extra chew. I go 45 because I like balance. Lift out with a slotted spoon. If you see a bagel getting wrinkly, shorten the time for the next batch. I once tried boiling for 2 minutes and regretted it because the crust got tough and the inside was a bit dense.
- Top and bake: While they are still a little sticky from the bath, dip or sprinkle on toppings. Bake on a preheated steel or an inverted sheet at 230 C or 450 F for 15 to 18 minutes until deep golden. Rotate the tray halfway if your oven has hot spots. When you tap the side, they should sound hollow, like a tiny drum.
- Cool just enough: Let them sit for 15 minutes before slicing. I know, waiting is annoying. But the crumb sets and you will get cleaner cuts. Then enjoy, ideally with butter that melts into every nook.
Oh, quick detour. My starter is named Noodle. I did not plan that. It just sort of stuck after a friend said the dough looked noodly one day. Anyway, Noodle likes a warm counter corner and the occasional rye snack.
Notes from my messy counter
- If you do not have barley malt syrup, honey does the job and adds a gentle floral note. Brown sugar makes them a tad darker faster.
- Flour can be fussy. If the dough feels dry, wet your hands and fold a little moisture in. If it is sticky beyond reason, dust the counter, but sparingly. Too much flour makes tight bagels.
- Actually, I find it works better if the oven is fully preheated for at least 20 minutes even after the beep. The extra heat helps the rise.
- I once thought I needed perfect rounds. On second thought, the slightly wonky ones are the first to be eaten. Rustic is code for delicious.
Variations I have actually tried
- Sesame and scallion: Fold a handful of chopped scallions into the dough during the last fold. Finish with sesame on top. Green flecks look cheery.
- Cinnamon raisin: Add 1 teaspoon cinnamon and 120g raisins during shaping. Sweet and cozy, though I reduce boil time to 30 seconds per side so the sugar does not over caramelize.
- Cheddar jalapeno: Press shredded sharp cheddar and thin jalapeno slices on top before baking. Messy tray, big flavor.
- Salt and pepper: Simple and oddly perfect with eggs.
- One that did not work well: I tried stuffing cream cheese inside before boiling. Looked fun, leaked everywhere, tasted fine but cleanup was a faff. Would not recommend unless you love scrubbing pans.
Equipment that helps
- Kitchen scale essential for consistency. That said, if you are traveling or the scale battery dies, measuring cups will get you close enough for a batch.
- Slotted spoon or spider for scooping from the pot. No spoon? Two forks held together work, just be gentle.
- Baking steel or sturdy sheet preheated. If you only have a regular thin sheet, double stack two sheets to reduce hot spots.
- Parchment and a sprinkle of semolina for easy release.
For timing ideas and a friendly bake schedule, I like browsing The Perfect Loaf, even if I do not follow it to the letter. And if you want to nerd out on boil chemistry, this Serious Eats bagel deep dive is a cracking read.
Storage, such as it is
Cool completely, then stash in a paper bag inside a plastic bag at room temp for 1 day. After that, slice and freeze for up to 2 months. Reheat straight form the freezer in a toaster. Though honestly, in my house it never lasts more than a day. I think this tastes even better the next morning, but that might be because I am not cooking then.
Serving, the fun bit
We do a little bagel bar on Sundays. Butter, cream cheese, sliced tomatoes, capers, red onion, and if I am feeling fancy, smoked salmon. My personal favorite is a hot bagel with salted butter and honey. Also, try an egg and cheese in there for a cheeky breakfast sandwich. For a crowd, cut into quarters so everyone can graze.
Pro tips learned the hard way
- I once tried rushing the cold rest and regretted it because shaping was sticky chaos. The overnight chill really is worth it.
- Do not overcrowd the boiling pot. They bump into each other and you get odd seams. Give them space, like siblings on a long car ride.
- Keep the simmer moderate. A wild boil can make the crust blister in a way that is not cute.
- Salt matters. If your bagels ever taste flat, it is probably under salted dough. A tiny extra pinch can rescue the batch.
FAQ you might toss at me
Can I use all purpose flour?
Yes, you can. Expect a slightly softer chew and a bit less height. If you can, mix in 50g bread flour for backbone.
My starter is new. Will it work?
It can, but give it some time to get strong. If it barely rises after feeding, wait a few days. Active and bubbly starter makes happier bagels.
Do I really need a kitchen scale?
I say yes because flour packs oddly, and grams make life easier. But if you only have cups right now, go for it. Just watch the dough feel and adjust.
Why are my bagels flat?
Likely over proofed, or the boil was too long. Chill the shaped bagels 10 minutes before boiling and keep the simmer gentle. Also bake on a fully preheated surface.
Can I sweeten the boil with honey instead of malt?
Absolutely. Honey gives a lighter color and a subtle aroma. Malt is more old school bakery. Both are tasty.
Is egg wash necessary for toppings to stick?
Nope. Fresh form the pot they are tacky enough. I press the topping side down onto a plate of seeds and it clings like a champ.
How many does this make?
Usually 8 medium bagels. If you want 6 big ones, portion a bit larger and add an extra minute of bake time.
Can I make the dough in a stand mixer?
For sure, 3 to 4 minutes on low until smooth. Just keep an eye out so you do not over mix. Hand mixing is calmer, but mixers are great when you are knackered.
Do I need to score bagels?
No, the hole acts like a built in chimney. Which is handy.