A Little Love Letter to Cheese Crackers
Alright, confession time: I’m one of those people who gets strangely (maybe overly) happy about savory snacks, especially when cheese is involved. In fact, my first foray into homemade cheese crackers was equal parts desperation and nostalgia—I ran out of the boxed kind and couldn’t bear the thought of snacking on plain carrots again. So, after a long afternoon plagued with mild kitchen chaos (plus a dog sprinting through my legs for every scrap), I finally nailed down a batch that had my family swooping in before they’d even cooled. If you ever doubted comfort food could come straight from your own messy kitchen, this is going to change your mind. Or at least your snack game.
Why You’ll Love This Snack (At Least I Do!)
I make these when the snack cravings hit hard, or if we’re planning family game night—the bowl always vanishes way before Monopoly gets ugly. My kids (and okay, me) prefer them warm and just a little extra crispy on the edges. Honestly, the best part is how real they taste. Oh, and you won’t get that odd aftertaste from boxed stuff. Although, once I tried doubling the batch and somehow wound up with a dough beard—don’t ask! Still ate them, though.
So, What Goes In?
- 3 ounces cheddar cheese (about 1 cup, loosely packed) — I swing between sharp and extra sharp; once even tried it with smoked cheddar, pretty tasty!
- ½ cup all-purpose flour — If you’re feeling adventurous, I’ve subbed in spelt flour in a pinch (decent, but not life-changing).
- ¾ teaspoon cornstarch — Trust me, it makes them pleasantly crisp.
- ⅛ teaspoon salt — My gran would say to “use fancy sea salt,” but regular table salt works fine—seriously.
- 3 tablespoons unsalted butter, cold — Don’t skip the cold part! If all you’ve got is salted, just dial back the added salt a titch.
How To Make Homemade Cheese Crackers (In My Slightly Clumsy Way)
- First thing’s first: chuck your shredded cheddar, flour, cornstarch, and salt into a food processor (or a big mixing bowl if that’s what you’ve got). Add the cold butter, chopped up roughly. Then pulse (or use a pastry cutter/fork—elbow grease time) until the mixture clumps together into a kind of dough. It might look a little shambolic at first; that’s OK. I usually pinch a bit and squish it—if it holds, you’re golden.
- Gently pat and shape this dough into a squat little disk. Wrap it up tight in plastic wrap—mine always ends up looking like a lumpy spaceship—and stick it in the fridge for half an hour, maybe up to an hour if you’re distracted (guilty).
- Fire up your oven to 350°F (yep, preheating matters for this one) and line a baking sheet with parchment paper. Foil kind of works as a last resort but sticks more.
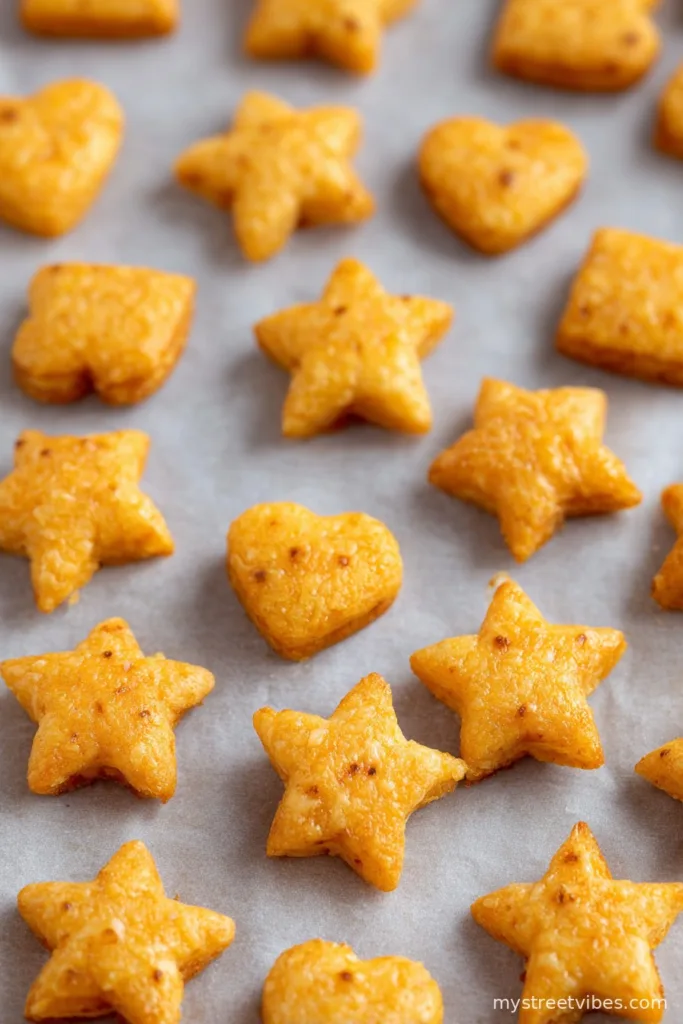
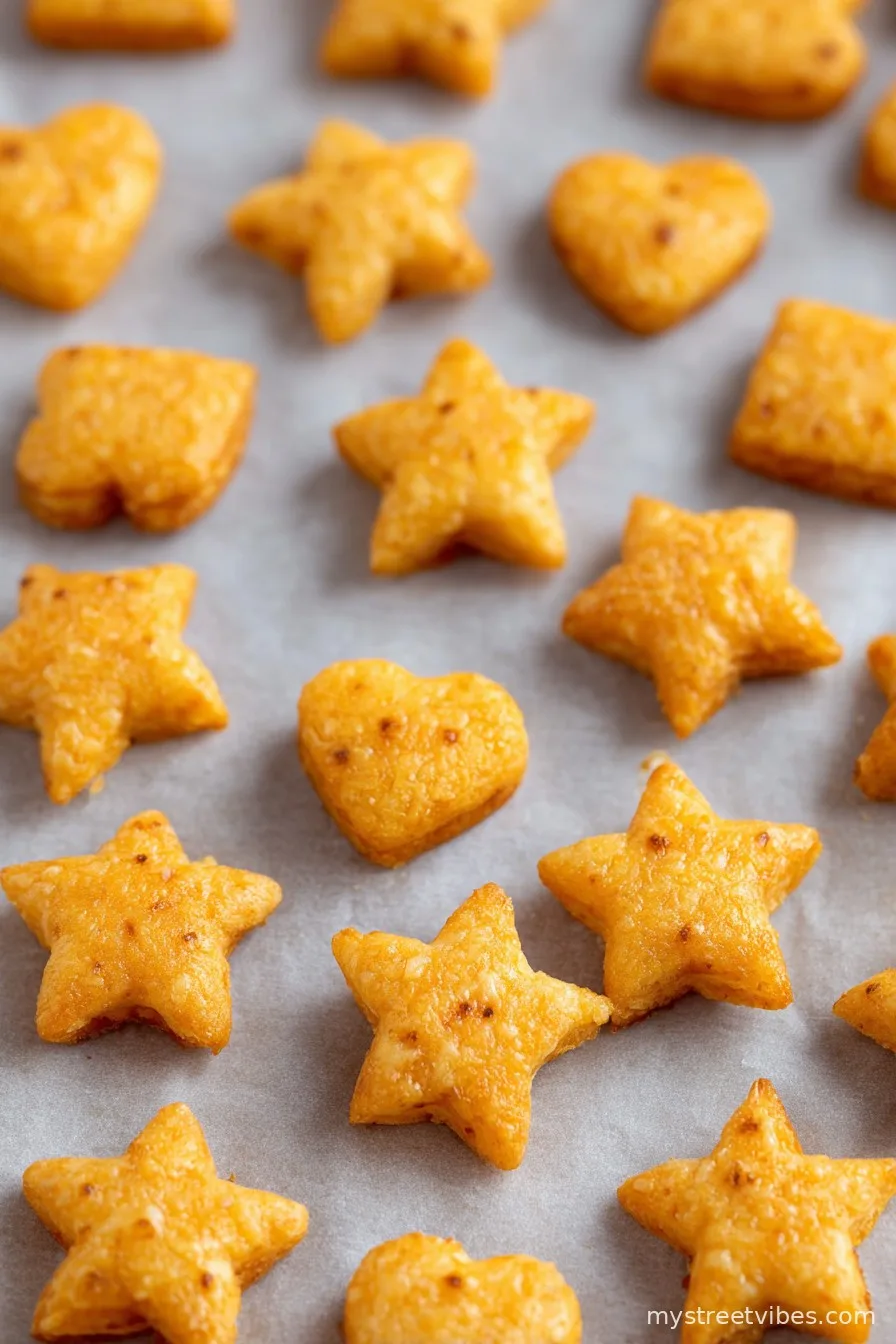
- Once the dough chills, lay it out on a lightly floured surface and roll it to about 1/8-inch thick. Don’t stress if it’s not a perfect rectangle—just go with it. Use a sharp knife or pizza cutter to slice it into 1-inch squares. Or, if you want to get wild, make triangles or wonky rectangles—my youngest insists sharks taste better.
- Transfer all those little shapes onto the baking sheet, spacing them just a teensy bit apart. (I always sneak a rogue edge piece here, which, honestly, is my favorite—don’t tell the rest of the family.)
- Bake for 16 to 18 minutes. I hover around the oven at about 15, since they go from golden to, um, “extra toasty” in a flash. Pull them out when the edges are just browning and crisping up.
- Let the crackers cool completely on the baking sheet. And yes, I always snag one while they’re still warm (worth the burnt fingers, in my opinion).
Notes from My Well-Used Notebook
- If the dough’s looking a bit crumbly, just press it together—cheese magic makes it come together as it chills.
- I regretted stacking the crackers while still warm once. They clung together like a cheese puzzle. Lesson learned!
Variations I’ve Messed Around With
- Pepper jack instead of cheddar: more zing, less classic comfort. Not for picky eaters!
- Added dried herbs (rosemary was legit, but the time I tried dill, it was…let’s say “unique”.)
- Sprinkled cracked black pepper on top—good, but only if you love pepper!

What You Actually Need (but maybe not)
- Food processor (makes life easier, but a bowl and pastry cutter/fork will do—I’ve done both, though my wrist wasn’t thrilled)
- Rolling pin—or honestly, I usually grab a wine bottle when I can’t find mine (which is… often)
- Parchment paper or baking sheet liner. Greased foil in a pinch, but they’re stickier.
Keeping Things Fresh (the Crackers, Not the Jokes)
If you manage to have leftovers (big if in my household), store them in an airtight jar or tin. Maybe two or three days, max? Honestly, ours rarely make it past the first evening, so let me know if yours last longer—I’d be impressed!
How to Serve ‘Em
These little guys are great plain, but I sorta love them with a dollop of hummus (weird, I know). For movie nights, we just dump ’em in a bowl and fight over the darkest crispy ones. Occasionally, I’ll pack some in a lunchbox and feel terribly domestic.
Pro Tips I Learned the Hard(ish) Way
- Don’t try to skip the chilling step—the dough just gets sticky and miserable. I thought it’d be fine once. It wasn’t.
- Watch the bake time. Set a timer. Or two. Burnt cheese is kind of tragic.
Your Real Questions, Answered
- Can I double the recipe?
Oh, absolutely—but the bigger the dough, the trickier it gets to roll and cut. Maybe do it in two batches if you, like me, have limited countertop space. - Can I use pre-shredded cheese?
Yeah, but scratch-shredded cheese melts smoother (less powdery stuff on it). That said, I’ve used pre-shredded when lazy, worked just fine. - Can I freeze the dough?
It’s possible! I sometimes stick a wrapped disk in the freezer. Thaw overnight in the fridge before rolling. Texture’s a little different but totally snackable. - What about gluten-free?
I haven’t tried a GF flour yet, but if you do, let me know how it goes! Actually, that’s a reminder for me to finally give it a try next time. (I keep meaning to…)
Anyway, now that you know all my cheesy secrets—happy snacking! And hey, if you come up with a new twist worth sharing, drop me a note. I love a good kitchen experiment, even when it’s a bit of a mess.
Ingredients
- 3 ounces cheddar cheese 1 cup lightly packed
- ½ cup all-purpose flour
- ¾ teaspoon cornstarch
- ⅛ teaspoon salt
- 3 tablespoons unsalted butter cold
Instructions
-
1First thing’s first: chuck your shredded cheddar, flour, cornstarch, and salt into a food processor (or a big mixing bowl if that’s what you’ve got). Add the cold butter, chopped up roughly. Then pulse (or use a pastry cutter/fork—elbow grease time) until the mixture clumps together into a kind of dough. It might look a little shambolic at first; that’s OK. I usually pinch a bit and squish it—if it holds, you’re golden.
-
2Gently pat and shape this dough into a squat little disk. Wrap it up tight in plastic wrap—mine always ends up looking like a lumpy spaceship—and stick it in the fridge for half an hour, maybe up to an hour if you’re distracted (guilty).
-
3Fire up your oven to 350°F (yep, preheating matters for this one) and line a baking sheet with parchment paper. Foil kind of works as a last resort but sticks more.
-
4Once the dough chills, lay it out on a lightly floured surface and roll it to about 1/8-inch thick. Don’t stress if it’s not a perfect rectangle—just go with it. Use a sharp knife or pizza cutter to slice it into 1-inch squares. Or, if you want to get wild, make triangles or wonky rectangles—my youngest insists sharks taste better.
-
5Transfer all those little shapes onto the baking sheet, spacing them just a teensy bit apart. (I always sneak a rogue edge piece here, which, honestly, is my favorite—don’t tell the rest of the family.)
-
6Bake for 16 to 18 minutes. I hover around the oven at about 15, since they go from golden to, um, “extra toasty” in a flash. Pull them out when the edges are just browning and crisping up.
-
7Let the crackers cool completely on the baking sheet. And yes, I always snag one while they’re still warm (worth the burnt fingers, in my opinion).
CLICK FOR NUTRITION INFO
↑
Approximate Information for One Serving
Serving Size:
1 serving
Calories:
142cal
Protein:
4 gg
Fat:
10 gg
Saturated Fat:
0g
Trans Fat:
0g
Cholesterol:
0mg
Sodium:
0mg
Potassium:
0mg
Total Carbs:
10 gg
Fiber:
0g
Sugar:
0g
Net Carbs:
0g
Vitamin A:
0
Vitamin C:
0mg
Calcium:
0mg
Iron:
0mg
Nutrition Disclaimers
Number of total servings shown is approximate. Actual number of servings will depend on your preferred portion sizes.
Nutritional values shown are general guidelines and reflect information for 1 serving using the ingredients listed, not including any optional ingredients. Actual macros may vary slightly depending on specific brands and types of ingredients used.
To determine the weight of one serving, prepare the recipe as instructed. Weigh the finished recipe, then divide the weight of the finished recipe (not including the weight of the container the food is in) by the desired number of servings. Result will be the weight of one serving.
Did you make this recipe?
Please consider Pinning it!