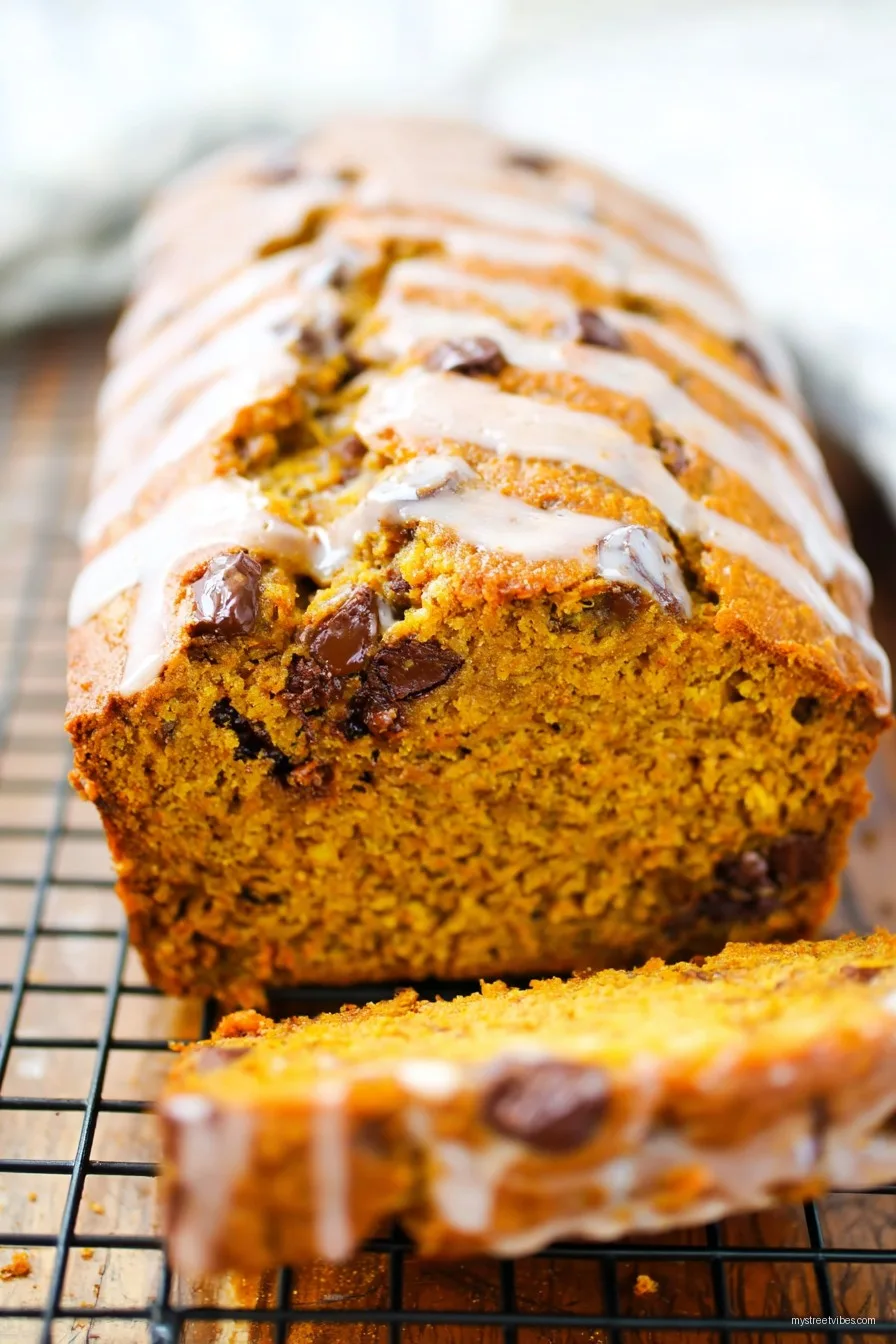
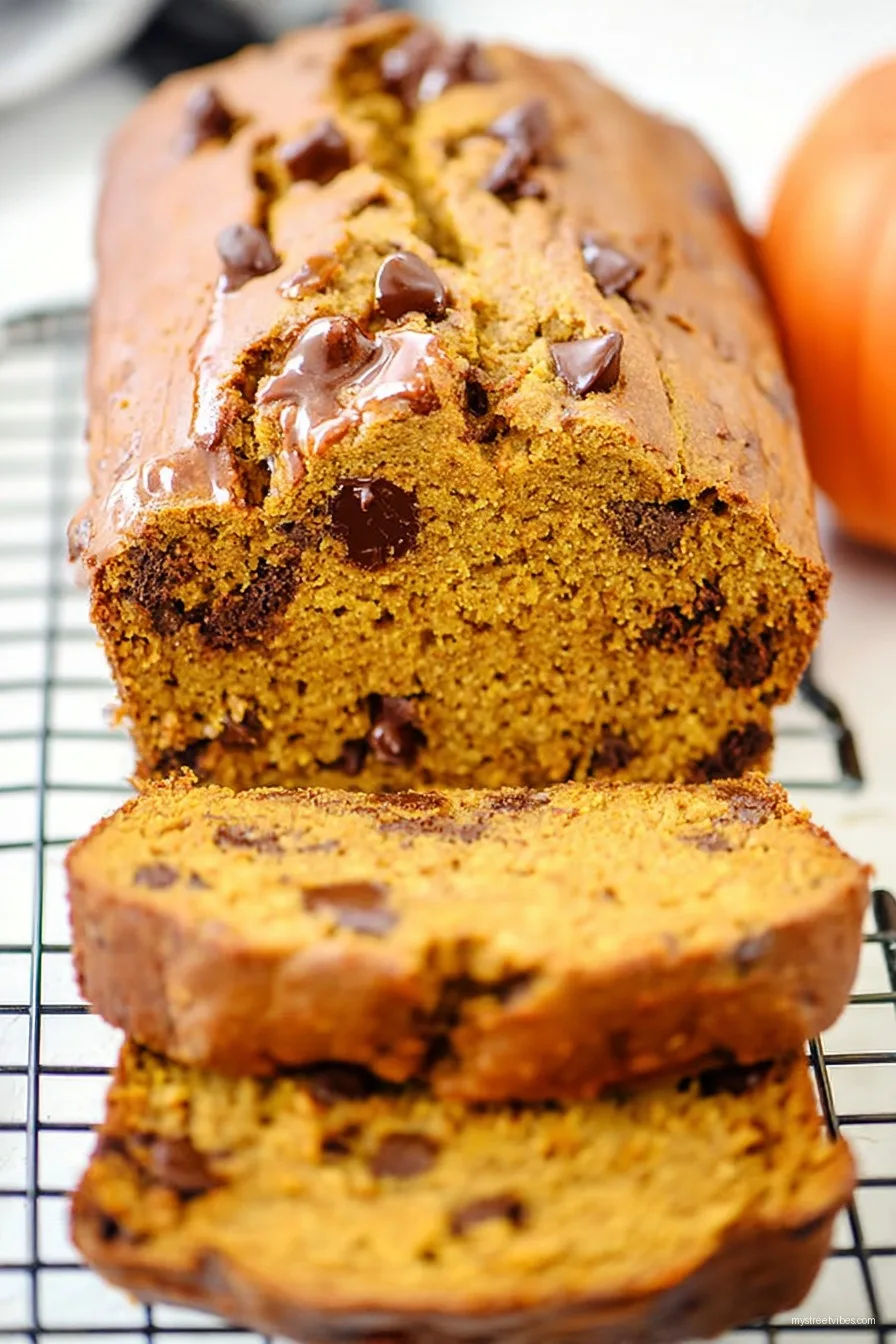
The Pumpkin Bread I Can’t Stop Baking
If you’ve ever found yourself hovering by the oven with a mug of tea, impatiently waiting for something warm and sweet to appear (oh, just me?), you’re in excellent company. This Glazed Chocolate Chip Pumpkin Bread has seen me through more than one rainy afternoon and—I’ll admit it—more than a handful of midnight snacks. The first time I made this, the loaf vanished so fast, I suspected a family of mice was living in the kitchen. Nope, just my two teens and, let’s be honest, me again for a post-dinner ‘taste test.’
Fun fact: Once, while I was distracted binge-watching random baking shows, I used cayenne instead of cinnamon. Not recommended unless you’re feeling adventurous or want to prank your brother.
Why You’ll Fall for This (And Probably Eat Half the Loaf Yourself)
I make this bread whenever that first autumn chill hits—or, honestly, anytime someone brings home a can of pumpkin and I’ve got leftover chocolate chips from failed cookies. My family goes absolutely bananas (uh, pumpkins?) for this because it’s not too sweet, just rich enough with those melty chocolate pockets, and the glaze makes you feel like you’ve got your life together, even if your kitchen is a disaster zone. Plus, it gives you a reason to eat vegetables for breakfast, which is basically winning at adulthood, right?
(If you’re like me, you’ll end up nibbling slices straight from the cooling rack—oh well, someone’s gotta do it.)
So Here’s What You’ll Need (Kind Of)
- 1 and 2/3 cups all-purpose flour (though, now and then I use half whole wheat—makes me feel slightly virtuous…)
- 1 cup canned pumpkin puree (Libby’s is classic, but store brand hasn’t failed me yet—my grandma would disagree!)
- 2 large eggs
- 1/2 cup vegetable oil (sometimes I switch it for melted coconut oil if it’s on sale)
- 1 cup granulated sugar (or, well, toss in some brown sugar if you forgot to refill the container, like I have. More flavor anyway.)
- 1 tsp vanilla extract (splashy is fine, I never measure)
- 1/2 tsp baking powder
- 1/2 tsp baking soda
- 1/2 tsp salt
- 1 1/2 tsp cinnamon (oh, and a pinch of nutmeg if you remember)
- 1 cup chocolate chips (I like dark but you do you. Mini-chips are fun for kids—unless you want them bouncing off the walls…)
- For the glaze: 3/4 cup powdered sugar, 2-3 tsp milk, 1/4 tsp vanilla (water will do in a pinch, but it’s honestly tastier with milk—and if you’ve only got almond, it’s fine!)
Let’s Make This (And Sneak a Taste!)
- Preheat your oven. Set it to 350°F (175°C). I always forget this step and end up waiting, spatula in hand, debating another coffee.
- Grease your pan. I usually grab a standard 9×5-inch loaf pan. Butter or nonstick spray both work—no shame in the store-brand stuff here.
- Mix your wet stuff. In a big bowl, whisk together the eggs, pumpkin puree, sugar, oil, and vanilla. This is where I sometimes use an electric mixer if I’m feeling fancy, but a whisk is just fine. Don’t overthink it.
- Add the dry stuff. In a separate bowl, mix together flour, baking soda, baking powder, salt, cinnamon, and nutmeg if you’re feeling spicy. Combine the wet and dry gently—just enough so you don’t see flour pockets. And don’t worry if it looks a bit thick—totally normal.
- Stir in chocolate chips. I usually do this by hand so I don’t crush them. Plus, this is when I steal a few to snack on. Who’s judging?
- Bake it! Pour into your pan and level it out. Bake for about 50-60 minutes, but start checking at 50 with a toothpick or a fork (sometimes I just use a chopstick. No shame). When it comes out mostly clean, it’s ready! If the top’s getting too brown, I just toss some foil over halfway through.
- Cool & glaze. Let it sit in the pan 15 min or so, then run a knife around the edge and turn it out. Whisk together your glaze ingredients—it should be thick but pourable. Drizzle over the cooled loaf (or still slightly warm, if patience isn’t your thing). Lick the spoon. It’s the law.
Notes from Someone Who Spills Flour. A Lot.
- If your bread sinks a little in the middle, join the club—usually just means it’s extra moist.
- Swap in half the oil for applesauce if you want to, but on second thought, I think it’s actually more tender with full oil. Up to you.
- I once used baking paper that was too small and the whole thing stuck; now I just butter the heck out of the pan if I don’t have parchment.
- Don’t use pumpkin pie filling by mistake—it tastes odd, trust me.
Stuff I’ve Tried (And Sometimes Regretted)
- Chopped walnuts are actually delightful, but my daughter picks them out like a truffle hog sniffing for chocolate.
- Coconut flakes—hmm, not for me, but if you love that vibe, go for it.
- White chocolate chips instead of regular—tried once; way too sweet, but maybe you’re braver than me.
- Mini-muffins? Takes about 18-22 minutes to bake and are adorable, just don’t forget the liners or they’ll stick.
Do You Need Fancy Equipment?
Honestly, a mixing bowl, spatula (or big spoon), and a loaf pan are the basics. If you don’t own a loaf pan, I’ve used a square cake pan in a pinch—bread’s just shorter and a little sassy-looking. Still tastes good. Oh, and I once tried mixing by hand with a clean coffee mug when all my whisks were inexplicably missing. It works!
Storing (Though It Vanishes Fast)
Wrap this bread up tight in plastic wrap or tuck it in an airtight container. It’ll keep for 2-3 days at room temp—if, by some miracle, there are leftovers. I do think it’s even better the next day; the flavors settle in and get cozy. You can freeze slices between wax paper for up to 2 months, but—let’s be real—it’s never lasted that long here.
How We Eat It (Besides Inhaled Over the Sink)
This is so good warmed up with a pat of butter; I’ll sometimes top mine with a little cream cheese and a sprinkle of cinnamon sugar (my Southern aunt swears by this). My husband dunks his in coffee, and my kids eat it plain—ideally for breakfast if I’m not looking. Serve on a mismatched plate for best results, or sneak a slab straight from the cutting board. No judgment.
Things I Learned The Hard Way (A.K.A. “Pro Tips”)
- Resist slicing while hot—the chocolate chips will be molten and you’ll end up with a, well, chocolate lava situation. (I learned this the messy way.)
- Don’t rush the glaze. I once dumped it on straight away and it just sort of, well, dissolved into a puddle. Wait till it’s barely warm, promise.
- Actually, if you use really dark chocolate chips, sprinkle a bit of flaky sea salt on top. Game changer.
FAQ (Because People Actually Ask Me)
- Can I make this gluten-free? Sure thing! Use a 1:1 GF flour blend—Bob’s Red Mill has a decent one. Might be a tiny bit denser, but it works.
- Can you reduce the sugar? Yeah, you probably could knock out 1/4 cup, but it won’t be quite as tender. Still plenty delicious for breakfast. (If you’re not afraid of a little sugar rush—live a little!)
- Does it freeze well? Definitely. I slice before freezing so I can grab and toast individually. Great for hiding from the kids—kidding. Sort of.
- Any tips for making it less sweet? Skip the glaze and use bittersweet chips. Or add in some roasted seeds for crunch. I once tried reducing the sugar too much, though, and it turned out kinda rubbery, so don’t go overboard.
- Can I double this recipe? Absolutely! Or, just make two loaves at once—you’ll be glad you did. (Check out this King Arthur Pumpkin Bread primer for inspiration; I borrowed a couple of tricks from there.)
So, next time you’ve got spare pumpkin and a half-eaten bag of chocolate chips, you know what to do. And if your glaze drips off the sides? That’s just gravity doing its best. Happy baking, mate!
Ingredients
- 1 and 3/4 cups all-purpose flour
- 1 cup granulated sugar
- 1/2 cup light brown sugar, packed
- 1 teaspoon baking soda
- 1/2 teaspoon salt
- 2 teaspoons pumpkin pie spice
- 1 cup canned pumpkin puree
- 2 large eggs
- 1/2 cup vegetable oil
- 1/4 cup milk
- 1 teaspoon vanilla extract
- 3/4 cup semi-sweet chocolate chips
- 1 cup powdered sugar (for glaze)
- 2 tablespoons milk (for glaze)
- 1/2 teaspoon vanilla extract (for glaze)
Instructions
-
1Preheat oven to 350°F (175°C). Grease a 9×5-inch loaf pan and set aside.
-
2In a large bowl, whisk together flour, granulated sugar, brown sugar, baking soda, salt, and pumpkin pie spice.
-
3In a separate bowl, mix pumpkin puree, eggs, oil, milk, and vanilla extract until well combined. Add wet ingredients to the dry ingredients and stir until just combined.
-
4Fold in the chocolate chips. Pour the batter into the prepared loaf pan and smooth the top.
-
5Bake for 50–55 minutes, or until a toothpick inserted into the center comes out clean. Cool in pan for 10 minutes, then transfer to a wire rack to cool completely.
-
6For the glaze, whisk together powdered sugar, milk, and vanilla extract until smooth. Drizzle over cooled pumpkin bread before serving.
CLICK FOR NUTRITION INFO
↑
Approximate Information for One Serving
Serving Size:
1 serving
Calories:
290cal
Protein:
4 gg
Fat:
10 gg
Saturated Fat:
0g
Trans Fat:
0g
Cholesterol:
0mg
Sodium:
0mg
Potassium:
0mg
Total Carbs:
48 gg
Fiber:
0g
Sugar:
0g
Net Carbs:
0g
Vitamin A:
0
Vitamin C:
0mg
Calcium:
0mg
Iron:
0mg
Nutrition Disclaimers
Number of total servings shown is approximate. Actual number of servings will depend on your preferred portion sizes.
Nutritional values shown are general guidelines and reflect information for 1 serving using the ingredients listed, not including any optional ingredients. Actual macros may vary slightly depending on specific brands and types of ingredients used.
To determine the weight of one serving, prepare the recipe as instructed. Weigh the finished recipe, then divide the weight of the finished recipe (not including the weight of the container the food is in) by the desired number of servings. Result will be the weight of one serving.
Did you make this recipe?
Please consider Pinning it!!