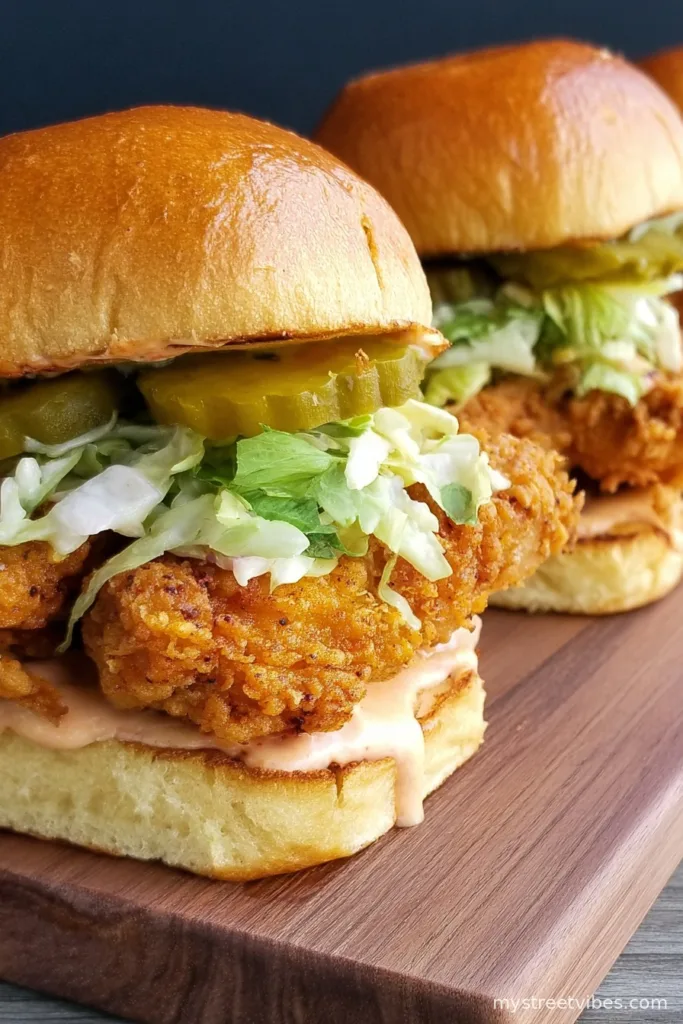
Fried Chicken Sliders: The Recipe I Make When I Want to Impress (But Not Actually Try That Hard)
Alright, gather round—let me tell you about the first time I made these fried Chicken Sliders. It was supposed to be a quick little snack for friends watching the game (but you know how that goes—they all show up ravenous and, next thing I know, it’s dinner). I remember thinking, “How hard could it be?” Turns out, if you accidentally use baking powder instead of flour in the breading, it’s not great. But I fixed it eventually—with a side of laughter and a lot of napkins. These little guys are the reason I now keep slider buns in my freezer; you never know when you’ll need to save the day (or at least dinner). Anyway, let’s get into it before I ramble off into another story about my cousin’s disastrous attempt at deep frying tofu—you don’t want to eat that, believe me.
Why These Chicken Sliders Are My Party Ace in the Hole
I make these fried chicken sliders when I want to look like I’ve got my life together—even though I’m usually winging it (pun 100% intended). My family goes crazy for this because everyone can build theirs just how they like. Plus, if I’m honest, I’ve burnt so many full-size fried chickens that these little sliders save me a heap of worry (and cleaning time—the oil splatters never end, right?). If you’ve got picky eaters, you just plop some pickles on for the adults and keep things basic for the kids, easy peasy. Actually, it was my oldest who convinced me to try spicy mayo, which—I’ll admit—took these to another level.
What You’ll Need (And What I Swap In When I’m Out)
- Chicken thighs, boneless & skinless (or chicken breast in a pinch—even nuggets if you’re desperate)
- All-purpose flour—my grandmother always insisted on Gold Medal, but honestly, store brand is fine
- Buttermilk (when I forget to buy it, I just add a splash of vinegar to regular milk—tastes pretty close!)
- Eggs (2, that’s usually enough)
- A big handful of breadcrumbs—panko has the best crunch, but homemade is totally fine
- Garlic powder, paprika, a bit of cayenne (or just whatever seasoned salt you find at the back of your spice drawer)
- Slider buns (I grab brioche when I feel fancy but regular dinner rolls work; and my neighbor once used mini bagels—wild move but fun)
- Pickles. That’s non-negotiable, unless you hate them (in which case, more for me)
- Oil for frying—I use canola, but have gotten away with sunflower oil
- Optional: Lettuce, spicy mayo (just mix Sriracha with mayo), cheese slices, or—if your grocery run got weird—coleslaw mix
How I Actually Make These Fried Chicken Sliders
- Pound out the chicken a bit. Not enough to vent all your work stress; just to flatten so they fry evenly. Aim for about half an inch thick. I usually do this with a rolling pin wrapped in cling film, but a wine bottle works (ask me how I know…)
- Marinate in buttermilk. I just plop the chicken into a bowl, cover with buttermilk, a little salt and pepper, and stash it in the fridge for at least 30 minutes—overnight if I’ve planned ahead, which is hardly ever.
- Prep your breading station. Line up one plate of flour mixed with the spices, a second bowl with beaten eggs, and a third plate of breadcrumbs. This is where things get messy (embrace it).
- Coat the chicken. Dredge in flour, dip in eggs, then toss in breadcrumbs. Press breadcrumbs on so you get max crunch. Don’t worry if you get clumps, it’s normal (or so I tell myself every time).
- Heat your oil. Fill a deep pan with about an inch or so of oil—enough to float the chicken. Get it hot—about 350°F (or, if you’re like me and misplace the thermometer, just sprinkle some breadcrumbs in and see if they sizzle and float).
- Fry in batches. Slide the breaded chicken pieces in gently, don’t overcrowd. Fry 3-4 minutes per side until golden brown and crispy; flip once. I usually sneak a taste here—quality control, right?
- Drain on a cooling rack or a paper towel–lined baking sheet. (But let’s be real, a pile of napkins will do.) Sprinkle a bit of salt while they’re hot if you remember.
- Assemble your sliders! Add chicken to the buns, pile on pickles, maybe some slaw or spicy mayo. Enjoy while still warm.
Lil’ Notes from the Front Line of My Kitchen
- The chicken is just as good cold, though I secretly like it better on day two—assuming any survives.
- If the flour gets clumpy mid-breading, just sift the clumps out with your fingers; or shrug and move on.
- Double-dip for thicker breading. (But it’s also messier. Your call.)
Variations I’ve Tried (Some Winners, Some… Not)
- Spicy Korean style: Coat the chicken in gochujang sauce before stacking. It’s a proper flavor bomb.
- Buffalo: Toss fried chicken with hot sauce and butter. It’s messy, but so good (have wipes handy).
- Veggie attempt: Tried breading eggplant slices one time—honestly, not my favorite, kind of soggy. Maybe I did something wrong?
- Sweet and savory: Drizzle some honey on top. Sounds odd, but trust me, it works (unless you really hate sweet with savory—then, give it a miss).
What You’ll Need (But Not Necessarily Have)
- Frying thermometer (I always lose mine but you can get by with the sizzle test)
- Wire rack for draining (or just a bunch of paper towels; I use a cooling rack from baking and it does double duty)
- Mixing bowls and tongs, unless you prefer to use your fingers and get breading everywhere

How Long Do They Last? (Spoiler: Not Long)
Okay, so technically you can store these in an airtight container in the fridge; they’ll keep for about 2 days. Reheat in the oven so they crisp up again. But honestly, in my house it never lasts more than a day! They just seem to vanish. You can read more on fried chicken storage if you want the expert take—I just eat ’em fast.
How We Serve These at Home (And What Works for You!)
I usually serve these with a big bowl of chips (fries for my American pals) and sometimes a simple salad—well, as simple as opening a bag and dumping it in a bowl, which counts in my book. My aunt insists on squeezing a bit of lemon over the chicken, and honestly, she’s onto something. Oh, and there’s always some kind of dipping sauce lineup. Try spicy mayo or that bottled ranch (my nephew swears by mixing ketchup AND ranch together).
Things I Messed Up So You Don’t Have To
- Don’t rush the marinating. I tried skipping it once and, wow, so dry. Just let it hang out in buttermilk awhile, even if only half an hour.
- Overcrowding the pan gives you soggy breading—be patient and fry in batches, even if you’re in a hurry.
- Let the oil heat back up between batches. I forgot once and the second round wasn’t crisp (stab to my heart).
Your Questions (Because Friends Really Do Text Me About These!)
- Q: Can I bake these instead of frying?
A: You can, and I’ve tried—just brush with a little oil and bake at 220°C/425°F. Not quite as crunchy but less mess, so that’s something! - Q: What if I don’t have buttermilk?
A: Splash a tablespoon of lemon juice or vinegar into plain milk and let it sit five minutes. Works in a pinch. Or check out these other buttermilk hacks. - Q: Any tips for feeding a crowd?
A: Absolutely—just keep the fried chicken pieces warm in the oven (like 100°C/200°F) until ready to assemble. Or hand off bun-assembly duties to someone who needs distracting. 😉 - Q: Can I make these ahead?
A: You can fry the chicken ahead and reheat in the oven, but I tend to think they taste better straight from the fryer, so I usually bribe someone to help with last-minute frying. - Q: Do I really need all three breading steps?
A: I mean, no one’s watching, are they? If you’re pressed for time, just go flour and breadcrumbs, but you won’t get maximum crunch.
And there you are. Fried chicken sliders, the way I actually make them at home (with all the shortcuts and missteps included). If you give these a try, let me know what you think—or if you come up with a variation that blows my mind. Always up for tweaking a classic, even if it goes sideways.

Ingredients
- 8 small slider buns
- 2 boneless, skinless chicken breasts
- 1 cup buttermilk
- 1 cup all-purpose flour
- 1 teaspoon paprika
- 1 teaspoon garlic powder
- 1/2 teaspoon salt
- 1/2 teaspoon black pepper
- 1 cup vegetable oil, for frying
- 8 slices dill pickle
- 1/4 cup mayonnaise
- 1 tablespoon hot sauce
Instructions
-
1Slice each chicken breast into 4 equal pieces to make 8 portions. Place the chicken pieces in a bowl with buttermilk and let marinate for at least 15 minutes.
-
2In a separate bowl, combine flour, paprika, garlic powder, salt, and black pepper.
-
3Remove chicken from buttermilk, let excess drip off, and dredge in the flour mixture until well coated.
-
4Heat vegetable oil in a large skillet over medium-high heat. Fry the chicken pieces for about 4-5 minutes per side, or until golden brown and cooked through. Drain on paper towels.
-
5In a small bowl, mix mayonnaise and hot sauce. Toast slider buns lightly.
-
6Assemble sliders: Spread spicy mayo on each bun, add a fried chicken piece, top with a pickle slice, and close with the bun top. Serve warm.
CLICK FOR NUTRITION INFO
↑
Approximate Information for One Serving
Serving Size:
1 serving
Calories:
320 caloriescal
Protein:
17gg
Fat:
15gg
Saturated Fat:
0g
Trans Fat:
0g
Cholesterol:
0mg
Sodium:
0mg
Potassium:
0mg
Total Carbs:
32gg
Fiber:
0g
Sugar:
0g
Net Carbs:
0g
Vitamin A:
0
Vitamin C:
0mg
Calcium:
0mg
Iron:
0mg
Nutrition Disclaimers
Number of total servings shown is approximate. Actual number of servings will depend on your preferred portion sizes.
Nutritional values shown are general guidelines and reflect information for 1 serving using the ingredients listed, not including any optional ingredients. Actual macros may vary slightly depending on specific brands and types of ingredients used.
To determine the weight of one serving, prepare the recipe as instructed. Weigh the finished recipe, then divide the weight of the finished recipe (not including the weight of the container the food is in) by the desired number of servings. Result will be the weight of one serving.
Did you make this recipe?
Please consider Pinning it!!