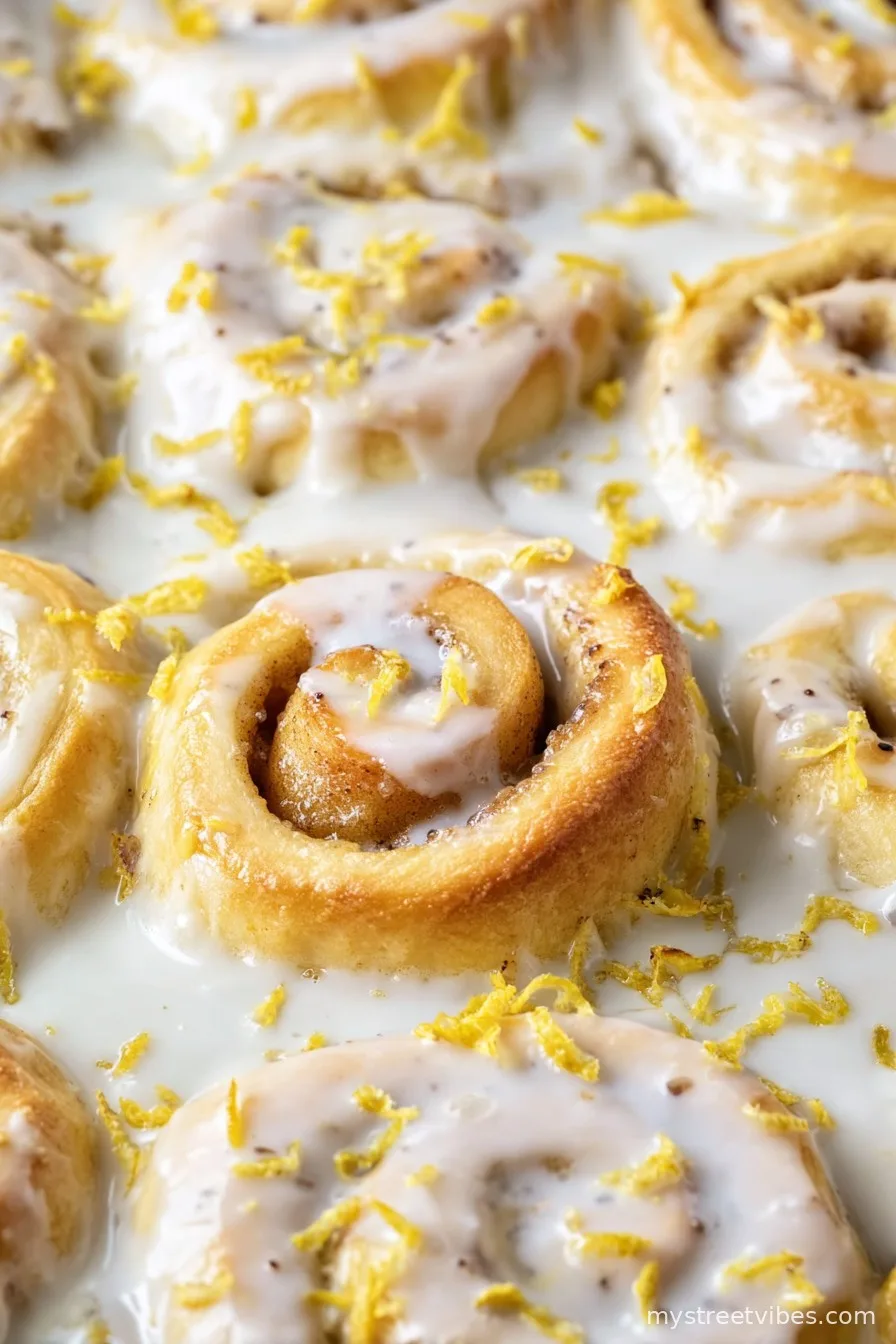
Making Lemon Rolls: The Story (Or Why My Kitchen Smells Like Sunshine)
You know those days when you wake up craving something that’s both cozy and a bit zingy? For me, that’s almost always a batch of Easy Lemon Rolls. The first time I made these, I actually thought they’d end up looking like something form a kid’s playdough set. Turns out, they’re as forgiving as my old slippers—plus they smell a whole lot better. One time, my sister dropped by while I was making them, and she asked if I was secretly running a fancy bakery. (Ha! As if anyone would pay for my wonky-shaped rolls.)
Why I Keep Coming Back to These Lemon Rolls
Honestly, I make these whenever I can’t decide between lemon cake and cinnamon rolls, which is probably more often than I should admit. My family goes absolutely bananas for them, especially my partner, who starts poking around the oven at least twenty minutes before they’re done (I get it, the waiting is torture). Oh, and if you’re the kind of person who likes to see the glaze run down the sides in dramatic little rivers—yep, this one’s for you. And look, I’ve curdled milk, underbaked, overbaked… and these lemon rolls still end up delicious most of the time. How’s that for forgiving?
What You’ll Need (And What I Sometimes Sub)
- 2 3/4 cups all-purpose flour (I steal some bread flour from the cupboard if I’m low, works just fine)
- 1/4 cup granulated sugar (brown sugar if you forget to buy more, honestly not bad)
- 2 1/4 teaspoons (1 packet) instant yeast (my grandma insisted on Red Star, but I’ve used generic—nobody noticed)
- 1/2 teaspoon salt
- 1/2 cup whole milk (in a pinch, I’ve mixed half water half cream… it’s not chaos, it works!)
- 1/4 cup unsalted butter, melted (or slightly softened if you lose patience)
- 2 large eggs (room temp if you remember; straight from the fridge if you, like me, forget every time)
- For the filling:
- 1/2 cup unsalted butter, very soft but not totally melted (margarine technically works, but the taste is, well, different)
- 3/4 cup sugar
- Zest of 2 large lemons (sometimes I use 1 grapefruit when lemons are suspiciously expensive)
- 2 tablespoons lemon juice (plus more if you’re allergic to subtlety)
- For the glaze:
- 1 cup powdered sugar (just sift if it’s lumpy—trust me, or don’t!)
- 2-3 tablespoons lemon juice (milk if you want it milder, but I go wild with the lemon)
How I Actually Make These—Step by Step, Ish
- Warm up your milk until it’s just shy of hot. Like, think ‘baby bath warm’—if you dip your finger and want to nod off, it’s probably right. Pour it in a big bowl with the sugar and yeast, and stir. I usually let it get frothy for a couple minutes, pretend I’m patient.
- Add eggs, melted butter, and salt. Give it a quick whisk; then start adding flour a cup at a time. The dough should be sticky, but not like quicksand. Honestly, it’s always a bit of a guess—sometimes I need an extra handful, sometimes not.
- Knead for about 6–8 minutes. (I use the stand mixer with a dough hook when I’m feeling lazy.) If you’re doing it by hand, get a bit of elbow grease going. The dough should feel soft, almost like a squishy toy, but not glove-sticky.
- Plop it in a greased bowl, cover, and let it rise somewhere warm for about an hour—or until it looks sort of doubled. There’s honestly always some anxiety at this stage. Too warm? Too cold? Whatever, as long as it moves.
- While you wait, mix the filling. Dump the soft butter, sugar, lemon zest, and juice in a bowl. Mash it all up ’til it’s spreadable and fragrant (this is where I usually sneak a taste, just to be sure it hasn’t somehow gone off—in my dreams, right?).
- Once the dough is puffy, gently squish it flat, then roll out to a largish rectangle—mine’s always a bit wobblier than a proper shape so don’t stress. Spread the filling right up to about 1cm from the edges.
- Roll it up (tightly-ish), then slice into rolls about 2–2.5cm thick. Wildly uneven rolls are practically a tradition at this point, by the way.
- Place rolls in a greased baking tin (sometimes I squish the extras into a smaller tin, or occasionally just eat the ends raw—don’t judge) and cover. Let them rise again while the oven heats to 180C/350F, usually half an hour or until they look sleepy and puffy.
- Bake for 20–25 minutes. You want gently golden tops—if you wait for deep brown, they’ll be tough. Don’t worry if the filling escapes everywhere, that’s part of the charm.
- Let cool a tiny bit and drizzle the glaze (just mix powdered sugar and lemon juice until pourable). I’m usually too eager, so the glaze gets all melty, but that’s fine with me.
A Few Notes (Learned the Wobbly Way)
- The dough always looks too sticky. Resist the urge to add more flour at first—it’ll firm up as it rises. I promise, unless your kitchen’s a sauna.
- If you forget to zest the lemons in advance you will curse the sticky fingers, but the end result is still worth it.
- Sometimes the filling comes out the sides. Still tastes just as good—maybe even better!
- I used to let the glaze cool completely, but actually, I find it’s better while everything’s still a little warm and gooey.
Tried-and-True Tweaks (And, Er, Misses)
- Orange zest and a splash of vanilla is lovely—like a less mean-spirited marmalade roll.
- Adding blueberries turned into a purple mess, but tasted fab—just maybe don’t wear white. (Ask me how I know.)
- I tried making these gluten-free once with a cup-for-cup flour; the texture was kinda rubbery, so maybe I did something daft, but if you crack it—let me know!

Do You Really Need Fancy Equipment?
I mean, a stand mixer makes me feel like a pro (even if I’m not), but honestly, you can knead this dough by hand with a good wood spoon and a hefty dose of patience. If you’re rolling out dough with an empty wine bottle, well, friend, you’re in excellent company.
Keeping ‘Em Fresh (Ha, Good Luck!)
Supposedly, these rolls last in an airtight container for a day or two, but in my house they rarely survive breakfast. If, by some miracle, you have leftovers, you can warm them up the next day—even better if you’ve got a microwave. Or just eat straight cold from the tin (zero shame, promise).
How We Serve Lemon Rolls Around Here
We eat these as soon as they’re cool enough to grab, usually still in PJs (the family, not the rolls). Sometimes I dust a bit of extra lemon zest on top—other times, I slather them with more glaze, because who’s watching. If you wanted to be posh, they’re pretty good with a mug of strong black tea—at least, that’s what my Aunt June insists.
Lessons the Hard Way (Yep, Real Pro Tips… Sorta)
- One time, I rushed the first rise, and the rolls were sad and dense. So just give the dough time—it’s worth it, or at least that’s what I keep telling myself.
- Chill the glaze a bit if you want it to set up pretty, but honestly, I think the drippy version is miles better.
- Don’t panic if things look uneven. These rolls forgive and forget.
Questions I Get (Yes, I’m Still Learning, Too!)
- Can I use bottled lemon juice? Sure, if that’s all you’ve got; it’s not as zingy, but it’ll do the job.
- What if my dough doesn’t rise? Well, check if your yeast is even alive—sometimes it’s the sneaky culprit, especially if it’s been sitting in the pantry since last Christmas.
- Can I prep these the night before? Actually, yes—just do everything up to slicing and put the whole tray in the fridge. Bake in the morning (let them sit out while the oven heats or they’ll be grumpy and sluggish).
- Is it okay to freeze? Yes, but be prepared for a slight change in texture. Not bad, mind, but not as cloudlike as fresh.
- Do I have to use real butter? Nah, though honestly, margarine tastes… sort of like homework, if you get my drift.
And that’s it! If you give these a go and something turns out a bit sideways, remember: it always looks fancier with a dust of powdered sugar. Or, if you’re my nephew, just eat the middle bits and call it a day.
Ingredients
- 2 1/4 cups all-purpose flour
- 2 1/4 teaspoons instant yeast
- 1/3 cup granulated sugar
- 1/2 teaspoon salt
- 2/3 cup warm milk
- 1/4 cup unsalted butter, melted
- 1 large egg
- 1 tablespoon lemon zest
- 1/3 cup lemon juice
- 1/2 cup powdered sugar
Instructions
-
1In a large bowl, combine flour, yeast, sugar, and salt.
-
2Add warm milk, melted butter, and egg to the dry ingredients. Stir until a dough forms.
-
3Knead in the lemon zest, then cover and let the dough rest for 10 minutes.
-
4Roll out the dough into a rectangle, brush with lemon juice, then roll up and slice into 8 rolls.
-
5Place rolls into a greased baking dish and let rise for 15 minutes.
-
6Bake at 350°F (175°C) for 25 minutes or until golden brown. Drizzle with a glaze made from powdered sugar and extra lemon juice before serving.
CLICK FOR NUTRITION INFO
↑
Approximate Information for One Serving
Serving Size:
1 serving
Calories:
210 caloriescal
Protein:
5gg
Fat:
5gg
Saturated Fat:
0g
Trans Fat:
0g
Cholesterol:
0mg
Sodium:
0mg
Potassium:
0mg
Total Carbs:
37gg
Fiber:
0g
Sugar:
0g
Net Carbs:
0g
Vitamin A:
0
Vitamin C:
0mg
Calcium:
0mg
Iron:
0mg
Nutrition Disclaimers
Number of total servings shown is approximate. Actual number of servings will depend on your preferred portion sizes.
Nutritional values shown are general guidelines and reflect information for 1 serving using the ingredients listed, not including any optional ingredients. Actual macros may vary slightly depending on specific brands and types of ingredients used.
To determine the weight of one serving, prepare the recipe as instructed. Weigh the finished recipe, then divide the weight of the finished recipe (not including the weight of the container the food is in) by the desired number of servings. Result will be the weight of one serving.
Did you make this recipe?
Please consider Pinning it!!