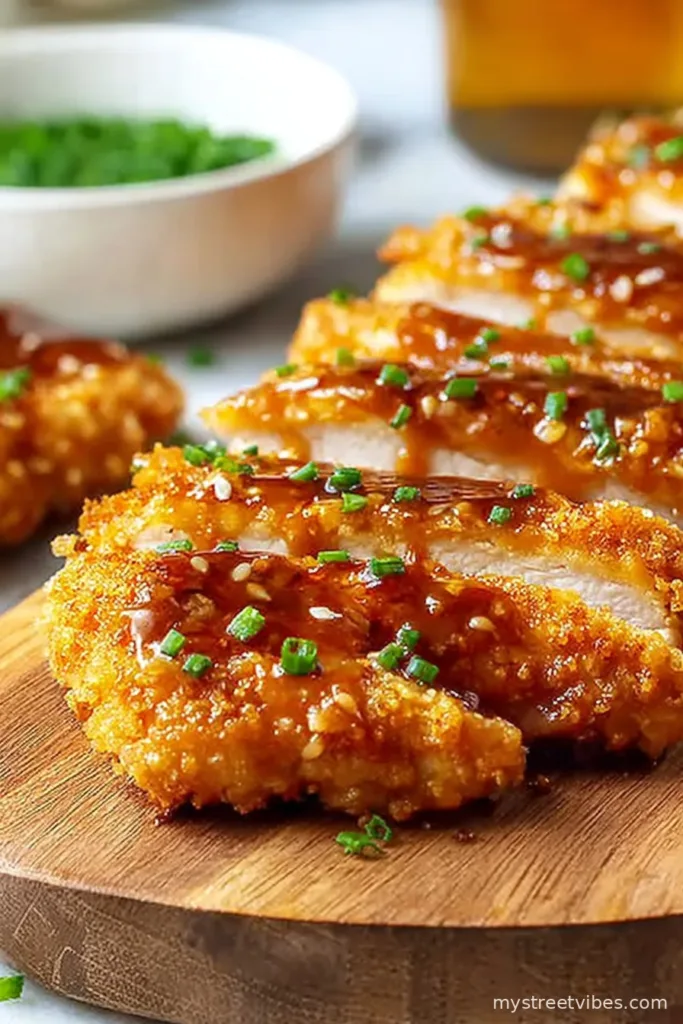
How I Fell for Crunchy Honey Garlic Chicken (No Shame Here)
Let me tell you, the first time I made these Easy Double Crunch Honey Garlic Chicken Breasts, I was sure I’d burnt them. Turns out, that dark golden color is exactly what you want—who knew? Anyway, this recipe isn’t about fancy chef-y stuff. I started making it when I just wanted to prove to my cousin (who’s notorious for dry chicken—sorry, Amy) that crispy chicken breasts at home don’t have to taste like sawdust. The first time, I even dropped an egg on the floor, so if your kitchen gets a bit wild, you’re in good company.

Why You’ll Love This (Or Maybe Get Weirdly Obsessed Like Me)
I make this whenever I’m craving something that feels takeouty, but I don’t want to put on actual pants and go out. My family goes a bit feral for these; seriously, I’ve had to fend them off with a wooden spoon while I finish drizzling the sauce. There’s something about that double dredge—crunchy, yes, but the honey garlic sauce soaks in just enough? Heaven. (Plus, when I’m feeling lazy, sometimes I just do one dip—works, but not as fun.)
Gather These (Or “Use What You’ve Got, Honestly”)
- 2 large chicken breasts (about 500g; I sometimes use thighs if that’s what’s in the fridge—just boneless, please!)
- 1 cup all-purpose flour (grandma swore by King Arthur, but store brand works; whole wheat if you want to get wild, but it’s a tad less crispy)
- 1 cup cornstarch (or potato starch in a pinch; thickens up the crunch)
- 2 tsp paprika (I like sweet, but smoked is good too for some drama)
- 1/2 tsp garlic powder
- 1/2 tsp onion powder
- 1/2 tsp salt (don’t skimp here or the flavor sulks)
- 1/2 tsp black pepper (or a grind extra if you like it peppy)
- 2 large eggs
- 1/4 cup milk (or honestly, water if you ran out—it’s just for the batter cohesiveness)
- Vegetable oil, for frying (enough for about 1/2 inch in your pan; I’ve even tried olive oil when I’m feeling like a Mediterranean rebel)
- 4 tbsp butter (salted or unsalted, up to you)
- 4 garlic cloves, minced (jarred garlic works but you’ll lose bragging rights)
- 1/3 cup honey (real, fake, doesn’t matter—cheapy bear bottle works!)
- 1/4 cup soy sauce (low sodium is fine—just don’t skip it, or the sauce gets weirdly sweet)
- 1-2 tbsp water, to thin the sauce if you like
Quick Directions (Mostly Precise, Some Rambly Bits)
- Slice your chicken breasts in half horizontally, so you get four thin-ish pieces. No need for a ruler; just aim for not-too-chunky.
- Mix the flour, cornstarch, paprika, garlic powder, onion powder, salt, and black pepper in a big shallow bowl or a pie plate—whatever’s got room for chicken flopping. (The mixture always looks way too orange for me, but that’s normal!)
- In another bowl, whisk eggs and milk together. Sometimes I forget the milk and honestly don’t notice much difference.
- Grab a piece of chicken, dunk it in the flour mix, then the egg, then back in the flour mix—press it a bit so it sticks there lovingly. Repeat for all pieces. Expect messy fingers, unless you’re one of those tongs people (no judgment).
- Heat a large skillet with about 1/2 inch of oil—medium-high is good. (If you flick a crumb in and it sizzles, you’re golden.)
- Gently slide the chicken into the hot oil. Fry about 4-5 minutes on each side until super golden, but not, like, burnt. This is where I usually sneak a crunchy bit, just for “testing” (wink).
- Take the chicken out and rest it on a rack or some kitchen paper. Seriously, don’t put it straight on a plate or it’ll get mushy-bottomed.
- Meanwhile, melt the butter in a small saucepan; toss in the minced garlic, heat for just under a minute (don’t wander—garlic burns SO fast, trust me). Stir in honey and soy sauce. Bring it up to a bubbly simmer for about 2 minutes; add a splash of water if it looks too thick.
- Pour or brush that glossy honey garlic sauce all over your crunchy chicken. Let it sit for 1-2 minutes so it soaks up the magic.
- Slice, stack, or just grab and eat (we won’t judge). Maybe throw on some chopped parsley or sesame seeds if you wanna be extra.

Notes From My (Slightly Messy) Kitchen
- Sometimes I make double the sauce if I want to drown rice or veggies in it. Actually, I find it works better if you drizzle the sauce just before serving, not too soon or the crust gets slightly limp.
- If you keep frying batches, your oil can get gunky—just scoop out floaty crumbs between rounds with a slotted spoon (or, uh, a fork if that’s all you’ve got).
- I’ve tried air-frying. It’s okay, but doesn’t hit quite the same crunch. Okay for a weeknight rush, though.
Things I’ve Experimented With (Plus One Fail)
- Swapped honey for maple syrup—kinda Canadian, and pretty tasty, though a bit thinner.
- Added chili flakes to the sauce once; actually, that’s good if you like a little heat. My partner didn’t—more for me!
- Tried panko in the dredge. Crunchier but a pain to stick, honestly. Ate the results anyway.
- Do NOT try making the crust just with cornstarch; it turned out weirdly squeaky, if that’s even a texture.

About Tools (Or, Making Do Without)
I use a big nonstick skillet for frying; cast iron works too, if you want that Old School vibe. No wire rack? I’ve rested chicken on a cooling rack from my oven, or even a pile of paper towels—does the job. If you only have a tiny pan, just fry in batches; don’t crowd them or you’ll get soggy sadness.
Storage Nitty-Gritty (Will You Even Have Leftovers?)
Store in an airtight box in the fridge up to 3 days, although honestly in my house, it never lasts more than a day—teenager approval is the true test. If you want to revive the crunch, a quick blast in a hot oven (say, 200C for 10 minutes) does wonders. Microwave works, but bye-bye crunch.
Serving Ideas (And My Slight Rice Obsession)
I love serving this piled on fluffy jasmine rice, with a heap of steamed broccoli (triple, really, if I’m honest). My daughter swears it’s best with homemade mac and cheese, but then again, she’s nine. Sometimes I just slice leftovers onto a green salad—fancy, right?
Things I Now Swear By (Yep, Learnt the Hard Way)
- Don’t rush the sauce—once I cranked the heat to “speed things up” and it got all weird and splitty. Just simmer, you’ll thank yourself.
- If you skip the rest period after frying, the juices leak out and the crust slides right off—been there, not pretty.
- Use two hands for dipping: one for wet, one for dry. Or don’t, but you’ll look like you wrestled a doughy chicken monster after.
Real Questions Folks Have Asked (Believe Me!)
- Can I use chicken thighs instead? Oh, absolutely. I sometimes do if they’re on sale. Juicier, a bit less tidy for slicing, but taste fab.
- What can I substitute for honey? Maple syrup, brown rice syrup, or even agave—but maple’s my fave. Never tried Karo, so can’t vouch for that.
- Do I need a thermometer? Nah, but if you have one, shoot for 74C (165F) inside. I usually just judge by color and a quick peek.
- Can I bake these instead of frying? You can, but the crust is different—still tasty but a little less heart-thumping joy. Bake at 220C/425F for 20-25 mins, flip halfway.
- Is this really better the next day? Actually, I think so—at least, if you pop leftovers under a broiler for a minute. All the flavors soak in. But I’ve gotten sidetracked with cold chicken strips at 3am too. Both valid.
So that’s it—real-life, crunchy, sticky-sweet chicken that’s saved dinnertime more times than I care to admit. If you give it a go, let me know if your kitchen gets as splattered as mine! (And, side note: if you ever find a way to avoid floury fingerprints all over the faucet, please share…)
Ingredients
- 2 large chicken breasts (about 500g; I sometimes use thighs if that’s what’s in the fridge—just boneless, please!)
- 1 cup all-purpose flour (grandma swore by King Arthur, but store brand works; whole wheat if you want to get wild, but it’s a tad less crispy)
- 1 cup cornstarch (or potato starch in a pinch; thickens up the crunch)
- 2 tsp paprika (I like sweet, but smoked is good too for some drama)
- 1/2 tsp garlic powder
- 1/2 tsp onion powder
- 1/2 tsp salt (don’t skimp here or the flavor sulks)
- 1/2 tsp black pepper (or a grind extra if you like it peppy)
- 2 large eggs
- 1/4 cup milk (or honestly, water if you ran out—it’s just for the batter cohesiveness)
- Vegetable oil, for frying (enough for about 1/2 inch in your pan; I’ve even tried olive oil when I’m feeling like a Mediterranean rebel)
- 4 tbsp butter (salted or unsalted, up to you)
- 4 garlic cloves, minced (jarred garlic works but you’ll lose bragging rights)
- 1/3 cup honey (real, fake, doesn’t matter—cheapy bear bottle works!)
- 1/4 cup soy sauce (low sodium is fine—just don’t skip it, or the sauce gets weirdly sweet)
- 1-2 tbsp water, to thin the sauce if you like
Instructions
-
1Slice your chicken breasts in half horizontally, so you get four thin-ish pieces. No need for a ruler; just aim for not-too-chunky.
-
2Mix the flour, cornstarch, paprika, garlic powder, onion powder, salt, and black pepper in a big shallow bowl or a pie plate—whatever’s got room for chicken flopping. (The mixture always looks way too orange for me, but that’s normal!)
-
3In another bowl, whisk eggs and milk together. Sometimes I forget the milk and honestly don’t notice much difference.
-
4Grab a piece of chicken, dunk it in the flour mix, then the egg, then back in the flour mix—press it a bit so it sticks there lovingly. Repeat for all pieces. Expect messy fingers, unless you’re one of those tongs people (no judgment).
-
5Heat a large skillet with about 1/2 inch of oil—medium-high is good. (If you flick a crumb in and it sizzles, you’re golden.)
-
6Gently slide the chicken into the hot oil. Fry about 4-5 minutes on each side until super golden, but not, like, burnt. This is where I usually sneak a crunchy bit, just for “testing” (wink).
-
7Take the chicken out and rest it on a rack or some kitchen paper. Seriously, don’t put it straight on a plate or it’ll get mushy-bottomed.
-
8Meanwhile, melt the butter in a small saucepan; toss in the minced garlic, heat for just under a minute (don’t wander—garlic burns SO fast, trust me). Stir in honey and soy sauce. Bring it up to a bubbly simmer for about 2 minutes; add a splash of water if it looks too thick.
-
9Pour or brush that glossy honey garlic sauce all over your crunchy chicken. Let it sit for 1-2 minutes so it soaks up the magic.
-
10Slice, stack, or just grab and eat (we won’t judge). Maybe throw on some chopped parsley or sesame seeds if you wanna be extra.
CLICK FOR NUTRITION INFO
↑
Approximate Information for One Serving
Serving Size:
1 serving
Calories:
520 caloriescal
Protein:
35 gg
Fat:
22 gg
Saturated Fat:
0g
Trans Fat:
0g
Cholesterol:
0mg
Sodium:
0mg
Potassium:
0mg
Total Carbs:
52 gg
Fiber:
0g
Sugar:
0g
Net Carbs:
0g
Vitamin A:
0
Vitamin C:
0mg
Calcium:
0mg
Iron:
0mg
Nutrition Disclaimers
Number of total servings shown is approximate. Actual number of servings will depend on your preferred portion sizes.
Nutritional values shown are general guidelines and reflect information for 1 serving using the ingredients listed, not including any optional ingredients. Actual macros may vary slightly depending on specific brands and types of ingredients used.
To determine the weight of one serving, prepare the recipe as instructed. Weigh the finished recipe, then divide the weight of the finished recipe (not including the weight of the container the food is in) by the desired number of servings. Result will be the weight of one serving.
Did you make this recipe?
Please consider Pinning it!