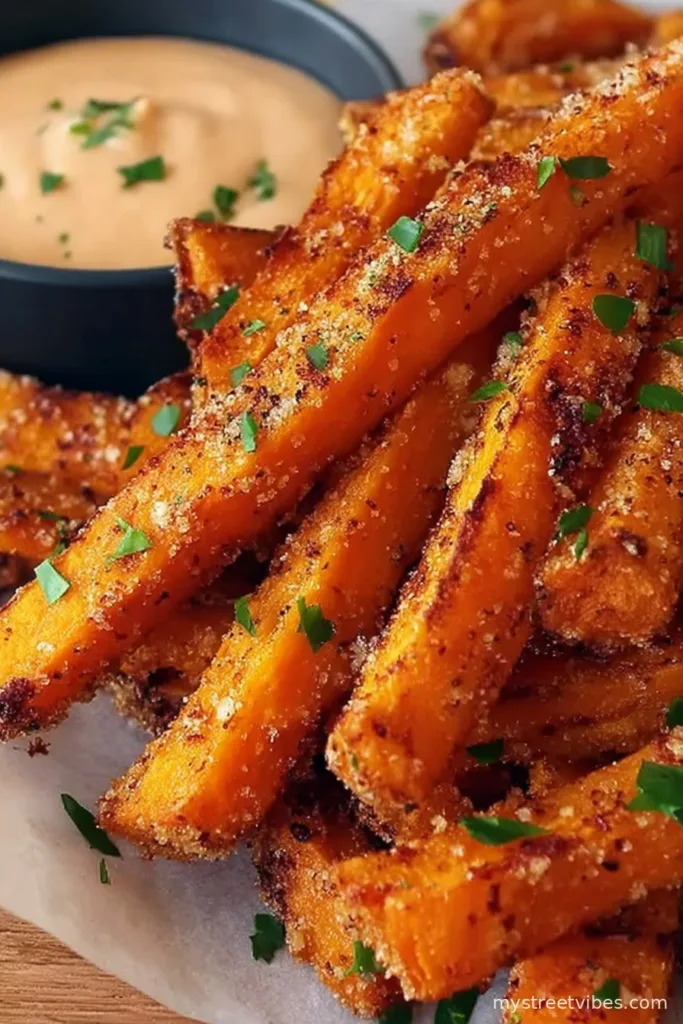
Let Me Tell You About My Crispy Oven Baked Sweet Potato Fries
Okay, you know those nights where you just can’t face another pile of soggy fries? Yeah, that was me—until I stumbled (almost literally, story for another time) into these crispy oven baked sweet potato fries. I make them whenever I need some reliable comfort food that, well, actually feels a little healthy. First time I cooked them, I basically hovered over the tray and ate half before dinner. Zero regrets. Oh, if you ever had sweet spuds from a fairground truck, this is as close as I’ve been able to get at home—minus the mystery oils.
Why You’ll Want to Make These Over and Over
I’ll be honest: My family devours them, even the cooks-in-training who claim they “hate anything orange.” I make these when I need something I can trust to come out crispy (sometimes). If you’ve ever shouted into your oven: “Why are these still floppy?!”—same. But lately, this method’s worked almost every time (unless I get distracted by the dog and forget the timer). So, they’re healthier than frying, you still get that crunch, and—sidebar—dipping is basically a sport in our house.
Gather Up These Ingredients (Sub in What You Like!)
- 2 large sweet potatoes (I sometimes just use whatever’s in the bottom of the pantry—white ones are okay too, but cook faster!)
- 2-ish tablespoons cornstarch (or sometimes rice flour, because I run out at the worst times…)
- 2 tablespoons olive oil (You could use avocado oil; my grandmother always insisted on peanut oil, but honestly, anything except butter probably works.)
- 1 teaspoon smoked paprika (regular is fine too, but the smoky one feels fancier, doesn’t it?)
- 1/2 teaspoon garlic powder (sometimes I go heavy-handed, not sorry)
- Salt and pepper, to taste (Do the wrist flick and taste after baking—so worth it)
Let’s Get Cooking: Directions (Plus a Few Personal Tangents)
- Preheat the oven to 220°C (or about 425°F). If you forget and throw the fries in early, they’ll just be a bit chewier—no drama.
- Peel the sweet potatoes or not, up to you. (I leave the skins on when I can’t be bothered and honestly it tastes more rustic, whatever that means.) Slice them into batons—aim for about the size of your pinkie finger. Wobbly cuts are fine.
- Toss them in a big bowl with the cornstarch. This bit helps them crisp. Don’t overthink it; if you see a little white dust, you’re doing it right. This is where I usually sneak a fry… totally safe, right?
- Drizzle in your oil and toss again. Then add your smoked paprika, garlic powder, salt, pepper—shake it like you mean it. If you want more zing, a sprinkle of cayenne never hurt.
- Line a baking tray with parchment (or baking paper, if you prefer). Scatter the fries out in a single layer. Overlapping = steamed, not crisp, so give them space. Sometimes a second tray is worth the extra dish.
- Bake about 15 minutes, flip everything with a spatula (or, I just sort of shake the tray if I’m feeling lazy), then put ’em back for another 12–15 minutes until the edges are dark and crispy. Don’t panic if some look a little more brown than others; they’re probably the tastiest bits.
- If you’ve managed not to eat half, congrats. Sprinkle fresh salt or herbs on while they’re still hot.
Real Life Notes—AKA What I’ve Messed Up Before
- If you skip the cornstarch step, things will get limp. Don’t ask how I know, just trust me.
- Some sweet potatoes just refuse to crisp, especially if they’re monstrous (see: the one I tried to bake last August). Smaller ones work better. Or maybe it’s just my oven—who knows?
- I used to crowd everything onto one tray. Bad move. Go for two if you have to.
Twists and Variations I’ve Tried (or Failed, Actually)
- If you’re feeling spicy, a dash of chili flakes is epic. My partner swears by a sprinkle of parmesan at the last minute—it melts and tastes dreamy.
- Tried making them with coconut oil once. Tasted like dessert. Not for me, but maybe it’s your thing?
- Straight up, sweet potato wedges are fun, but they’re always less crispy for me. Maybe you’ll have more luck.
What You’ll Need (and How to Wing It)
- Baking tray or two. In a pinch, I used a roasting tin. Worked okay but cleaning was a pain.
- Good chef’s knife—makes cutting less of an upper-arm workout.
- Parchment paper (no biggie if you haven’t got it; just oil the tray well and hope for the best!)
Storing Your Fries (If You Have Leftovers—Rare, Honestly)
Toss any leftovers in an airtight tub in the fridge. They’ll stay crunchy-ish until the next day, but honestly, in my house it never lasts more than a day! Maybe reheat under the grill (or broiler, for my American pals), and those crispy edges come right back. Or eat them cold, standing at the fridge in your socks. Not that I’ve… okay, I have.
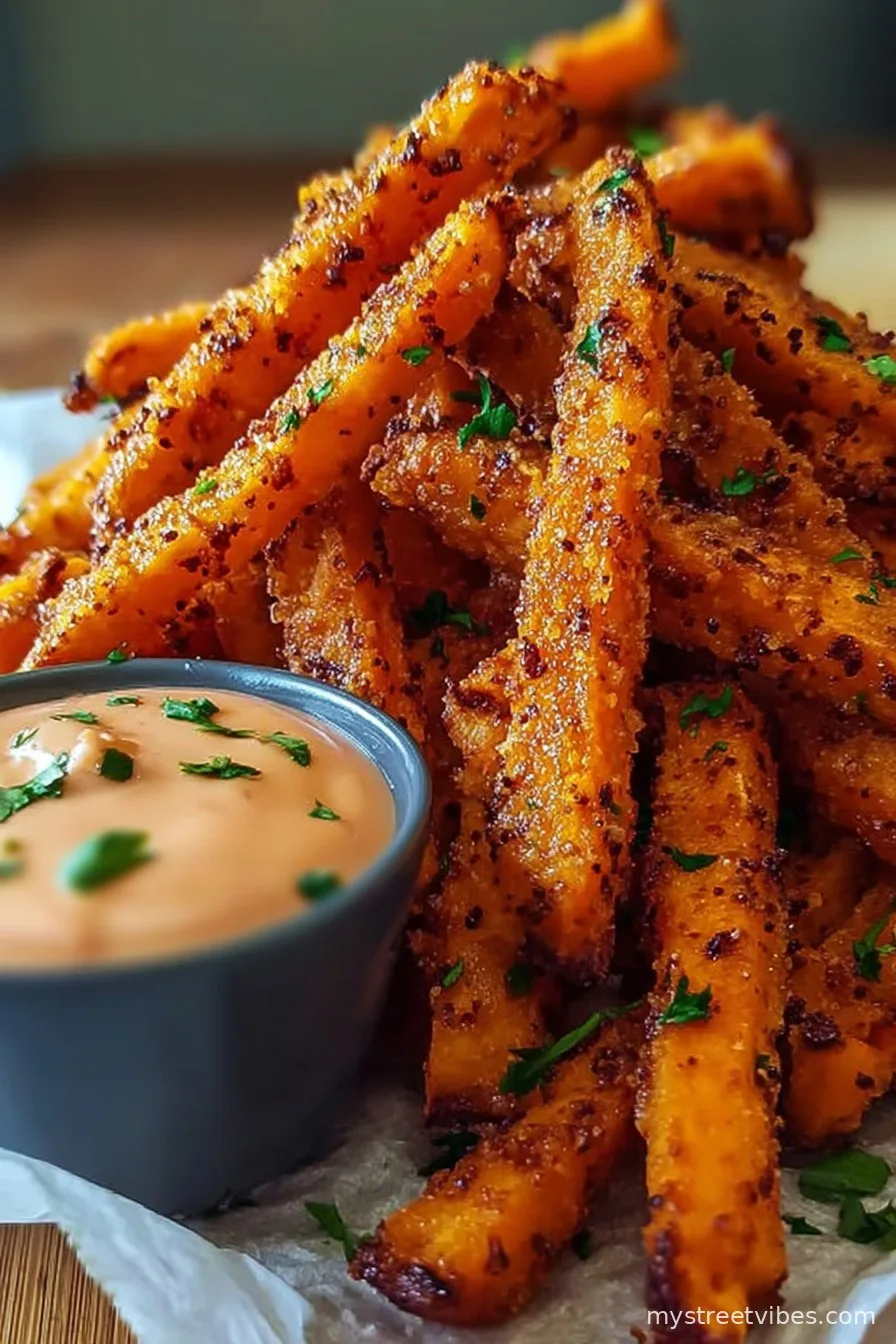
How I Like to Serve ‘Em
If I’m being fancy: little bowls of aioli, sriracha mayo, or an herby yogurt dip (like this one from Cookie + Kate). For Tuesday nights: just ketchup and everyone grabs their own. Sometimes I make a meal out of just these and a salad—no shame. Oh, and you’ll want something cold to drink nearby.
True Pro Tips (AKA Things I Learned the Hard Way)
- I once tried cranking up the oven to max temp thinking it’d speed things up. Just got burnt outsides and raw insides. Don’t be me.
- Actually, leaving the fries alone after flipping lets them crisp better. I used to prod them every 2 minutes out of impatience. Turns out, less is more here!
- If they seem floppy right out of the oven, let them sit a couple minutes—they firm up a bit as they cool.
FAQs Because Folks Always Ask Me
- What’s the deal with cornstarch? Can I skip it?
- Sure, you can skip it, but then you’re playing crispy roulette. It’s there to help give that bite. Sometimes I use rice flour if I’m out—that works too.
- They went soggy—what happened?
- Let’s see—most often, it’s crowding the tray; or not using a hot enough oven. Or sometimes it’s just those massive, super-wet sweet potatoes from the shop. Happens to the best of us!
- Can I make them ahead?
- You can prep the potatoes and toss with oil and spices, but they taste best right out of the oven. If you absolutely must, store and reheat like I said up above.
- Will this work with regular potatoes?
- Yeah, absolutely. The timings are a bit shorter though. On second thought, just keep an eye on them. Potato fries are less fussy.
- Do I need to peel the sweet potatoes?
- Nah, unless the skins are gnarly. Sometimes I leave them on just to save effort; nobody complains.
And if you want more ideas on dips, this mayo hack from Serious Eats is foolproof—seriously changed my sandwich game too.
Alright, that’s the lot. Go on—get your hands a bit messy and make a proper batch. If you figure out a new twist (or mess one up), let me know. We’ll compare notes. Cheers!

Ingredients
- 2 large sweet potatoes, peeled and cut into thin fries
- 2 tablespoons olive oil
- 1 tablespoon cornstarch
- 1 teaspoon smoked paprika
- 1/2 teaspoon garlic powder
- 1/2 teaspoon sea salt
- 1/4 teaspoon black pepper
- 1/4 teaspoon cayenne pepper (optional)
Instructions
-
1Preheat your oven to 425°F (220°C) and line a large baking sheet with parchment paper.
-
2Place the cut sweet potato fries in a large bowl. Sprinkle with cornstarch and toss to coat evenly.
-
3Drizzle the olive oil over the fries and sprinkle with smoked paprika, garlic powder, sea salt, black pepper, and cayenne pepper if using. Toss again to fully coat.
-
4Spread the fries out in a single layer on the prepared baking sheet, making sure they do not overlap.
-
5Bake for 15 minutes, flip the fries, then bake for an additional 15 minutes or until crispy and golden brown.
-
6Remove from oven and let cool for a few minutes before serving. Enjoy with your favorite dipping sauce.
CLICK FOR NUTRITION INFO
↑
Approximate Information for One Serving
Serving Size:
1 serving
Calories:
170cal
Protein:
2 gg
Fat:
5 gg
Saturated Fat:
0g
Trans Fat:
0g
Cholesterol:
0mg
Sodium:
0mg
Potassium:
0mg
Total Carbs:
30 gg
Fiber:
0g
Sugar:
0g
Net Carbs:
0g
Vitamin A:
0
Vitamin C:
0mg
Calcium:
0mg
Iron:
0mg
Nutrition Disclaimers
Number of total servings shown is approximate. Actual number of servings will depend on your preferred portion sizes.
Nutritional values shown are general guidelines and reflect information for 1 serving using the ingredients listed, not including any optional ingredients. Actual macros may vary slightly depending on specific brands and types of ingredients used.
To determine the weight of one serving, prepare the recipe as instructed. Weigh the finished recipe, then divide the weight of the finished recipe (not including the weight of the container the food is in) by the desired number of servings. Result will be the weight of one serving.
Did you make this recipe?
Please consider Pinning it!!