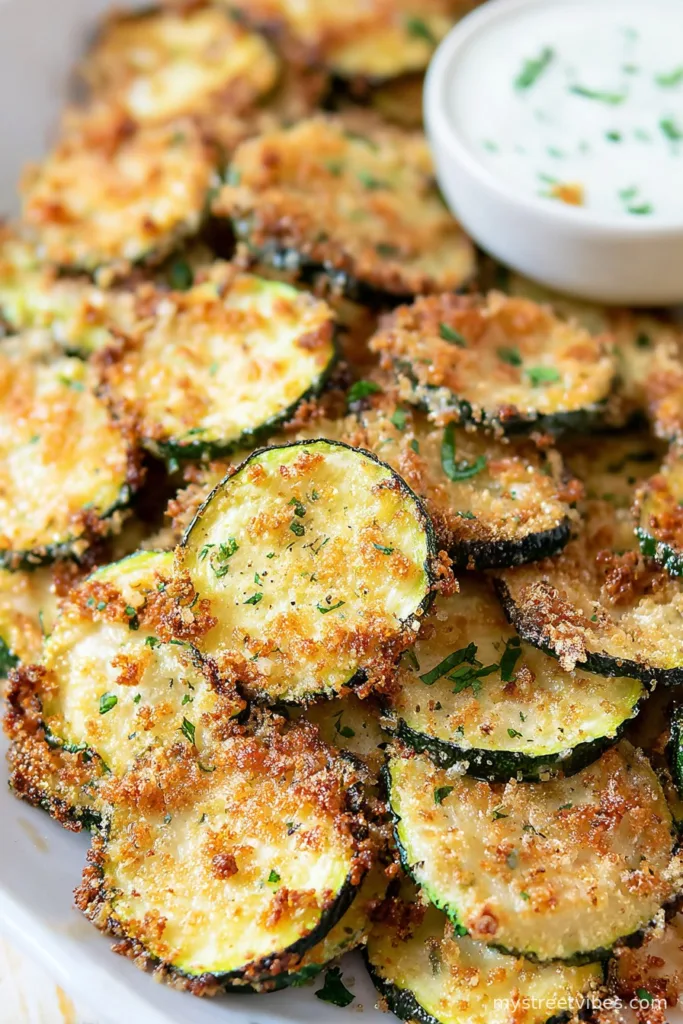
Why I Can’t Stop Making These Crispy Zucchini Chips
Alright, let me tell you something—these Crispy Baked Zucchini Chips have been my go-to snack since, well, I accidentally bought too many zucchinis at a market stall two summers ago. (There was a sale, I can’t resist a bargain—what can I say.) Anyway, my first try was a disaster—soggy like a wet sponge. But after some mild oven drama and a few tweaks, these chips became my secret fridge-cleaning trick, snack-for-dinner solution, and the only way I get my niece to eat anything green without a bribe. The smell when they’re roasting always reminds me of visiting my Nan—she called them ‘summer crisps’ and swore they cured bad moods. Not sure about that, but honestly, it can’t hurt?
When Do I Make These? (Spoiler: All the Time)
I make these chips when I crave something crunchy (and I’m trying not to reach for the crisps) or if we have friends over—though my mate Steve once ate the whole batch before anyone else got a look in. My family goes absolutely bonkers for them—especially if I sneak a bit of smoked paprika. Actually, getting them crispy used to drive me batty, but once I stopped piling them all on top of each other, it’s smooth sailing. Oh, and if you’ve just come home from work and want a snack that isn’t boring old celery—these are a winner.
Here’s What You Need to Grab
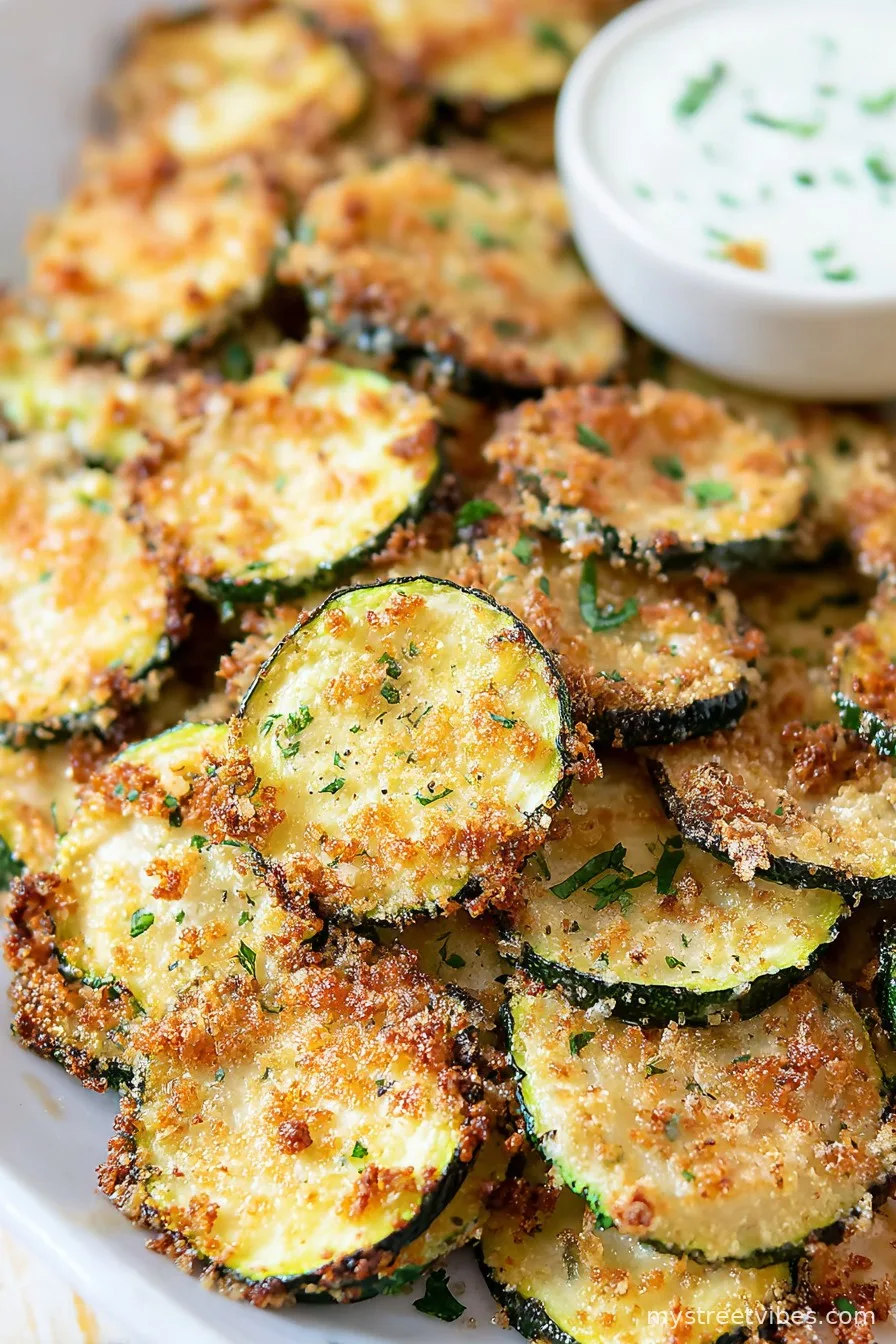
- 2 medium zucchinis (or courgettes—whatever you like calling them, same thing; I once used yellow squash and nobody noticed)
- 2-3 tablespoons olive oil (I use whatever I have left, even sunflower oil in a pinch. Nan insisted on ‘the good stuff’ but, you know…)
- 1/2 cup breadcrumbs (Panko’s fancy but I’ve blitzed stale bread in the blender more than once)
- 1/3 cup grated parmesan (leave it out if you’re dairy-free—it works! Cheddar is fun too, if you like rebellion)
- 1/2 teaspoon garlic powder (sometimes I double it; live a little)
- Salt and black pepper to taste (I’m heavy-handed; you do you)
- Pinch smoked paprika or dried chili flakes (just if you fancy, or skip if kids are about)
Let Me Walk You Through the Steps (Just Like I Do)
- Slice the Zucchini: Get your sharpest knife—my favorite one is always in the dishwasher when I need it. Aim for coins, about as thin as a pound coin. Or use a mandolin if you like living dangerously (I always nick my thumb).
- Dry ‘Em Out: Layer slices onto a big clean tea towel and pat them until they’re pretty dry. Don’t skip—learned this the hard way. They can be a bit bendy, but that’s part of the fun.
- Toss with Oil: Dump the slices in a bowl, add your oil, and get your hands messy (nothing else really gets the oil everywhere as well as hands do). Have a sneaky taste; raw zucchini isn’t bad!
- Coat with Crunch: Mix breadcrumbs, parmesan, garlic powder, salt, pepper, and whatever extra spices in another bowl. Throw in the slices and just sort of shuffle them around. Totally fine if they don’t all get an even coating—rustic, right?
- Prep the Tray: Baking paper on a tray, please. Single layer the slices. Don’t cram ’em on—the crispy bits hate cuddling.
- Bake: Stick the tray in a preheated oven, 220°C (425°F, I checked my conversion chart twice). Flip them halfway through, around 20 minutes or when they look slightly tanned—at this point they’ll smell incredible. Sometimes one or two burn, but that’s just the cook’s snack.
- Cool Off: Let them chill for a few minutes outside the oven. If they seem a bit soft, don’t panic—they crisp up as they cool (mostly… although sometimes not, and honestly they’re good either way).

Little Notes (Things I Learned By Messing Up)
- Don’t skip the drying step. Promise yourself you’ll do it. Wet zucchini = floppy sadness, every time.
- Parmesan can smell weird when overbaked—it’s fine, just keep an eye on it.
- I once tried baking them at a lower temp to ‘be healthy’—nah, never again, they just steamed. Crank it up!
Variations (Some Awesome, Some Not So Much)
- Toss in some thyme or rosemary for a herby kick—it’s lovely, like a walk through an English garden.
- I tried a version with crushed cornflakes instead of breadcrumbs… odd texture, kids weren’t impressed but my partner ate them all anyway.
- Dusted them with curry powder once. Divisive! (I liked it, most others not so much.)

What If You Don’t Have All the Gear?
No mandolin? Don’t worry, just slice carefully with a good old knife. I actually think chunky slices work nice too, they’re just more like mini-roasts than chips. And if your oven’s unpredictable (mine likes to run hot in the back left), just shuffle the tray around halfway through and keep an eye on ’em.
Keeping Them Fresh (Ha, If They Last That Long)
If you somehow don’t eat them all at once, shove the leftovers in an airtight tin for a day or two. They’re not as crispy the next day—unless you pop them back in a warm oven for a tick. But honestly, in my house they rarely make it past the evening. Let me know if you actually manage, you might win a medal.
Ways I Love to Serve These (And a Little Digression)
We dunk them in sour cream or tzatziki (homemade if the mood strikes, but more often than not it’s just whatever’s in the fridge—ketchup once when I was desperate). They’re brilliant with a cold lager, or as part of a DIY mezze board. My youngest nephew likes them with barbecue sauce, and I still don’t know why.
Completely off-topic, but these chips once went missing at a picnic and for half an hour we all accused the neighbor’s Labrador. Turns out my dad ate them before he even sat down.
Pitfalls I’ve Tumbled Into (So You Don’t Have To)
- Don’t skip flipping them over mid-bake. I rushed before, ended up with half soggy, half burnt ones. Rookie mistake.
- If you’re feeling lazy and don’t lay them in a single layer, they kind of stick together and you’re left with a heap instead of chips. Lesson learned (multiple times—old habits die hard).
Some Questions I Get (And the Occasionally Odd One)
- Can I use squash or aubergine instead of zucchini? Sure, but aubergine can go a bit bitter. I’d stick with zucchini if you can—but yellow squash works fine, honestly.
- Do I have to use breadcrumbs? Nope. You could just dust them with cheese or try crushed rice crackers. Actually, one time I used crushed potato chips. Strange, but fun.
- How do I know when they’re done? They start getting golden with slightly brown edges, and they don’t bend so easily. Sometimes I take one off early and, er, crunch it just to see.
- My chips came out soggy!? That happens if they’re sliced too thick, wet, or bunched up on the tray. Next time, more space and thinner slices. Or just embrace the chewy ones—still tasty.
- Can you freeze them? I wouldn’t. Tried it—came out with sad, limp chips. But if you’re really curious, maybe you’ll have better luck than I did.
Ingredients
- 2 medium zucchinis, thinly sliced
- 2 tablespoons olive oil
- 1/2 cup panko breadcrumbs
- 1/4 cup grated Parmesan cheese
- 1/2 teaspoon garlic powder
- 1/2 teaspoon paprika
- 1/2 teaspoon salt
- 1/4 teaspoon black pepper
Instructions
-
1Preheat the oven to 425°F (220°C) and line a large baking sheet with parchment paper.
-
2Pat the zucchini slices dry with a paper towel. Toss them in olive oil to coat.
-
3In a shallow bowl, combine panko breadcrumbs, Parmesan cheese, garlic powder, paprika, salt, and black pepper.
-
4Dredge each zucchini slice in the breadcrumb mixture, pressing gently to adhere.
-
5Arrange the coated zucchini slices in a single layer on the prepared baking sheet.
-
6Bake for 20-25 minutes, flipping halfway, until golden brown and crispy. Serve immediately.
CLICK FOR NUTRITION INFO
↑
Approximate Information for One Serving
Serving Size:
1 serving
Calories:
110cal
Protein:
4 gg
Fat:
6 gg
Saturated Fat:
0g
Trans Fat:
0g
Cholesterol:
0mg
Sodium:
0mg
Potassium:
0mg
Total Carbs:
11 gg
Fiber:
0g
Sugar:
0g
Net Carbs:
0g
Vitamin A:
0
Vitamin C:
0mg
Calcium:
0mg
Iron:
0mg
Nutrition Disclaimers
Number of total servings shown is approximate. Actual number of servings will depend on your preferred portion sizes.
Nutritional values shown are general guidelines and reflect information for 1 serving using the ingredients listed, not including any optional ingredients. Actual macros may vary slightly depending on specific brands and types of ingredients used.
To determine the weight of one serving, prepare the recipe as instructed. Weigh the finished recipe, then divide the weight of the finished recipe (not including the weight of the container the food is in) by the desired number of servings. Result will be the weight of one serving.
Did you make this recipe?
Please consider Pinning it!!