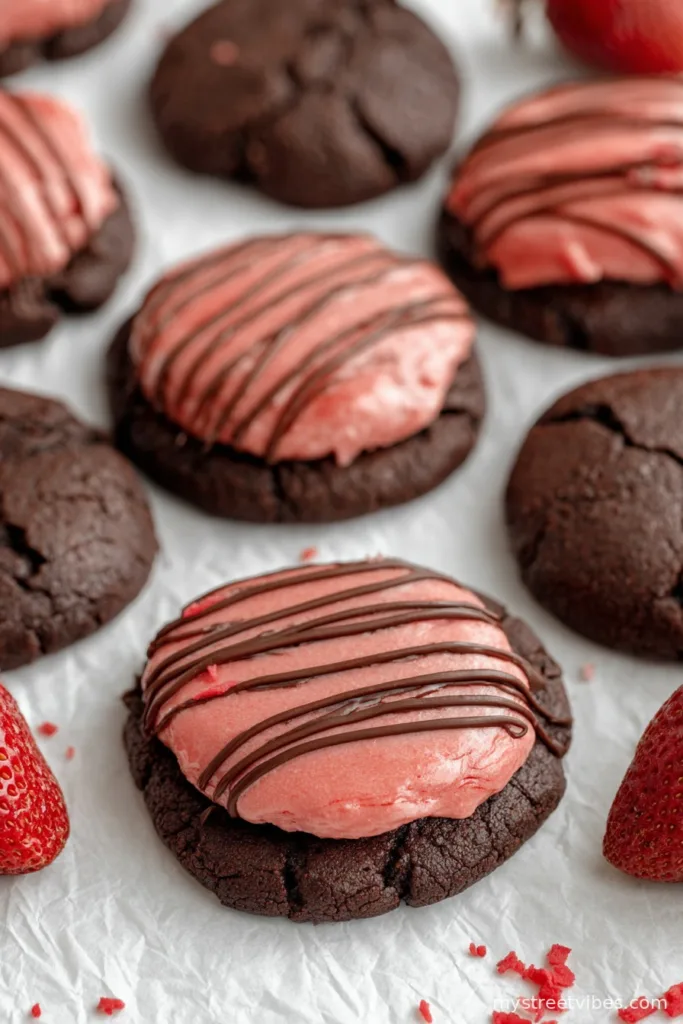
Where My Obsession with Chocolate Covered Strawberry Cookies Began
Alright, let me start by saying these cookies are pretty much my personal cure for gloomy days. The first time I whipped up a batch was actually after I’d burnt a pan of brownies—don’t ask, I somehow set the timer for the microwave instead (we’ve all been there, right?). Anyway, I wanted something indulgent but a little fun, so I tossed in strawberries with chocolate like those fancy confections you get at the summer fair. Now, the smell of these baking takes me right back to those less-than-stellar baking days, when my little kitchen was a disaster but the end result made it all worthwhile. Plus, if you’ve ever tried to eat a chocolate covered strawberry without getting chocolate smudges everywhere, you’ll understand why these cookies are kinda genius.

Sometimes I make a double batch and, not gonna lie, hide a few in one of those old Tupperware containers at the back of the fridge. “They’re for later,” I tell myself, but let’s be real..
Why These Cookies Might End Up on Repeat in Your House
I make these whenever I want something that tastes impressive but isn’t a pain in the neck to put together. My family goes slightly mad for these; I mean, who wouldn’t want gooey chocolate and little bursts of tart strawberry in every bite? (Well, aside from my brother, who inexplicably hates strawberries. His loss!)
Honestly, I used to get annoyed because fresh fruit and cookies can be a bit unpredictable, but after several slightly mushy or overbaked batches, I think I’ve got the system down now. And if you’re a dunker, like me, these cookies stay sturdy enough to dip in a cup of tea. But if you leave them on the pan too long, you’ll be prying them off. Ask me how I know.
What You’ll Need (And What You Can Swap In a Pinch)
- 1 1/2 cups all-purpose flour (My grandmother always swore by King Arthur, but I honestly just buy what’s cheapest—don’t overthink it)
- 1/2 cup unsweetened cocoa powder (Dutch process if you’re feeling fancy, but regular’s fine—I’ve used both, can’t tell much diff)
- 1/2 tsp baking soda
- 1/4 tsp salt (I use flaky sea salt if I have it, for a little drama)
- 1/2 cup unsalted butter, room temp (I’ve also used margarine; it works if you’re in a pinch but doesn’t taste quite as rich)
- 3/4 cup brown sugar, packed
- 1/4 cup granulated sugar (Or swap it for coconut sugar for a caramely kick. Once tried stevia—yeah, don’t do that here.)
- 1 large egg
- 1 tsp vanilla extract (Or almond if you want a twist—hazelnut’s another fun one that my cousin swears by)
- 1 cup semi-sweet chocolate chips (Honestly, use any kind—milk, dark, even white, but I find semi-sweet balances the berries best)
- 1 heaping cup fresh strawberries, chopped small (If you’re in the dead of winter, I’ve chopped up freeze-dried strawberries and they work… kinda. Frozen strawberries—not great, everything goes a bit soggy.)
How I Actually Throw It All Together (It’s Easy, Promise)
- Preheat your oven to 350°F (or 175°C if that’s your thing). Line two baking sheets with parchment—seriously, don’t skip this unless you like chiseling cookies off a tray.
- In a bowl, mix flour, cocoa, baking soda, and salt. You can whisk it or use a fork, whatever’s clean.
- In another bowl, beat the room-temp butter, brown sugar, and granulated sugar together until fluffy. Well, fluffy-ish. I use a hand mixer when I feel motivated; sometimes just a wooden spoon if I didn’t want to wash up more stuff.
- Add in the egg and vanilla. Mix until it’s all friends in there (it always looks weird at first—keep going).
- Slowly add your dry ingredients to the wet, a bit at a time. Stir until just combined. (Here’s where I sneak a bit of dough. Sue me.)
- Fold in the chocolate chips and strawberries. Try not to mash the berries too hard—they break apart but it’s okay if a few bits go rogue.
- Scoop dough onto the trays; I use a tablespoon or sometimes just my hands if I’m feeling rustic. Give them some space—these spread, not a ton, but enough.
- Bake for 10 to 12 minutes. Edges should look set but middles can still be a bit soft (they’ll finish up as they sit). Don’t fret if they look underdone—they catch up while cooling.
- Let cool on the pan 5 minutes then transfer to a rack. Or, eat one now and burn your mouth a little—your call.

What I Learned The Hard Way (Notes)
- If your strawberries are super juicy, pat them a bit dry with a paper towel. Otherwise, you might end up with cookies that are more like cake (or, worse, mystery mush after a day).
- Chilling the dough for 20 minutes will help if you want a thicker cookie, but I usually skip it because patience is not my best skill.
- If you use a hot oven spot, shuffle trays halfway through—otherwise, one batch might look like they spent an afternoon sunbathing and the other stays pale.
I’ve Tried These Twists (and Some Regrets)
- White chocolate chips: Tried this once! It’s very sweet—my nephew loved them, but I kind of craved a glass of water after each bite.
- Almond extract: A splash makes them taste sort of “bakery fancy.” (Just don’t overdo it—trust me, a little goes a long way. I learned this after adding a whole teaspoon by mistake. Whoops.)
- Lemon zest: Actually, I thought this would work, but it’s a bit… odd. If you’re a citrus lover maybe give it a go, but it’s not my favourite.

The Gear I Grab (and the Shortcuts I Use)
- Mixing bowls, biggish size
- Hand mixer or sturdy spoon (If you don’t have a mixer, some elbow grease does the job. Pre-make a playlist—makes it feel less like work.)
- Parchment paper
- Baking trays
- Wire cooling rack (Or just an upside-down muffin tin if you’re improvising, ha!)
Stashing The Leftovers (If There Are Any)
Room temp in an airtight tin is fine for 2 days—though honestly, in my house it never lasts more than a day! The strawberries mean these won’t store forever, so don’t push it. If you want to freeze some soupy dough for later, stick to a month. Baked, they get a bit weird after freezing, so I’d skip that bit.
How We Serve ’Em (and the Little Rituals)
I love these with a tall glass of icy milk or a mug of milky tea, especially if it’s just cool enough outside to want socks on. My partner likes to pile whipped cream on top (sure, why not?). For a party once, I tried turning these into ice cream sandwiches—major hit, but also, major mess.
Stuff I’ve Learned (The Occasional Hard Way)
- Let the cookies cool a bit before you try to move them; I’ve absolutely ruined hot cookies by being impatient, and then you just get strawberry-chocolate rubble (not the worst fate, but still…)
- I once tried rushing the mixing because I was late for bingo night. Ended up with flour pockets that looked like little ghost patches in the cookies—not my proudest work.
- If you’re tempted to use frozen berries, just… don’t. Turns everything a bit swampy.
Some Questions I’ve Actually Gotten (And My Two Cents)
- Can I use raspberries instead?
Sure, mate, just be gentle—they’re even softer than strawberries. Actually, you might want to pat them dry really well. - How do I keep them from getting soggy?
It’s mostly the berries—try to dry them a bit first before folding them in, but a bit of moisture is normal. - Can I make these gluten free?
Oh, I tried swapping gluten free flour one time and it was… edible. Maybe add a tiny splash more vanilla or a tablespoon of almond flour for better flavor. - What if I don’t have parchment?
Grease your pan really well; the cookies might get crispier edges but that’s not bad, either. - Do these taste better warm or next day?
I’m gonna say both, for different reasons. Warm is gooey and melty, but honestly, day two (if you get there) the flavors have cozied up together. I tend to think they’re best about 8 hours after baking, but who waits that long? - Why are mine flat?
Mine came out flat once too, probably because I melted the butter by accident. Room temp butter, not melted, does the trick.
Anyway, that’s my wild ride with chocolate covered strawberry cookies—if you come up with a combo I haven’t tried (or a disaster story), I wanna hear it. Baking’s about the fun (and sometimes the mess… and, occasionally, cookies for dinner, but I’ll pretend that never happened).
Ingredients
- 1 1/2 cups all-purpose flour
- 1/2 teaspoon baking soda
- 1/4 teaspoon salt
- 1/2 cup unsalted butter, softened
- 3/4 cup granulated sugar
- 1 large egg
- 1/2 teaspoon vanilla extract
- 1/3 cup freeze-dried strawberries, finely crushed
- 1 cup semi-sweet chocolate chips, melted
- 2 tablespoons milk
Instructions
-
1Preheat the oven to 350°F (175°C) and line a baking sheet with parchment paper.
-
2In a medium bowl, whisk together flour, baking soda, salt, and crushed freeze-dried strawberries.
-
3In a large bowl, cream together the butter and sugar until light and fluffy. Beat in the egg and vanilla extract until well combined.
-
4Gradually mix the dry ingredients into the wet ingredients until a soft dough forms.
-
5Scoop out tablespoons of dough onto the prepared baking sheet, spacing them about 2 inches apart. Bake for 10-12 minutes or until the edges are set.
-
6Let cookies cool completely. Dip each cookie halfway into the melted chocolate and place on a parchment-lined tray to set before serving.
CLICK FOR NUTRITION INFO
↑
Approximate Information for One Serving
Serving Size:
1 serving
Calories:
140 caloriescal
Protein:
2gg
Fat:
6gg
Saturated Fat:
0g
Trans Fat:
0g
Cholesterol:
0mg
Sodium:
0mg
Potassium:
0mg
Total Carbs:
20gg
Fiber:
0g
Sugar:
0g
Net Carbs:
0g
Vitamin A:
0
Vitamin C:
0mg
Calcium:
0mg
Iron:
0mg
Nutrition Disclaimers
Number of total servings shown is approximate. Actual number of servings will depend on your preferred portion sizes.
Nutritional values shown are general guidelines and reflect information for 1 serving using the ingredients listed, not including any optional ingredients. Actual macros may vary slightly depending on specific brands and types of ingredients used.
To determine the weight of one serving, prepare the recipe as instructed. Weigh the finished recipe, then divide the weight of the finished recipe (not including the weight of the container the food is in) by the desired number of servings. Result will be the weight of one serving.
Did you make this recipe?
Please consider Pinning it!!