

Let Me Tell You About This Mac and Cheese (Spoiler: It’s Got Ranch)
Okay, so straight up, Chicken Ranch Macaroni and Cheese is the thing I whip up when everyone is tired, cranky, and in need of something cozy—but not another pizza night. The first time I made this, I was actually trying to impress my sister during a snowstorm and, well, she still talks about it two years on. If you love the idea of classic mac with a little twist (plus a sneaky nod to the Midwest), settle in. And yes, this is the stuff your stretchy pants were made for. One time I forgot the ranch and my nephew noticed after literally one bite—don’t skip it if ranch is your thing.
Why You’ll Really Love This (No Foolin’)
I make this when the fridge is looking a little sad, because let’s be real: you only need a few things and there’s room for swapping. My family goes kinda wild for this—especially when I add extra cheese and a few crumbled bacon bits (they’re monsters for bacon, honestly). I love that it’s both rich and tangy from the ranch, and anything that uses up leftover chicken is a win. Only warning—I’ve had it turn out a bit too thick when I forgot to check the noodles, so, uh, keep an eye out for that.
What You Need (Give or Take)
- 3 cups cooked macaroni (elbows are classic, but shells or penne totally work—my friend swears by rotini, though I’m not fully convinced)
- 2 cups cooked chicken, shredded or chopped (rotisserie chicken is my go-to; leftover roasted chicken is also great. In a true pinch? I’ve even used canned, though the texture’s different. Not terrible, not great.)
- 1 cup shredded sharp cheddar (I sometimes use colby jack if that’s what’s in my fridge—or, let’s be honest, whatever’s on sale)
- 1 cup shredded mozzarella (provolone would be nice too, but I’ve never remembered to buy it)
- 3/4 cup ranch dressing (Hidden Valley if you’re hardcore, but store brand is honestly just fine. My grandmother would probably protest, but…)
- 1/2 cup whole milk (I’ve used 2% and it’s okay—it just ends up a little less creamy)
- 1/4 cup cream cheese (softened; sometimes I skip this if I’m out, but it does add a nice velvet-y thing)
- 1 teaspoon garlic powder
- 1/2 teaspoon onion powder
- Salt and pepper, to taste
- Optional: Handful of chopped fresh chives or green onions, for serving
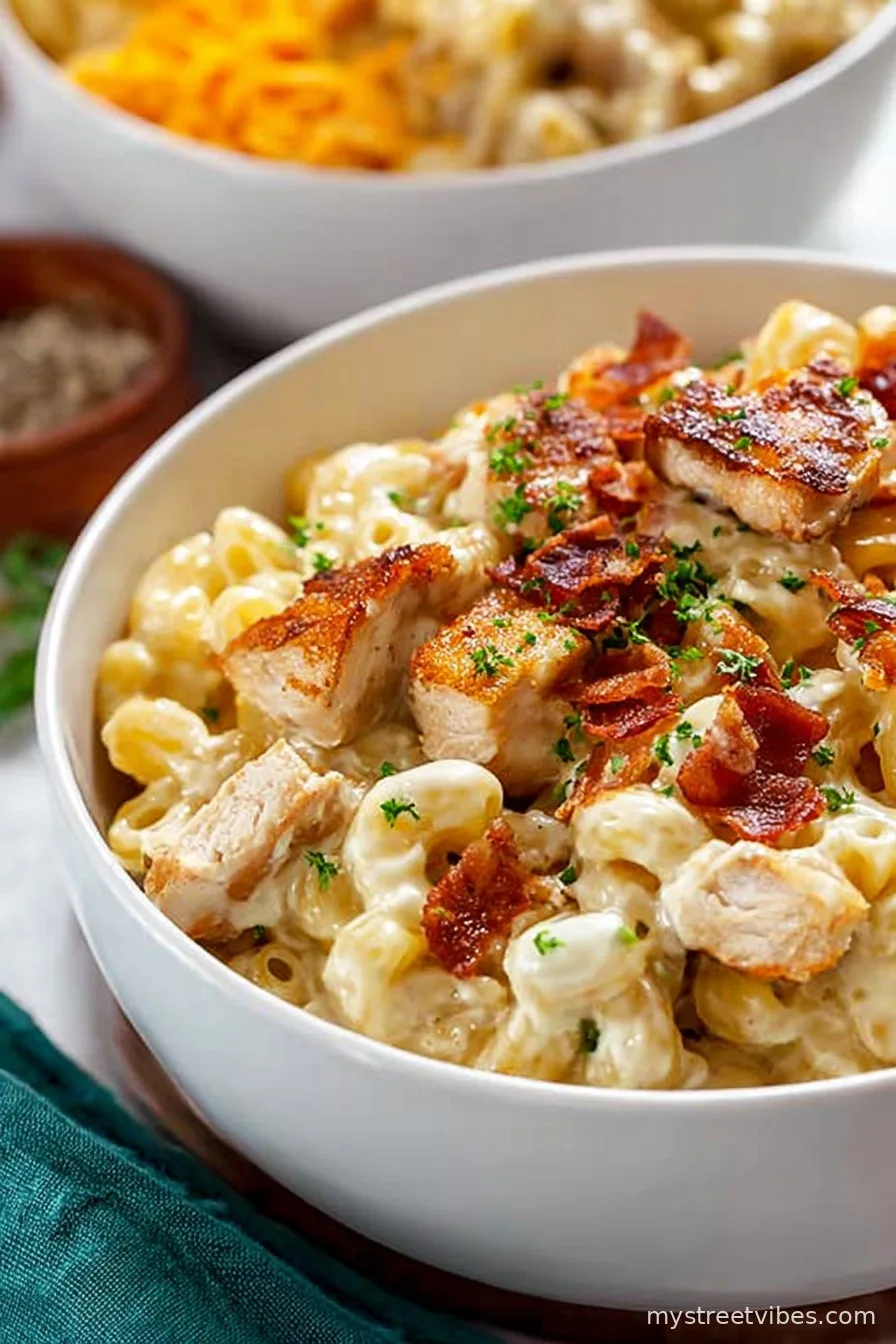
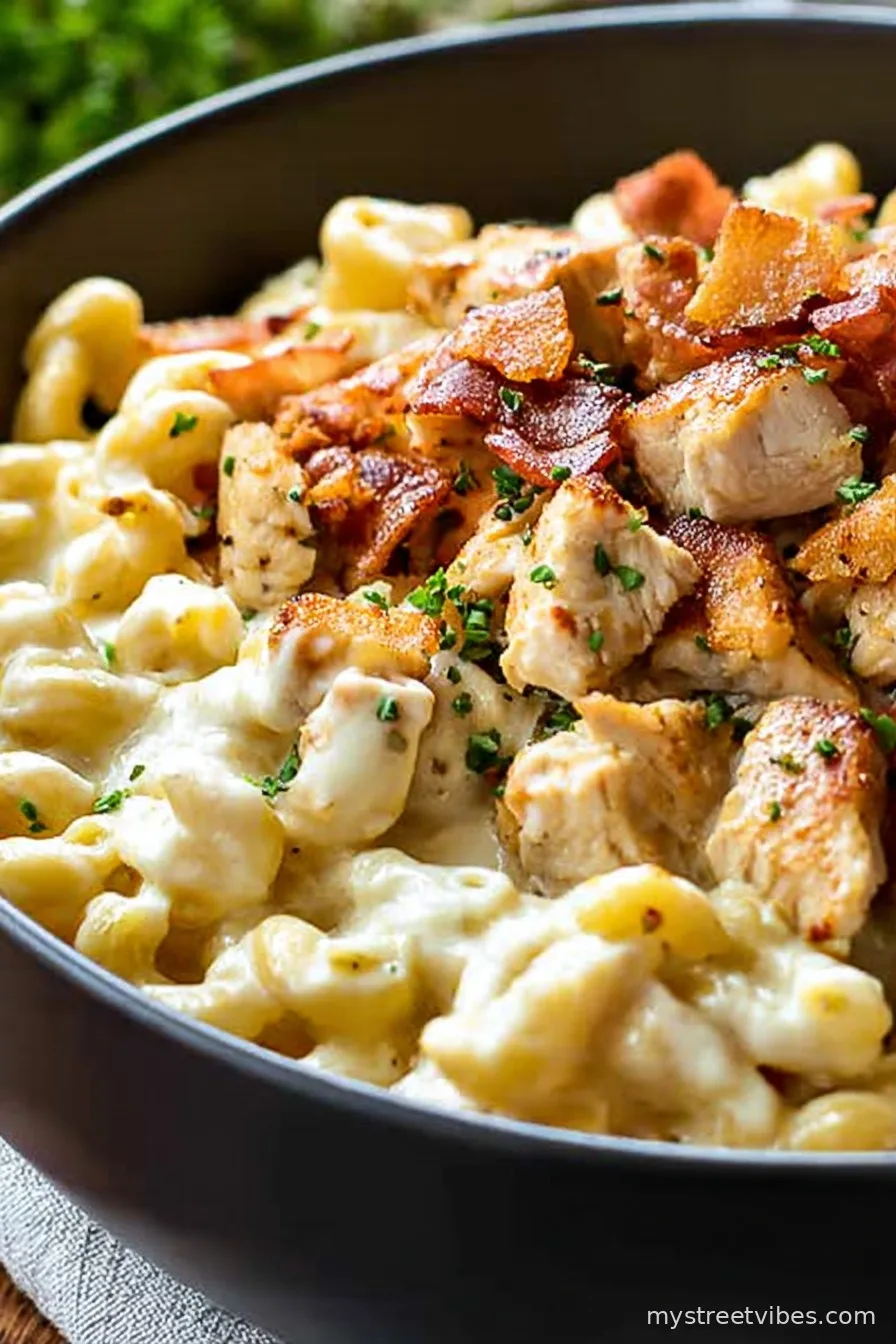
- Optional: Few pieces of cooked, crumbled bacon (not required, but wow does it add something. If my husband has anything to say, it’s required.)
How I Actually Make It (and Sometimes Mess Up)
- Start by preheating your oven to 375°F (if you’re baking it—sometimes I just do stovetop if I’m impatient). Grease up your favorite 9×13-inch baking dish. If you only have a weird size, use that; it’ll still taste good—I promise!
- Boil your pasta according to the package. I tend to go for just shy of al dente since it’ll keep cooking. Drain and set aside. This is where I usually sneak a taste to see if it needs more salt. Occasionally, I’ve totally forgotten this step and ended up with mushy noodles. Not fantastic.
- While the noodles do their thing, mix together ranch dressing, milk, and cream cheese in a big bowl. Sometimes I microwave it for 20 seconds so the cream cheese blends nicely (or just use a whisk/muscle—up to you!). Add the garlic powder, onion powder, and a few shakes of salt and pepper.
- Toss in your chicken and the cooked pasta. Next, add about 3/4 of both cheeses (hold a little back for the top). Mix it all together until coated. Don’t worry if it looks a bit weird at first—trust me, it sorts itself out.
- Pour the mixture into your baking dish. Sprinkle that remaining cheese on top (plus chives and bacon if you’re in the mood). Pop it all in the oven and bake 20–25 min; I like it with some golden bubbly bits. If you’re feeling rebellious, crank the broiler at the very end, but keep an eagle eye on it. I’ve definitely burned a batch by walking away “just for a sec”…
- Let it cool slightly. Or eat it right away and burn the roof of your mouth like I do every time. Up to you.
Some Notes I’ve Learned (the Hard Way)
- If the mixture looks a bit dry before baking, add an extra glug of milk. I’ve been burned by a dry mac before—in more ways than one.
- Honestly, don’t get too crazy with fancy cheeses. Cheddar and mozzarella really just work for that perfect stretchy, melty bite. Save the blue cheese for another day.
- For breadcrumbs fans: sprinkle on some buttered panko before baking. I forget to do this half the time, but when I remember, people rave.
Variations I’ve (Mostly) Tried
- Buffalo-style: Mix in a couple tablespoons of buffalo sauce with the ranch. My cousin loved it; I thought it overpowered everything. Maybe go easy at first.
- Veggie version: Once I tossed in roasted broccoli and peas. My six-year-old gave me the stink-eye, but I kinda liked it.
- One misstep: I tried using leftover turkey once thinking “oh, same as chicken.” Honestly, not the same. Too dry.
Equipment (Or, What If You Don’t Have All the Stuff?)
- Large pot for boiling pasta (and yeah, a deep frying pan works in a pinch)
- Mixing bowl (sometimes I just use the pasta pot after draining—fewer dishes!)
- Baking dish (anything oven-safe, even a deep cast iron. Once used two loaf pans—little weird but still tasted fine)
- Cheese grater—but hey, pre-shredded works if you’re not feeling ambitious.
How Long Does This Stuff Last?
Honestly, in my house it never lasts more than a day! But if you somehow have leftovers, stick them in an airtight container for up to 3 days in the fridge. I’ve microwaved or baked leftovers—both are fine, but if you microwave, add a splash of milk first, trust me. Freezer? In theory, yes, but the cheese texture gets a little weird (in my opinion). If you try it, read this guide first.
Serving It Up—My Favorite Way
I usually serve it with a side salad and half a loaf of garlic bread. On Fridays, sometimes we do it with crispy tater tots, which is a big hit with the kids (and my brother-in-law, who isn’t a kid, but you’d never know that by his plate). I’ve seen someone eat this straight out of the dish—can’t say I blame them.
Pro Tips (Learned by Messing Up)
- Don’t skimp on salting the pasta water. I once forgot, and the whole thing tasted a bit bland. You wanna give it a head start.
- Letting it cool briefly before serving helps everything set, but I usually dive in too soon anyway—it’s always molten at first.
- Actually, I find it works better if you shred your own cheese. Pre-shredded is fine, but it melts more smoothly if you grate a block.
FAQs (Or, the Stuff People Keep Asking Me)
- Can I make this ahead of time? Sure can! I often assemble it earlier in the day, then throw it in the oven when people start bugging me about dinner. If you refrigerate before baking, add a few extra minutes—right out of the fridge it needs a bit longer to get bubbly (just keep an eye on it; sometimes it heats unevenly!).
- What if I don’t like ranch? Well, it’s kind of a big flavor here, but you could try using half the ranch and half sour cream. Or check out this classic recipe if you want to skip ranch altogether.
- Can I use gluten-free pasta? Yup! The texture’s a little different (sometimes it sticks together), but it works. I’ve done it for a friend, just don’t overcook.
- Why does mine get dry? Could be too little milk or overbaked. I’ve had it turn out dry, and sometimes I just pour a little ranch or milk over the reheated portion, which helps!
- Could I use turkey bacon to lighten this up? Probably! But if you ask my uncle, it’s a crime against nature. I say go for it; dinner should be fun anyway.
Oh, and just as a tiny aside: If you’ve never actually tried making homemade ranch dressing, it’s weirdly easy and kinda magical—I’d suggest giving this version a shot sometime when you’re feeling fancy. But honestly, bottled is just fine too. That’s dinner at my place—messy, loud, and nobody leaves hungry!
Ingredients
- 2 cups cooked chicken breast, diced
- 12 oz elbow macaroni
- 2 cups shredded cheddar cheese
- 1 cup shredded mozzarella cheese
- 2 cups milk
- 1/2 cup ranch dressing
- 2 tablespoons unsalted butter
- 2 tablespoons all-purpose flour
- 1/2 teaspoon garlic powder
- 1/2 teaspoon black pepper
- 1/4 cup chopped green onions (optional)
Instructions
-
1Preheat the oven to 375°F (190°C). Grease a 9×13-inch baking dish.
-
2Cook elbow macaroni according to package instructions until al dente. Drain and set aside.
-
3In a large saucepan over medium heat, melt butter. Whisk in flour and cook for 1-2 minutes.
-
4Gradually whisk in milk and cook, stirring constantly, until thickened. Stir in ranch dressing, garlic powder, and black pepper.
-
5Add cheddar and mozzarella cheeses; stir until melted and smooth. Add cooked chicken and macaroni to the sauce, mixing well.
-
6Transfer mixture to prepared baking dish. Bake uncovered for 20 minutes, or until bubbly and golden. Garnish with green onions if desired and serve warm.
CLICK FOR NUTRITION INFO
↑
Approximate Information for One Serving
Serving Size:
1 serving
Calories:
480cal
Protein:
29 gg
Fat:
22 gg
Saturated Fat:
0g
Trans Fat:
0g
Cholesterol:
0mg
Sodium:
0mg
Potassium:
0mg
Total Carbs:
41 gg
Fiber:
0g
Sugar:
0g
Net Carbs:
0g
Vitamin A:
0
Vitamin C:
0mg
Calcium:
0mg
Iron:
0mg
Nutrition Disclaimers
Number of total servings shown is approximate. Actual number of servings will depend on your preferred portion sizes.
Nutritional values shown are general guidelines and reflect information for 1 serving using the ingredients listed, not including any optional ingredients. Actual macros may vary slightly depending on specific brands and types of ingredients used.
To determine the weight of one serving, prepare the recipe as instructed. Weigh the finished recipe, then divide the weight of the finished recipe (not including the weight of the container the food is in) by the desired number of servings. Result will be the weight of one serving.
Did you make this recipe?
Please consider Pinning it!!


