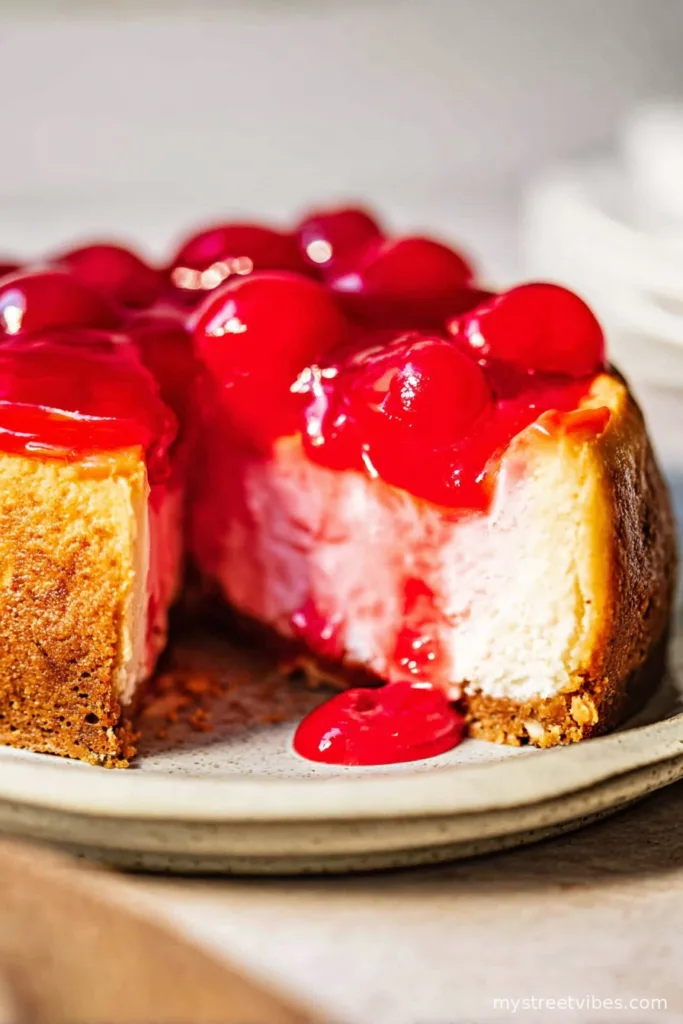
Let Me Tell You About This Cherry Cheesecake
So, cherry cheesecake. Just saying those words kind of gets my mouth watering – which, I admit, makes it tricky to write about (and not wander off to the fridge). The first time I made this recipe, I thought I’d impress my in-laws, but I accidentally used way too much vanilla and forgot to soften the cream cheese. Result? Weirdly runny, vanilla-bomb cheesecake; but everyone still ate it. That’s when I figured, even if you fumble a bit, folks love cherry cheesecake so much it doesn’t seem to matter. Besides, a little imperfection gives desserts character, right? Oh, and don’t ask my brother about the time he dropped it on the porch. That was a whole different kettle of fish.
Why You’ll Love This – According to Me
I make this whenever I need a dessert that doesn’t stress me out (because, seriously, baking can be a minefield if you overthink it). My family goes absolutely bonkers for this – especially my dad, who claims he’s “not a dessert guy” but always manages to snag the biggest slice. There’s something about the combo of creamy, tangy cheesecake and that honest-to-goodness sweet-tart cherry topping. Also, you can chill it ahead, which means you can actually enjoy dinner knowing dessert is handled (one less thing to burn). Personally, I used to get annoyed with lumpy batter, but I’ve figured out that letting the cream cheese hang out at room temp fixes almost anything.
What You’ll Need (And Substitutes I’ve Tried)
- 1 and 1/2 cups graham cracker crumbs (sometimes I grab digestive biscuits if I’m out — my gran used those, and honestly, they’re just as good!)
- 1/4 cup white sugar (brown sugar works in a pinch for a caramelly flavor)
- 1/3 cup melted butter (I’ve even used coconut oil, but butter’s just, well, nicer here)
- 16 oz (450g) cream cheese, softened (Philadelphia is my go-to, but any full-fat cream cheese is fine)
- 1 cup white sugar
- 2 large eggs (I once used 3 medium ones, and it didn’t really ruin things. Go figure.)
- 1 tsp vanilla extract (Okay, okay, I sometimes pour a bit more… no regrets!)
- 1 cup sour cream (Greek yogurt in a pinch, though it’s not quite as rich)
- 1 can cherry pie filling (homemade if I’m feeling fancy, but that’s rare)
How I Like to Make It (And Where I Usually Sneak a Taste)
- First off, preheat your oven to 325°F (160°C) — unless you’re like me and forget. It still works if you remember halfway through.
- Mix the graham crumbs, sugar, and melted butter in a bowl until it looks like, well, wet sand. Press it into a 9-inch springform pan. (I use the bottom of a mug to smoosh it really flat. No special tools here.)
- Bake the crust for about 10 minutes, then let it cool while you deal with the filling.
- Beat the cream cheese and sugar together in a big bowl until it’s smooth-ish. (Don’t panic if there are tiny lumps.)
- Add the eggs, one at a time. This is where I usually sneak a taste — it’s like a cream cheese cloud.
- Stir in the vanilla and sour cream. Again, don’t overthink it; just mix until it’s all friends in the bowl.
- Pour the filling over your (hopefully cool) crust. If it’s a bit wobbly, that’s fine. The oven will work its magic.
- Bake for about 45-50 minutes. It should look mostly set but have a little jiggle in the middle. Don’t open the oven every five minutes like I used to — it messes with the temp.
- Let it cool on the counter, then chill in the fridge for at least 4 hours (or overnight, if you’ve got the willpower).
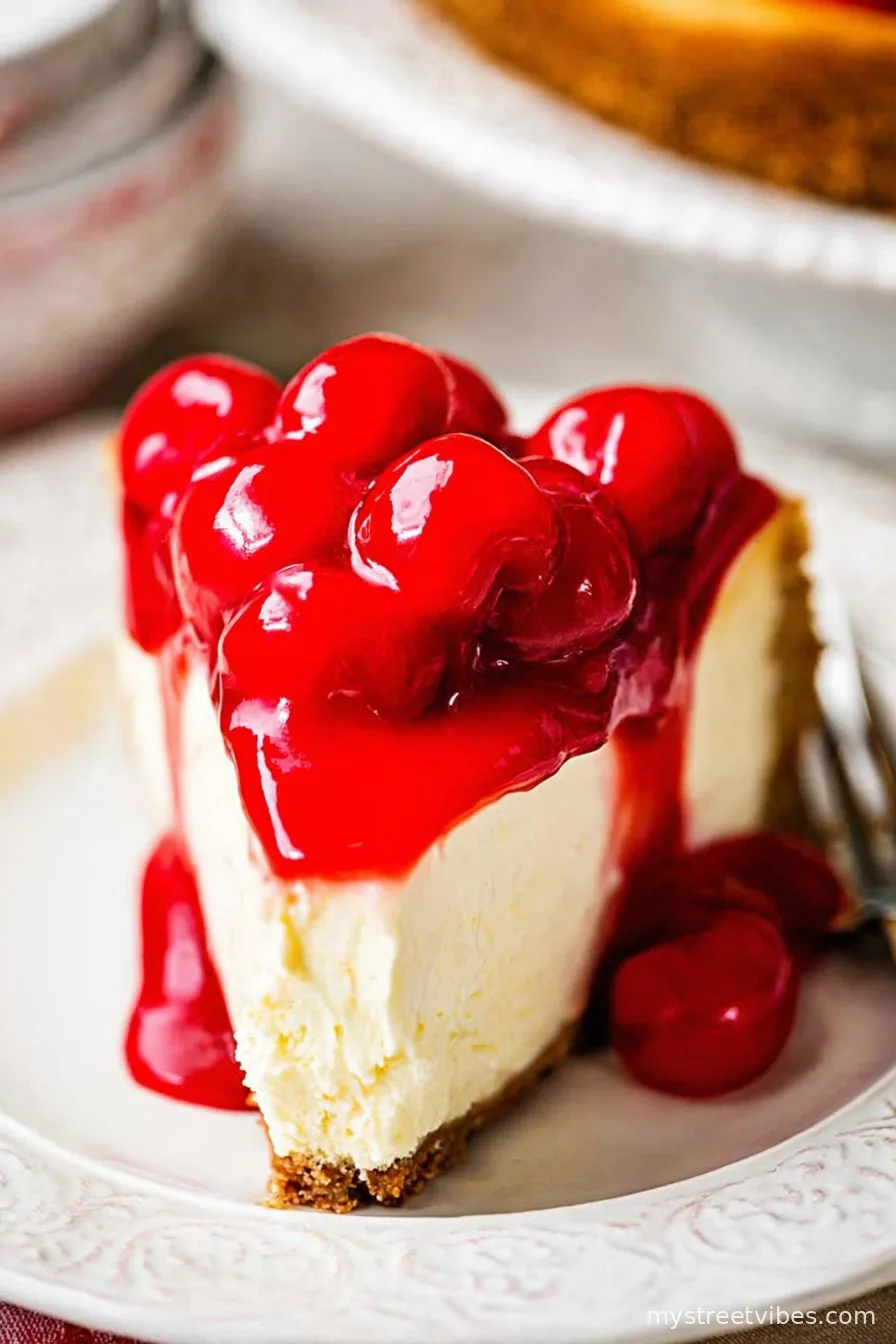
- Smother the whole thing with cherry pie filling right before serving. Bonus points if you mound the cherries high and proud, the way my auntie Maggie does.
Notes From My Totally Perfect (ha) Kitchen
- The crust sometimes sticks; lining the pan with parchment helps, but if you forget (like me), just use a butter knife and gentle persuasion.
- Don’t worry if the top cracks. A thick layer of cherries covers a multitude of baking sins.
- Actually, I find it tastes even better the next day. The flavors seem to like each other more after a sleep.
Did You Know You Can Switch It Up?
I once swapped the cherry filling for blueberries — honestly, that was a winner. Strawberries slid right off, though, so maybe avoid that unless you like homemade slide puzzles. And, for a no-bake version, you can check out Sally’s No-Bake Cheesecake (I’ve made it on a boiling hot day; so chill). Also, I went rogue once and tried an Oreo crust — not a classic, but my nephew raved.
Stuff You Might Need (But If You Don’t, Don’t Panic)
- 9-inch springform pan — but I’ve also used a normal pie dish and just scooped out rustic slices. It’s all good.
- Electric mixer (a whisk and elbow grease works if you’re determined; I’ve done it while binge-watching Great British Bake Off)
- Mixing bowls
- Rubber spatula, though a regular spoon kind of works. Just don’t leave half the cheesecake in the bowl, yeah?
How to Store (But Ours Never Lasts Long)
Technically, it’ll keep in the fridge for up to 5 days, covered. Freeze slices if you’re super organized. But honestly, in my house, leftovers are like unicorns — they just don’t exist. On the rare occasion we do have a piece left, it’s grandma’s breakfast with her coffee. She says it’s got eggs, so it’s practically health food.
Serving Up (My Favorite Part)
I like a fat wedge straight from the fridge, but my cousin heats her slice up slightly in the microwave so it gets all creamy. We also sometimes sprinkle a bit of lemon zest on top for zip — or just eat it straight out of the pan at midnight if nobody’s looking. Dessert rules are made to be broken, right?
Pro Tips Learned the Hard Way
- Once, I tried rushing the chilling step (impatience is my middle name), and the filling oozed everywhere when I cut it. So yeah, let it chill properly.
- Don’t skimp on the cream cheese quality; there is a difference in taste. Learned that after a discount-brand mishap.
- If you’re tempted to open the oven to check every five seconds, resist! The temp swing can make it weirdly dense. Or, maybe that’s just me.
Cherry Cheesecake Questions People Actually Ask Me
Q: Can I use low-fat cream cheese?
A: You can but the texture is a bit less dreamy — honestly, I’d rather use the full-fat and eat a smaller slice (or not!).
Q: Do I have to use a springform pan?
A: Nope. It makes for neat slices but I’ve used deep pie dishes more than once. You just get more rustic servings, which works for me.
Q: Can I make this ahead?
A: Definitely. Actually, I think it works even better if it sits overnight. But don’t top with cherries until you’re ready to serve, or the color bleeds (which is a bit “artistic”, but not super pretty).
Q: Is it okay to freeze?
A: Sure is, just wrap slices well. The crust gets a touch softer, but I don’t mind. My neighbor actually prefers it that way (she’s odd like that!).
Have any more questions? Drop me a comment, or just shout across the fence if you’re local. I’m usually pottering in the kitchen or, let’s be honest, raiding the fridge.

Ingredients
- 1 1/2 cups graham cracker crumbs
- 1/4 cup granulated sugar
- 1/3 cup unsalted butter, melted
- 3 packages (8 oz each) cream cheese, softened
- 1 cup granulated sugar
- 3 large eggs
- 1 teaspoon vanilla extract
- 1 can (21 oz) cherry pie filling
Instructions
-
1Preheat the oven to 325°F (163°C). Mix graham cracker crumbs, 1/4 cup sugar, and melted butter until well combined. Press mixture into the bottom of a 9-inch springform pan.
-
2In a large bowl, beat cream cheese and 1 cup sugar until smooth and creamy. Add eggs one at a time, beating well after each addition. Mix in vanilla extract.
-
3Pour the cream cheese mixture over the prepared crust and smooth the top.
-
4Bake for 60 minutes or until the center is almost set. Turn off oven and leave the cheesecake inside with the door slightly open for 1 hour.
-
5Remove from oven and let cool completely at room temperature, then refrigerate for at least 3 hours.
-
6Top cheesecake with cherry pie filling before serving. Slice and enjoy!
CLICK FOR NUTRITION INFO
↑
Approximate Information for One Serving
Serving Size:
1 serving
Calories:
420 caloriescal
Protein:
7 gg
Fat:
24 gg
Saturated Fat:
0g
Trans Fat:
0g
Cholesterol:
0mg
Sodium:
0mg
Potassium:
0mg
Total Carbs:
47 gg
Fiber:
0g
Sugar:
0g
Net Carbs:
0g
Vitamin A:
0
Vitamin C:
0mg
Calcium:
0mg
Iron:
0mg
Nutrition Disclaimers
Number of total servings shown is approximate. Actual number of servings will depend on your preferred portion sizes.
Nutritional values shown are general guidelines and reflect information for 1 serving using the ingredients listed, not including any optional ingredients. Actual macros may vary slightly depending on specific brands and types of ingredients used.
To determine the weight of one serving, prepare the recipe as instructed. Weigh the finished recipe, then divide the weight of the finished recipe (not including the weight of the container the food is in) by the desired number of servings. Result will be the weight of one serving.
Did you make this recipe?
Please consider Pinning it!!