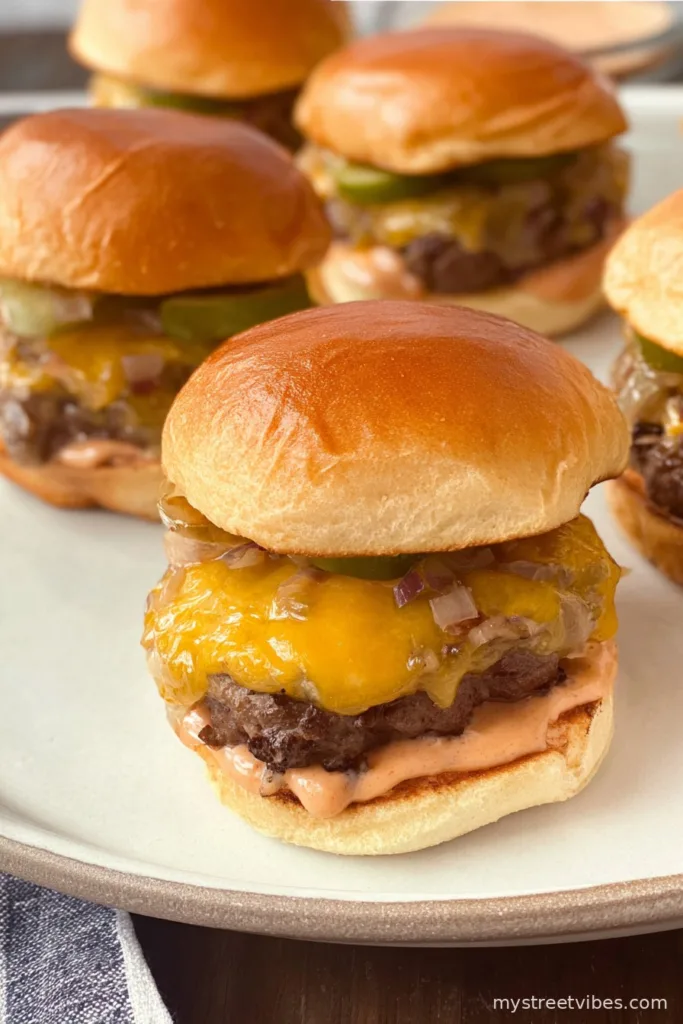
The Story Behind My Cheeseburger Sliders
I first made these Cheeseburger Sliders on a complete whim for, of all things, a cousin’s game night. You know that kind of evening—everyone’s hovering around the kitchen, pretending to help but really just waiting for food to magically appear. Mini burgers seemed like the answer. Fast-forward to today and, not to sound cocky, but these are now the most-requested thing at any family gathering. (Mom’s potato salad had a good run, but these sliders stole the show.) Maybe it’s the gooey cheese, or maybe it’s the tang from the sauce—or maybe it’s just that two-bite size that makes you feel like you can eat six without guilt. Who’s counting, right?

Why This Recipe Gets Requested (A Lot)
I make this when there’s a mix of picky eaters and full-on foodies in the room, because no one’s ever complained. Honestly, the melted cheddar makes everyone smile (even my aunt, who claims not to like cheese but always ends up having seconds). And I’ll admit, caramelizing the onions was something I always used to rush, but once I took my time with it? Game changer. My family goes bonkers for these, and I’d be lying if I said there were ever leftovers—that’s just how it goes at my place.
Here’s What You’ll Need (With My Notes)
- 1 lb Ground Beef (Sometimes I use a beef/pork blend if that’s all I’ve got, but 100% beef is classic.)
- 1 tablespoon Worcestershire Sauce (My grandma insisted on Lea & Perrins, but any brand does the trick.)
- ½ teaspoon Salt
- ½ teaspoon Black Pepper (I like it coarsely cracked, but pre-ground works when rushed.)
- 4 slices Sharp Cheddar Cheese, cut in half (I’ve tried colby-jack in a pinch—also yum.)
- 8 Slider Buns (Brioche buns are a bit of a treat, but regular dinner rolls are just fine.)
- 2 Whole Dill Pickles, sliced (Seriously, use any pickles; sweet, spicy, whatever you like.)
- Grilled Onions:
- 1 Yellow Onion, sliced thin
- 2 tablespoon Butter
- 1 tbsp Worcestershire Sauce
- 1 tbsp Red Wine Vinegar (White wine vinegar works too—don’t stress it.)
- Burger Sauce:
- 1 teaspoon Mustard (I use yellow, but Dijon if I’m feeling fancy.)
- 1 tablespoon Sweet Pickle Relish
- ¼ cup Ketchup
- ¼ cup Mayo
Let’s Cook—Step by Step (But Not Too Fussy)
- Mix up your burger sauce first. In a small bowl, stir together the mustard, sweet pickle relish, ketchup, and mayo. Give it a quick taste (this is the moment I can never resist a finger swipe). Pop it in the fridge—honestly, the longer it chills, the better it tastes, but even 10 minutes is fine if you’re impatient like me.
- Grill the onions next. Melt the butter in a skillet set over medium heat. Dump in your sliced onions, plus that splash of Worcestershire and red wine vinegar. Toss with a pinch of salt. Let them do their thing under a lid, stirring now and then, until they’re all jammy and golden, about 15-20 minutes. (It’ll look weird, almost stringy and messy, before it comes together—don’t panic. That’s normal.)
- Shape your burgers. Grab your ground beef and gently divide it into eight equal balls. Flatten each one into a patty about the size of your buns. I drizzle both sides with Worcestershire and sprinkle with salt and pepper—don’t over-handle the meat, trust me, they’re juicier if you keep a light touch.
- Cook the sliders. Heat a skillet or your grill over medium-high. Once it’s hot (test with a drop of water; it should dance), add the patties. Cook about 4 minutes on the first side, flip, then go another 3 minutes. Lay the cheese on top after you flip them—cover the pan if you want it super melty, it’s so satisfying to watch.
- Build your sliders. Toast the buns lightly (I sometimes skip this step if I’m in a hurry, but it does add crunch). Smear some of that burger sauce on the bottom, stack your cheesy burger, a few pickles, and a pile of those tangled onions. Pop on the top bun. That’s it! Time to dig in before the crowd descends.
What I’ve Learned—Little Notes
- If your onions seem to cook unevenly, just give ‘em an extra stir—it’ll even out. Patience here really pays off.
- I’ve noticed these reheat pretty well, but fresh is still best. Don’t bother with the microwave; use a skillet to warm them up if you must.
Variations I’ve Played With (Not All Winners!)
- Tried blue cheese one night—my kids revolted. Not my brightest idea.
- Adding crispy bacon? Works wonders if you want to go all out. But it’s a lot of pans flying about.
- Swapping out pickles with jalapeños for a spicy version—actually pretty good, just not for everyone in my house.

Gear You’ll Need (But Don’t Stress It)
- Large skillet or grill (If you lack a lid, use an upside-down sheet pan or just loosely tent with foil. Done it a million times.)
- Bowl for mixing the sauce
- Spatula, sharp knife
Storing These Sliders (You Probably Won’t Have To)
Stick any leftover sliders in the fridge—covered tightly. They’re okay for a day or two. But honestly, I don’t think I’ve ever had any left after an hour, let alone a day. Maybe your house is more restrained!
How We Serve Them At Home
Best thing ever with thick-cut fries or just plain potato chips. I put out extra pickles (because people always ask). If it’s a big crowd, I’ll double the batch and throw together a simple green salad. That way I can pretend it’s a balanced meal.
Pro Tips I Learned The Hard Way
- Don’t rush the onions. One time I cranked the heat and they went from raw to burnt—no middle ground. Slow and low is the magic.
- Resist smashing the patties with the spatula while they cook. It’s so tempting, but you’ll lose all the juiciness.
Some Real Questions I Get (And My Honest Answers)
- Can I make these ahead? Sort of—form the patties and prep the sauce and onions in advance. But cook the burgers fresh for best flavor.
- Is there a good gluten-free bun? Sure is. I’ve used little lettuce wraps when needed, or whatever gluten-free bun’s at the market. It’s not exactly the same, but works fine.
- What if I don’t like pickles? Skip ‘em. Or swap for tomato slices. This recipe’s pretty forgiving.
- Can I freeze these? I’ve done it with cooked patties (no bun or cheese), and it’s fine for a month or so. Reheat gently.
- What’s the best cheese to use? Cheddar’s my fave, but jack or even Swiss works great if that’s what’s left in the fridge.
If you end up with any weird mishaps, let me know. Cooking’s not about being perfect—it’s about feeding people you like with good, fun food. These sliders are proof enough for me!
Ingredients
- 1 lb Ground Beef
- 1 tablespoon Worcestershire Sauce
- ½ teaspoon Salt
- ½ teaspoon Black Pepper
- 4 slices Sharp Cheddar Cheese cut in half
- 8 Slider Buns
- 2 Whole Dill Pickles sliced
- Grilled Onions
- 1 Yellow Onion sliced thin
- 2 tablespoon Butter
- 1 tbsp Worcestershire Sauce
- 1 tbsp Red Wine Vinegar
- Burger Sauce
- 1 teaspoon Mustard
- 1 tablespoon Sweet Pickle Relish
- ¼ cup Ketchup
- ¼ cup Mayo
Instructions
-
1Mix up your burger sauce first. In a small bowl, stir together the mustard, sweet pickle relish, ketchup, and mayo. Give it a quick taste (this is the moment I can never resist a finger swipe). Pop it in the fridge—honestly, the longer it chills, the better it tastes, but even 10 minutes is fine if you’re impatient like me.
-
2Grill the onions next. Melt the butter in a skillet set over medium heat. Dump in your sliced onions, plus that splash of Worcestershire and red wine vinegar. Toss with a pinch of salt. Let them do their thing under a lid, stirring now and then, until they’re all jammy and golden, about 15-20 minutes. (It’ll look weird, almost stringy and messy, before it comes together—don’t panic. That’s normal.)
-
3Shape your burgers. Grab your ground beef and gently divide it into eight equal balls. Flatten each one into a patty about the size of your buns. I drizzle both sides with Worcestershire and sprinkle with salt and pepper—don’t over-handle the meat, trust me, they’re juicier if you keep a light touch.
-
4Cook the sliders. Heat a skillet or your grill over medium-high. Once it’s hot (test with a drop of water; it should dance), add the patties. Cook about 4 minutes on the first side, flip, then go another 3 minutes. Lay the cheese on top after you flip them—cover the pan if you want it super melty, it’s so satisfying to watch.
-
5Build your sliders. Toast the buns lightly (I sometimes skip this step if I’m in a hurry, but it does add crunch). Smear some of that burger sauce on the bottom, stack your cheesy burger, a few pickles, and a pile of those tangled onions. Pop on the top bun. That’s it! Time to dig in before the crowd descends.
CLICK FOR NUTRITION INFO
↑
Approximate Information for One Serving
Serving Size:
1 serving
Calories:
390 caloriescal
Protein:
21gg
Fat:
23gg
Saturated Fat:
0g
Trans Fat:
0g
Cholesterol:
0mg
Sodium:
0mg
Potassium:
0mg
Total Carbs:
28gg
Fiber:
0g
Sugar:
0g
Net Carbs:
0g
Vitamin A:
0
Vitamin C:
0mg
Calcium:
0mg
Iron:
0mg
Nutrition Disclaimers
Number of total servings shown is approximate. Actual number of servings will depend on your preferred portion sizes.
Nutritional values shown are general guidelines and reflect information for 1 serving using the ingredients listed, not including any optional ingredients. Actual macros may vary slightly depending on specific brands and types of ingredients used.
To determine the weight of one serving, prepare the recipe as instructed. Weigh the finished recipe, then divide the weight of the finished recipe (not including the weight of the container the food is in) by the desired number of servings. Result will be the weight of one serving.
Did you make this recipe?
Please consider Pinning it!