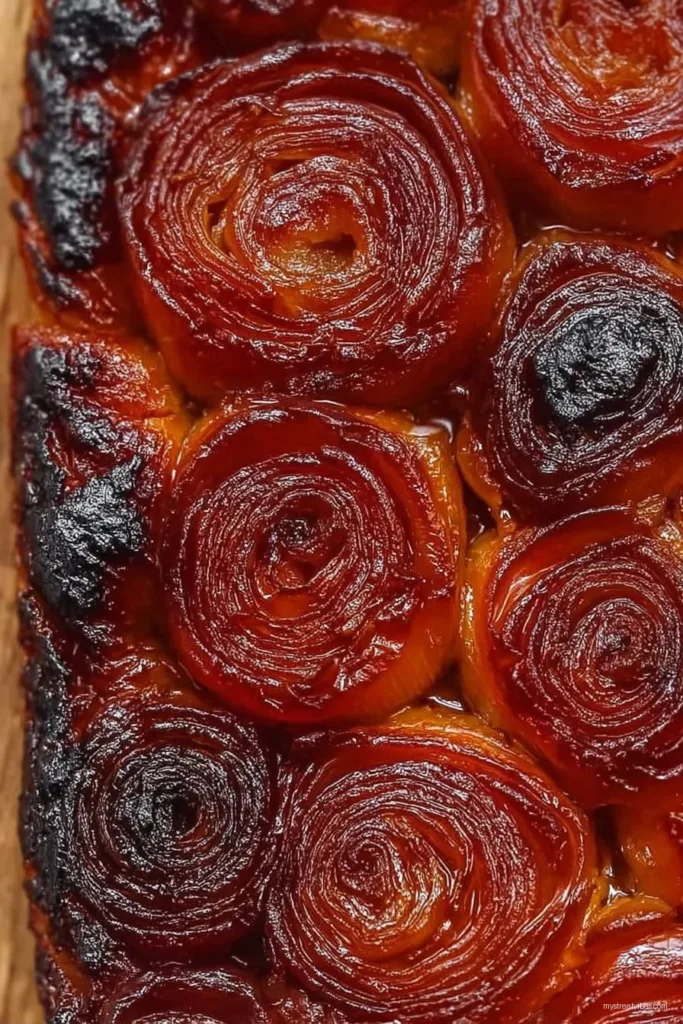
I made this Caramelized Onion Tarte Tatin once for a neighbor who came by with a bag of onions and a slightly panicked look, and it turned into one of those low stress dinners that somehow felt like a tiny restaurant moment at home. The onions go glossy, the pastry puffs like it is showing off, and you flip it out with a little drumroll. I still hold my breath for the flip, every time. Also, full disclosure, I ate a corner before serving because I am only human.
Why I keep making this one
I make this when friends bring a bottle and I have about an hour to pull something lovely together. My family goes a bit wild for the sticky edges because they are sweet but not silly sweet, if you know what I mean. And when I do not feel like fussing with a big main, this with a green salad just reads dinner. There was a phase when the onions kept catching in spots, which made me mutter at the stove, but actually I find it works better if I slow down a wee bit and let them do their thing.
(If you have never sliced a mountain of onions, this onion slicing refresher helped me so much: how to cut an onion.)
What you need, plus the little swaps I make
- 6 large yellow onions, about 1.2 to 1.5 kg, peeled and halved through the root
- 40 g unsalted butter, plus a tiny extra knob if the pan looks dry
- 2 tbsp olive oil
- 2 tbsp light brown sugar, or regular sugar if that is what you have
- 2 tbsp balsamic vinegar, or a splash of red wine vinegar with a spoon of honey
- A handful of fresh thyme sprigs and 1 bay leaf
- 1 tsp Dijon mustard, optional, I sometimes spread it thin under the pastry
- Flaky salt and black pepper
- 1 sheet all butter puff pastry, about 250 g, chilled not frozen
- 30 g soft goat cheese, totally optional, but nice little tang
- Optional swaps I use: a teaspoon of miso for extra oomph, or a few anchovy fillets that melt right in. My grandmother always insisted on Brand X pastry, but honestly any all butter version works fine.
How I cook it, step by step but not too fussy
- Heat oven to 200 C or 400 F. If you remember to move the oven rack down a notch, do it now so the pastry has room.
- Use a 24 to 26 cm oven safe skillet. Set it over medium heat, melt the butter with the olive oil, then slide in the onions cut side down. Sprinkle with a good pinch of salt. Let them sit there so they pick up color, maybe 8 to 10 minutes. Do not poke too much at first.
- Flip the onions once they have some amber around the edges. Add the sugar, thyme, and bay. Stir gently, then cook on medium low for about 20 to 25 minutes, shuffling things now and then so nothing scorches. This is where I usually sneak a taste, purely for quality control.
- Pour in the vinegar to deglaze, scrape up the sticky bits, and let it bubble for a minute. Grind in pepper. If the pan seems dry, a splash of water or stock is fine. Do not worry if it looks a bit odd at this stage, it always does before it turns gorgeous.
- Turn off the heat. Nudge the onions into a snug single layer with the rounded sides facing down. Pluck out the bay leaf. If using goat cheese, dot tiny bits in the gaps. If you like the mustard trick, spread a thin smear on the pastry with the back of a spoon.
- Lay the pastry over the pan, tucking the edges down along the inside like you are putting a blanket to bed. Cut two small vents with the tip of a knife. Chill the whole pan in the fridge for 5 minutes if the pastry feels soft, it helps. On second thought, even 3 minutes helps.
- Bake until deep golden and puffed, about 25 to 30 minutes. If the top is browning too fast, loosely tent with foil. You will see syrup bubbling at the edges and it smells like a cosy bistro. Lovely.
- Let it rest 5 to 8 minutes so the juices settle. Run a small knife around the edge. Invert a large plate over the pan, take a breath, and flip with conviction. If a few onions stick, just tuck them back in, no one will know. Serve warm. Or at room temp, which I think is its best mood.
- If your skillet is not oven safe, cook the onions in any pan, then transfer them to a buttered cake tin and top with pastry. It is a tiny faff but works a charm.
Notes from my slightly splattered stovetop
- If your onions are very sharp, a quick rinse in cold water after cutting can tame them, but pat dry so they actually brown.
- A tiny pinch of baking soda speeds browning, though it can soften the onions more than I like. I use it only if I am in a rush.
- Do not skip the rest before flipping. I once rushed it, and all the syrup slid out like a tiny caramel river.
- Store bought pastry is absolutely fine. If you want to make your own, this puff pastry guide is solid and friendly: puff pastry tips.
- Curious about the onion science bit I mentioned earlier The caramel notes come with time. This piece is an easy read: caramelised onions basics.
Variations I have actually tried
- Blue cheese and walnut nibs tucked in the gaps. Very good with a glass of something red.
- Apple and onion half and half, with a few sage leaves. Slightly sweeter, great for brunch.
- Tomato and onion with a sprinkle of olives. More Mediterranean, I suppose.
- The one that did not work so well: filo pastry on top. It was tasty but flew everywhere like confetti, and the bottom got a bit sad.
Tools I use and what to do if you do not have them
- Oven safe skillet, about 24 to 26 cm. I say you really need this. But if you do not, transfer to a cake tin like I mentioned and you are grand.
- A wooden spoon or fish spatula, something friendly to your pan.
- Rolling pin helps if your pastry needs a little stretch. A wine bottle does the job in a pinch, ask me how I know.
- A digital scale if you like precision. Or do what I do on a Tuesday and just eye it.
How to store it
Cool completely, cover, and refrigerate up to 3 days. Reheat slices in a hot oven for 8 to 10 minutes so the pastry crisps again. You can freeze wedges for a month, tightly wrapped, then reheat form frozen until hot. Though honestly, in my house it never lasts more than a day.
How I love to serve this
A big tangle of peppery rocket with lemon and olive oil. Maybe a soft poached egg on top if it is lunch. For a cosy dinner, I add roast carrots or a simple chicken, but the tarte is the star. At Christmas my mum insists on a tiny spoon of cranberry jam on each slice and somehow it works.
Pro tips learned the wobbly way
- I once tried rushing the first browning step and regretted it because the onions steamed and turned pale. Give them time to get a little bronze suit.
- Do not overload the pan with extra onions, tempting as it is. They need space to color.
- Vent the pastry. I forgot once, and it puffed like a pillow and tried to escape the pan.
- Use all butter pastry if possible. The flavor sings. But if you cannot find it, any good puff will do.
Questions you have asked me
Can I make the Caramelized Onion Tarte Tatin ahead
Yes. Cook the onions earlier in the day, cool them in the pan, top with pastry right before baking. Or bake fully and reheat at 180 C or 350 F for about 12 minutes. It is still great.
Can I make it vegan
Totally. Use olive oil instead of butter and a vegan puff pastry. Flavor will be slightly different but still lovely.
Red onions or white onions
Yellow onions are my pick. Red onions can turn a bit magenta and slightly jammy, which is pretty but tastes different. If that is your vibe, go for it.
How do I stop a soggy bottom
Get the onions well reduced so there is not loads of liquid, and bake until the pastry is deeply golden. Resting before flipping helps too.
What size pan should I use
Something around 24 to 26 cm, which fits a standard pastry sheet. Smaller pan works, it will just be a bit taller. Bigger pan will be thinner and crisper. Both are nice.
Do I need sugar
You can reduce it to 1 tablespoon or skip and rely on slow onion sweetness. I prefer a bit, it balances the vinegar and brings that gloss.
Can I freeze the whole tarte
Yes, after baking and cooling. Wrap tightly, freeze, then reheat straight form the freezer until hot and crisp again.
Small digression because it made me smile last time I cooked this: a robin sat on the fence and watched me flip the tarte like a tiny judge at a cooking show. I passed, barely.

Ingredients
- 6 medium yellow onions, thinly sliced (about 900 g / 2 lb)
- 2 tablespoons unsalted butter
- 1 tablespoon olive oil
- 2 tablespoons brown sugar
- 1 tablespoon balsamic vinegar
- 1 teaspoon fresh thyme leaves (or 1/2 tsp dried thyme)
- 1 sheet puff pastry (about 250–300 g), thawed
- Salt and freshly ground black pepper, to taste
Instructions
-
1Prepare onions: Peel and thinly slice the onions. Pat the puff pastry dry if needed and roll slightly to fit a 9-10 inch (23–25 cm) ovenproof skillet or tart pan.
-
2Caramelize onions: Heat the butter and olive oil in a large ovenproof skillet over medium heat. Add the sliced onions and a pinch of salt. Cook, stirring occasionally, until soft and deeply golden, about 25–30 minutes.
-
3Add flavor: Sprinkle the brown sugar over the onions and stir to combine. Cook 2–3 minutes more until the sugar melts and starts to glaze the onions. Stir in the balsamic vinegar and thyme, then season with salt and pepper to taste.
-
4Arrange in pan: Press the caramelized onions evenly into the skillet, creating a slightly domed surface if desired. Allow the mixture to settle for a minute so excess liquid reduces.
-
5Top with pastry and bake: Drape the puff pastry over the onions, tucking the edges down around the inside of the skillet. Make a few small slits in the pastry to vent. Transfer the skillet to a preheated oven at 200°C (400°F) and bake until the pastry is golden and crisp, about 20–25 minutes.
-
6Invert and serve: Let the tart rest 5 minutes, then carefully invert onto a serving plate so the caramelized onions are on top. Serve warm or at room temperature, optionally garnished with extra thyme or a drizzle of olive oil.
CLICK FOR NUTRITION INFO
↑
Approximate Information for One Serving
Serving Size:
1 serving
Calories:
320cal
Protein:
6 gg
Fat:
18 gg
Saturated Fat:
0g
Trans Fat:
0g
Cholesterol:
0mg
Sodium:
0mg
Potassium:
0mg
Total Carbs:
30 gg
Fiber:
0g
Sugar:
0g
Net Carbs:
0g
Vitamin A:
0
Vitamin C:
0mg
Calcium:
0mg
Iron:
0mg
Nutrition Disclaimers
Number of total servings shown is approximate. Actual number of servings will depend on your preferred portion sizes.
Nutritional values shown are general guidelines and reflect information for 1 serving using the ingredients listed, not including any optional ingredients. Actual macros may vary slightly depending on specific brands and types of ingredients used.
To determine the weight of one serving, prepare the recipe as instructed. Weigh the finished recipe, then divide the weight of the finished recipe (not including the weight of the container the food is in) by the desired number of servings. Result will be the weight of one serving.
Did you make this recipe?
Please consider Pinning it!!