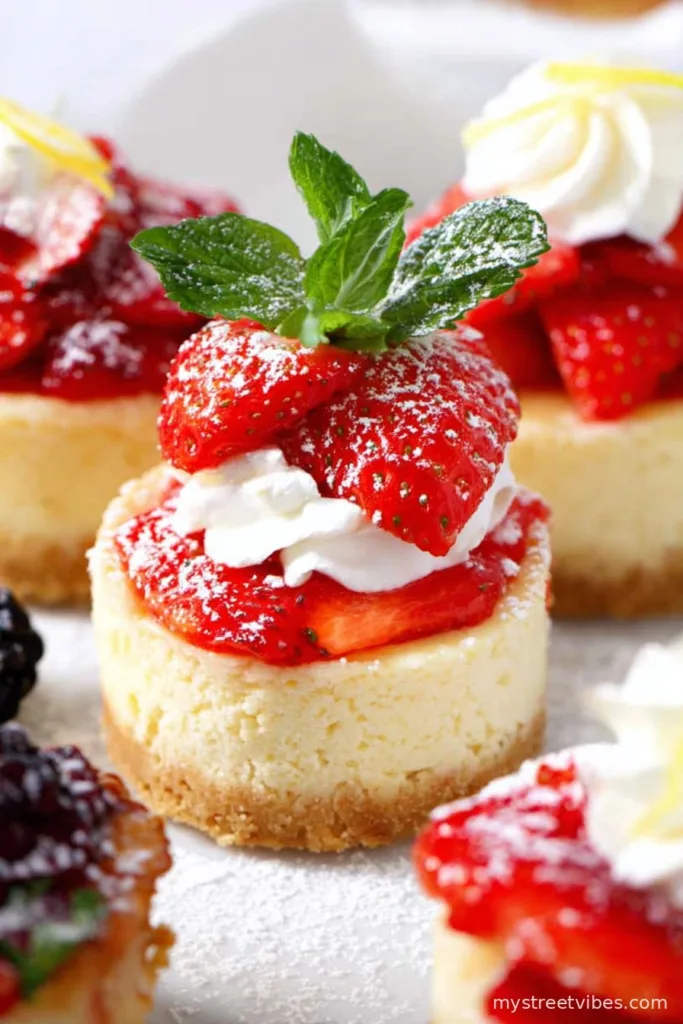
Hey, friend! So, about these mini cheesecakes… They’ve basically become my secret weapon for potlucks, birthdays, or, you know, nights when I want dessert but also want to claim I’m being reasonable. I remember the first time I made them for my cousin’s get-together—I was nervous these little guys would stick like glue or collapse into a sad puddle. But (and here’s the kicker), they turned out so adorable and delicious that people actually fought over the last one. Real elbows-on-the-table action.

Why I Keep Coming Back to This Recipe
I pull this out any time I’m short on time but still want to impress (or bribe my kids into eating their veggies). My family goes bonkers for these, probably because they’re easy to grab, eat, and sneak another when they think I’m not looking. Plus, you don’t have to fuss with a water bath or any of that fancy business—just whip, bake, chill, and you’ve got creamy little cheesecakes, minus the drama. Occasionally, the batter gets a little lumpy, which used to annoy me, but honestly? No one has ever noticed except me (I just call it an artisan touch now!).
What You’ll Need (And What I Swap In a Pinch)
- 3/4 cup graham cracker crumbs (sometimes I use digestive biscuits or even gingersnaps when I’m feeling jazzy—my gran used to, but honestly, any plain cookie works forget the rules)
- 2 tablespoons sugar (I’ve swapped in brown sugar when I run out of white, still tastes great)
- 3 tablespoons melted butter
- 226g cream cheese, softened (full-fat for the win, but I once used light and it didn’t end in disaster)
- 1/4 cup granulated sugar
- 1 large egg
- 1 teaspoon vanilla extract (okay, confession: sometimes I eyeball this and it’s never been a problem)
- 1 tablespoon sour cream (Greek yogurt works if you’re all out, I promise)
- A pinch of salt
How I Throw These Together
- First things first: Preheat your oven to 325°F (160°C). Line a muffin tin with 8 cupcake liners. No fancy silicone pans here, though if you have ’em—bonus!
- Grab a bowl and mix the graham cracker crumbs, 2 tablespoons sugar, and melted butter until it looks like damp sand. I scoop a heaping tablespoon of this into each liner and press it down, usually with the bottom of a glass—though once I used my knuckles in a pinch (ouch, but it worked). Stick the tin in the freezer while you make the filling. Or just keep it on the counter; nobody’s policing the crust.
- In another bowl, beat the softened cream cheese until it’s smoothish. Add the 1/4 cup sugar and a pinch of salt—mix, mix, mix. Crack in the egg and splash in the vanilla; blend just until it all comes together. Sour cream gets folded in last. Actually, I find it works better if you scrape the sides at this point. Don’t worry if you see a few tiny lumps—mine always has them, and I think it tastes just fine.
- Spoon the batter over your chilled crusts, trying to keep it even – but, if you’re anything like me, some will be fuller than others. Smooth the tops with the back of a spoon if you care; I usually don’t bother.
- Bake for about 16-18 minutes, or until the centers barely jiggle when you nudge the pan with a spoon handle. They’ll puff up, sometimes crack a smidge—just let them be. While they cool, they’ll fall a wee bit, and that’s okay. Not a tragedy, more like character!
- Let the pan cool for 15 minutes on the counter (this is where I sneak a taste of the crust I “accidentally” overfilled). Stick the pan in the fridge for at least 1 hour, or up to overnight if you’re good at resisting temptation.

Oh, Some Notes…
- If you accidentally overmix the egg, it can get kinda puffy in the oven (I learned this after trying to multitask making dinner at the same time—don’t recommend)
- Once I forgot to line my pan—never again. Those cheesecakes clung on like barnacles
- You can totally double the recipe if you’ve got a crowd. Or halve it, though why would you?
Wild Experiments and Variations
- I once chopped up chocolate chips and sprinkled them into the filling. Tasted amazing, but they sank to the bottom and made the crust a bit soft; lesson learned.
- Lemon zest gives these a real zing—sometimes I add 1 teaspoon if I’m feeling bright.
- For a super simple chocolate base, sub in chocolate wafer cookies for the crust. My nephew swears it’s better this way, but I’ll let you be the judge!

You Don’t Need All the Fancy Gear
Muffin tin is pretty much non-negotiable, unless you want a cheesecake puddle. But if you don’t have a mixer, a sturdy wooden spoon and elbow grease are just as good—my first time making these, the electric mixer was nowhere to be found, and it was fine (though I broke a sweat).
How Long Do They Keep?
Technically, these’ll last 3 days in the fridge if you seal them up (I just use a plastic tub). But honestly, in my house they disappear before breakfast the next day. Your mileage may vary.
How We Serve ‘Em
Sometimes I just plop on a spoon of cherry jam, or if I’m feeling very posh, a few berries and a dusting of powdered sugar. My daughter once made faces with chocolate chips and sprinkles for her friends—not exactly Michelin, but definitely memorable.
Learned the Hard Way: Pro Tips
- I once tried to microwave-soften my cream cheese—ended up with hot spots and a weird mess. Trust the process, let it soften on the counter.
- Bake them just until they’re barely set. Rushing it makes them rubbery. And really, who wants rubbery cheesecake?
- If you’re tempted to skip chilling, don’t; they taste waaaay better cold (plus, they hold their shape).
FAQ: Questions I Actually Get
- Can I freeze these? Sure thing. I’ve frozen them (wrapped up, in a box), but let them thaw in the fridge for the best texture.
- Can I use low-fat cream cheese? You can, but they’re not quite as creamy—sometimes a bit chalky if I’m being honest.
- Do I have to use liners? It’s, uh, pretty useful (trust me). I’ve tried without, and cleanup took longer than making the recipe.
- Help! My cheesecakes cracked. Honestly, all mini cheesecakes crack sometimes. No one seems to mind, especially once you cover them with something yummy.
- Why do they sometimes sink? That’s totally normal. They always sink a bit after coming out of the oven. Still taste like victory.
And if you make extra—well, just invite me over. I think these little cheesecakes just might be my favorite way to end a day, rainy or sunny, just right.
Ingredients
- 3/4 cup graham cracker crumbs (sometimes I use digestive biscuits or even gingersnaps when I’m feeling jazzy—my gran used to, but honestly, any plain cookie works forget the rules)
- 2 tablespoons sugar (I’ve swapped in brown sugar when I run out of white, still tastes great)
- 3 tablespoons melted butter
- 226g cream cheese, softened (full-fat for the win, but I once used light and it didn’t end in disaster)
- 1/4 cup granulated sugar
- 1 large egg
- 1 teaspoon vanilla extract (okay, confession: sometimes I eyeball this and it’s never been a problem)
- 1 tablespoon sour cream (Greek yogurt works if you’re all out, I promise)
- A pinch of salt
Instructions
-
1First things first: Preheat your oven to 325°F (160°C). Line a muffin tin with 8 cupcake liners. No fancy silicone pans here, though if you have ’em—bonus!
-
2Grab a bowl and mix the graham cracker crumbs, 2 tablespoons sugar, and melted butter until it looks like damp sand. I scoop a heaping tablespoon of this into each liner and press it down, usually with the bottom of a glass—though once I used my knuckles in a pinch (ouch, but it worked). Stick the tin in the freezer while you make the filling. Or just keep it on the counter; nobody’s policing the crust.
-
3In another bowl, beat the softened cream cheese until it’s smoothish. Add the 1/4 cup sugar and a pinch of salt—mix, mix, mix. Crack in the egg and splash in the vanilla; blend just until it all comes together. Sour cream gets folded in last. Actually, I find it works better if you scrape the sides at this point. Don’t worry if you see a few tiny lumps—mine always has them, and I think it tastes just fine.
-
4Spoon the batter over your chilled crusts, trying to keep it even – but, if you’re anything like me, some will be fuller than others. Smooth the tops with the back of a spoon if you care; I usually don’t bother.
-
5Bake for about 16-18 minutes, or until the centers barely jiggle when you nudge the pan with a spoon handle. They’ll puff up, sometimes crack a smidge—just let them be. While they cool, they’ll fall a wee bit, and that’s okay. Not a tragedy, more like character!
-
6Let the pan cool for 15 minutes on the counter (this is where I sneak a taste of the crust I “accidentally” overfilled). Stick the pan in the fridge for at least 1 hour, or up to overnight if you’re good at resisting temptation.
CLICK FOR NUTRITION INFO
↑
Approximate Information for One Serving
Serving Size:
1 serving
Calories:
185 caloriescal
Protein:
3gg
Fat:
13gg
Saturated Fat:
0g
Trans Fat:
0g
Cholesterol:
0mg
Sodium:
0mg
Potassium:
0mg
Total Carbs:
15gg
Fiber:
0g
Sugar:
0g
Net Carbs:
0g
Vitamin A:
0
Vitamin C:
0mg
Calcium:
0mg
Iron:
0mg
Nutrition Disclaimers
Number of total servings shown is approximate. Actual number of servings will depend on your preferred portion sizes.
Nutritional values shown are general guidelines and reflect information for 1 serving using the ingredients listed, not including any optional ingredients. Actual macros may vary slightly depending on specific brands and types of ingredients used.
To determine the weight of one serving, prepare the recipe as instructed. Weigh the finished recipe, then divide the weight of the finished recipe (not including the weight of the container the food is in) by the desired number of servings. Result will be the weight of one serving.
Did you make this recipe?
Please consider Pinning it!