Alright, You’re Here for Bread (But First, My Tangent)
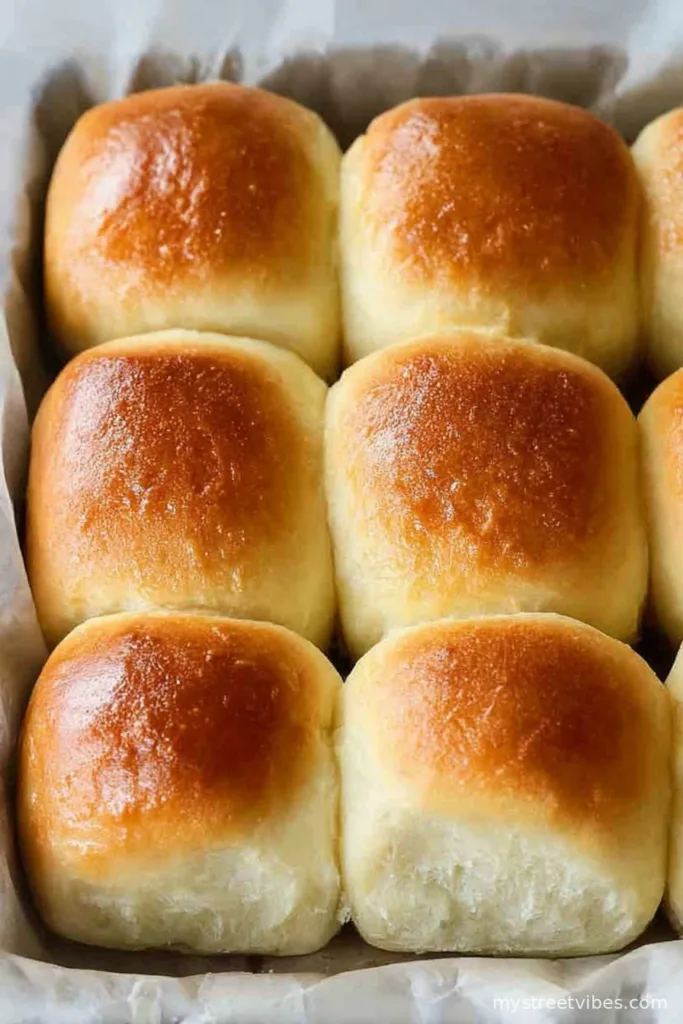
You know how some recipes just seem to follow you home and basically demand a place in your rotation? That is absolutely what happened with these condensed milk bread rolls. I first tried them at a friend’s kids birthday—completely by accident, I was “helping” in the kitchen by taste-testing (best kind of help if you ask me). And wow, that fluffy, almost cloud-like inside had me jotting mental notes between sips of lukewarm tea. I’ve been making my own version ever since—sometimes for brunch, sometimes way past midnight (oops). Honestly, a properly soft bread roll is my food love language. The smell alone is worth getting flour everywhere, which I 100% do every time.
Why I Keep Baking These Fluffy Rolls
I bake these when I’ve got leftover condensed milk burning a hole in my fridge shelf—like, who really finishes a can in one go? My family goes a bit bonkers for these, especially if I swear that they’ll get first dibs as they’re cooling (good luck with that—I’m always nibbling at the crusty corners). The texture, that’s what hooks me in. They’re pillowy, warm, just a little sweet, and they stay soft for ages. Or, at least, that’s what I’d tell you, but honestly they’ve never lasted more than a single day in this house! Oh, and if you’ve ever been defeated by dry, sad homemade bread—this recipe is forgiving, a bit like a laidback old friend who doesn’t mind a minor measuring mishap here or there.
What You’ll Need (and a Few Switch-Ups)
- 3 cups (375g) bread flour, but honestly, I’ve grabbed all-purpose in a pinch and they’re still soft.
- 2 teaspoons instant dry yeast (any brand; Grandma swears by Red Star, but you do you)
- 1/2 cup (120ml) warm milk (whole milk if you ask me, but I’ve used skim without disaster—just a bit less rich)
- 1/3 cup (100g) sweetened condensed milk, plus a bit more for brushing on top
- 1/4 cup (55g) unsalted butter, softened—if you only have salted, just skip the extra salt
- 1 large egg (room temp is best, but sometimes I forget and it’s fine)
- 1/2 teaspoon salt (some days I leave it out, mostly by accident, and it still turns out okay!)
- Optional: A splash of vanilla extract for a bit of cozy aroma—it’s not classic, but I like it
- Optional: Sprinkle of sesame seeds or a dusting of powdered sugar for the top, if you’re feeling wild
Let’s Get Mixing: Directions That Actually Make Sense
- Warm up your milk until it’s just a bit warmer than your finger, not scalding—about 30 seconds in the microwave. Mix in your yeast and let it sit for 5 minutes till foamy (sometimes mine just sits there stubborn, and I use it anyway—doesn’t seem to mind).
- Throw your flour, salt (if using), softened butter, the egg, and that gorgeous condensed milk into a big bowl. Pour in your milk-yeast mix. I start with a wooden spoon, but honestly, sometimes I just use my (clean) hands towards the end.
- Mix until it comes together in a sticky-ish dough, then knead it on a floured surface for about 10 minutes. Or, pop it in a stand mixer with a dough hook—on days my arms can’t be bothered. It should be soft and just a bit tacky, kind of like a squishy marshmallow. (If it’s ridiculously sticky even after kneading, add a pinch more flour.)
- Scoop the dough into a lightly greased bowl, cover it with a damp kitchen towel, and let it rise somewhere cozy and draft-free. I use the microwave (turned off, obviously) or, on really cold days, the oven with just the light on. It takes about 60-90 minutes to double but honestly, go by look not clock—sometimes mine takes longer if I forget about it while doomscrolling.
- Punch down the dough (gently, it’s not your enemy), then divide it into 12-ish equal pieces. If you want bigger rolls, divide into 9. I just eyeball it, but is anyone really counting?
- Shape each piece into a ball—don’t stress if they’re wobbly, they’ll puff up in the oven. Line them up in a greased baking dish or on a parchment-lined tray. Give them some hugging room but not too much distance!
- Cover again and let rise another 30-40 minutes, until puffy. This is where I sneak a pre-dinner snack. Or three.
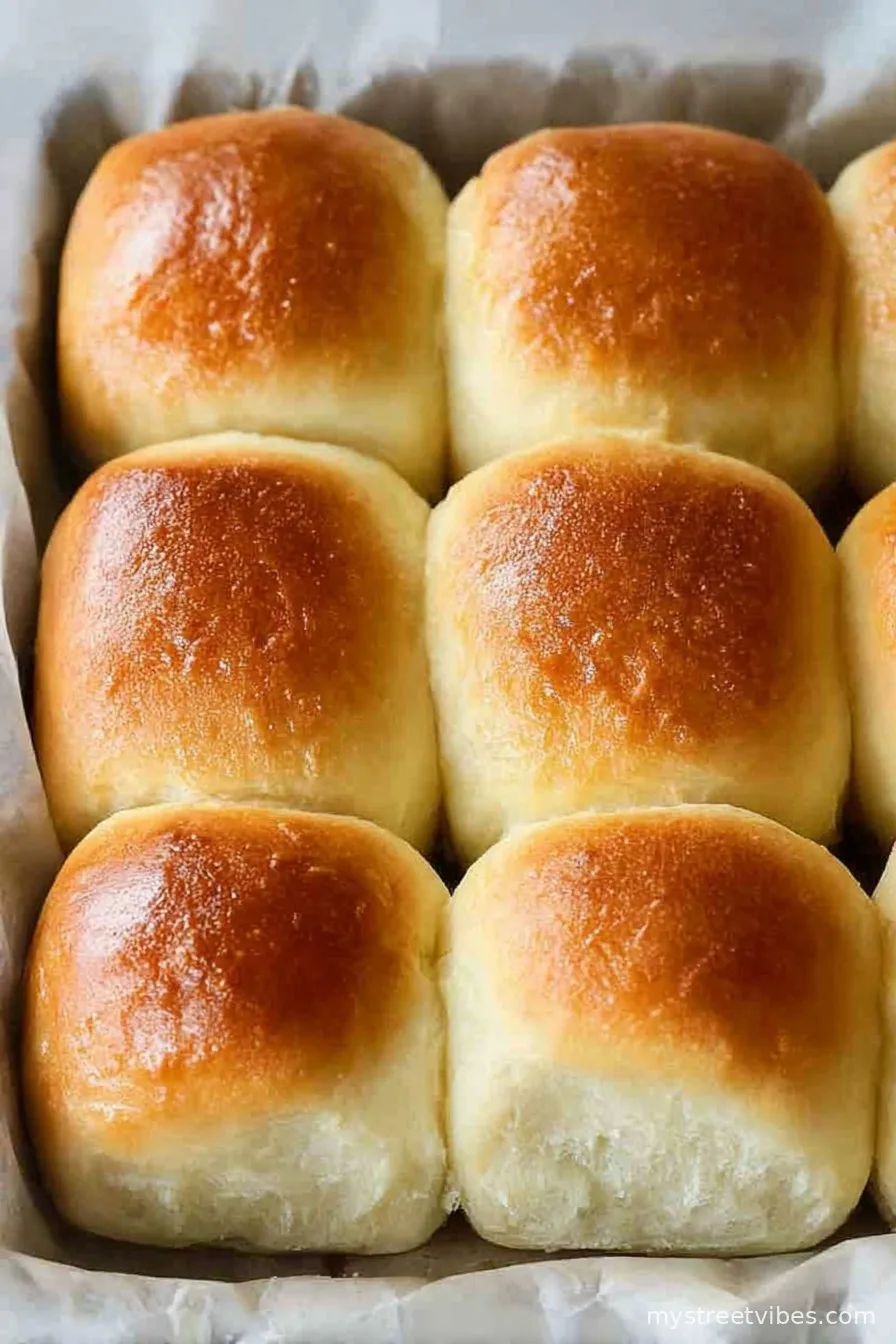
- Preheat the oven to 350°F (175°C). Right before baking, brush the tops with a bit of extra condensed milk (or melted butter if you’re out). Sprinkle with sesame seeds or leave them plain—up to you.
- Bake for 18-22 minutes till beautifully golden. The kitchen will smell like heaven, don’t let that distract you and accidentally over-bake (yes, I’ve done this, those crusts were like armor).
- As soon as they’re out, brush tops again with condensed milk, or if you want silky softness, a swipe of butter. Let them cool slightly before you start pulling them apart (if you have that much patience, gold star for you).

A Few Notes I Jotted Down (the hard way)
- If the dough’s still a smidge sticky after kneading, that’s okay—better too soft than too dry.
- Room temp ingredients really do blend easier, but honestly, I never remember to take out the butter in advance.
- If your rolls seem pale on top, a quick broil (like, less than a minute—learned that one the smoky way) does the trick.
- Actually, I find these taste better the next day—if you ever have leftovers, which I almost never do!
Tried (and Sometimes Failed) Variations
- Swapped in honey for half of the condensed milk once—came out denser, sort of like a squishy scone. Not my favourite, but maybe you’ll love it?
- Added a handful of mini chocolate chips (kids’ idea)—totally works, as long as you don’t mind chocolate for breakfast.
- Tried to make a cinnamon sugar swirl version. Cinnamon everywhere. Maybe needs work.
- Once made mini rolls and baked in a muffin tin—came out super cute (but a bit dry around the edges, so watch your timing).

Do You Really Need All the Equipment?
If you’ve got a stand mixer, great. If not, it’s a good arm workout with a wooden spoon, and honestly, I like the meditative kneading sometimes. I’ve shaped these just with my kitchen counter and an old plastic bowl—fancy gadgets are fun, but don’t let lack of tools stop you. And if you have no pastry brush? Use a bit of paper towel or clean fingers!
How to Store (But Will You Even Need To?)
Keeps soft at room temp in a zip bag or airtight container for up to 2 days. I also toss them in the oven for a couple minutes to freshen them up. Freezer? Definitely works, just wrap up tight and thaw as needed. Though, truthfully, these are usually gone before breakfast the next day at my place.
How I Love to Serve These Rolls
Best when still warm, split and slathered with jam or salted butter. Or there’s this thing my Mum does—she dips them in her morning coffee (never understood it, but she swears it’s the best). Great for soaking up stew or with a little cheese tucked inside (sounds weird, but don’t knock it till you’ve tried).
Lessons Learned (Mostly the Hard Way)
- I once tried speeding up the rise by sticking the dough on a warm radiator—yeah, half-baked on the outside, raw in the middle. Definitely not worth the shortcut.
- If you forget the second rise, the rolls are more dense than fluffy. So, just chill and let them puff up.
- Don’t skimp on the butter/condensed milk brushing at the end—that’s what gives you the dreamy soft tops.
Real Questions, Real Answers (and Honest Opinions!)
Can I make these rolls without eggs?
Probably. I’ve swapped in 2 extra tablespoons milk before and it’s still solid, maybe a little less rich but still good.
Help! My dough isn’t rising. What’s wrong?
Well, one time I forgot my yeast in the fridge for, oops, a year. Maybe try fresh yeast or check if your kitchen’s too chilly.
Can I knead with a food processor?
You can… but mine overheated trying to do bread dough. I’d stick to hands or a stand mixer if you can.
Do I have to use bread flour?
Nope, plain flour works, they’re a smidge less chewy but nearly as fluffy. (Honestly, I often can’t tell the difference unless I’m squinting.)
These look weirdly pale after baking, is that right?
Sometimes, yeah. Maybe your oven runs cool? I blast the top with a mini broil for color, just keep an eye out!
P.S. Once made a double batch and forgot the second pan in the oven. Found it two hours later—super crusty, odd but kind of addictive, especially with soup. Happy baking!
Ingredients
- 3 cups (375g) bread flour, but honestly, I’ve grabbed all-purpose in a pinch and they’re still soft.
- 2 teaspoons instant dry yeast (any brand; Grandma swears by Red Star, but you do you)
- 1/2 cup (120ml) warm milk (whole milk if you ask me, but I’ve used skim without disaster—just a bit less rich)
- 1/3 cup (100g) sweetened condensed milk, plus a bit more for brushing on top
- 1/4 cup (55g) unsalted butter, softened—if you only have salted, just skip the extra salt
- 1 large egg (room temp is best, but sometimes I forget and it’s fine)
- 1/2 teaspoon salt (some days I leave it out, mostly by accident, and it still turns out okay!)
- Optional: A splash of vanilla extract for a bit of cozy aroma—it’s not classic, but I like it
- Optional: Sprinkle of sesame seeds or a dusting of powdered sugar for the top, if you’re feeling wild
Instructions
-
1Warm up your milk until it’s just a bit warmer than your finger, not scalding—about 30 seconds in the microwave. Mix in your yeast and let it sit for 5 minutes till foamy (sometimes mine just sits there stubborn, and I use it anyway—doesn’t seem to mind).
-
2Throw your flour, salt (if using), softened butter, the egg, and that gorgeous condensed milk into a big bowl. Pour in your milk-yeast mix. I start with a wooden spoon, but honestly, sometimes I just use my (clean) hands towards the end.
-
3Mix until it comes together in a sticky-ish dough, then knead it on a floured surface for about 10 minutes. Or, pop it in a stand mixer with a dough hook—on days my arms can’t be bothered. It should be soft and just a bit tacky, kind of like a squishy marshmallow. (If it’s ridiculously sticky even after kneading, add a pinch more flour.)
-
4Scoop the dough into a lightly greased bowl, cover it with a damp kitchen towel, and let it rise somewhere cozy and draft-free. I use the microwave (turned off, obviously) or, on really cold days, the oven with just the light on. It takes about 60-90 minutes to double but honestly, go by look not clock—sometimes mine takes longer if I forget about it while doomscrolling.
-
5Punch down the dough (gently, it’s not your enemy), then divide it into 12-ish equal pieces. If you want bigger rolls, divide into 9. I just eyeball it, but is anyone really counting?
-
6Shape each piece into a ball—don’t stress if they’re wobbly, they’ll puff up in the oven. Line them up in a greased baking dish or on a parchment-lined tray. Give them some hugging room but not too much distance!
-
7Cover again and let rise another 30-40 minutes, until puffy. This is where I sneak a pre-dinner snack. Or three.
-
8Preheat the oven to 350°F (175°C). Right before baking, brush the tops with a bit of extra condensed milk (or melted butter if you’re out). Sprinkle with sesame seeds or leave them plain—up to you.
-
9Bake for 18-22 minutes till beautifully golden. The kitchen will smell like heaven, don’t let that distract you and accidentally over-bake (yes, I’ve done this, those crusts were like armor).
-
10As soon as they’re out, brush tops again with condensed milk, or if you want silky softness, a swipe of butter. Let them cool slightly before you start pulling them apart (if you have that much patience, gold star for you).
CLICK FOR NUTRITION INFO
↑
Approximate Information for One Serving
Serving Size:
1 serving
Calories:
185cal
Protein:
5 gg
Fat:
4.5 gg
Saturated Fat:
0g
Trans Fat:
0g
Cholesterol:
0mg
Sodium:
0mg
Potassium:
0mg
Total Carbs:
30 gg
Fiber:
0g
Sugar:
0g
Net Carbs:
0g
Vitamin A:
0
Vitamin C:
0mg
Calcium:
0mg
Iron:
0mg
Nutrition Disclaimers
Number of total servings shown is approximate. Actual number of servings will depend on your preferred portion sizes.
Nutritional values shown are general guidelines and reflect information for 1 serving using the ingredients listed, not including any optional ingredients. Actual macros may vary slightly depending on specific brands and types of ingredients used.
To determine the weight of one serving, prepare the recipe as instructed. Weigh the finished recipe, then divide the weight of the finished recipe (not including the weight of the container the food is in) by the desired number of servings. Result will be the weight of one serving.
Did you make this recipe?
Please consider Pinning it!