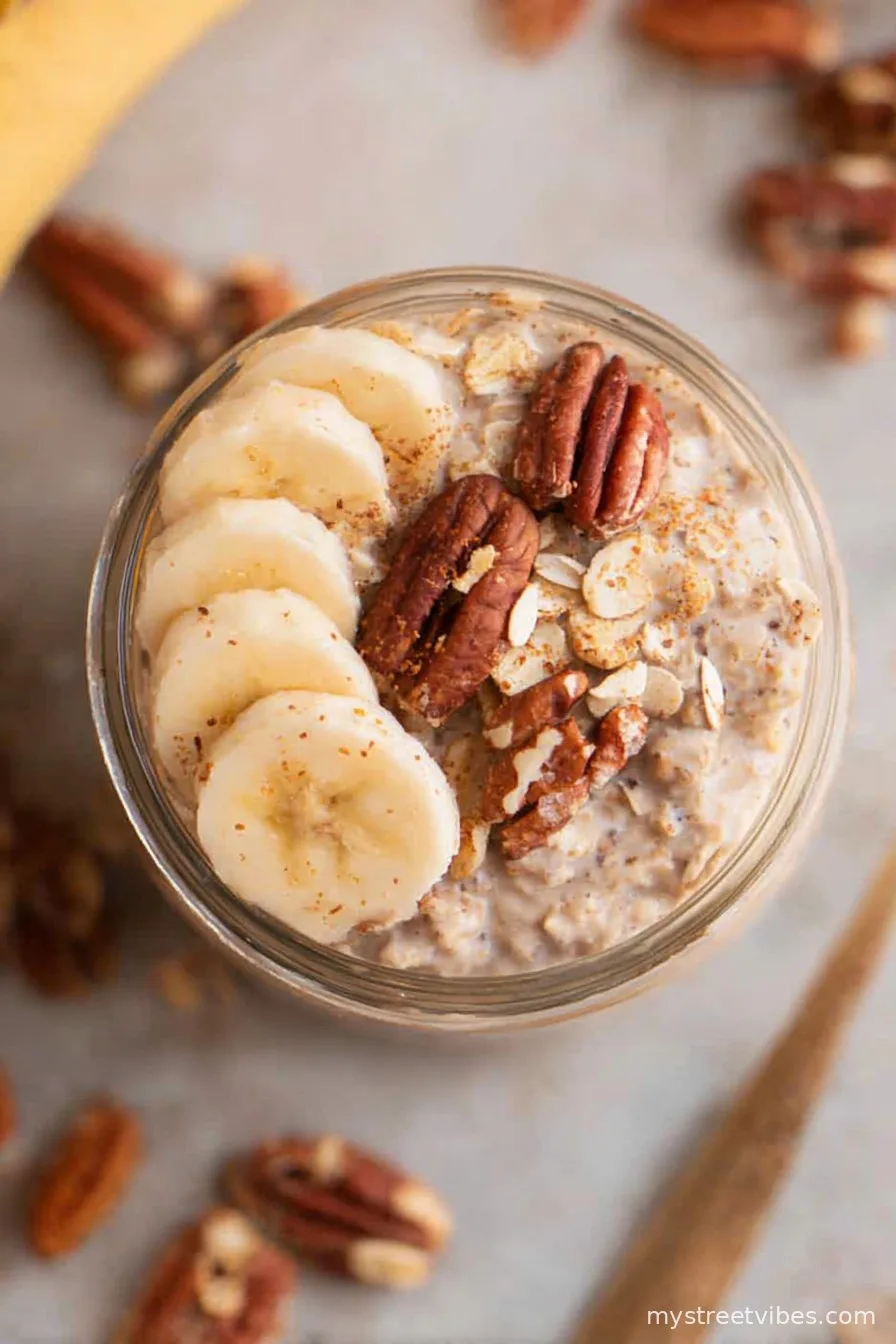
Alright, so you know how some mornings you wake up and want something that feels all warm and homey… except, well, without actually having to bake at 6am? Yeah, that’s where these Banana Bread Overnight Oats come in. True story: the first time I tried making them, I got banana all over the counter and my dog thought it was a new treat—definitely not recommended. But for real, these oats legit taste like you dunked banana bread in milk and called it breakfast, minus the oven and with way less mess. Honestly, half the reason I do these is because my housemate started lurking around the fridge after I mentioned them (pretty sure that’s the secret to getting people out of bed on dreary Mondays).
Why I Basically Live Off These (Well, Almost)
I make this when I’ve got bananas turning that classic shade of face-in-a-sock brown. My family goes bananas (haha, sorry, had to) for this because, unlike actual banana bread, you don’t have to worry about the inside ending up weirdly gooey or undercooked. I used to get frustrated that overnight oats were always kinda bland, but this? The cinnamon makes the whole fridge smell like a bakery, and honestly, I even eat it for dessert sometimes. Slice of banana bread—without the pan-washing agony.
What You Actually Need (And What You Can Sub In)
- 1 ripe banana (I sometimes use two small ones if they’re almost liquid, works a treat)
- 1 cup rolled oats (not steel-cut, unless you like chewing forever—trust me)
- 1 cup milk of choice (I go oat or whole, but almond tastes good too. My grandma was a dairy diehard but honestly any will do)
- 1/2 cup plain Greek yogurt (optional—but gives it that creamy vibe. Coconut yogurt is fab if you’re dairy-free)
- 1-2 tablespoons maple syrup or honey (my mate swears by date syrup, up to you, or skip it if the bananas are properly sweet)
- 1/2 teaspoon cinnamon (you can totally do pumpkin pie spice if you’re feeling wild)
- 1/4 teaspoon vanilla extract (I just splash it in, the measuring spoon rarely makes an appearance tbh)
- Pinch of salt (like, a real pinch—for balance)
- 2 tablespoons chopped walnuts or pecans (sometimes I throw in chocolate chips when I need cheering up)
- Extra banana slices, nuts, or a blob of peanut butter for topping
How I Throw This Together (No Fancy Magic, Promise)
- Peel and mash the ripe banana in a big-ish bowl—you want it properly smushed, almost baby food (I usually eat a bit here, chef’s tax).
- Stir in the oats, milk, Greek yogurt, maple syrup, cinnamon, and vanilla. Toss in that pinch of salt. Mix it up—not so much that it’s soup, just until everything looks friends.
- Add the chopped nuts (and choc chips if the day’s gone off the rails). Stir again, but don’t stress if it’s clumpy—it sorts itself out overnight.
- Spoon the whole mixture into a glass jar (or any container with a lid, I use old salsa jars—no shame). Seal it up and give it a quick shake, then stick it in the fridge for at least 4 hours, but overnight is way better.
- Next morning, open it up—if it’s a bit thick just add a splash more milk. Top with extra banana slices, nuts, maybe a blob of peanut butter. Try not to eat it straight out the jar with a soup spoon, but I mean, sometimes you gotta do what you gotta do.

Notes from Me to You (Because I Learned the Messy Way)
- If your banana is super ripe, you can prob skip the sweetener. But if you add it, taste before dumping in too much—it’s a sugar bomb otherwise.
- Don’t panic if it looks a bit grey in the morning—bananas do that. It’s not going moldy, just…oxidizing? (Science!) Stir it up, looks fine.
- I actually like it better after two days. Texture goes nice and pudding-y.
Variations I’ve Tried (Yes, Some Are Weird)
- Swapped out the walnuts for toasted coconut flakes—kinda tropical, not bad.
- Used chocolate protein powder instead of yogurt once. Big nope from me, tasted like muddy dessert. But hey, maybe try half a scoop if you’re feeling bold?
- Add a handful of raisins—tastes more like banana bread, if you’re into that.

Equipment—Or Whatever You’ve Got
I use a big jar, but a container with a lid or even just a well-covered bowl works fine. If you have no jars, just use a mug and cover with foil—done it loads, works a charm.
How Long This Actually Lasts (Maybe)
Should keep for 2-3 days in the fridge. Though honestly, in my house it never makes it past breakfast day two because everyone ‘forgets’ they already had some. If it goes brown, you can still eat it, but maybe add a splash more milk and give it a good mix.
How I Serve It (And Other Ideas)
For me, it has to be topped with banana slices and a good drizzle of peanut butter. My aunt sometimes sprinkles her morning oats with a few chocolate chips (not judging). Sometimes I eat it cold; other days I zap it in the microwave for 30 seconds because I’m craving warmth—both work!
Stuff I’ve Learned—Pro Tips (Mostly From Messing Up)
- I once rushed the mixing step and ended up with dry oats at the bottom—definitely give it a good stir before it goes in the fridge.
- Don’t use greenish bananas—trust me, they taste like sadness.
- If you want it extra creamy, let it sit a full night. Four hours is fine but overnight, wow.
Real (Sometimes Odd) Questions I Get
Can I make this vegan?
Yep, just use plant milk and coconut yogurt or skip yogurt entirely; nobody’ll notice unless they’re dairy-obsessed.
Is it okay to use instant oats?
Eh, they go really soft, kinda like baby food. If that’s your jam, go for it—I prefer a bit of chew but no judgment!
Can you warm this up?
Actually, yes! 30 seconds in the microwave, stir, then maybe 10 more seconds if it’s still chilly. But don’t overdo it or the banana can smell a little funky.
What if my oats are too thick?
Ah, just stir in some more milk till it loosens—no need to measure, just eyeball it until it looks how you want.
Can you freeze this?
Honestly, I tried once and it turned out a weird icy mush. Wouldn’t recommend. Fresh is best!
Anyway, hope you give these Banana Bread Overnight Oats a go. If you come up with a weirdly delicious variation, send it my way—I’m always up for a kitchen experiment (as long as it doesn’t involve canned peas; long story, maybe next time).
Ingredients
- 1 ripe banana (I sometimes use two small ones if they’re almost liquid, works a treat)
- 1 cup rolled oats (not steel-cut, unless you like chewing forever—trust me)
- 1 cup milk of choice (I go oat or whole, but almond tastes good too. My grandma was a dairy diehard but honestly any will do)
- 1/2 cup plain Greek yogurt (optional—but gives it that creamy vibe. Coconut yogurt is fab if you’re dairy-free)
- 1-2 tablespoons maple syrup or honey (my mate swears by date syrup, up to you, or skip it if the bananas are properly sweet)
- 1/2 teaspoon cinnamon (you can totally do pumpkin pie spice if you’re feeling wild)
- 1/4 teaspoon vanilla extract (I just splash it in, the measuring spoon rarely makes an appearance tbh)
- Pinch of salt (like, a real pinch—for balance)
- 2 tablespoons chopped walnuts or pecans (sometimes I throw in chocolate chips when I need cheering up)
- Extra banana slices, nuts, or a blob of peanut butter for topping
Instructions
-
1Peel and mash the ripe banana in a big-ish bowl—you want it properly smushed, almost baby food (I usually eat a bit here, chef’s tax).
-
2Stir in the oats, milk, Greek yogurt, maple syrup, cinnamon, and vanilla. Toss in that pinch of salt. Mix it up—not so much that it’s soup, just until everything looks friends.
-
3Add the chopped nuts (and choc chips if the day’s gone off the rails). Stir again, but don’t stress if it’s clumpy—it sorts itself out overnight.
-
4Spoon the whole mixture into a glass jar (or any container with a lid, I use old salsa jars—no shame). Seal it up and give it a quick shake, then stick it in the fridge for at least 4 hours, but overnight is way better.
-
5Next morning, open it up—if it’s a bit thick just add a splash more milk. Top with extra banana slices, nuts, maybe a blob of peanut butter. Try not to eat it straight out the jar with a soup spoon, but I mean, sometimes you gotta do what you gotta do.
CLICK FOR NUTRITION INFO
↑
Approximate Information for One Serving
Serving Size:
1 serving
Calories:
350 caloriescal
Protein:
12 gg
Fat:
11 gg
Saturated Fat:
0g
Trans Fat:
0g
Cholesterol:
0mg
Sodium:
0mg
Potassium:
0mg
Total Carbs:
54 gg
Fiber:
0g
Sugar:
0g
Net Carbs:
0g
Vitamin A:
0
Vitamin C:
0mg
Calcium:
0mg
Iron:
0mg
Nutrition Disclaimers
Number of total servings shown is approximate. Actual number of servings will depend on your preferred portion sizes.
Nutritional values shown are general guidelines and reflect information for 1 serving using the ingredients listed, not including any optional ingredients. Actual macros may vary slightly depending on specific brands and types of ingredients used.
To determine the weight of one serving, prepare the recipe as instructed. Weigh the finished recipe, then divide the weight of the finished recipe (not including the weight of the container the food is in) by the desired number of servings. Result will be the weight of one serving.
Did you make this recipe?
Please consider Pinning it!