So, Why Are We Talking Meatballs?
Alright, confession time: I’ve tried—I kid you not—at least five different methods for getting meatballs right, and some of them ended in meatball chaos (we don’t talk about the microwaved ones). Baked meatballs became my safe zone right after a particularly spicy kitchen disaster at my old apartment in Leeds. There’s something about that cheery smell of roasted beef and garlic, yeah? Or maybe it just reminds me of Sunday afternoons, when my cousin would drop by unannounced, knowing full well there’d be meatballs in the oven. Anyway, that’s the vibe here! Oh, and if you’re reading this while secretly eating one straight off the tray—solidarity, friend.
Why You’ll Probably Love These (My Family Sure Does…)
I make this when I can’t face scrubbing a splattered stovetop; baked meatballs save my sanity. My partner calls them “little comfort bombs” (‘course, also blames them for missing Tupperware). The kids beg for these in lunchboxes—that’s the ultimate compliment, right? Once, I tried switching up the seasoning and no one even noticed (except my youngest, who claims to be a meatball connoisseur—she is five). If you’re sick of wrestling with big pans or just want something that works for lazy days, these are your new best mates.
Your Ingredient Lineup (And a Few Cheeky Swaps)
- 500g ground beef (or mix in some pork—or even turkey, honestly, I use what’s on offer)
- 1/2 cup breadcrumbs (panko, homemade, or my lazy trick: smooshed-up crackers)
- 1/4 cup milk (whole, skim, or even oat milk if you’re feeling virtuous)
- 1 large egg
- 2 big cloves garlic, crushed (I sometimes use the pre-chopped jar stuff when I’m rushed)
- 1/4 cup grated Parmesan (optional, but my grandmother swore by it—well, by Grana Padano, but I can’t always afford that!)
- 1 tablespoon dried oregano (or Italian blend, or just whatever’s left in the little jar)
- Salt and pepper (I start with a pinch and then secretly taste the mix)
- Olive oil (for greasing—not critical if you have non-stick paper)
- Pasta sauce (optional, but lovely for serving; never hurts to have a jar from Bon Appétit’s basic tomato sauce on standby)
How I Actually Make These (Step-by-Step… Mostly)
- Preheat your oven to 200°C (just shy of 400°F)—though my oven once ran hot and things turned a bit crispy, so keep an eye if yours is temperamental.
- Grab a big bowl. Toss in your meat, breadcrumbs, milk, egg, garlic, Parmesan, oregano, and a hearty pinch of salt and pepper. Mix with your hands (don’t be shy—it’s the only way). If it feels dry, splash a bit more milk; too wet, add a tick more breadcrumbs.
- Now, roll the mixture into little balls—about golf ball size, but honestly, do what feels right. A spoon helps if you hate sticky fingers (I use my trusty cookie scoop sometimes; very posh, I know).
- Arrange them on a lined baking tray. Space them out—they need breathing room. Drizzle or brush with olive oil for that lovely sheen. Sometimes, at this stage, I sneak a tiny taste of the meatball mixture (yes, I know, not strictly recommended, but I’ve survived so far).
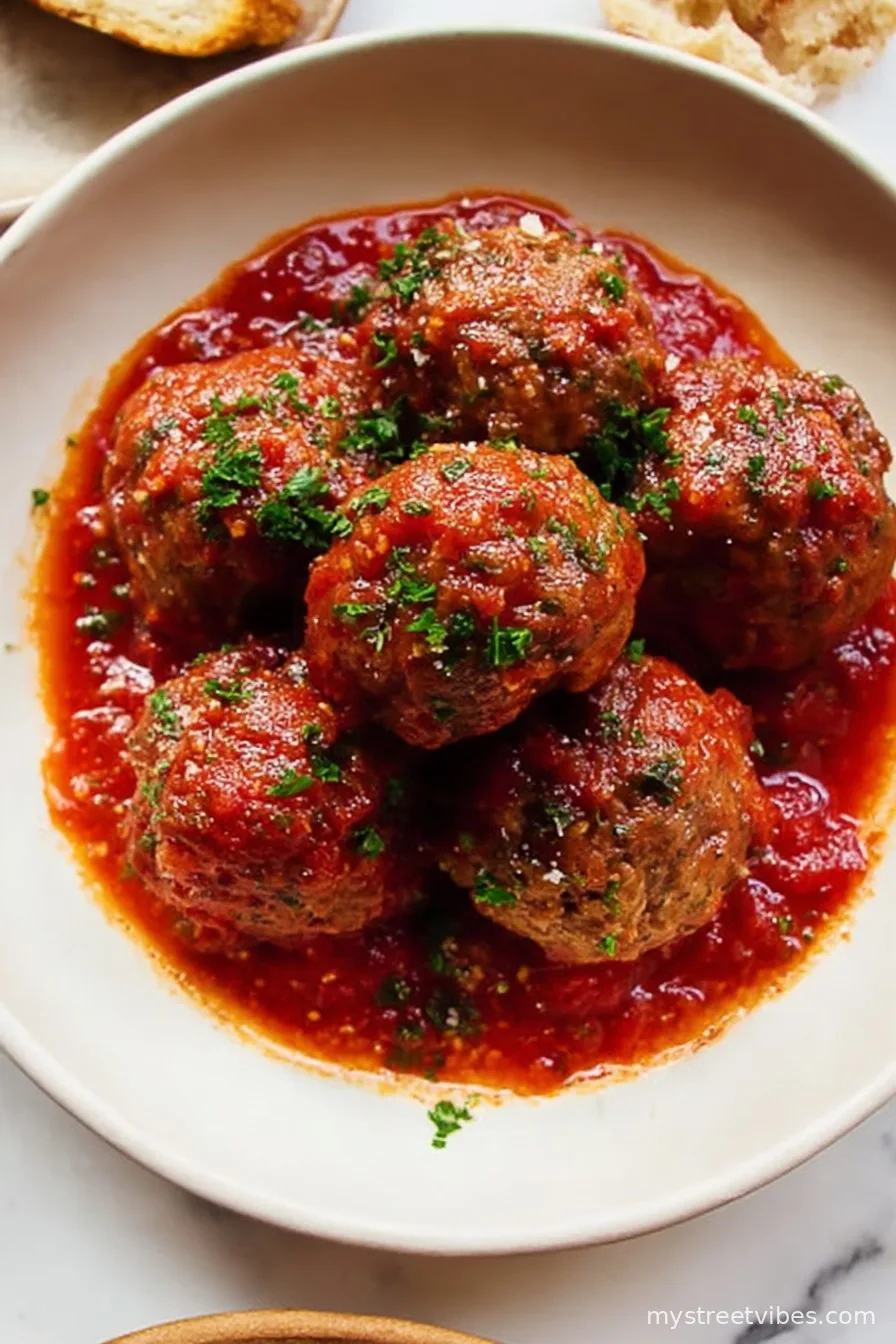
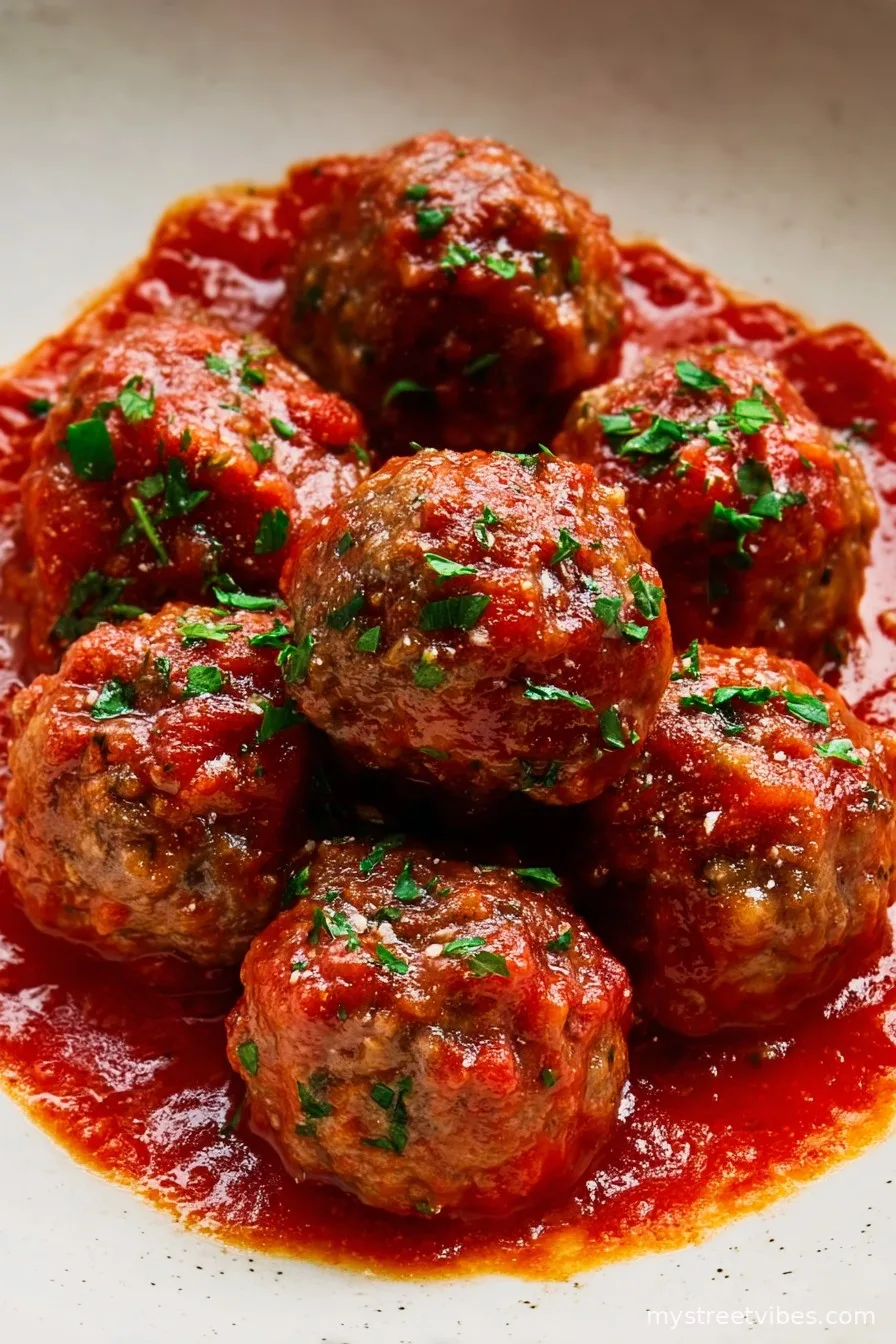
- Bake for 18-22 minutes or ’til they’re golden and a little crispy on the edges. Don’t fret if they look a tad pale—that’s what sauce is for!
- Optional but recommended: Simmer them in pasta sauce for 5-10 mins after baking. It adds that lovely soft edge (plus covers up any crispy bits if you overbaked them—just saying).
A Few Notes from My Many, Many Attempts
- If you add too much milk, the mix gets sloshy—but fridge time helps firm it back up.
- Baking on a wire rack on the tray makes ‘em extra crispy, but half the time I can’t find the blasted rack, so parchment paper it is.
- Sometimes I double the garlic, but, uh, that’s not always appreciated by everyone the next day.
Variations (Some Winners, Some… Not So Much)
- Turkey version? More delicate, dries out quick—add a dash more milk or a splash of oil.
- Swap breadcrumbs for oats—surprisingly good, especially if you blitz them up first. I learned this on Serious Eats’ meatball deep dive, which is a rabbit hole I recommend.
- All-veggie balls: Tried it once with lentils and mushrooms… yeah, they were edible, but no one was fighting for seconds (my uncle actually brought pizza instead).
Stuff You’ll Need (And What to Do When You Don’t Have It)
- Mixing bowl: Any big old salad bowl works. I’ve actually used a clean plastic tub in a pinch, truth be told.
- Baking tray: Flat and fuss-free. If you only have a roasting pan, that’ll work (meatballs might cozy up, but they’ll survive).
- Cookie scoop: Fun but not essential; you can always go all-in with your hands instead. Forks are awkward for this bit—just don’t.
How I Keep (Or, Let’s Be Honest, Rarely Store) Them
Technically, these keep great in an airtight box in the fridge for three days (maybe four if you’re living dangerously). But, in my house, the tray’s usually empty before I’ve put the kettle on again. For longer, freeze ‘em—just lay them in a single layer first, then bag them up.
Serving: My Favourite Ways
Spaghetti and loads of sauce, obviously. Or, squashed into a soft roll with mozzarella (proper tea, that is). Sometimes I serve them with a big salad, just to feel like I’m making a healthy choice. Leftovers—if any—go straight into lunchboxes, or get chopped onto pizza (try it; the kids will think you’re a genius).
Couple of Pro Tips (Or, Things I’ve Messed Up Before)
- Rushing the mixing makes the balls tough, not tender—so, take your time on that step. Seriously, I’ve made that mistake, and no amount of sauce will rescue dry meatballs.
- If they stick, the tray might not be greased enough. I once tried baking straight on foil. Regret. Stick with parchment or a non-stick tray.
- Baking at too high a temp? The outsides burn before the middle’s done. Learned that one on a hot summer day with the oven cranking. Would not recommend!
Real-Life FAQ (Because People Actually Ask These!)
- Can I use just beef? Yep, totally fine. I sometimes just use beef when that’s all I’ve got. The texture’s a bit denser, but still good.
- Do I have to use an egg? Nah, on second thought, you can skip it if you’re out. Maybe add a dab more milk to help everything stick.
- What if my meatballs are too soft? Pop the mix in the fridge for 20 mins—it firms up. Also, don’t panic if the first batch looks weird (mine always do; they taste fine).
- How big should I make them? Whatever fits, really. Golf balls are standard, but bite-sized ones cook faster and sneak into lunchboxes easier.
- Why bake instead of fry? Less mess. Plus, I once set off my smoke alarm with frying—never again! Baking’s so much tidier.
- Can I make these ahead? Definitely. I think they taste even better the next day, actually. The flavors kind of meld together—little flavour party!
- Something else on your mind? Pop over to King Arthur Baking’s FAQ—I found some fun ideas there, too.
Hope you enjoy making (and probably eating half of) these baked meatballs. Drop me a note if you come up with a twist that actually works—I’m always up for a kitchen experiment, unless it involves more washing up.
Ingredients
- 1 lb ground beef
- 1/2 cup bread crumbs
- 1/4 cup grated Parmesan cheese
- 1/4 cup milk
- 1 large egg
- 2 cloves garlic, minced
- 2 tbsp chopped fresh parsley
- 1 tsp salt
- 1/2 tsp black pepper
Instructions
-
1Preheat oven to 400°F (200°C) and line a baking sheet with parchment paper.
-
2In a large bowl, combine ground beef, bread crumbs, Parmesan cheese, milk, egg, minced garlic, parsley, salt, and black pepper.
-
3Mix the ingredients gently until just combined. Do not overmix.
-
4Form the mixture into 1 1/2-inch meatballs and place them evenly on the prepared baking sheet.
-
5Bake for 20-25 minutes or until the meatballs are browned and cooked through.
-
6Serve hot with your favorite sauce or pasta.
CLICK FOR NUTRITION INFO
↑
Approximate Information for One Serving
Serving Size:
1 serving
Calories:
330cal
Protein:
27 gg
Fat:
20 gg
Saturated Fat:
0g
Trans Fat:
0g
Cholesterol:
0mg
Sodium:
0mg
Potassium:
0mg
Total Carbs:
10 gg
Fiber:
0g
Sugar:
0g
Net Carbs:
0g
Vitamin A:
0
Vitamin C:
0mg
Calcium:
0mg
Iron:
0mg
Nutrition Disclaimers
Number of total servings shown is approximate. Actual number of servings will depend on your preferred portion sizes.
Nutritional values shown are general guidelines and reflect information for 1 serving using the ingredients listed, not including any optional ingredients. Actual macros may vary slightly depending on specific brands and types of ingredients used.
To determine the weight of one serving, prepare the recipe as instructed. Weigh the finished recipe, then divide the weight of the finished recipe (not including the weight of the container the food is in) by the desired number of servings. Result will be the weight of one serving.
Did you make this recipe?
Please consider Pinning it!!