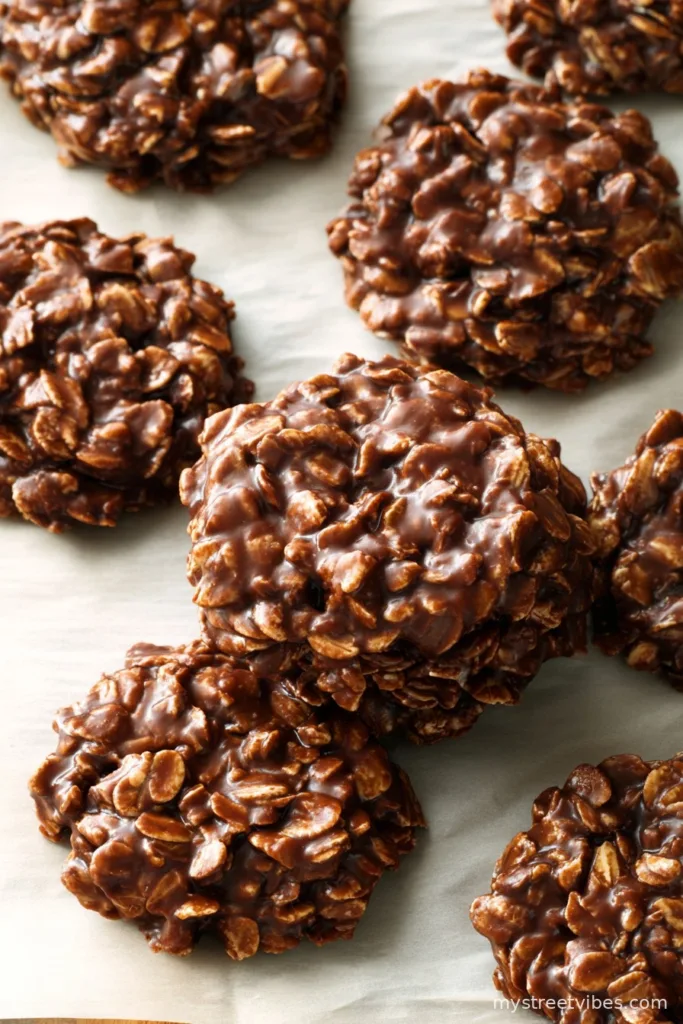
Chit Chat First: The Story Behind My Go-To Chocolate No Bake Cookies
If you grew up in the South like me, you almost surely got handed at least one napkin-wrapped, still-warm chocolate no bake cookie at some point in your life. For me, the memory is catching the scent of chocolate and oats wafting from my grandma’s kitchen while Bruce Springsteen played in the background (never too quietly, I might add). Someone, usually my cousin, would swipe one while it was still gooey — and honestly, I can’t fault them. I’ve been making these since I could barely reach the stove, and even today they make me do a happy little dance in the kitchen. I only wish I could claim the recipe as my invention, but my contributions are mostly tweaks and, occasionally, minor mishaps that turn into happy accidents. So let’s get stuck in and make your kitchen smell like a chocolatey dream.

Why You’ll Love This (Trust Me, I Make These Too Much)
I whip these up when it’s way too hot to turn on the oven or, honestly, just when I’m after something chocolatey but refuse to make an extra trip to the store. My family absolutely loses it over these — half the time they don’t last long enough to hit the cookie jar (not exaggerating). Even my partner who’s supposedly “over” sweets sneaks two before I’ve finished scooping. And the peanut butter-chocolate combo? It’s simple wizardry. Oh, and if you were ever intimidated by anything involving boiling on the stovetop, don’t worry; I promise this part is a breeze (once I completely burned them but hey, live and learn).
What You’ll Need: The Ingredients (and a Few Sub-ins)
- 1/2 cup (1 stick) unsalted butter (I sometimes cheat and use salted — just skip the pinch of salt if you do)
- 2 cups white sugar (I have mixed in half brown sugar before and nobody noticed, so don’t stress if you’re running low)
- 1/2 cup milk (whole milk is classic, but I’ve done this with oat milk when my fridge looked bleak…works fine!)
- 1/4 cup unsweetened cocoa powder (just the cheap store brand, honestly — grandma swore by Hershey’s, but I can’t taste the difference)
- 1/2 cup creamy peanut butter (crunchy is cool if you want more texture)
- 2 teaspoons vanilla extract (I don’t always measure exactly — a couple glugs is okay!)
- 3 cups quick-cooking oats (never tried with steel cut and… might not recommend. Old-fashioned oats give a chewier bite, but it’s up to you)
- Pinch of salt (omit if your butter’s already salted)
How You Actually Make Chocolate No Bake cookies
- Melt & Mix: In a big-ish saucepan (medium, not tiny), toss in your butter, sugar, milk, and cocoa powder. Turn the heat to medium. Stir now and then — don’t wander off. Keep going until it’s all melty and smooth. If the butter looks a little separated at first, no worries. It comes together; trust me.
- Boil for Real: Crank the heat up. Once you see those big bubbles (not just tiny simmering ones), start timing and let it properly boil for about 1 minute (don’t be tempted to rush — I once did 30 seconds and ended up with mush). Stir here and there, but not too vigorously.
- Peanut Butter Power: Pull the saucepan off the heat. Now, dump in your peanut butter, vanilla extract, and a pinch of salt. Stir until it’s smooth and glossy (this is the point I always sneak a spoonful… for science, right?).
- Get Those Oats In: Add in the quick oats all at once. Stir goofy-fast until every oat is chocolate-coated (if it looks a little loose, wait thirty seconds; it thickens up). It’ll look messy. This is normal.
- Scoop & Plop: Grab a spoon or, if you’re being fancy, a cookie scoop. Drop mounds onto some parchment paper, wax paper, or heck, a silicone mat if you have one. I usually aim for golf ball sizes, but sometimes things get a bit whimsical.
- Wait (Ugh): Let the cookies sit at room temp until they set up — maybe 25-30 minutes, if you can handle the wait. If it’s humid, pop them in the fridge for quicker firming. Or just eat them with a spoon — I won’t judge.
Some Notes That Only Come With (Bungled) Experience
- If you underboil, your cookies end up sticky puddles (tasty, but not very portable).
- If you overboil, they get a little crumbly/dry, but still devourable. Actually, I prefer them that way sometimes.
- Swapping out the peanut butter for almond or cashew butter? Works great, but sunbutter turned them green on me once — which is neat, but weird.
How I Like to Experiment (and Occasionally Fail)
- Almond butter in place of PB is yummy; Nutella was oddly too sweet for me (but maybe that’s just me?).
- Adding a handful of mini chocolate chips once the mixture cools down a bit is… wow. But if you add them while it’s hot, it just melts – so wait!
- I tried half coconut flakes instead of half the oats. Actually, I think it worked better if you toast the coconut first. If you just throw it in raw, it’s a bit chewy-odd.
- I once tried raisins and… nope. Not for me, but maybe you’re made of sterner stuff.

Equipment You Really Need (Or Not?)
- Medium saucepan (too small = sticky disasters all over the stove)
- Spoon or cookie scoop (honestly, a soup spoon works fine… or your hands if you don’t mind a mess)
- Parchment/wax paper (I once used a big plastic cutting board in a pinch; it worked okay!)
How Do You Store Them (Though They Barely Survive a Day Here)
Supposedly they keep on the counter in an airtight container for up to 5 days. But, yeah… in my house, if they’re around for more than a day and a half, something’s odd, and I get suspicious. If it’s hot or humid, just toss them in the fridge so they stay firm.
What To Serve These With (Or Just Eat Them Straight Up)
I like them best with an ice-cold glass of milk (classic, yeah?). Sometimes we’ll sandwich a scoop of vanilla ice cream between two and call it a “cookie sandwich” — not fancy, but a total treat at backyard barbecues. My little cousin has dipped them into coffee before; she swears by it, though I’m not sure what it says about her bedtime.
Pro Tips — Things I’ve Totally Learned the Hard Way
- Don’t skimp on boiling time; if you do, the cookies never set. I once tried cutting corners and ended up with a sticky, chocolatey mass. Still tasty, but not really cookies.
- Let the mixture cool only a little before scooping. Wait too long and it turns to concrete in the pan. Nobody wants that (I certainly didn’t!).
- Old-fashioned oats = chewier, a bit rustic; quick oats = classic store look and texture.
FAQ — Because Folks Always Ask
- Help! My cookies didn’t set, what happened?
Most of the time, you just didn’t boil long enough. Wait 24 hours and if it’s still gooey, call it a topping for ice cream (I’ve done this, and it’s great). - Can I freeze them?
Absolutely! Just layer parchment between them in a container. They thaw pretty quick — or just nibble frozen bits (kinda like chocolate oat fudge, honestly). - What if I don’t like peanut butter?
Almond or cashew butter works — although, as mentioned before, sunbutter kind of went green for me. Or go wild and try tahini, but, full disclosure, I haven’t tried that one out myself yet. - Is it okay if my oatmeal is the “old-fashioned” kind?
Yes, but the texture’s chewier and less, um, uniform. Some folks love that, others, not so much. Totally edible though! - Can my kids help?
Definitely, with the scooping and plopping; but the hot sugar part is all you, grownup! It’s a good excuse to lick the spoon yourself though… just saying.
Okay, that’s it, I’ve probably rambled long enough. These chocolate no bake cookies are pure nostalgia (and super simple). Let me know if you add something wild or if you end up with the same sticky hands as me!
Ingredients
- 1/2 cup (1 stick) unsalted butter (I sometimes cheat and use salted — just skip the pinch of salt if you do)
- 2 cups white sugar (I have mixed in half brown sugar before and nobody noticed, so don’t stress if you’re running low)
- 1/2 cup milk (whole milk is classic, but I’ve done this with oat milk when my fridge looked bleak…works fine!)
- 1/4 cup unsweetened cocoa powder (just the cheap store brand, honestly — grandma swore by Hershey’s, but I can’t taste the difference)
- 1/2 cup creamy peanut butter (crunchy is cool if you want more texture)
- 2 teaspoons vanilla extract (I don’t always measure exactly — a couple glugs is okay!)
- 3 cups quick-cooking oats (never tried with steel cut and… might not recommend. Old-fashioned oats give a chewier bite, but it’s up to you)
- Pinch of salt (omit if your butter’s already salted)
Instructions
-
1In a big-ish saucepan (medium, not tiny), toss in your butter, sugar, milk, and cocoa powder. Turn the heat to medium. Stir now and then — don’t wander off. Keep going until it’s all melty and smooth. If the butter looks a little separated at first, no worries. It comes together; trust me.
-
2Crank the heat up. Once you see those big bubbles (not just tiny simmering ones), start timing and let it properly boil for about 1 minute (don’t be tempted to rush — I once did 30 seconds and ended up with mush). Stir here and there, but not too vigorously.
-
3Pull the saucepan off the heat. Now, dump in your peanut butter, vanilla extract, and a pinch of salt. Stir until it’s smooth and glossy (this is the point I always sneak a spoonful… for science, right?).
-
4Add in the quick oats all at once. Stir goofy-fast until every oat is chocolate-coated (if it looks a little loose, wait thirty seconds; it thickens up). It’ll look messy. This is normal.
-
5Grab a spoon or, if you’re being fancy, a cookie scoop. Drop mounds onto some parchment paper, wax paper, or heck, a silicone mat if you have one. I usually aim for golf ball sizes, but sometimes things get a bit whimsical.
-
6Let the cookies sit at room temp until they set up — maybe 25-30 minutes, if you can handle the wait. If it’s humid, pop them in the fridge for quicker firming. Or just eat them with a spoon — I won’t judge.
CLICK FOR NUTRITION INFO
↑
Approximate Information for One Serving
Serving Size:
1 serving
Calories:
130 caloriescal
Protein:
2gg
Fat:
5gg
Saturated Fat:
0g
Trans Fat:
0g
Cholesterol:
0mg
Sodium:
0mg
Potassium:
0mg
Total Carbs:
20gg
Fiber:
0g
Sugar:
0g
Net Carbs:
0g
Vitamin A:
0
Vitamin C:
0mg
Calcium:
0mg
Iron:
0mg
Nutrition Disclaimers
Number of total servings shown is approximate. Actual number of servings will depend on your preferred portion sizes.
Nutritional values shown are general guidelines and reflect information for 1 serving using the ingredients listed, not including any optional ingredients. Actual macros may vary slightly depending on specific brands and types of ingredients used.
To determine the weight of one serving, prepare the recipe as instructed. Weigh the finished recipe, then divide the weight of the finished recipe (not including the weight of the container the food is in) by the desired number of servings. Result will be the weight of one serving.
Did you make this recipe?
Please consider Pinning it!