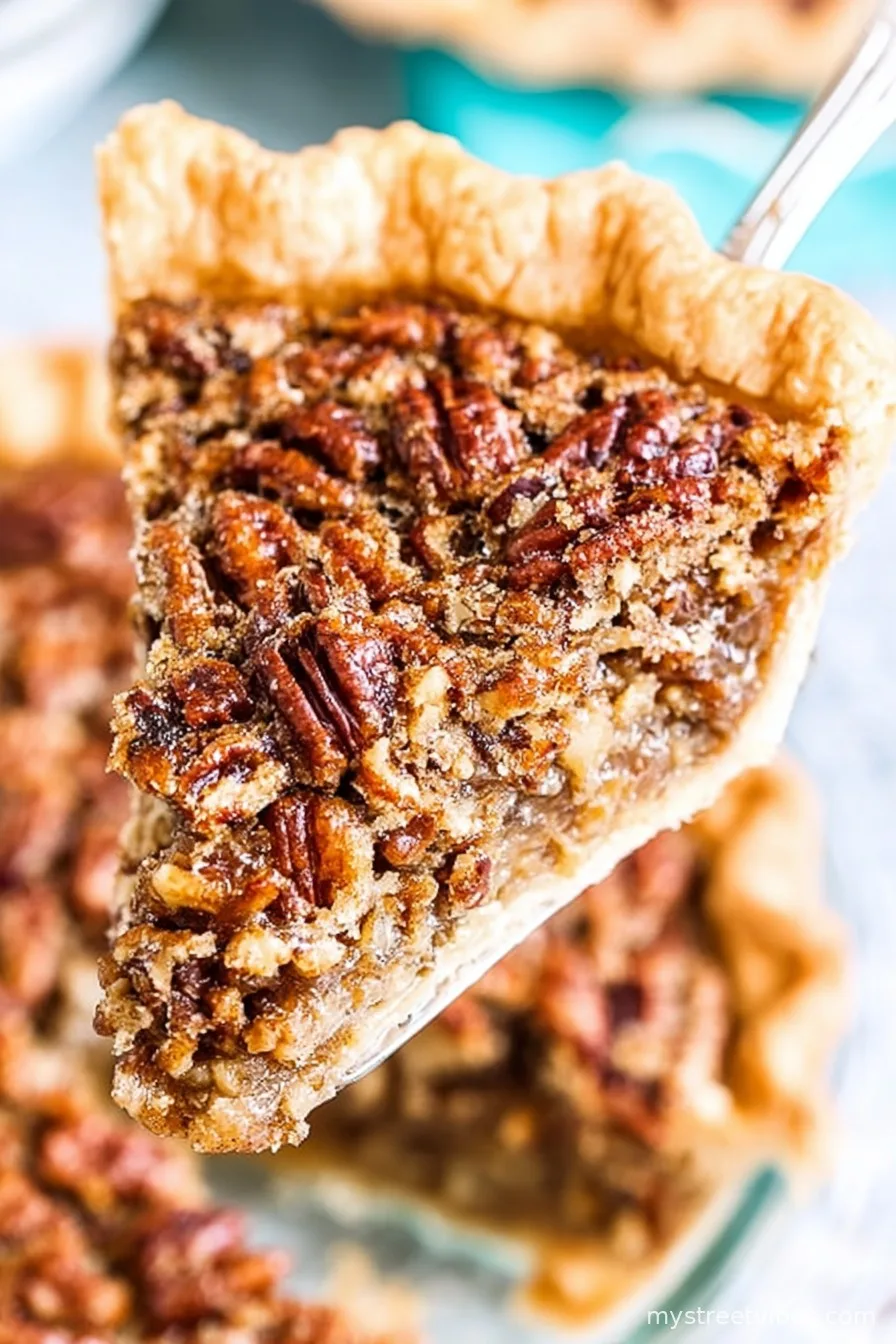
Alright, pulling together a homemade pecan pie has been sort of my unofficial job at family get-togethers since, oh, 2009 or so. (That year, Aunt Linda swore she’d sworn off sweets… she ate two slices. So, yeah.) It’s that classic gooey, nutty, buttery slice of nostalgia that, in my totally unbiased opinion, can beat out even the fanciest store-bought pies. And hey, if my clumsy pastry attempts didn’t scare everyone off, you’ve definitely got this.
When I Bake This and Why You’ll Probably Love It
I make this when the leaves start to turn and life’s calling for something sweet—with a little bit of crunch. My brother loses his mind (in a good way) every time the smell comes drifting out of the oven. Sometimes I make two so I can actually snag a leftover piece. Funny story, once I poured in the filling before realizing I’d forgotten the pecans. It still baked up just fine but… it lost its soul, you know? pecan pie really does need its crunch. And if you’ve ever been frustrated by a soggy bottom (pie, not pants!), I’ve got a fix for that below.
What You’ll Need (and How Grandma Did It)
- 1 unbaked 9-inch pie crust (store-bought if you’re short on time but homemade is king, in my book)
- 1 cup light corn syrup (grandma insisted on the Karo brand, but honestly—store brands work too)
- 1 cup packed light brown sugar (I’ve swapped in dark brown, gives it a deeper vibe)
- 3 large eggs
- 1/3 cup unsalted butter, melted (the salted stuff works in a pinch)
- 1 tsp vanilla extract (I go a little heavy-handed, who’s judging?)
- 1/2 tsp salt (or a pinch more if you like it salty-sweet; I do!)
- 1 and 3/4 cups pecan halves (sometimes I chop half and leave the rest whole for more texture)
- Optional: a small splash of bourbon, for when you want to feel extra Southern
Let’s Get To It: Step-By-Step Directions
- Preheat your oven to 350°F (175°C). Or 180°C if your oven runs cold—I learned the hard way one Christmas it really does make a difference.
- Fit your pie crust into a 9-inch pie pan. Flute the edges if you wanna feel fancy, or just press it in. If it tears, patch with a little leftover dough. Nobody sees the bottom.
- In a biggish bowl, whisk together corn syrup, brown sugar, eggs, melted butter, vanilla, and salt until glossy and well-mixed. Go ahead—this is where I usually sneak a taste, for quality assurance purposes.
- Stir in your pecan halves (and bourbon, if using). Give it a few gentle spins so they don’t get smashed to bits, unless you’re into that rustic look.
- Pour the whole mixture into the crust. Try to get the pecans kinda evenly scattered (though, actually, the pies where it gets lumpy end up pretty anyway).
- Bake on the center rack for 55-65 minutes. It should be puffed up and barely jiggle in the middle when you nudge it. If the crust starts browning too quickly, tent it with foil. I always forget and have to scramble for some at the last minute.
- Cool completely before slicing. (I know, I know. But if you cut too soon it’ll go runny on you. Spoken form experience!)

Some Notes Form My Own Pie Experiments
- If your filling is still wobbly after an hour, just bake it another 5-10 minutes. Don’t panic—it’ll set up as it cools. I freaked out the first time.
- Sometimes I toast the pecans first (on a baking sheet, 8 mins at 350°F)—it gives the filling even more flavor. But if you skip this, no one’s going to notice too much (unless they’re a pie detective).
Switch It Up (or, Recipes Gone Sideways)
- I’ve swapped in maple syrup for half the corn syrup—a little more earthy, not bad!
- Chopped bittersweet chocolate scattered on top before baking? Absolutely try it if you’re craving something extra rich.
- Tried adding coconut once; wouldn’t recommend—everyone made that face, you know?

The Gear (and What If You Don’t Have It)
- 9-inch pie pan (ceramic, glass, metal, honestly anything except a skillet—I tried, wasn’t my best day)
- Mixing bowls
- Whisk (fork works in a pinch, your arm might get tired though)
- Baking sheet (just to catch any spills, but you could put a layer of foil on your oven rack if you’re feeling risky)
Keeping It Fresh (But Don’t Count on Leftovers)
If you actually don’t eat the whole thing, cover and keep at room temp for up to two days, or refrigerate for up to four. It tastes even better the next day (maybe because you snuck a cold slice for breakfast?). Though honestly, in my house it never lasts more than a day!
How We Serve It (Plus My Two Cents)
A big ol’ blob of whipped cream on top, or a scoop of vanilla ice cream, if we’re feeling over the top. My uncle crumbles a bit of salt on his—haven’t gotten into that habit yet, but you do you. Sometimes we just eat it straight from the pan. Family style!
Stuff I Learned the Hard Way (Aka, Don’t Rush These)
- Let the pie cool all the way—once I cut it early and, well, it was a pecan soup. Delicious but not very sliceable.
- Protect the crust edges; otherwise, charcoal pie. I have the photos to prove it, just trust me.
- Tent the pie with foil during baking if it’s browning too quick (you can skip this if you like a bit of burnt crunch… I learned some people do!)
Some Questions I Actually Got Asked
- Do I really need corn syrup? I mean, it’s traditional, but I’ve tried all maple once. The texture gets looser, so if that bothers you, maybe use at least half corn syrup.
- Can I make it ahead? Oh, absolutely. I think it tastes better the next day (but I also like pie for breakfast, so).
- My pie cracked! Did I ruin it? Nope! It happens—just pile on more whipped cream and no one will notice. Or care.
- Can I freeze it? Yeah, slice, wrap well, and freeze up to a month. Thaw overnight. Tastes just as good, mostly.
- What if I don’t have pecan halves? Use pieces. Seriously, nobody cares once it’s out of the oven and smelling amazing.
Not to digress too much, but if you’ve never just had a slice of pecan pie with strong coffee on a rainy afternoon, highly recommend. It’s the hug you didn’t know you needed. Anyway, happy baking—let your whisk do the talking, and don’t forget to save yourself a piece… or at least a forkful from the dish before everyone else gets to it.
Ingredients
- 1 unbaked 9-inch pie crust (store-bought if you’re short on time but homemade is king, in my book)
- 1 cup light corn syrup (grandma insisted on the Karo brand, but honestly—store brands work too)
- 1 cup packed light brown sugar (I’ve swapped in dark brown, gives it a deeper vibe)
- 3 large eggs
- 1/3 cup unsalted butter, melted (the salted stuff works in a pinch)
- 1 tsp vanilla extract (I go a little heavy-handed, who’s judging?)
- 1/2 tsp salt (or a pinch more if you like it salty-sweet; I do!)
- 1 and 3/4 cups pecan halves (sometimes I chop half and leave the rest whole for more texture)
- Optional: a small splash of bourbon, for when you want to feel extra Southern
Instructions
-
1Preheat your oven to 350°F (175°C). Or 180°C if your oven runs cold—I learned the hard way one Christmas it really does make a difference.
-
2Fit your pie crust into a 9-inch pie pan. Flute the edges if you wanna feel fancy, or just press it in. If it tears, patch with a little leftover dough. Nobody sees the bottom.
-
3In a biggish bowl, whisk together corn syrup, brown sugar, eggs, melted butter, vanilla, and salt until glossy and well-mixed. Go ahead—this is where I usually sneak a taste, for quality assurance purposes.
-
4Stir in your pecan halves (and bourbon, if using). Give it a few gentle spins so they don’t get smashed to bits, unless you’re into that rustic look.
-
5Pour the whole mixture into the crust. Try to get the pecans kinda evenly scattered (though, actually, the pies where it gets lumpy end up pretty anyway).
-
6Bake on the center rack for 55-65 minutes. It should be puffed up and barely jiggle in the middle when you nudge it. If the crust starts browning too quickly, tent it with foil. I always forget and have to scramble for some at the last minute.
-
7Cool completely before slicing. (I know, I know. But if you cut too soon it’ll go runny on you. Spoken form experience!)
CLICK FOR NUTRITION INFO
↑
Approximate Information for One Serving
Serving Size:
1 serving
Calories:
520 caloriescal
Protein:
5gg
Fat:
26gg
Saturated Fat:
0g
Trans Fat:
0g
Cholesterol:
0mg
Sodium:
0mg
Potassium:
0mg
Total Carbs:
68gg
Fiber:
0g
Sugar:
0g
Net Carbs:
0g
Vitamin A:
0
Vitamin C:
0mg
Calcium:
0mg
Iron:
0mg
Nutrition Disclaimers
Number of total servings shown is approximate. Actual number of servings will depend on your preferred portion sizes.
Nutritional values shown are general guidelines and reflect information for 1 serving using the ingredients listed, not including any optional ingredients. Actual macros may vary slightly depending on specific brands and types of ingredients used.
To determine the weight of one serving, prepare the recipe as instructed. Weigh the finished recipe, then divide the weight of the finished recipe (not including the weight of the container the food is in) by the desired number of servings. Result will be the weight of one serving.
Did you make this recipe?
Please consider Pinning it!