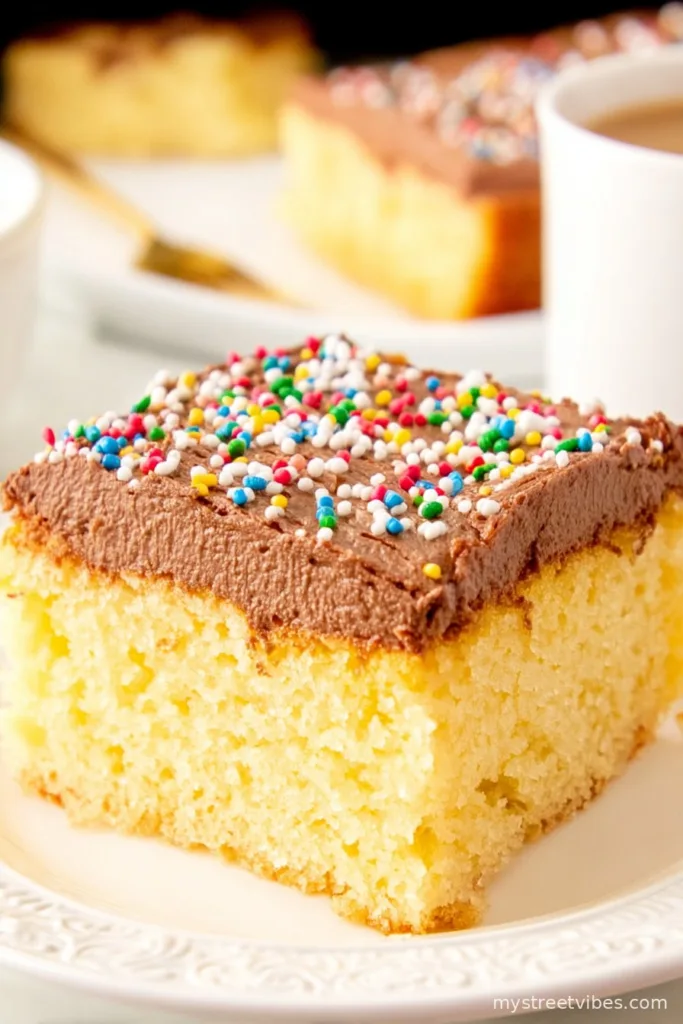
Alright, So Here’s the Story Behind My Yellow Butter Cake
You know those days when you just want something old-fashioned, buttery, and absolutely, unapologetically yellow? Yeah, “yellow cake” isn’t wild, but it brings me right back to the tiny kitchen in my childhood home—the one with the sticky linoleum and always-slightly-wonky oven door (oh, the cakes we nearly lost to that thing). I learned this yellow butter cake recipe from watching my mom try to rescue half-baked layers, only to nail it perfectly the next time. And now, here I am, still not immune to snitching little chunks while it’s cooling on the rack—my own family caught on years ago, but what’s cake for if not illicit nibbles?

Why You’ll Love This Cake (Or: Why It’s Always Gone at My Place!)
I make this when, honestly, I just need a break from all things complicated. My family goes absolutely crazy for it because it tastes like birthday parties from when you still wore paper hats, and the crumb is so soft it’s like eating a buttery cloud. (Not that I’ve actually eaten a cloud. But you know what I mean, right?) Also, quick confession: I’ve royally messed it up by overbeating—ended up with a dense yellow brick. But on good days? It’s basically the edible version of a warm hug.
What You’ll Need to Make This Yellow Butter Cake
- 2 1/2 cups (about 310g) all-purpose flour (sometimes I swap in cake flour for a slightly lighter crumb, but plain old AP flour does the trick)
- 2 1/2 tsp baking powder (my gran used to say “always level your spoons or you’ll have volcano cake”)
- 3/4 tsp salt (I’ve forgotten this before and… learn from my mistake!)
- 1 cup (225g) unsalted butter, room temp (I won’t judge if you use salted, just dial back the salt a bit)
- 2 cups (400g) white sugar (sometimes, if I’m feeling bold, I’ll swap a scant 1/4 cup for brown sugar for a bit of depth)
- 4 large eggs (room temp is best; but if I forget I just put ’em in warmish tap water for a few mins)
- 1 tablespoon vanilla extract (my mom swore by the fake stuff, but any works fine!)
- 1 cup (240ml) whole milk (no milk? Half-n-half, or if disaster strikes, I’ve used almond milk—don’t tell the purists)
How to Make Yellow Butter Cake (A Little Chatty Guidance)
- Preheat your oven to 350°F (that’s about 175°C); grease and line two 8-inch round cake pans. No parchment? Just give them a good buttery massage.
- In a medium bowl, whisk together the flour, baking powder, and salt. (This is where I usually daydream about actually sifting, but real talk: I just use a fork most days.)
- In another, larger bowl, beat the butter and sugar until it’s pale and pretty fluffy—takes about 3-5 minutes. I tend to start at a low speed since otherwise I’d be dusted top-to-toe in sugar.
- Add eggs one at a time, beating just until blended after each. Sometimes my third egg gets all dramatic and won’t mix in right away. Just keep going, it’ll sort itself out.
- Drizzle in the vanilla. (Here’s where I sneak a taste – sue me!)
- Add the flour mixture in three parts, alternating with the milk. So: flour, mix, milk, mix, repeat. Don’t overthink it, but don’t dump it all in either (been there, regretted that—lumpy city).
- Give the batter a good final fold with a spatula—make sure nothing’s hiding at the bottom. Don’t worry if it looks a little curdled before it all comes together, that’s normal.
- Divide the batter evenly between the pans. You can just eyeball it, or use a scale if you’re feeling fancy.
- Bake for 28–34 minutes, or until a toothpick stuck in the middle comes out just about clean. (If you smell it before you see it, it’s probably almost done.)
- Cool in the pans about 10 minutes—the hardest part, really—then turn onto a rack to finish cooling. Try to resist picking at the golden edges. I almost never succeed, but we’re all friends here.
Notes from My Real-Life Kitchen
- I used to think cold ingredients wouldn’t matter. They totally do (learned the hard way after a sad, dense cake).
- If your cake domes a bit, just level it with a knife or even a bread knife. Or, and hear me out—leave the hump and hide it with frosting. Works for me.
- Don’t panic if the batter looks broken after the eggs go in. Milk and flour fix it right up.
Variations I’ve Actually Tried (And a Fail!)
- Chocolate swirl: Swirl in 1/3 cup melted chocolate before baking. Turned out pretty, a real crowd-pleaser.
- Lemon zest: Add a tablespoon of lemon zest with the sugar. Gives it a nice lift.
- Curious about making it dairy-free? Almond milk plus vegan butter works, but when I tried coconut oil, it turned out a bit too dense—wouldn’t really recommend.

Let’s Talk Equipment (But Don’t Sweat It)
- Electric mixer makes life easy, but hey, I’ve made this with a strong arm and a wooden spoon. Cake’s still cake.
- Parchment paper is magical for easy pan removal. If you don’t have it, just grease extra well and go for it.
How I Store Leftovers (If There Are Any)
The cake keeps wrapped tight at room temp for about 2 days (though honestly, in my house, it never lasts more than a day!). Fridge if you must, but it can dry a little.
How We Serve Yellow Butter Cake (And a Digression on Ice Cream)
A thick layer of chocolate frosting is the classic (I’m a sucker for the canned stuff if I’m running out of steam). My Aunt Barb always insists you must serve it with a scoop of vanilla ice cream, and I grudgingly admit she might be right. Also, just a dusting of powdered sugar sometimes, when I’m feeling low key, does the trick.
Pro Tips I’ve Learned the Hard Way
- Once, I tried to rush creaming the butter and sugar. Don’t—unless you like rubbery cake (I did not).
- Let the cake cool completely before frosting—learned this when the icing slid right off. Oops.
- Be gentle with the flour-milk alternate—dumping it all in stress-bakes a cake with weird pockets. Ask me how I know.
FAQ About Yellow Butter Cake Recipe
- Can I bake this in a 9×13 pan? Totally, just extend the bake to about 35–40 minutes. Might get a bit more golden around the edges, but honestly, I kinda love those crispy bits.
- Is there a way to make it less sweet? Yep—cut the sugar down to 1 3/4 cups, but it’ll be a little less tender. Actually, I find it works better if you go easy on the frosting instead.
- Room temp eggs, really? It honestly makes a difference (not sure why, science I guess). But if I forget, they go in the sink with warm water for a few mins. Works a treat.
- Can I freeze this cake? Sure thing! Wrap tightly, pop in the freezer. I do this with unfrosted layers—thaw at room temp when needed. I might have found a rogue layer in the back of my freezer once, but after a year it was still not bad…
Ingredients
- 2 1/2 cups (about 310g) all-purpose flour (sometimes I swap in cake flour for a slightly lighter crumb, but plain old AP flour does the trick)
- 2 1/2 tsp baking powder (my gran used to say “always level your spoons or you’ll have volcano cake”)
- 3/4 tsp salt (I’ve forgotten this before and… learn from my mistake!)
- 1 cup (225g) unsalted butter, room temp (I won’t judge if you use salted, just dial back the salt a bit)
- 2 cups (400g) white sugar (sometimes, if I’m feeling bold, I’ll swap a scant 1/4 cup for brown sugar for a bit of depth)
- 4 large eggs (room temp is best; but if I forget I just put ’em in warmish tap water for a few mins)
- 1 tablespoon vanilla extract (my mom swore by the fake stuff, but any works fine!)
- 1 cup (240ml) whole milk (no milk? Half-n-half, or if disaster strikes, I’ve used almond milk—don’t tell the purists)
Instructions
-
1Preheat your oven to 350°F (that’s about 175°C); grease and line two 8-inch round cake pans. No parchment? Just give them a good buttery massage.
-
2In a medium bowl, whisk together the flour, baking powder, and salt. (This is where I usually daydream about actually sifting, but real talk: I just use a fork most days.)
-
3In another, larger bowl, beat the butter and sugar until it’s pale and pretty fluffy—takes about 3-5 minutes. I tend to start at a low speed since otherwise I’d be dusted top-to-toe in sugar.
-
4Add eggs one at a time, beating just until blended after each. Sometimes my third egg gets all dramatic and won’t mix in right away. Just keep going, it’ll sort itself out.
-
5Drizzle in the vanilla. (Here’s where I sneak a taste – sue me!)
-
6Add the flour mixture in three parts, alternating with the milk. So: flour, mix, milk, mix, repeat. Don’t overthink it, but don’t dump it all in either (been there, regretted that—lumpy city).
-
7Give the batter a good final fold with a spatula—make sure nothing’s hiding at the bottom. Don’t worry if it looks a little curdled before it all comes together, that’s normal.
-
8Divide the batter evenly between the pans. You can just eyeball it, or use a scale if you’re feeling fancy.
-
9Bake for 28–34 minutes, or until a toothpick stuck in the middle comes out just about clean. (If you smell it before you see it, it’s probably almost done.)
-
10Cool in the pans about 10 minutes—the hardest part, really—then turn onto a rack to finish cooling. Try to resist picking at the golden edges. I almost never succeed, but we’re all friends here.
CLICK FOR NUTRITION INFO
↑
Approximate Information for One Serving
Serving Size:
1 serving
Calories:
390 caloriescal
Protein:
5 gg
Fat:
17 gg
Saturated Fat:
0g
Trans Fat:
0g
Cholesterol:
0mg
Sodium:
0mg
Potassium:
0mg
Total Carbs:
54 gg
Fiber:
0g
Sugar:
0g
Net Carbs:
0g
Vitamin A:
0
Vitamin C:
0mg
Calcium:
0mg
Iron:
0mg
Nutrition Disclaimers
Number of total servings shown is approximate. Actual number of servings will depend on your preferred portion sizes.
Nutritional values shown are general guidelines and reflect information for 1 serving using the ingredients listed, not including any optional ingredients. Actual macros may vary slightly depending on specific brands and types of ingredients used.
To determine the weight of one serving, prepare the recipe as instructed. Weigh the finished recipe, then divide the weight of the finished recipe (not including the weight of the container the food is in) by the desired number of servings. Result will be the weight of one serving.
Did you make this recipe?
Please consider Pinning it!