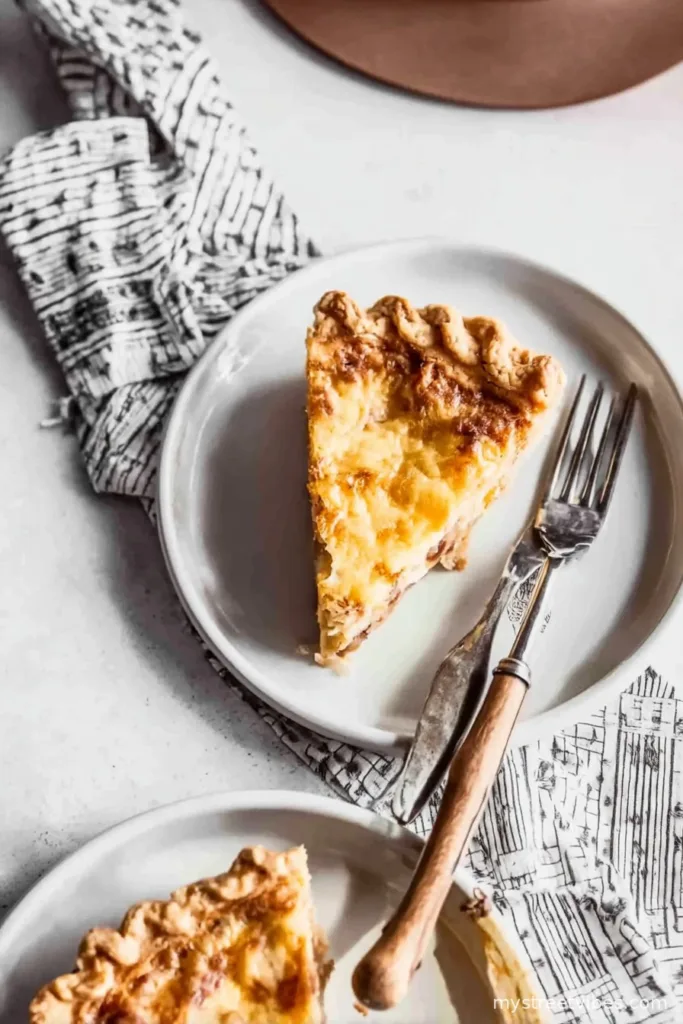
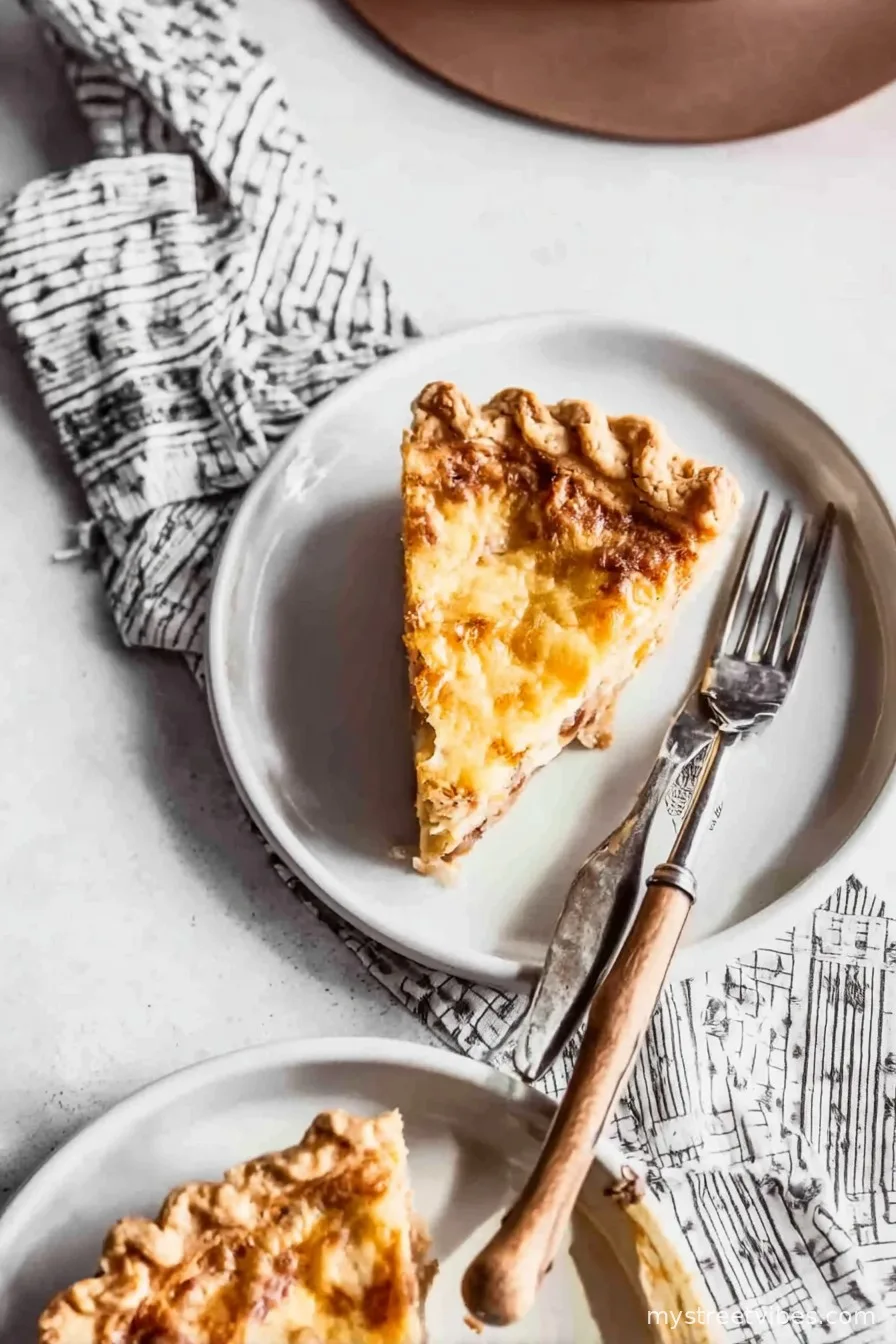
The Cowboy Quiche I Keep Coming Back To
So let me tell you, the first time I made this Pioneer Woman’s Cowboy Quiche, I was standing in a cloud of flour, nearly on the verge of swearing because my pie crust would not cooperate. (I’ve since come to peace with store-bought crusts. No shame!) There’s just something about the smell of bacon frying and onions caramelizing that makes my entire house feel like a little ranch somewhere, even if my only livestock is a disgruntled cat. If you’ve never made a quiche before, please don’t be nervous—this recipe forgives just about every mistake, and honestly, sometimes the messy ones are best.
Why You’ll Want This Quiche on Repeat
I make this when I want to feed people I actually like. My family goes crazy for it, mostly because there’s bacon but also because it’s just that comforting. I’ll whip it up for breakfast (or dinner, because who says eggs are just for mornings?), and there’s always at least one person who asks if there’s seconds. The creamy filling and crispy bacon make it basically irresistible—plus it somehow tastes even better cold out the fridge the next day (if it makes it that long, which it doesn’t, not here anyhow).
What You’ll Need (And a Few Lazy Shortcuts I’ve Tried)
- 1 unbaked pie crust (I sometimes go with the roll-out Pillsbury crust if I’m in a hurry; my grandmother insisted on making her own, though, so… choose your adventure!)
- 2 medium yellow onions, sliced nice and thin (red onions work in a pinch—just sweeter!)
- 2 Tablespoons salted butter (okay, I’ve used unsalted and snuck in a pinch of salt, works fine)
- 8 slices bacon, chopped (I won’t judge if you nibble a piece or two while cooking)
- 8 large eggs (I once used 7 eggs and some extra cream—no disaster, just a bit less fluffy)
- 1 1/2 cups heavy cream or half-and-half (I’ve done both, and even swapped a cup for whole milk; it’s just slightly less indulgent)
- 3/4 teaspoon salt (totally adjust if your bacon is super salty)
- 1/4 teaspoon black pepper (or, as I do, a few cracks of the grinder until it smells peppery “enough”)
- 2 cups grated cheddar cheese (I’ve thrown in pepper jack too—delicious. Seriously, use what’s in your cheese drawer, within reason!)
Let’s Throw This Together
- Start with the crust: Preheat your oven to 400°F. If you’re making your own crust, hats off to you—roll it out and drape it into a deep-dish pie plate (I use my old Pyrex one, but use whatever’s handy). Crimp those edges however you like. Then, stash the whole thing in the fridge so it stays chilled until the filling is ready. Cold crust = less soggy bottom.
- Time to caramelize those onions. Melt the butter in a big ol’ skillet over medium-low heat. Toss in your sliced onions, give them a stir, then let them hang out. Stir every five minutes. Total caramelizing will take about 20 minutes—they’ll get golden and soft. (Don’t rush this; if you do, you just get sautéed onions, which is tasty but not the same flavor. And yes, this is where my glasses fog up every single time.) Transfer your gorgeous onions to a bowl for now.
- Enter: Bacon stage. Turn the heat up to medium-high and add your bacon pieces right into that same skillet (no need to wash it). Cook until they’re crispy and you’re tempted to eat them all. Scoop out the bacon with a slotted spoon—they’ll join the onions in that bowl. You can sneak a piece, nobody’s looking.
- Eggs, cream, and the rest: In a large bowl, whisk the eggs, cream, salt, and pepper all together. Once smooth, mix in your caramelized onions, cooked bacon, and grated cheese. Pour all this deliciousness into your chilled pie crust (try not to spill—though, honestly, every cooktop has a little egg dribble, right?).
- Baking time. Place the filled pie on the oven’s middle rack, cover loosely with foil (I’ve used parchment and just kinda squished it on top—it’s fine). Bake for about 45 minutes. Then, take off the foil and give it about 15 more minutes. You want the top puffy and starting to brown, and the crust should look golden. It might still be a tad jiggly in the center, but that’s good—it’ll finish setting as it cools.
- The hardest step: Wait. Let your quiche rest at least 15 minutes before slicing in if you want neat pieces, or just dive in if you’re impatient. It’s totally good at room temp, and somehow just as snackable cold the next day.
Stuff I Learned the Hard Way
- If you start slicing before it’s set, you’ll get more of a scramble than a wedge. Tastes fine, looks less fancy—it’s a good excuse to call it “rustic.”
- Pie crust shrinks if you don’t chill it. I’ve made enough shrunken-edge pies to testify.
Variations I’ve Actually Tried (and One Fail)
- Swap half the cheddar for pepper jack for a spicy kick. Whole table loved it, except my cheese-purist child.
- Use ham instead of bacon—tastes good but honestly, it lacks the smoky punch I crave.
- I once tried adding broccoli florets. Turns out, you have to cook and drain them first or the whole thing gets weirdly watery. Live and learn.

What If You Don’t Have Fancy Equipment?
If you don’t own a deep-dish pie plate, I’ve made this in a square Pyrex, just pressing the crust into the corners. No one complained! Lost a little height, gained some crispy corners. If you don’t have a slotted spoon, use a fork—just don’t burn your fingers like I did once.
How to Store It (But It Might Vanish Fast)
If you do have leftovers, wrap them up and pop in the fridge. They keep for up to 3 days—even a bit longer, but I find the crust gets soft after that. I’ve tried freezing slices, but they never quite taste as good (eggs do funny things in the freezer, kind of like my sense of direction in a parking lot).
My Favorite Way to Serve It
I love a warm wedge with a cup of strong coffee and maybe a spoonful of salsa on top. My husband likes his with a heap of arugula—or whatever leafy green didn’t wilt in the crisper. And for dinner, sometimes I add a quick salad and call it a day. On Sundays, I confess to sneaking a second slice cold, straight from the fridge, right before bed.
From My Learning Curve: Don’t Skip These
- I once tried speeding up onion caramelizing by turning up the heat. Bad call—the onions burned, and it tasted like sadness.
- If your pie plate is shallow, keep an eye on overflows. Lay a baking sheet underneath, just in case (trust me—cleaning burnt egg off the oven is zero fun).
Friendly Quiche FAQs (Yep, People Always Ask)
- Can I make it ahead? Yep! Bake it off, cool, cover and refrigerate. Slices reheat beautifully in a toaster oven or wrapped in foil.
- What if I only have whole milk? It’ll be less creamy but still tasty—I’ve done it in a pinch.
- Do I have to use onions? Ehh, I suppose not. But they add irresistible sweetness. Maybe toss in some sautéed leeks or shallots?
- Can I use a gluten-free crust? Absolutely! The filling stays the same, just sub your favorite GF crust underneath.
- Can I double the recipe? Sure—just use two pie shells, not one giant one (I tried, and the middle never set up right. Rookie move!)
There you have it—Pioneer Woman’s Cowboy Quiche, my way, with all the hiccups and happy accidents along the line. If you make it, let me know how yours turns out (bonus points if it’s prettier than mine)!
Ingredients
- 1 unbaked pie crust
- 2 medium yellow onions sliced
- 2 Tablespoons salted butter
- 8 slices bacon chopped
- 8 large eggs
- 1 1/2 cups heavy cream or half-and-half
- 3/4 teaspoon salt
- 1/4 teaspoon black pepper
- 2 cups grated cheddar cheese
Instructions
-
1Start with the crust: Preheat your oven to 400°F. If you’re making your own crust, hats off to you—roll it out and drape it into a deep-dish pie plate (I use my old Pyrex one, but use whatever’s handy). Crimp those edges however you like. Then, stash the whole thing in the fridge so it stays chilled until the filling is ready. Cold crust = less soggy bottom.
-
2Time to caramelize those onions. Melt the butter in a big ol’ skillet over medium-low heat. Toss in your sliced onions, give them a stir, then let them hang out. Stir every five minutes. Total caramelizing will take about 20 minutes—they’ll get golden and soft. (Don’t rush this; if you do, you just get sautéed onions, which is tasty but not the same flavor. And yes, this is where my glasses fog up every single time.) Transfer your gorgeous onions to a bowl for now.
-
3Enter: Bacon stage. Turn the heat up to medium-high and add your bacon pieces right into that same skillet (no need to wash it). Cook until they’re crispy and you’re tempted to eat them all. Scoop out the bacon with a slotted spoon—they’ll join the onions in that bowl. You can sneak a piece, nobody’s looking.
-
4Eggs, cream, and the rest: In a large bowl, whisk the eggs, cream, salt, and pepper all together. Once smooth, mix in your caramelized onions, cooked bacon, and grated cheese. Pour all this deliciousness into your chilled pie crust (try not to spill—though, honestly, every cooktop has a little egg dribble, right?).
-
5Baking time. Place the filled pie on the oven’s middle rack, cover loosely with foil (I’ve used parchment and just kinda squished it on top—it’s fine). Bake for about 45 minutes. Then, take off the foil and give it about 15 more minutes. You want the top puffy and starting to brown, and the crust should look golden. It might still be a tad jiggly in the center, but that’s good—it’ll finish setting as it cools.
-
6The hardest step: Wait. Let your quiche rest at least 15 minutes before slicing in if you want neat pieces, or just dive in if you’re impatient. It’s totally good at room temp, and somehow just as snackable cold the next day.
CLICK FOR NUTRITION INFO
↑
Approximate Information for One Serving
Serving Size:
1 serving
Calories:
440 caloriescal
Protein:
19gg
Fat:
34gg
Saturated Fat:
0g
Trans Fat:
0g
Cholesterol:
0mg
Sodium:
0mg
Potassium:
0mg
Total Carbs:
18gg
Fiber:
0g
Sugar:
0g
Net Carbs:
0g
Vitamin A:
0
Vitamin C:
0mg
Calcium:
0mg
Iron:
0mg
Nutrition Disclaimers
Number of total servings shown is approximate. Actual number of servings will depend on your preferred portion sizes.
Nutritional values shown are general guidelines and reflect information for 1 serving using the ingredients listed, not including any optional ingredients. Actual macros may vary slightly depending on specific brands and types of ingredients used.
To determine the weight of one serving, prepare the recipe as instructed. Weigh the finished recipe, then divide the weight of the finished recipe (not including the weight of the container the food is in) by the desired number of servings. Result will be the weight of one serving.
Did you make this recipe?
Please consider Pinning it!